
The process of creating an appearance for your website is rather long. Choosing a nice template is not enough. A template is a very useful tool that helps you to build the website faster but you are not the only owner of it. If you leave the design as it is – your website won’t be original and unique. Imagine how many people have chosen the same template! To make it stand out you have to do sufficient customization – choose colors and fonts, add pictures and video, texts and links. Besides that, there should be some animation effects and widgets that could be added by installing plugins.
Actually, when we are talking about plugins that affect the website’s appearance, I guess they could be compared with jewelry. Why do people wear it? To make themselves prettier and to attract attention. Of course, the concept of beauty is not the same in every country. The jewelry of a beautiful woman will differ drastically in Africa, Japan, and Britain. However, one way or another, that jewelry would attract attention. The plugins accomplish the same goal – they decorate the website and attract the attention of users. Whether it is a parallax effect or a unique way of displaying products, it will accomplish the main goal of every website – make the visitor not only stay but also go through the content and, maybe, take the action you want him to take (subscribe to your newsletter, for example).

What on the website page would catch your eye first? Graphics, of course! Astounding photos, vivid arts, and breathtaking infographics – those are the best attention getters. However, if you are not going to create a second Instagram or Pinterest site – you can’t fill the website with just pics. There has to be some text and other stuff. And that’s where different types of galleries and image collections come in to save you. An animated gallery, or, otherwise, an animated wall is one of the effects that could spice up your blog, store, or portfolio a little.
It is obvious from the title what the animated wall is. In fact, it is a gallery that not only displays images but also changes and shifts them according to the chosen algorithm. Visuals slide, roll in, fade away or zoom in, adding some dynamics to the general view. It’s almost like a carousel but has more objects in it. Why is it better than a regular gallery? It automatically moves! Every movement, blinking, or sparkling automatically attracts the user’s eye. Besides that, when images are changing it is a nice opportunity to show more pictures than in a static gallery block.
Creating an animated wall
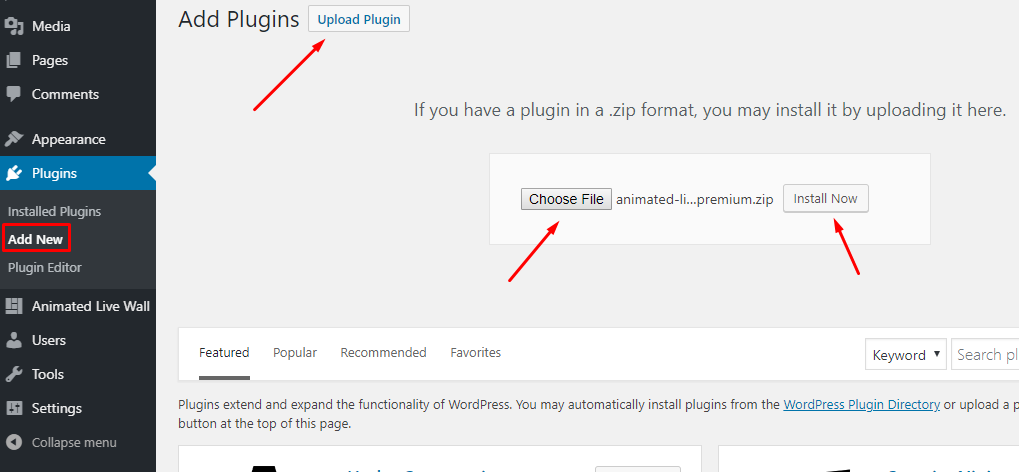
First of all, you have to get a special plugin. I, personally, would recommend the Animated Live Wall plugin – it was made by professionals and is not too expensive. However, you can also try to find some other solutions on the web. When you download the plugin – install it to your website. Open the administrative dashboard and go to Plugins > Add New. Click the “Upload Plugin” button, choose a file from your computer, and install it.

After activation, you will see that an additional tab has been added to your dashboard – the “Animated Live Wall”. When you will click on Animated Live Wall > Add New - an animated gallery tool opens. Here you can create and customize the gallery and then insert it to any page by just copying and pasting a link.
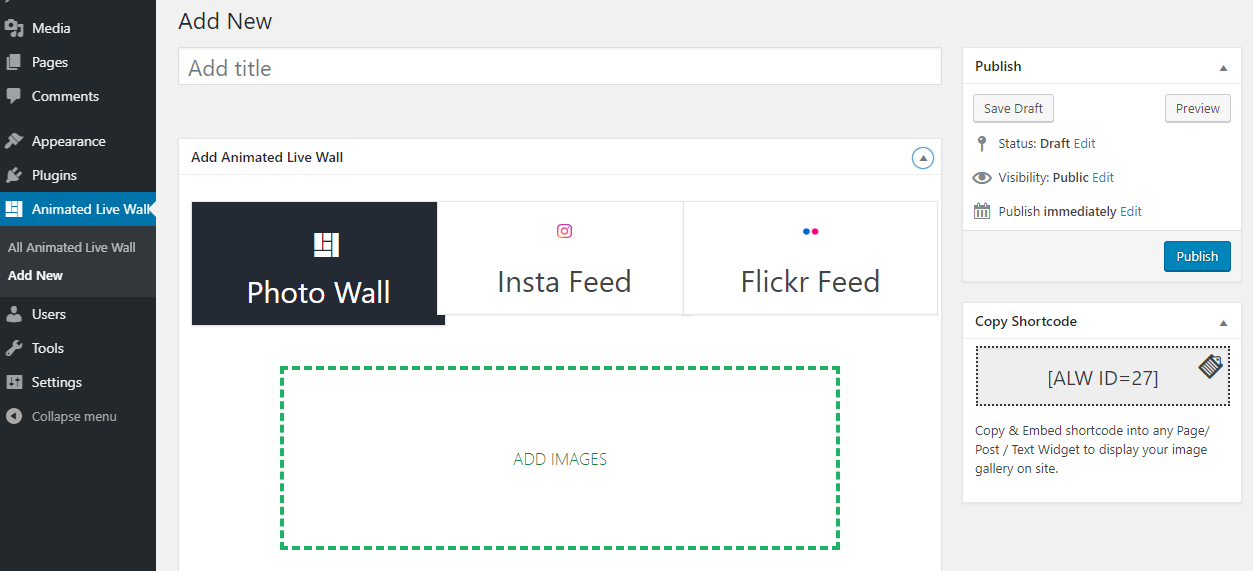

As you can see, with this plugin you can build a gallery from the pictures that are stored on your computer or combine it from personal Instagram or Flickr account posts. I will show you how to create a gallery of the pictures available on your PC. Click the “Add images” field and choose the pictures (or just drag-and-drop them to that field). Chosen photos will be displayed in the window below.
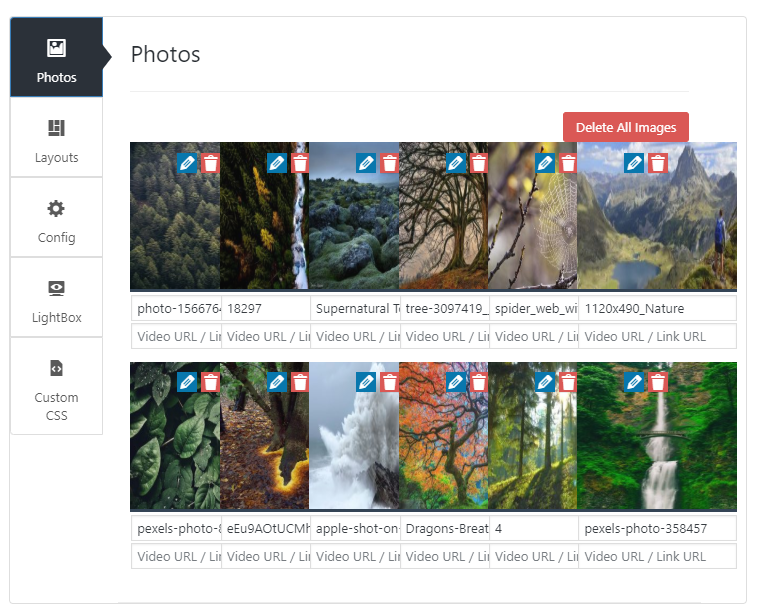

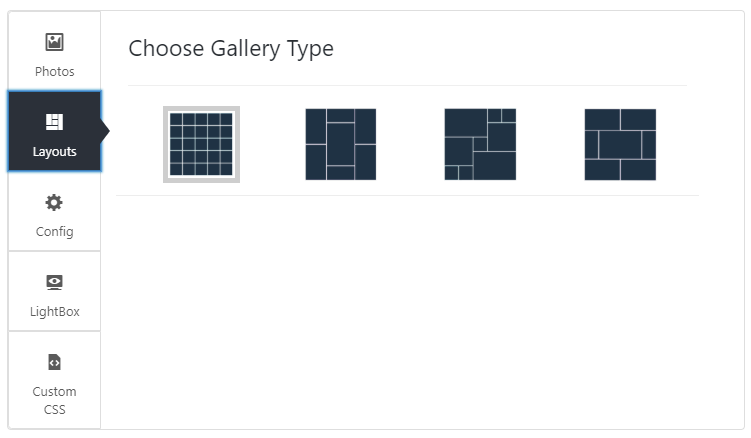
Here you can also rename the photos and add links to them. The window has several additional tabs that give you all the customization options. Let’s go through them one by one. The Layouts tab offers you four variants of layout: grid, masonry, mosaic, and justify. However, you will be able to add animation only to the grid gallery. Since we are talking about animated walls – I’ve chosen the grid layout.

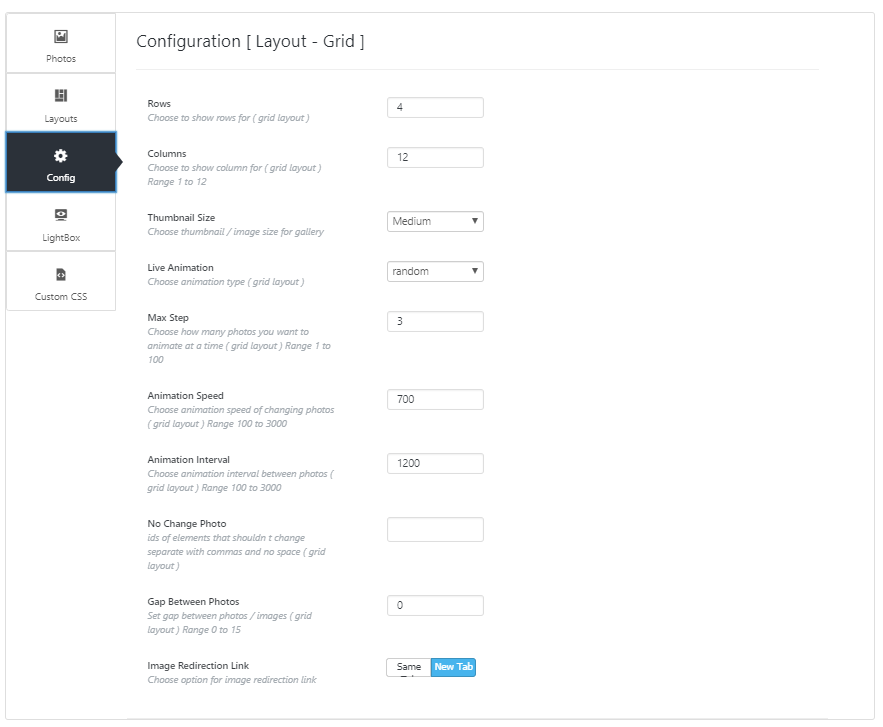
“Config” tab is the one where you define all the animated gallery settings. All the options are quite obvious but let’s go through them and see what you can change.
Rows. That’s obvious; here you define how many rows the grid will have. I would recommend not making more than three so the gallery fill fits the screen but it’s up to your taste.
Columns. The same situation here – this option defines the number of columns on the grid. I would say that three or four rows will be a perfect number here. In that case, the picture will be large enough to be clearly visible.
- Thumbnail Size. The drop-down menu gives you six variants for the size of the pictures. I’m going to choose the “Large” option but it will be better for you to play a little with that parameter and see what will resonate best with your website.
- Live Animation. Here you can choose how the pictures on the animated wall will shift. There are 16 variants and besides that, you can choose the “random” option – the way the images move will be chosen randomly. I, personally, don’t want too much motion, so I choose the “showHide” option. The pictures in my gallery will just change each other without any additional movements.
- Max Step. The number of pictures that are changed at the same time is set here. It could be either one picture at a time or all the pictures in the grid. I will leave the default settings here; three pictures at a time are quite enough for my taste.
- Animation Speed. This and the next parameter are the ones you have to pay special attention to. If the number is too small – the pictures will be blinking too quickly and annoy the users. And if it is too big – the changes will be hard to notice. I would recommend you start with the default speed and change it after you take a look at it.
- Animation Interval. As I said for the previous option – speed is very important. This option defines how often the pictures will change. Choose this parameter carefully.
- No Change Photo. For some reason, you may want some pictures to remain unchanged. You can type in the IDs of the picture you want to remain in the gallery constantly to this bar. I don’t have such pictures, so I’ll leave it empty.
- Gap Between Photos. It’s obvious from the title, this option allows you to set a gap between the images of the grid. I don’t like such separation, so I’ll leave it at “0”.
- Image Redirection Link. If you want the images the user clicks on to open in a separate tab – choose the “New Tab” option. Otherwise, click “Same”.
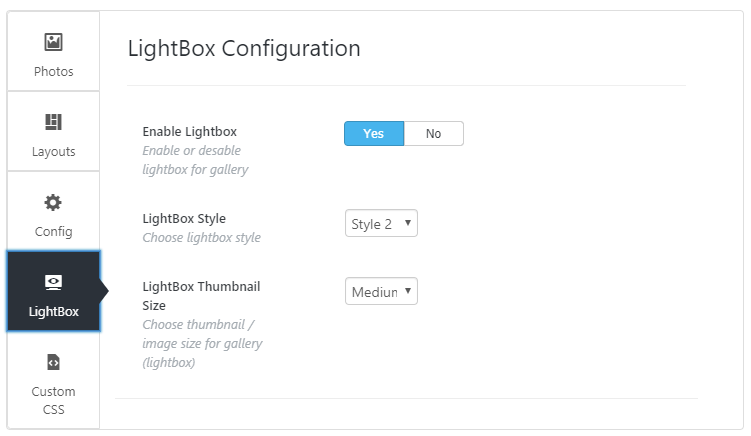
LightBox is functionality that opens your gallery in an overlay window that stretches over the whole screen. In the LightBox tab, you can enable or disable the lightbox, choose its style, and the thumbnails' size. I don’t want the gallery to be shown in the lightbox, so I disable it.

If the given function is not enough you can always add some custom CSS code. The Custom CSS tab is exactly for that purpose. However, if you don’t know how to create that piece of code and have no friendly developer to help – I recommend you stay away from that tab (just as I did).

Adding an animated wall to your website
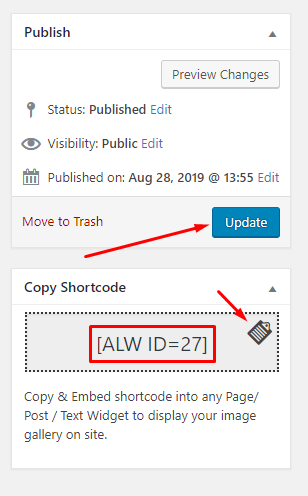
When the customization is done – name the gallery and push the “Update” button in the upper right corner. Now you have it! It is time to place it to one of your website’s pages. Copy the gallery’s shortcode by clicking the folder button in the corner.

When on the destination page – click the “Add block” button and choose the “Custom HTML” block.
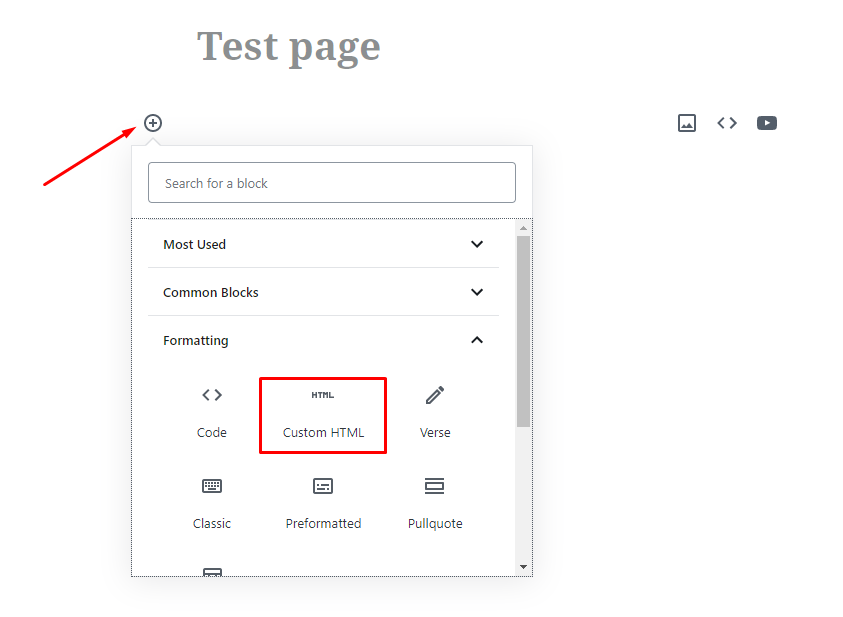

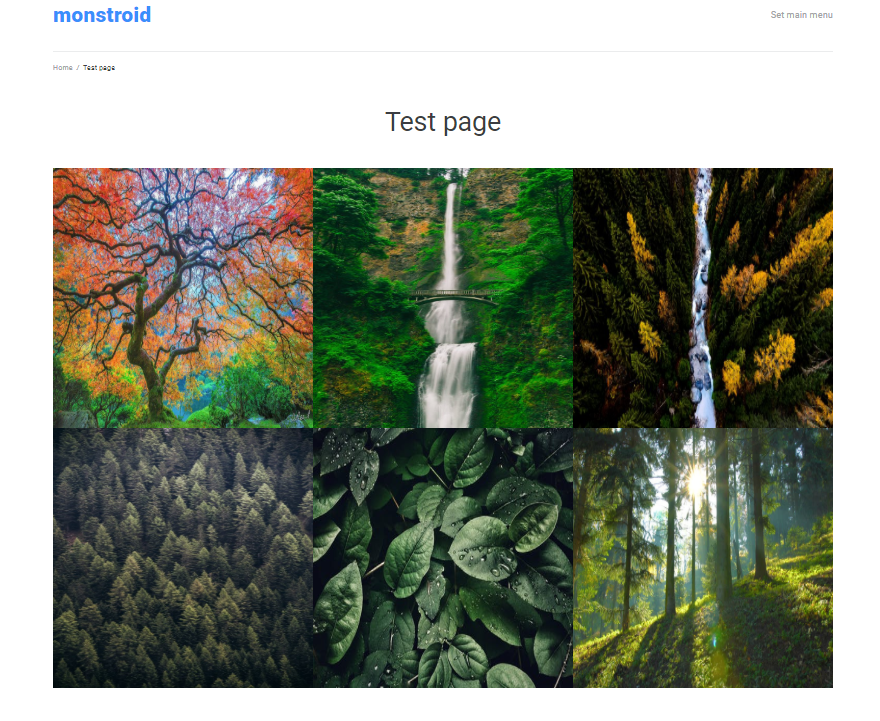
All that you have to do now is to paste the shortcode to the bar. After that update the page and it is done – you added the animated wall to the page. To the website visitor it will look like this:

Conclusion
When you are using plugins there’s only one real danger. Just as with jewelry you can easily overdo it. People with tons of jewelry on them look weird and funny. The website with tons of different effects will annoy the user and he will leave. So, now, when you know how to add an animated gallery to your website, remember not to overdo it.