


When managing your restaurant business, everything boils down to how fast and maximum easy? Do you have enough tools to meet the needs of an on-demand economy, which requires providing customers with multiple conveniences of a technological era? That implies online contacts and reviews, table reservation, online ordering and delivery, etc. Are you already looking for the ways to soup up your restaurant with anything of this nature?
If you already have a WordPress website, but it doesn’t present all of your menu offerings in detail, it will be harder to deal with an evolving customer behavior. I mean so many people won’t enter your cafe or restaurant if they don’t see beforehand the reviews, prices, and sometimes even nutrition info relating to the menu listings.
So, in this article, we’ll try to improve an online presence of your food establishment. To be more precise, you are going to read a quick guide on how to arrange a stylish restaurant menu and enable eCommerce functionality with one of the available number of free solutions - WordPress Restaurant Menu plugin by MotoPress.


Compared to other free alternatives on the market, this plugin stands out due to a couple of important features:
- It offers the biggest diversity of stylish menu layouts.
- It’s a two-in-one solution: building a menu plus full eCommerce support (built-in settings).
Let’s also list the main features of the plugin for you to understand its benefits more easily:
- Responsive menu design - you may rest assured that an increasing number of people who order food online will be fully satisfied with your website.
- A variety of stylish and clean-looking layouts - logical structure and catchy design.
- Ability to add unlimited menu items and categories.
- eCommerce-ready plugin - sell food and drinks online.
- Test payments - you may test drive the whole system without live transactions.
- Ability to let your users pay through a secure checkout page (you should have an SSL certificate installed).
- Optional guest shopping (allow users to buy from your site without registration).
- User-friendly management toolkit.
- Import and export of your data.
- A couple of premium add-ons available: delivery services and toppings.
Okay, let’s put theory into practice and review those three steps in detail.
Add menu items and categories
Start with adding menu items (all your food and beverage offerings) and categories (like ‘appetizers,' ‘entrees,' ‘desserts’) that you are going to add.
First up, if you are going to divide menu items into categories, add the latter: navigate to Restaurant Menu > Categories > Add new. In this section, you can also upload the category image to make it look more appealing in the live list. When everything is set up, you may proceed with menu items customization.
Now you are ready to add all relevant menu items and optionally connect them to the appropriate categories: Go to Restaurant Menu > Add new.
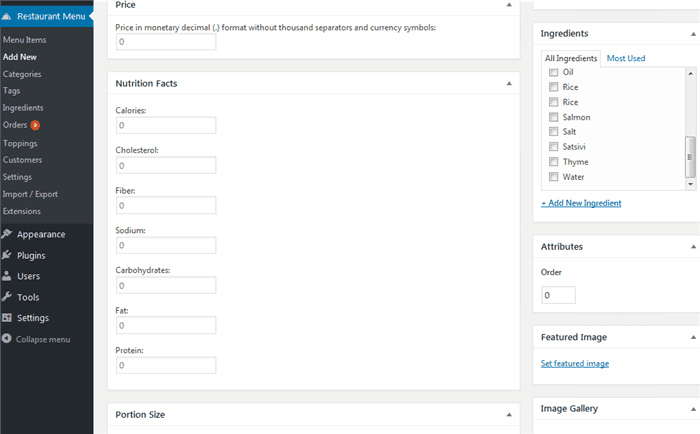
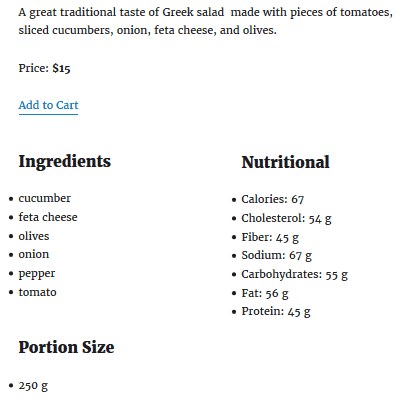
Apart from standard WordPress fields like title and description, you may add the following details:
- The price of the menu item.
- Nutrition facts - customers are becoming more health-conscious and may find these details necessary.
- Portion size.
- Category - connect to the menu item to the earlier added category.
- Ingredients - choose from the already existing ones or add new ingredients that will be listed next to the menu item on the site.
- Set an image and optionally add a picture gallery for this menu item - this is a great tool to show prospects photos of actual dishes and make your offerings even more attractive.

Apply general and eCommerce settings
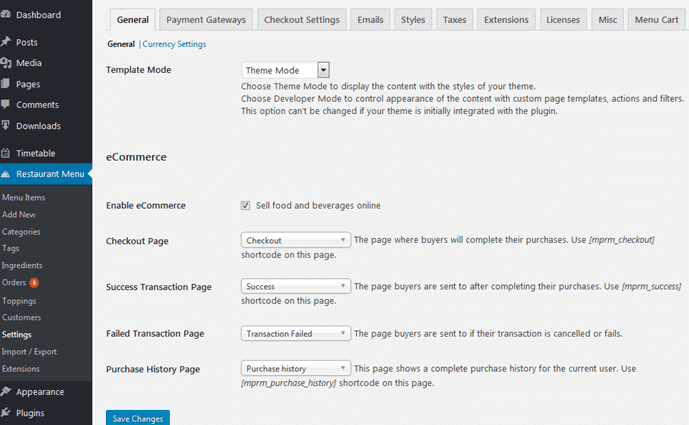
Navigate to the Settings menu to configure all options according to your needs. In this same section, you can also turn on eCommerce and fully adjust it. Here are the main settings you should work on.
- Choose a template mode: “theme mode” implies that your restaurant menu will be displayed in the style of your activated theme and in “developer mode” you are free to apply custom page templates, action, and filters;
- Select checkout, success transition, failed transition, and purchase history pages (they should be created beforehand);
- Choose the appropriate currency and modify its appearance with a couple of clicks (toggle to Currency Settings to perform the changes).

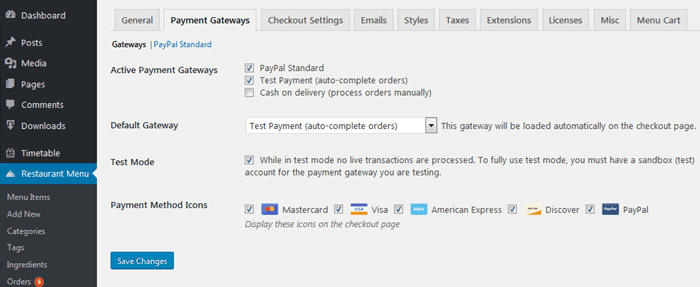
Then go to configure payment gateways. You get a pretty good list of options.
- Three gateways are available: PayPal Standard (set PP emails and styles by toggling to PayPal Standard tab right in this section), Test payments (a useful tool that allows you to test the system firsthand), and COD (orders processed manually).
- You can temporarily switch to a test mode to give a test-drive to the payment system without being charged.
- Tick the payment method icons to be shown on the checkout page.

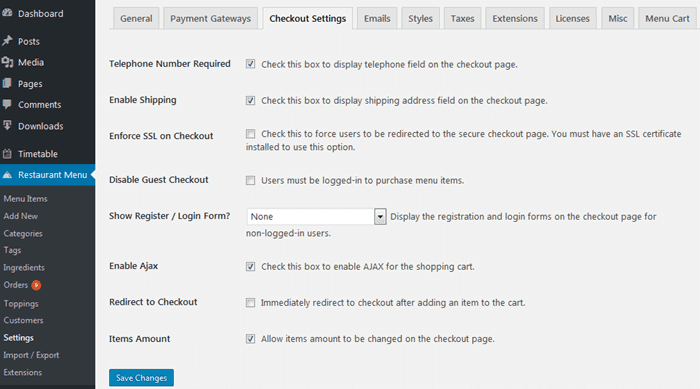
There are a few more important settings for the checkout process that you should define in the Checkout Settings tab.
- Enable/disable required fields for phone number/shipping address.
- If you have an SSL certificate installed and want your users to place their orders on the secure checkout page, you should tick “Enforce SSL on Checkout” option.
- Enable/disable guest checkout and accordingly set whether the registration/login form should be displayed.
- Turn on/off Ajax (to add items to cart automatically without updating a page manually).
- Allow/disallow immediate redirection to the checkout.
- Allow/disallow to change a the quntity of items on the checkout page.

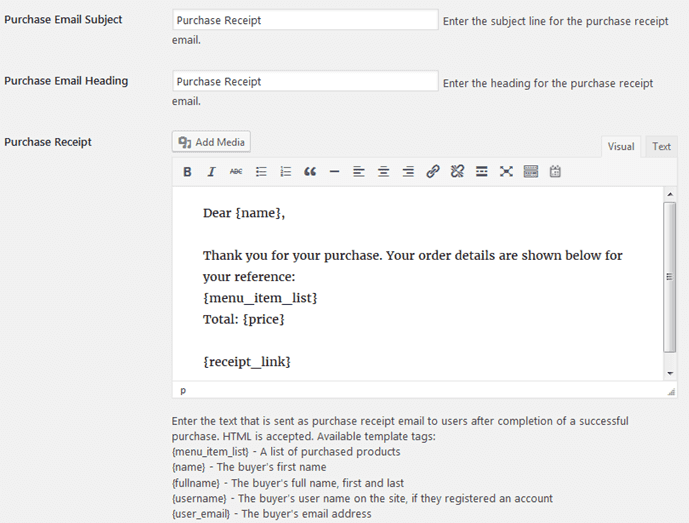
Email tab contains all the settings to help you customize admin and user emails, purchase receipt template, and “new sale” notifications. It contains plenty of user-friendly shortcodes to help you customize all emails more quickly.

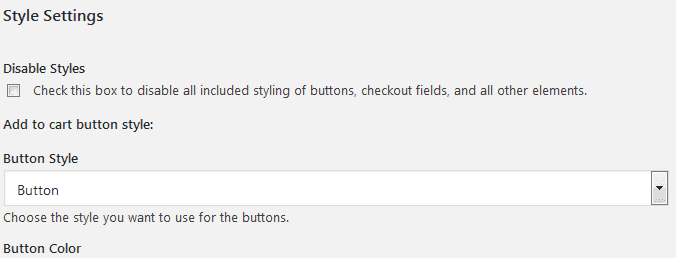
To make the shopping cart button suit your website color scheme and design, you can configure it in the styles tab: change color, style, and size of the button.

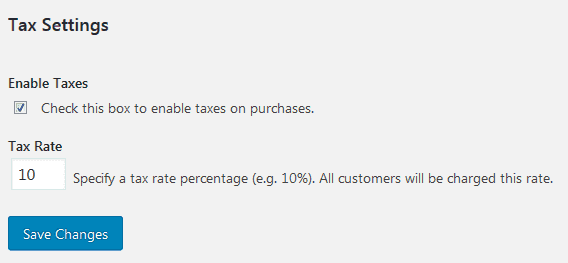
You may also enable taxes and set the tax rate via the Tax Settings menu.

In the Extensions section, you may see all currently available free and paid conversion-boosting addons. So far, there are three add-ons.
- Menu Cart addon that lets you add a shopping cart icon into a navigation menu and customize its appearance - free download.
- A delivery addon that enables delivery services offering delivery and pick-up choices for the customers - premium extension.
- Toppings addon - allows you to supply any menu item with extra ingredients/dishes available for additional purchase - premium extension.


It looks like you are ready to go!
Display your menu on the site
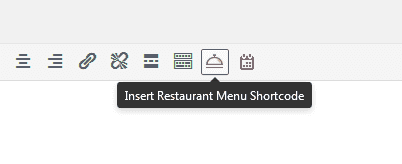
Well, almost ready. The most pleasant work is let - to play around with options for displaying your menu on the live site. You still need to output the shortcode with appropriate settings to get the most optimal viewing. To do this, go to add a post or page > on the TinyMCE dashboard find MotoPress Restaurant Menu icon and click it.

The shortcode offers you different options.

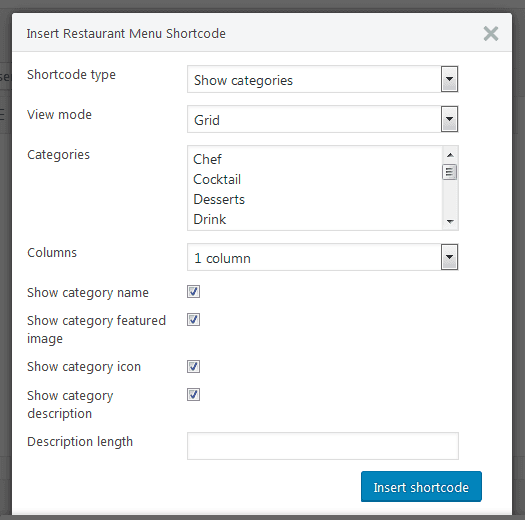
- Define the main view of your menu - show categories (most suitable for multiple menu items) or show menu items.
- And specify a view mode for your shortcode type: grid or list view.
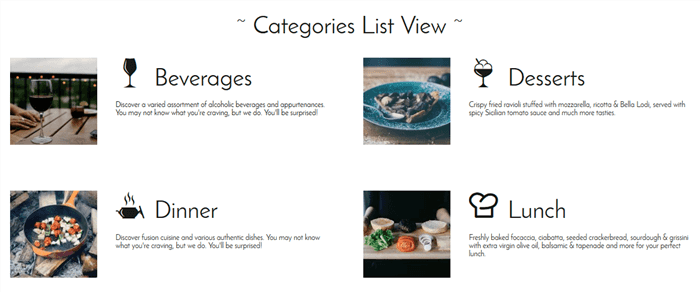
For example, here is what you can get setting Categories type and a list view.

- Set the number of columns to the optimum for presenting the menu in your current theme (up to 6 columns).
- Tick/untick the option to show: category name, category featured image, category icon, category description.
- Specify the length of description to be shown on the frontend.
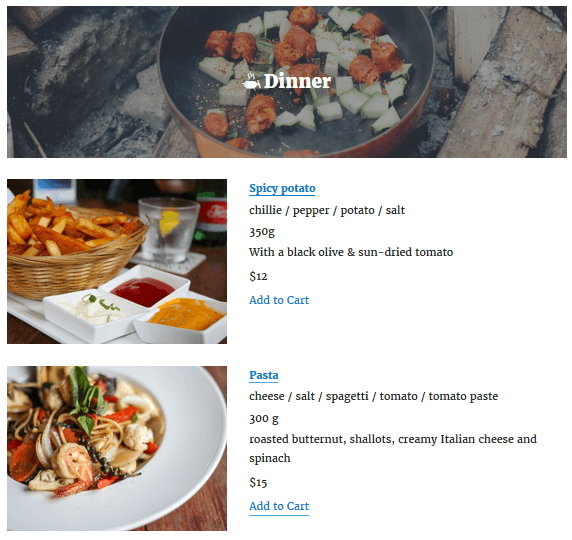
Here is what we can get outputting one column of a list view with all options ticked:

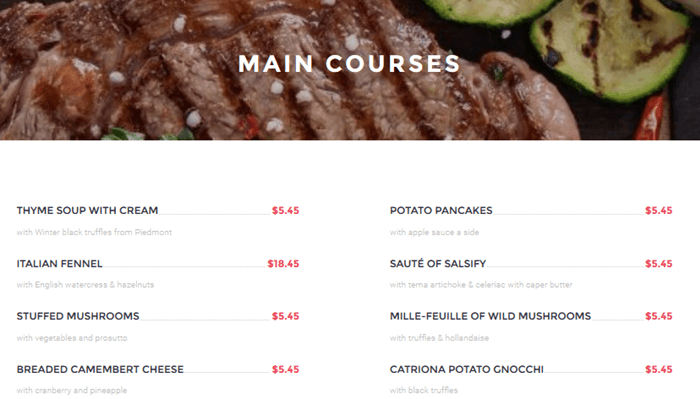
Moreover, if you plan to feature your menu without any additional info like an image, description, etc, you can set a Simple List view mode (Shortcode Settings > View mode > List > Simple List) and let your site visitors enjoy the menu without visual overcomplexity.

However, you can output more details about each menu item on the separate page.

Wrapping it up
Free MotoPress Restaurant Menu plugin for WordPress was created with special attention to a handy management toolkit so even a non-tech restaurant owner can set it all up. Of course, it’s not that as easy as pressing a button and hoping for the magic to happen, the process will take some time for you to get acquainted with the admin tools, but even magic lessons take time.
In case you're searching for premium themes to build a website from scratch, look through the Best WordPress Themes 2017.