Create Your Own Control in the WP Customizer
The WordPress Customizer is the canonical way for adding options to your theme, and during the last couple of years has become a must-have component of a modern WordPress theme. In this tutorial we’ll have a deeper look into the Theme Customization API, and show you how to create your own control, based on existing ones. In particular we’ll create an easy-to-use control for picking font icons from the FontAwesome set.
All the Customizer controls represented in the WordPress core are based on the WP_Customize_Control class. That means that all of our own controls should be based on this class as well, so if we want to create one, we need to extend the parent WP_Customize_Control class. In order to do that, open your functions.php file, and add this block of code:
Here we’re checking if the WP_Customize_Control class exists, to make sure that the code doesn’t show an error on older WordPress installations, that don’t support the WordPress Customizer.
Now we need to write the HTML code that would be outputted in our custom section. For this purpose we have to rewrite the render_content() method, which is responsible for outputting HTML code in all WP Customizer controls.
Let’s take a closer look at the code of this method. $this->label outputs the registered label of our control, $this->link() returns a data attribute, which is needed for the JS code in the WP Customizer to work correctly. $this->value() outputs either a value stored in the database, or the default value. The rest of the code can contain any other required markup.
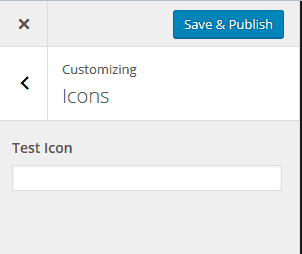
At this point we can see some results already. To do this, we need to register our newly created control. For the tutorial purposes we’ll create a separate function, and put our control in a custom section ‘Icons’.
Now we can see the following section appeared in the Customizer:
Right now it’s an ordinary text input field, but with a little bit of trickery we can transform it into an icon picker. In order to do that, let’s use the solution from Javier Aguilar. We would need to download the necessary CSS and JS files from the GitHub repository, download and add the FontAwesome itself, and also create a file colorpicker-control.js, where we’re going to initialize the script for picking icons in our control. In order to add all the mentioned scripts and stylesheets to the Customizer page we have to rewrite the enqueue() method in WP_Customize_Control:
We also need to add the following code to iconpicker-control.js:
Now our control is ready. By clicking on the text input we’ll get this nice selection of FontAwesome icons:
In order to use the saved icon in your theme properly, don’t forget to add FontAwesome on your frontend using wp_enqueue_style.
You can find the source files of this tutorial in the archive. In order to use them in your theme, simply copy the iconpicker-control folder in the root of your theme, and add the following code in functions.php:
That’s pretty much it. You have created your own Customizer control with a built-in icon picker. Now you can expand the code and add more controls to enrich your theme with options.
If you’d like to see more of such articles coming right into your inbox, make sure to subscribe to our WP Lifehack newsletter.
[mc4wp_form id="74928"]
Get more to your email
Subscribe to our newsletter and access exclusive content and offers available only to MonsterPost subscribers.


Leave a Reply
You must be logged in to post a comment.