


WooCommerce is one of the most effective eCommerce solutions on the market. With its help people can sell various kinds of products quickly and easily. It also powers over 30 % of all current online stores and is a perfect fit for both store owners and developers.
In this tutorial we will take a look at how to create product variations in WooCommerce and build a true one-of-a-kind store. So, what are product variations and how does one use them properly? To be brief - variations are used for managing products more easily. For example, you can offer a single product in different colors, sizes, etc. This feature ensures a first-rate buying experience and allows visitors to find the required products much faster.
It is also necessary for the webmasters to add variations for each new product so they can be accessed, unless they want to lose a large number of their customers. The reason is that the customers would not look for a specific color or size of a T-shirt all over the site if they can switch between these options right away in a single window. So, as you can see, it is a vital characteristic of any successful online store if you wish to attract visitors and grow revenue.
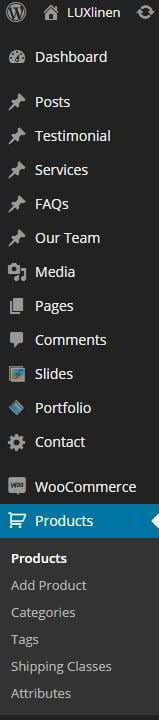
Well, let’s take a closer look at the procedure. To create Product Variations, you need to log into your WordPress account and click “Products” button on the left sidebar.

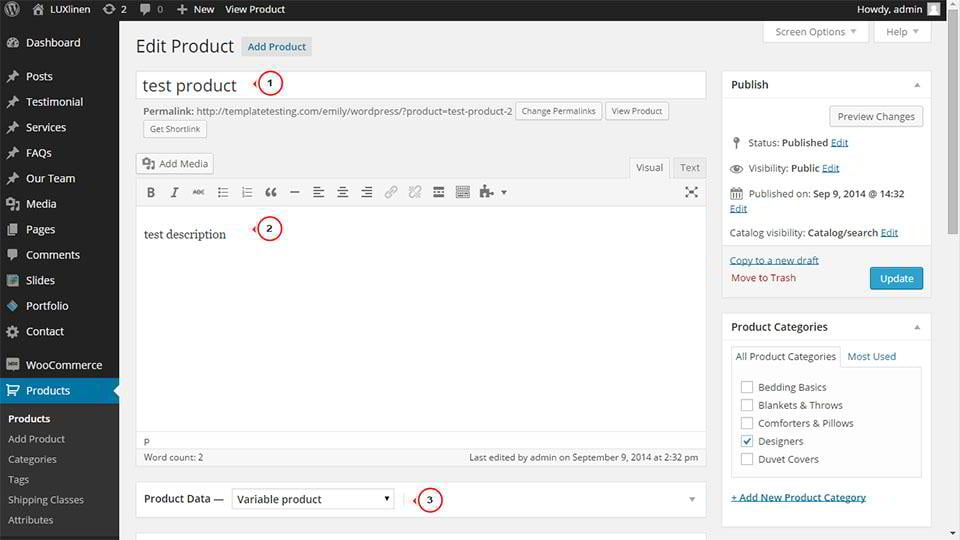
After that, hover the product you need to customize and click “Edit”. Once done, you will be redirected to the product page. (If you are creating a new product, type down its title and description). Make sure that the Product Data field is set to Variable Product.

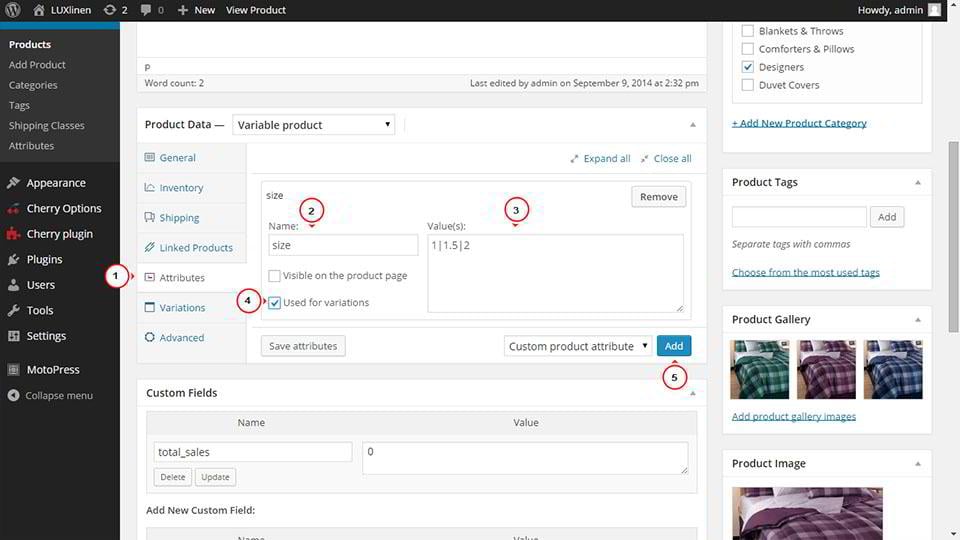
Go to the attributes tab, fill in the required fields and press “Add” button if you need to add more attributes. Make sure that “Used for variations” is checked. When everything is done, click “Save Attributes”
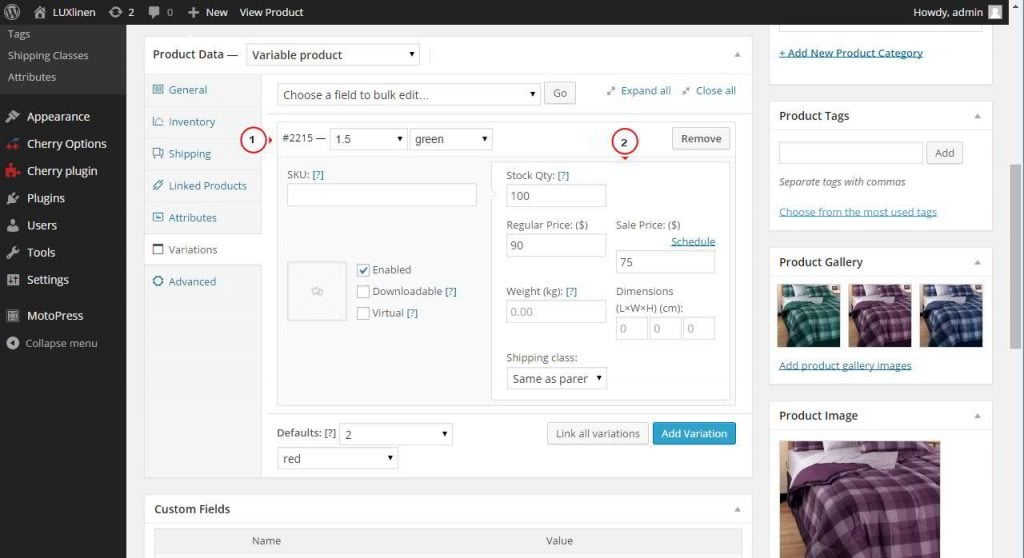
Next you should go to the Variations tab and click the Add Variation button to adjust the attribute values that are displayed on the product page.
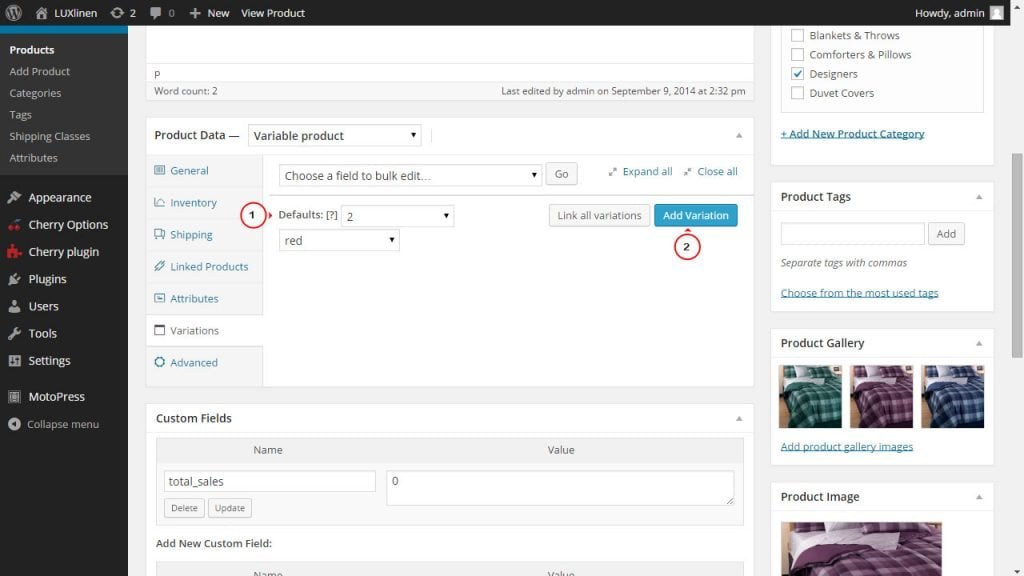

Once the variant is created, fill in the fields in accordance with the specifications of the product.

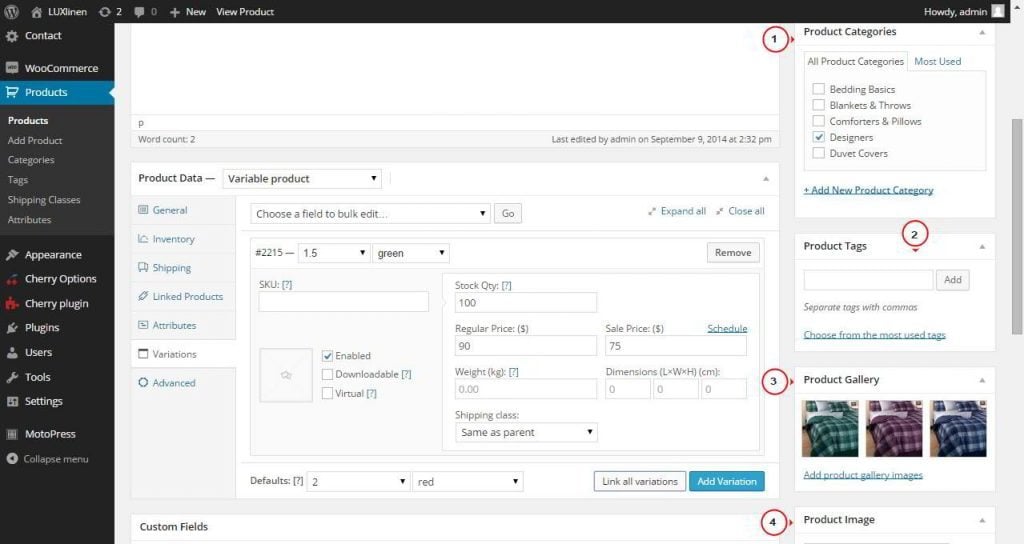
Finally, you need to assign the product to a specific category, give it proper tags add images and hit “Publish” button.

That is pretty much it. As you can see, everything is much easier than it seems. Just follow these step by step instructions and you will build a top notch store and easily add different product variations in WooCommerce no time at all.