Lesson 8: Creating & Editing a Post with Gutenberg
This lesson is a part of the How to Build & Maintain Elementor WordPress Website? course.
Hi, everyone!
In Lesson 7 we’ve learned what’s a page template, and what do we need them for. Also, we’ve created one and looked through the options of using page templates, now let’s check how we can make use of the Gutenberg editor.
Let's roll.
Anyone using the version of WordPress engine higher than 5.0 can wave goodbye to the classic WYSIWYG editor...well actually that’s not true if for some reason you don’t feel like using Gutenberg you can rollback and get the TinyMCE, how? Just install a plugin TinyMCE advanced.
When you install and activate the plugin, go to Settings >> Tiny MCE Advanced >> Classic Editor (TinyMCE) tab, scroll the page to the Advanced Options and mark the option Replace the Block Editor with the Classic Editor.
Until you remove the checkmark from this option you will never see the Gutenberg editor again.
Now let’s get Gutenberg back so we could build some “rich-content blog post”.
Let’s create a test blog post, I’ll call mine Creating & Editing a Post with Gutenberg.
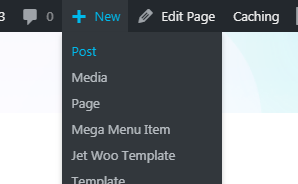
You can do it from any page in your WordPress website, just hover the + New >> Post
When the Gutenberg editor loads this is what you will see
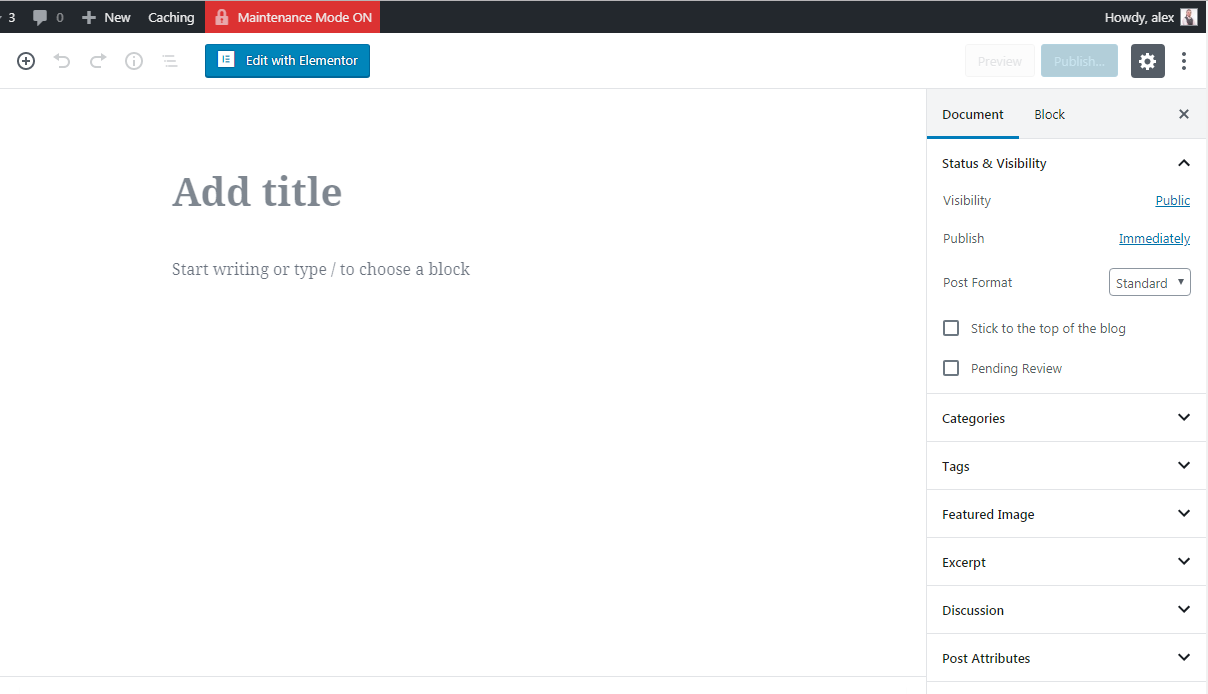
On the right side of the editor, you can change post options, like it’s visibility settings where you can make it Private or Password Protected.
In the middle of the page, this is the content area, where your rich content magic will happen.
Let’s have a look at the controls.
- Add blocks - just click on the plus to access the library of Gutenberg blocks.
- Undo and Redo - it’s your Ctrl+Z inside Gutenberg.
- Content Structure - when you click on it – it will show you a little drop-down table with the number of user words, headings, paragraphs, and blocks.
- Block Navigation - will give you access to quick navigation through all blocks in your post. When you click the block in the list it’s automatically opened for editing.
- Settings panel - includes a range of blocks options that will change depending on the block you choose.
- Post title - it does what it says.
How many blocks are there in Gutenberg?
The blocks menu is structured in 8 categories
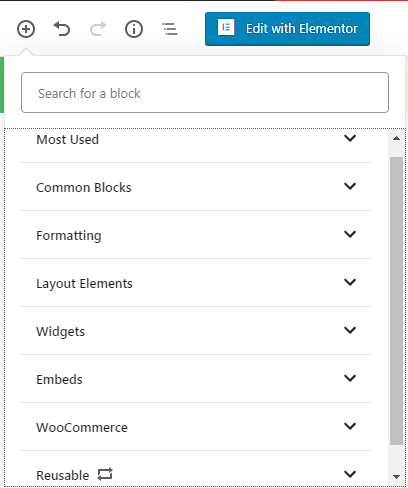
- Most Used will contain blocks that you’re using most of all.
- Common Blocks:
- Paragraph - use this block to create a paragraph of text.
- Cover - a hero like section with an image on the background and some text over it.
- Gallery - use this block to add an image gallery to your page or post.
- Heading - use it to create a headline.
- Image - adds an image to a post or a page.
- Quote - the good old quote you can use to cite someone.
- List - the block creates a numbered or bulleted list.
- Audio - upload any tune or a podcast so your blog readers could enjoy it in their browsers.
- File - you can upload any file to your post or page, like a free PDF.
- Video - adds a video to your post or page.
- Formatting:
- Code - adds chunks of code, as code quotes, to your post.
- Custom HTML - add executable HTML code to your post.
- Preformatted - add preformatted text to your post.
- Pullquote - a variation of the quote block, use it to quote your own pieces of writing. Pullquote block is more flexible in terms of customization than the Quote block.
- Table - block creates a table.
- Verse - the block for writing poetry and other literary expressions.
- Layout Elements:
- Button - use the block to add a button.
- Columns - the easiest way to create columns in your post.
- Media & Text - the block creates a section with an image on the left and some text on the right.
- More - adds Read more to break your post into parts.
- Page Break - the block adds pagination to your post.
- Separator - just a horizontal line to separate various blocks.
- Spacer - adds some space between blocks.
- Widgets:
- Shortcode - use the block to add custom shortcodes to your posts or pages.
- Archives - the block adds post archive to posts or pages.
- Calendar - add this block to display a calendar.
- Categories - the block displays available categories.
- Last Comments - display the latest comments from your blog.
- Latest Posts - the widget will add a section with your latest posts.
- RSS - the widget will display the RSS feed icon.
- Search - the block adds a search bar.
- Tag Cloud - the block adds a good old tag cloud.
- Embeds - with Gutenberg, you can easily embed content from a multitude of sources.
- WooCommerce - in case you're running a WooCommerce store, you can make use of Gutenberg blocks to display single products, product categories, products by attribute, top-rated products, and so on.
- Reusable - this section will contain pre-modified blocks that you have made.
Now let’s try to create something with Gutenberg.
First of all, let’s add some text. Choose a paragraph block, or start typing.
I’ll use some dummy text from hipsum.
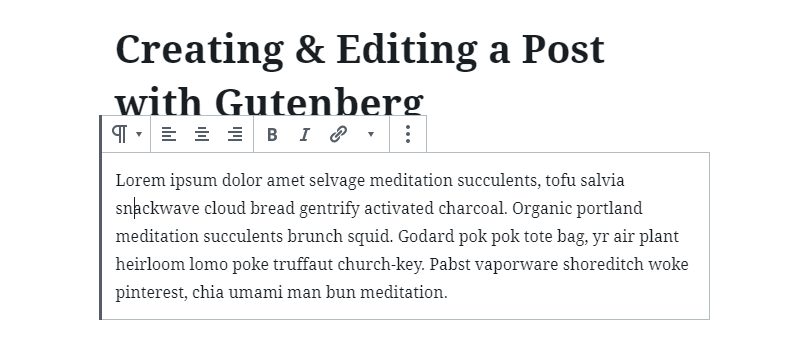
On top of the block, you will find some basic formatting options (like alignment, bold, italics, link and inline image). When you click on three dots you’ll access additional options of the block.

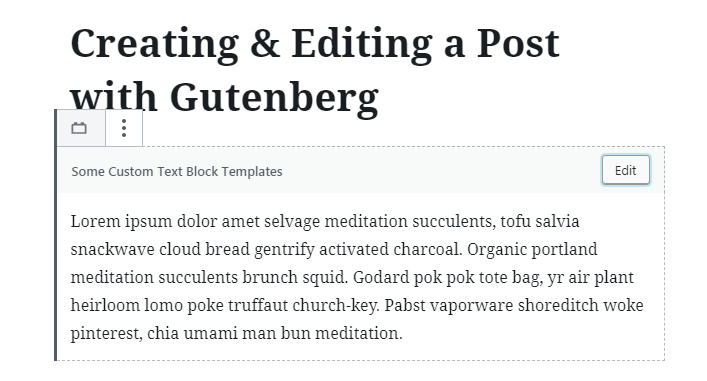
There’s an interesting option a reusable block, it’s like a template we’ve created previously with Elementor, here you can create a unique block and save it for further reuse.
Now let’s check the block settings. As you can see there’s a bunch of options that we can tweak.
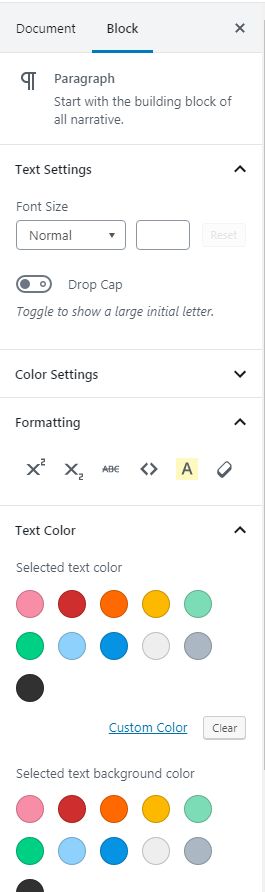
Frankly speaking, I wouldn’t recommend you easing up on all of those features, since all of your posts may look different, and eventually your blog will lose its wholesomeness of style.
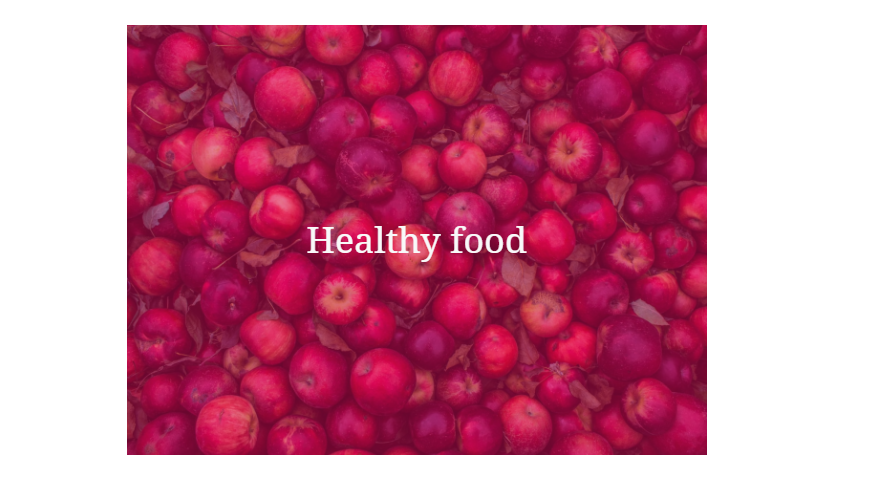
I’ve just checked in on Unsplash and downloaded a bunch of cool food photos, I’m going to use them for this post.
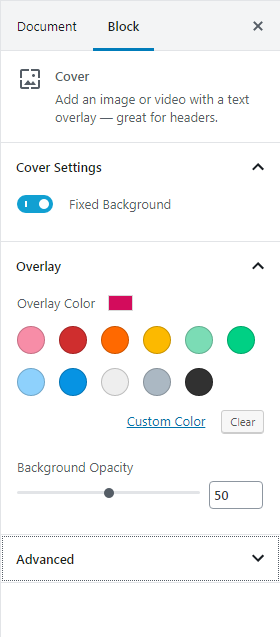
There’s a cool block in Gutenberg called Cover there you can add an image or a video, as well as some text above, as for me its like the hero area. This block is good for separating major parts of your post.
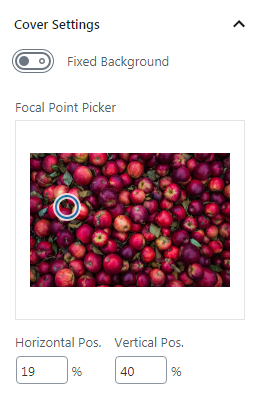
If you open the settings of this block you will note that you can turn on a fixed background, and it looks quite nice when turned on.
When it’s OFF you can move the focal point of the background thus changing the position of an image.
As an overlay color, I’ve used the same as for the button in my previous lesson #d30c5c.
After the cover, I’ve added another text block and the Gallery block.

Previously, adding a gallery to a WordPress post was a real pain at the back of a head, now you can do it in a few clicks.
Add a gallery block to your post
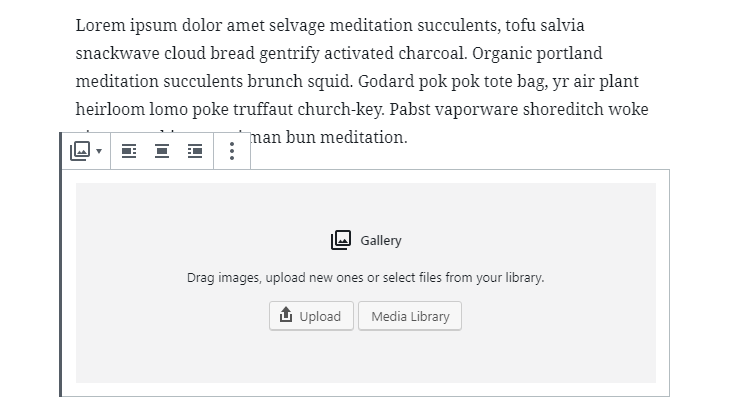
Choose a bunch of images from your Media Library or upload from the desktop. I have some nice shots of apples so here’s my gallery.
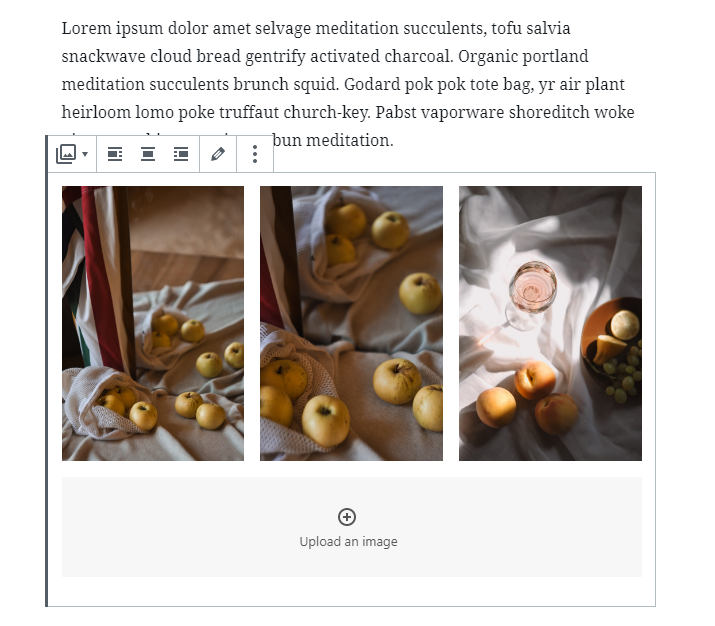
If you click on the + you will add some more images, though I think 3 is more than enough.
In the gallery block settings, you can change the number of columns from 1 to 3, and assign links to each item.

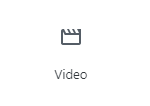
After the gallery, I’ve added another text block and a video block next to it. As always, there’s a bunch of options how you can add a video, either as a Video block...
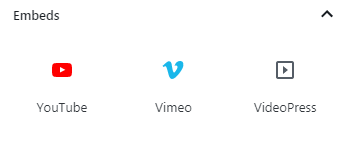
or as an embed from YouTube, Vimeo, VideoPress and tons of other sources:
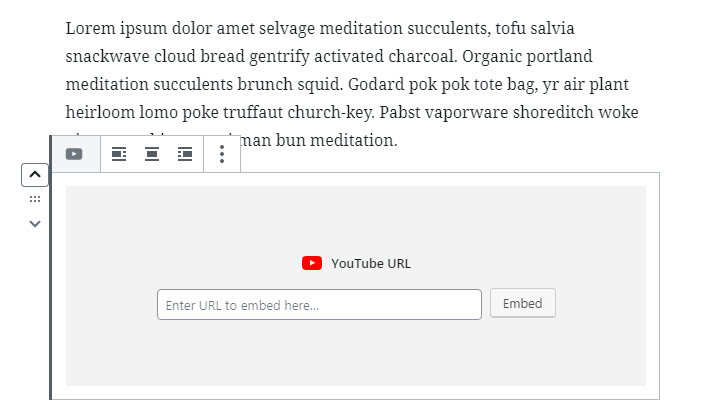
I’ll use the YouTube embed. As you can see, it’s dead simple, just paste the link to a YouTube video, and that’s all.
Right under the video, you can add a caption and this where some block settings will appear.
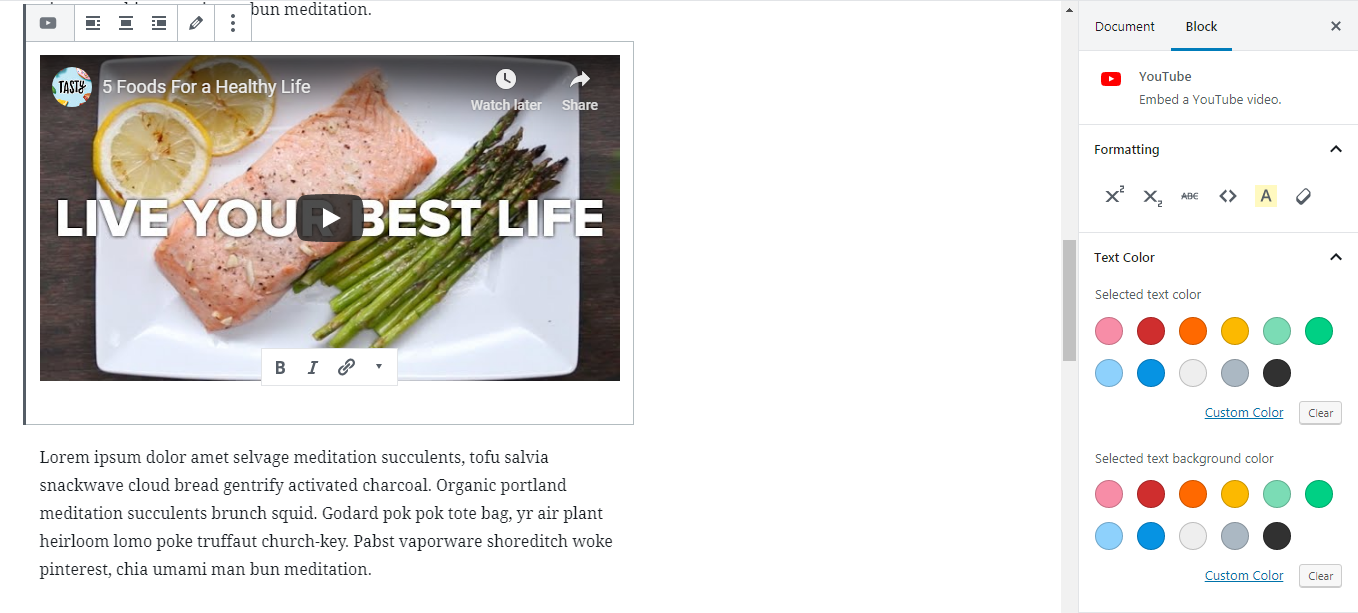
There’s some minor text formatting that you can use.
Under the video, I’ve added another text block. Lastly, I’ve added a button.
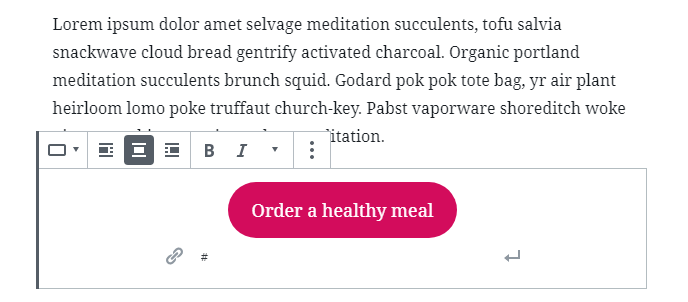
There’s a funny thing, you can add an inline image to the button (next to the button text) I wouldn’t recommend you adding something larger than an icon, cause it might look weird...
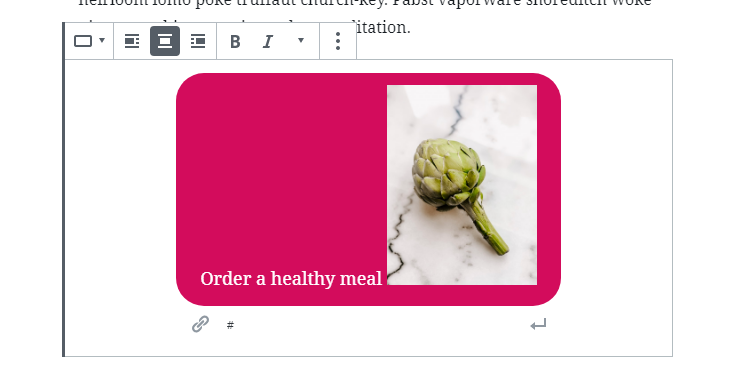
Does it look like a button to you?
To make something I’ve added two similar sections with Junk food and Good food.
To make it a little bit more interesting I've created some more sections, feel free to check full post screenshot here.
Additional information
WordPress 5.1 and Gutenberg Ultimate Cheat Sheet
Also, we have a full-fledged free course dedicated to Gutenberg editor, you can check it out here.
End of the lesson.