


Can you imagine a website without buttons? A site without buttons is like a car without wheels and pedals – even if there’s leather interior inside, it still can’t move. Anyway, it is obvious that a website needs buttons. All the navigation on the page is made by using buttons – they lead you to different parts of the website, help you to submit appointments, and open the information hidden under the spoilers. Usually, pre-designed buttons are included in the template pack and you don’t need to think about their customization. But what do you do if you want some animated or otherwise cool buttons? Elementor Page Builder can help you with that.

If you don’t have any Elementor plugins that expand the number of available options – you can just use the “Button” widget. However, if you use Elementor frequently, you probably have a JetElements plugin, which adds a lot of useful instruments to your Elementor toolbox. And JetElements has its own “Button” widget that is a little different from the default one. So, the question is – which one do you choose? Both the Elementor Button and JetElements Button have their advantages and I will show them to you, so it will be easier to choose. We will go through the whole customization process and see what the differences are and where each of the widgets will be perfect to use.


Adding to the Page
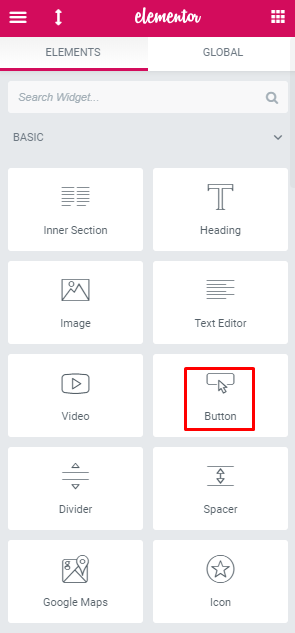
Both of the button widgets are easy to find and could be placed on the page by a simple drag-and-drop to the work field. You will see the basic Elementor Button right after opening the customization menu. After dropping it to the page you will see a very simple small button with “Click here” text on it.


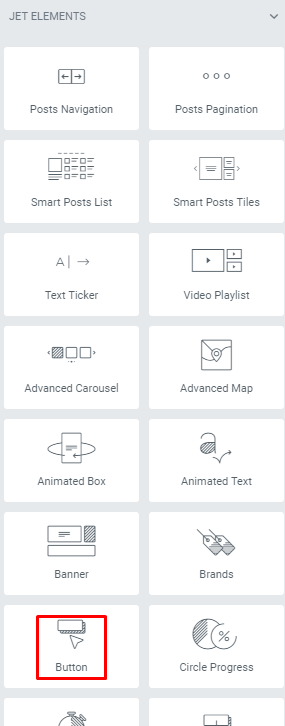
To find a JetElements Button you will have to scroll to the “Elements” section. Placed on the work field it is a little bigger than the basic button and has pre-set hover animation effect. There are also settings to change the color, icon and text.


“Content” Menu Tab
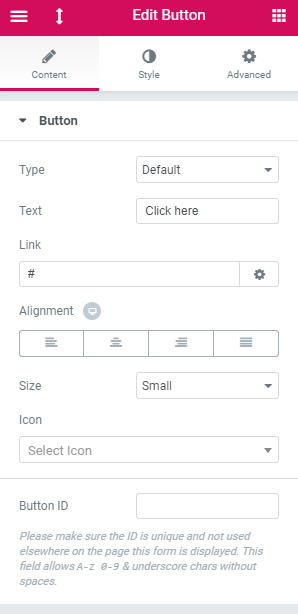
For the basic Elementor Button, this tab is quite simple. There’s only one section and all the settings are placed there. The “Type” option allows you to quickly change the color of the button. You can change text, link, alignment, size and choose an icon.

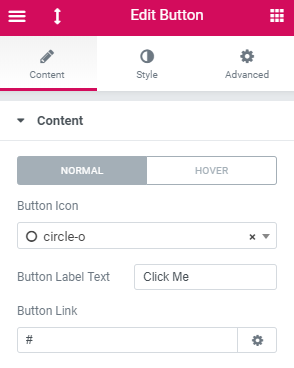
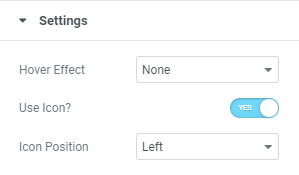
The JetElements Button “Content” tab is divided into two sections: “Content” and “Settings”. The first one allows you to set an icon, text and link to the normal and hovered sides of the button. The second section contains the options that define the hover effect, icon usage, and position.


“Style” Menu Tab
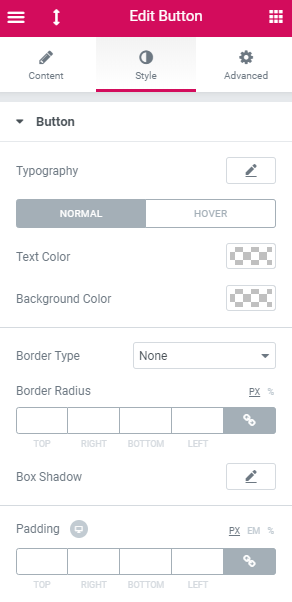
Once again, this tab is very simple for the basic Elementor Button. There is only one section where you can customize the design of the element. There are options to change the typography, text and background color, border type and padding. You can also turn on the hover animation here and set all the design options for the hovered side.

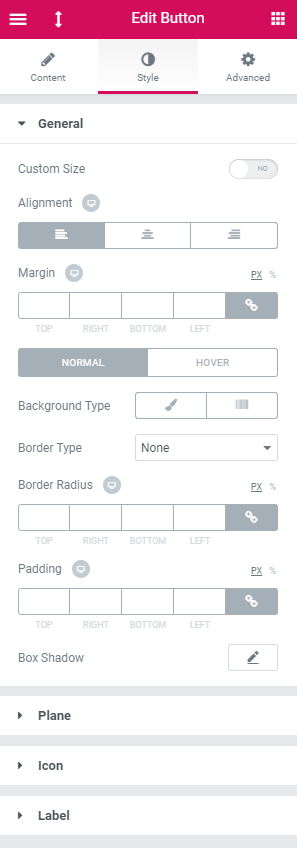
The JetElements Button is much more flexible. The “Style” tab has four sections: “General”, “Plane”, “Icon” and “Label”. Each of them has a “Normal” and “Hover” sides and allows you to change, literally, everything in the borders of the button element. You can change colors, shapes, and fonts for any detail of the button.

Do you often use Elementor content editor along with Jet plugins when customizing websites? If so, you’ll be pleased to know that you can easily access them at a single bundle. The thing is that TemplateMonster has recently launched a brand new subscription service called ONE. Featuring more than 8,500 items (e.g. premium plugins, top templates, graphics, and extensions) it costs only $19/month.
Need to say that we’ve prepared a pleasant bonus to everyone following our MonsterPost blog. With promo code BecomeThe1, you’ll be able to subscribe to a service with 5% off the price.
Video Tutorials
All Elementor features have really detailed tutorials – both video and text. The JetElements widgets are no exception, there are videos shot for every add-on in a set. They show all the features the user could change and the result he could achieve. Following the tutorials step by step, you will be able to create astonishing buttons that will attract your visitors’ attention.

Where to Use It
It’s time to make some sort of conclusion and define for what purposes each of the buttons will work better. Every instrument is created to do some specific work and it is better not to mix tools, or the efforts won’t be worth the cost.
You will need Elementor Button, if you want to create it quickly and easily. It is perfect for cases when you are generally happy with your current design and don’t really want to change it. This Button is a simple tool that is intuitively understandable even without tutorials.
JetElements Button is much more precise. It has a bunch of settings that allow you to create a button from scratch. It will fit you if you are combining different templates and want to create an eye-catching button that will focus the user’s attention.
So, to summarize – use the tools according to their mission and your work will be a real pleasure. If you have any comments or questions – you are welcome to leave them in the comment section below. If you have already used one or both of these widgets I would be glad to hear your opinion about them.
Read Also
JET Plugins for WordPress Elementor Builder [Review]
How to Create a Countdown Timer with Elementor Page Builder
JetElements: Build a Better Website With Our New Elementor Add-on
How to Create Testimonials Using Elementor Page Builder