Jeff Bell
Jeff is a 20 year old Tech Support Operator at TemplateMonster. Helping our clients to edit and customize their sites every day, he knows what they need most and how to make it as easy as possible. More than one satisfied client already promised to call their child after him. Being a semi-professional high jumper in the past Jeff leaves no issue unresolved.
Translating your site into several languages can expand your audience considerably. With Joomla it’s just a few intuitive steps away. Let me make it even easier for you.
You’ll Learn About:
- Installing a new language in Joomla
- Adding a content language
- Setting up System – Language Filter Plugin
- Setting up "Language Switcher" Module
- Creating multilingual content
- Joomla multilingual menus
- Multilingual articles
1. Installing a new language
The Joomla team did a great job making their product available in all the common languages and they don’t plan to stop at that. At the moment there are over 60 Joomla translation packs.
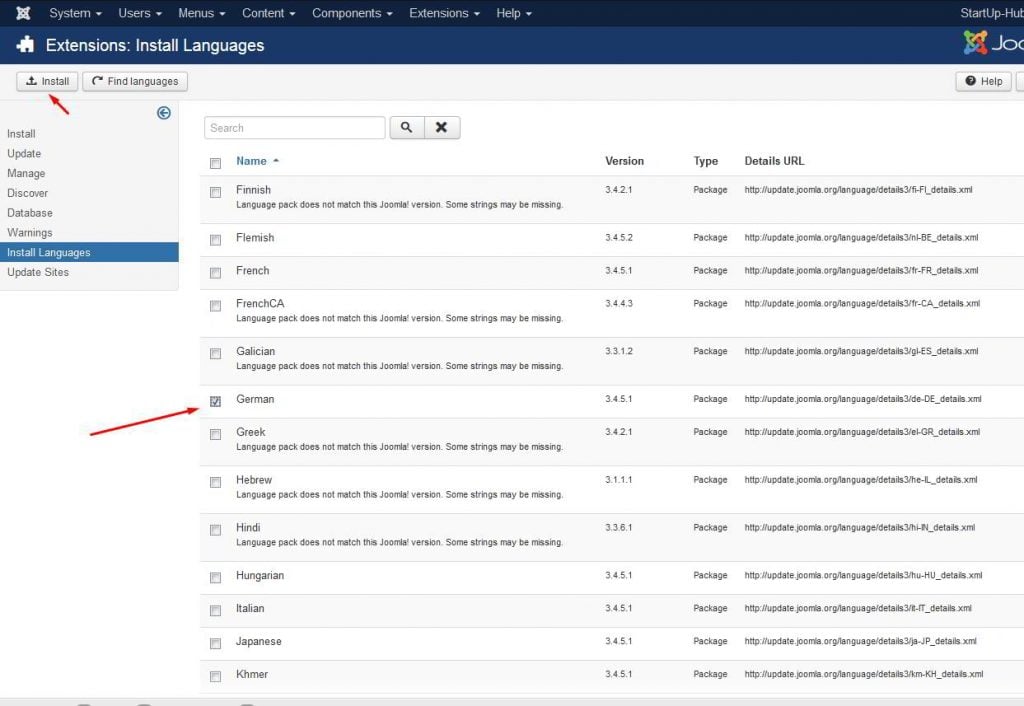
By installing a language pack you’ll basically translate the Joomla admin panel and the default front-end elements (e.g., “Back to top” button). In order to install the translation pack you need to navigate to Extensions -> Languages.
img1
In the screen that opens, select the language pack, tick it and click “Install”
If you go back to Extensions -> Languages now, you’ll see that your newly installed language is now showing there. You can make it the default one for your site by clicking on a grey star next to it. Doing so will translate your site’s admin panel into the selected language.
2. Adding a content language
But having your admin panel translated isn’t enough. Now you need to create a language for your content. If you navigate to Extensions -> Languages, you can see the Content Language tab in the right-side menu.
You need to create a Content Language now so that later on you are able to create and assign your site’s content to display in the specific language(s).
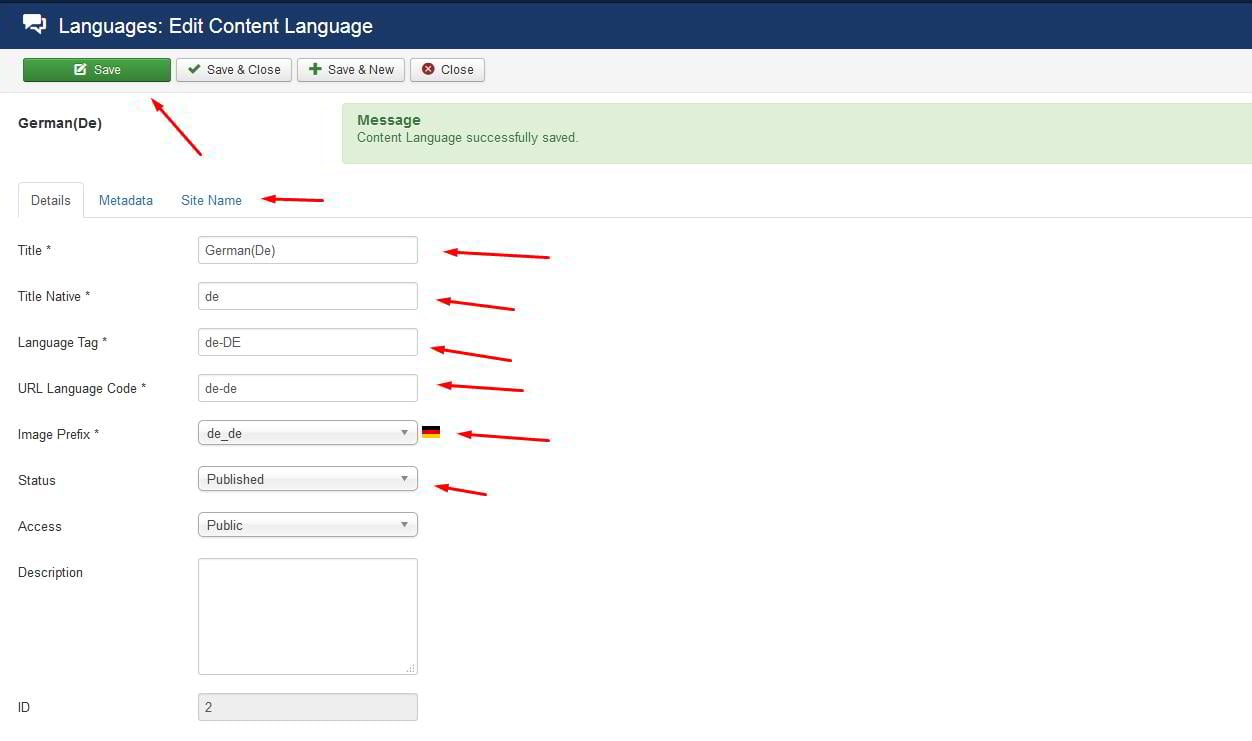
In this window you can set the URL language code, language tag, and the image prefix.
URL language Code: is displayed in your URLs to define into which language the page is translated e.g. your-domain.com/en/your-article-in-english.
Language tag will display when you or other users log in to the Joomla back end and сhoose the language of the site’s admin panel.
Image prefix will display when you hover on the language flag on your site’s front end
You can set the language specific site name in the corresponding tab (‘Site Name’) that will show up in the browser tab whenever that language version of your site is selected.
3. Setting up System – Language Filter Plugin
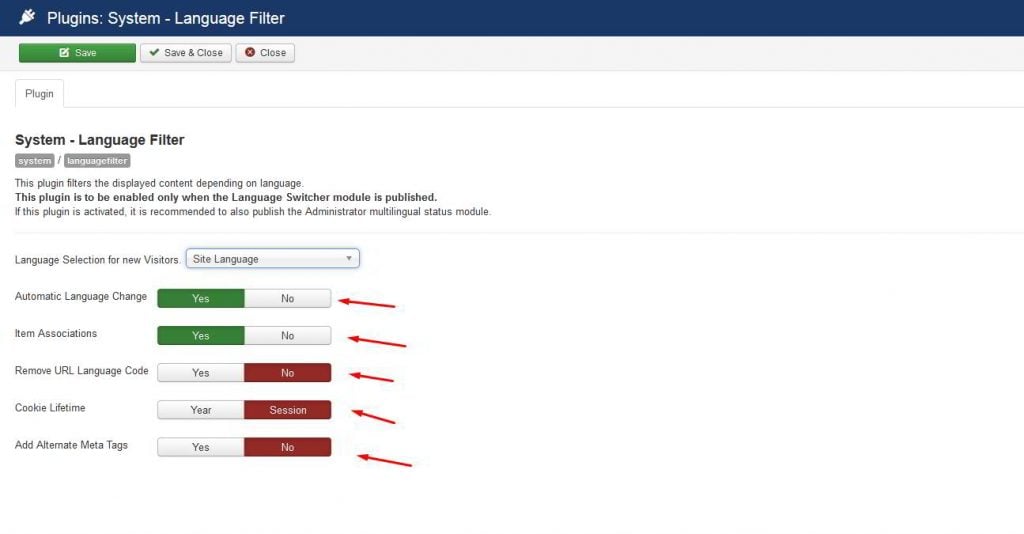
We’re about halfway through and the hard part is done. Once your content language is saved you need to navigate to Extensions -> Plugins and locate the “Language Filter” Plugin which is installed with the Joomla engine by default. To locate it even faster you might want to use the Search tool at the top of the screen. Enable the plugin by clicking the Enable/Disable button.
Open the plugin by clicking it to change the settings as shown on the screenshot below.
4. Setting up "Language Switcher" Module
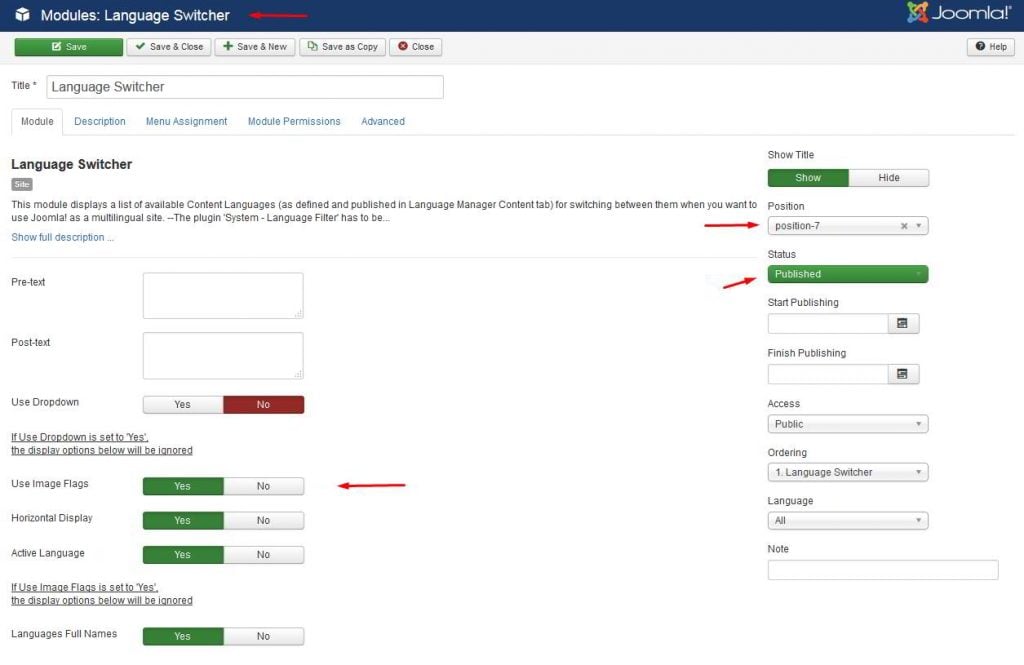
Now we should display all the changes we’ve made on the front end of the site using the "Language Switcher" Module.
Navigate to Extensions -> Module Manager, click "Add New" and select "Language Switcher" from the list. Open it to edit. You can set the location of the module on the page, choose the way the languages will be marked (with a flag icon or by name) and whether to display the module title.
5. Creating multilingual content
Congratulations! Your Joomla site has got everything it needs to be multilingual now! It’s time to create the content itself.
6. Multilingual menus
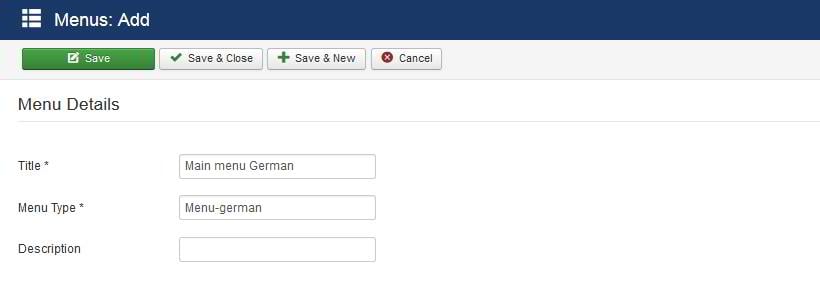
To display multilingual content on your site you’ll need to create menus for each content language. Within these language menus you’ll create pages assigned to each language. To do so navigate to Menus -> Manage -> Add New Menu. Name and save the menu for your language.
Repeat for other language(s). You can find and edit all of your menus in Menus -> Manage later.
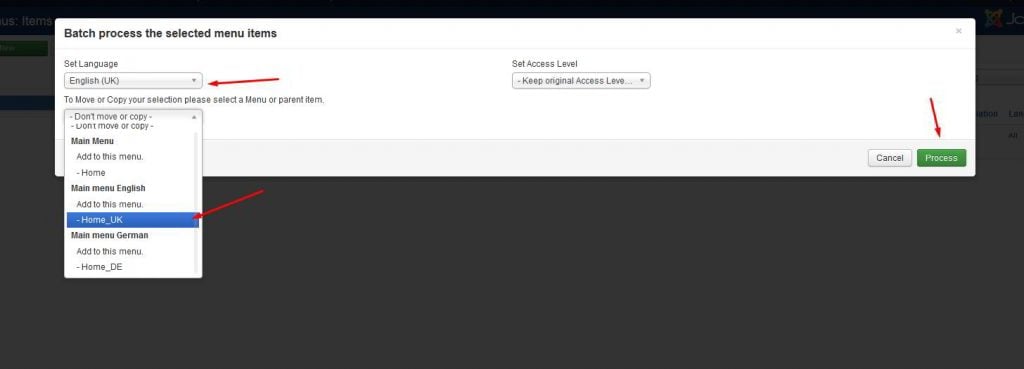
Now you need a default home page for each language. The easiest way to do so is to open your Main Menu, tick the Default menu item and click “Batch” at the top of the page.
What we’re going to do is copy the default menu item to your menus of different languages. In the popup that opens, choose the language to which you are copying the item and select the menu to where you want to copy it. Press “Proceed” once it’s done.
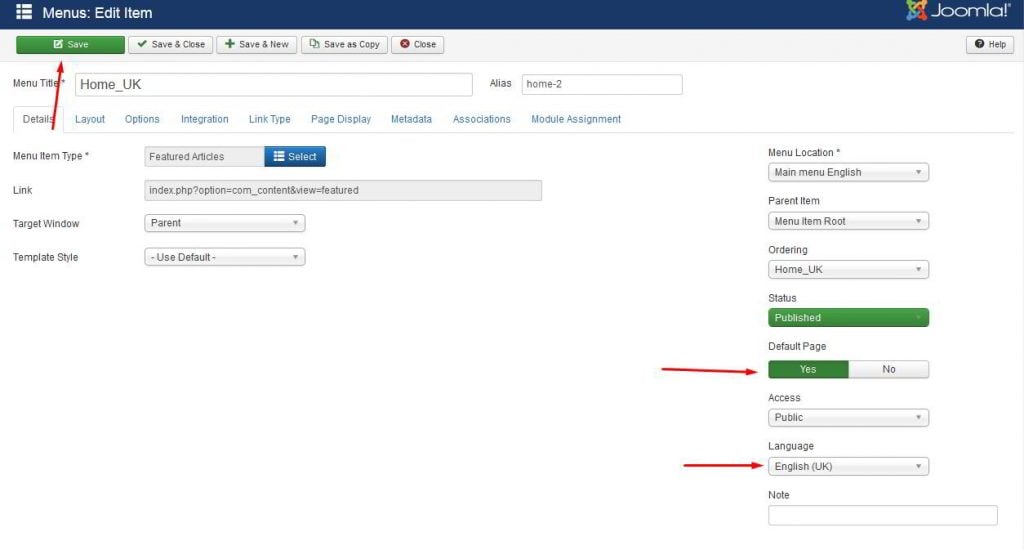
Repeat for other language(s). Now you have a menu for each language. You can open them one by one and assign a default page to them. It will display as a home page on language versions of your site. So the page assigned as the default one for the German menu will show up on your-domain.com/de.
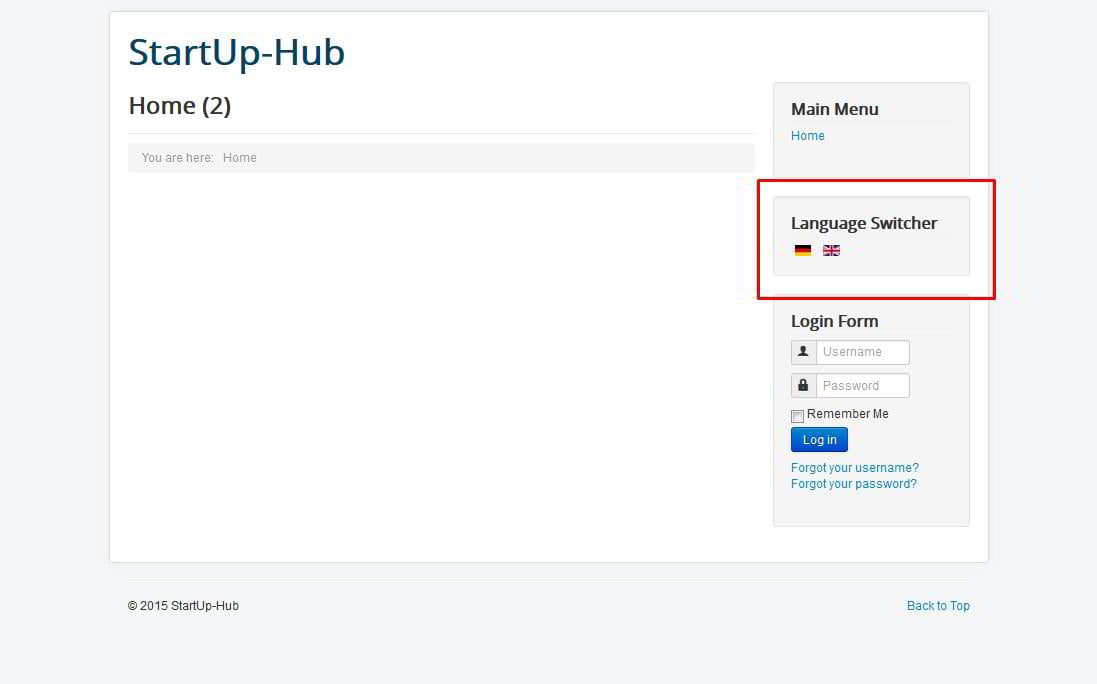
If you check your site’s front end, you should see something like that:
Each flag in the module points to one of the site’s language versions we created.
7. Multilingual articles
The menu items we created were set to display featured articles. Let’s create one just to see how it works.
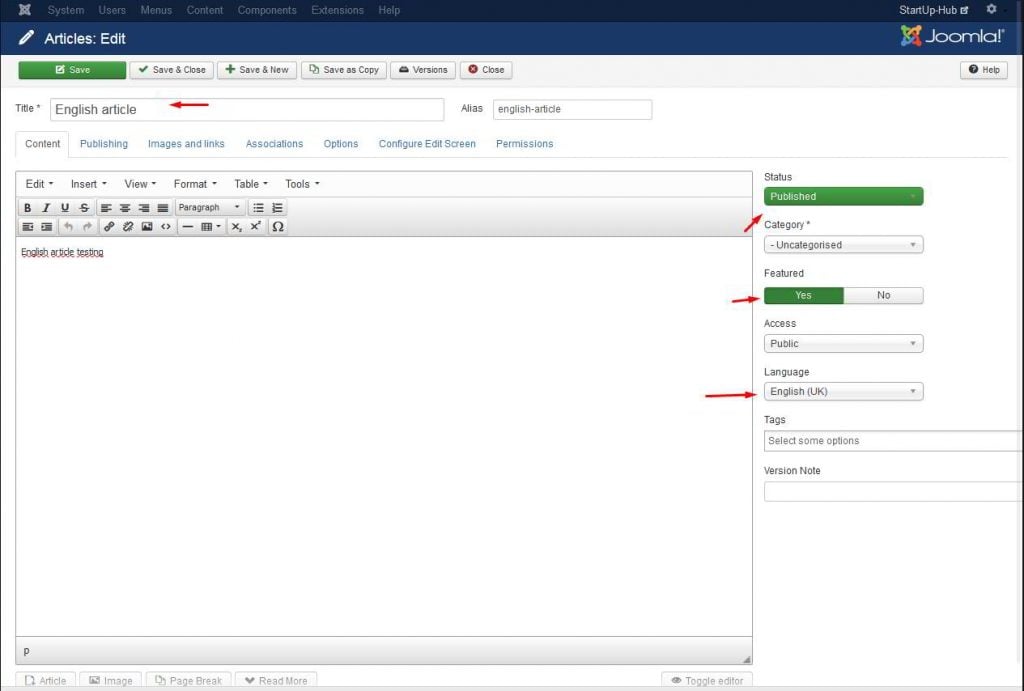
Navigate to Content -> Articles -> Add new. Select a language it will display in, set its status to published and make it a featured one
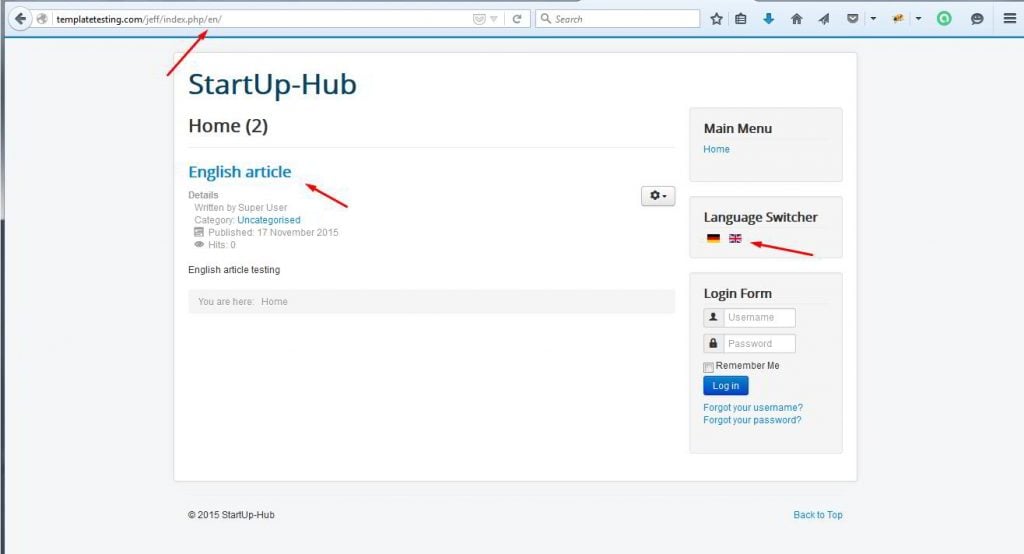
Save the changes and click the flag of the language for which you created the article, in our case - the British flag.
In the same way as we did with the article, you can assign modules and categories to certain languages.
As you can see, building a multilingual site with Joomla is not exactly some kind of rocket science. Basically, it’s just creating copies of your content that you wish to display in different languages.
Now you can conquer the international market with your Joomla site! Go get yourself a nice website template and localize it as I showed you.
If you’ve got anything to suggest that might help our readers create multilingual content with Joomla or if you need a piece of advice on that - feel free to leave a comment below.

