How to Install PrestaShop Engine from Scratch

So you are ready to start with PrestaShop. First, you need to install it on your hosting or on your local computer. This guide will help you to go through the installation process and get one step closer to your online store.
You’ll Learn About:
1. PrestaShop installation on local computer
You can install the downloadable PrestaShop platform on your local PC or laptop (in case you would like to learn PrestaShop first or test it) and on your hosting server (once you are ready to start your online shop development). Let us start with local installation.
Firstly check instructions on how to install localhost environments on Mac and Windows:
- How to install AppServ web development environment;
- How to install WAMP web development environment;
- How to install XAMP web development environment.
Now you will need to create a database to connect it with PrestaShop, so:
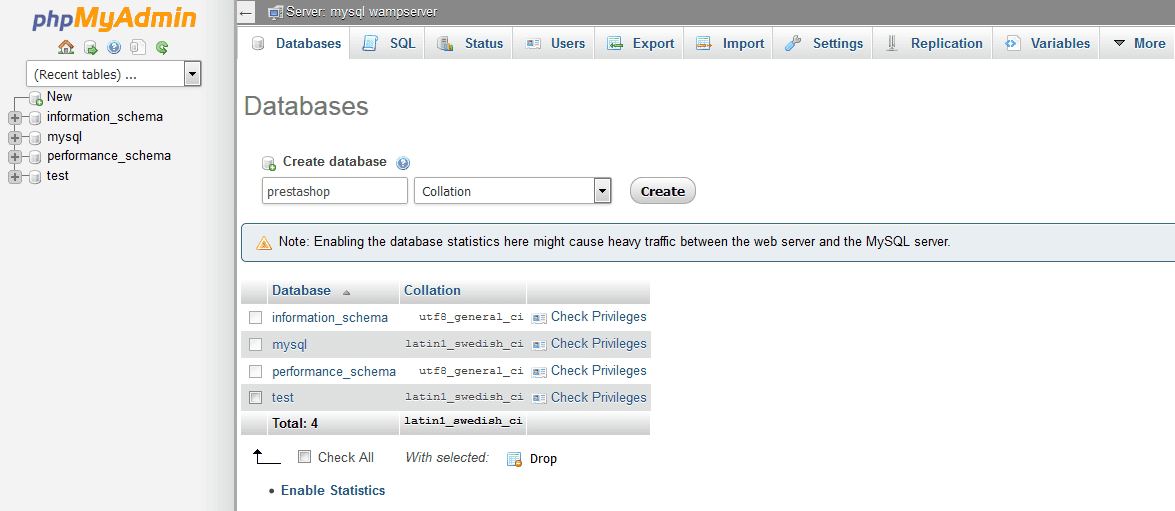
Go to the database management tool. You can usually access it using the http://localhost/phpmyadmin link. Note that it can differ depending on what local host software you’re using.
Click the Database tab.
Enter database name and click “Create”.
Let’s install PrestaShop now.
First, you need to download the PrestaShop engine at https://www.PrestaShop.com/en/download.
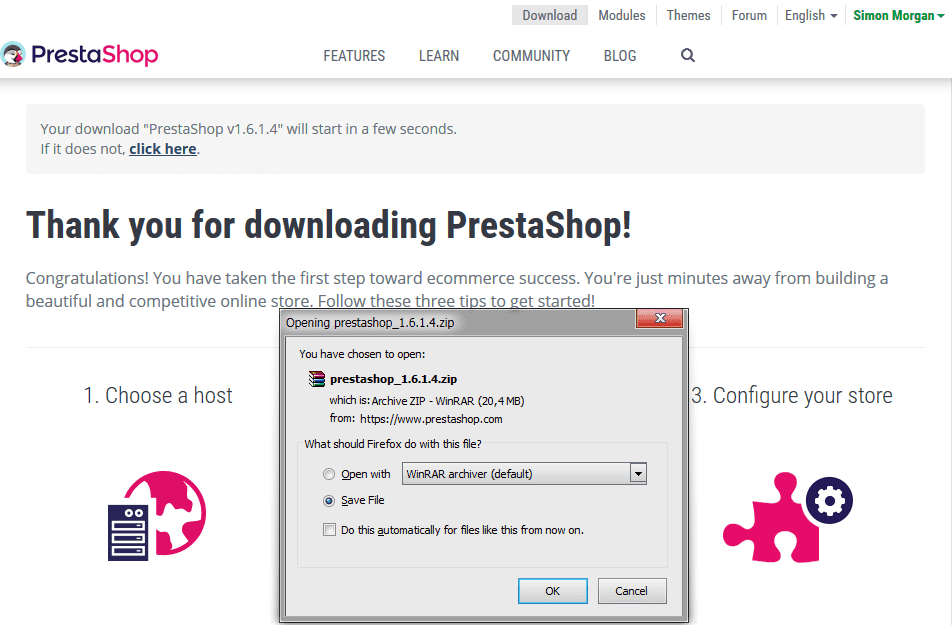
After that, unzip engine installation files and copy them to the local hosting (WAMP or XAMPP) www directory.
Open the browser and go to your localhost, usually it can be accessed via this link http://localhost/.
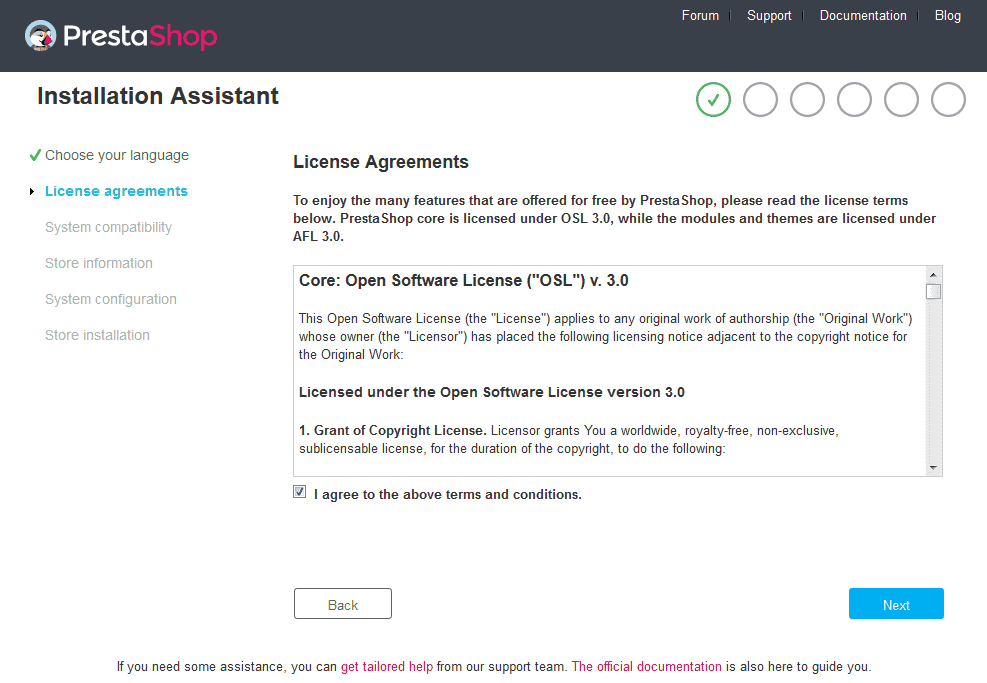
Select the installation language and accept the license agreement.
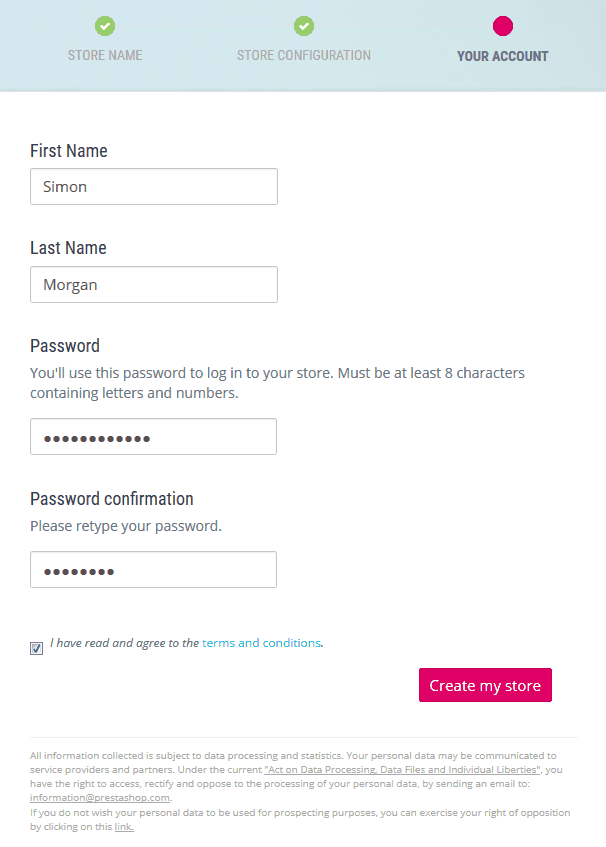
Fill out required fields: shop name, first and last name, password, password confirmation.
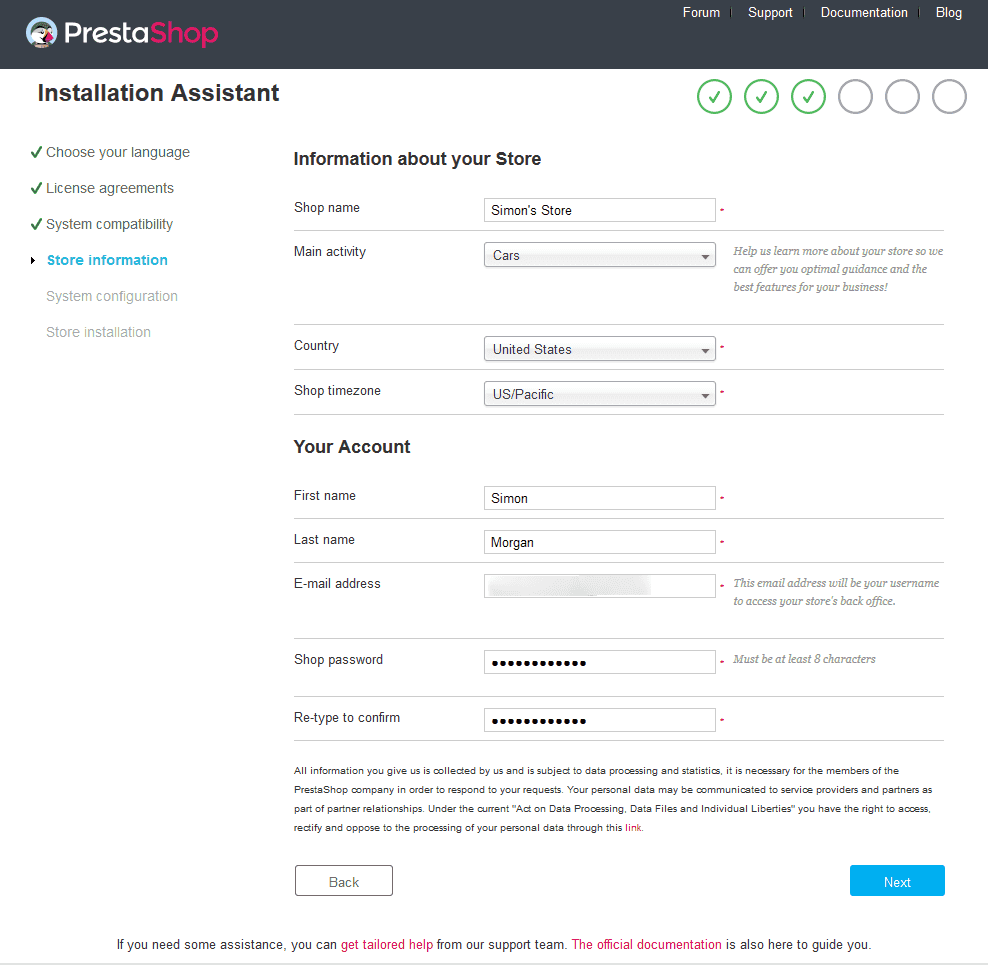
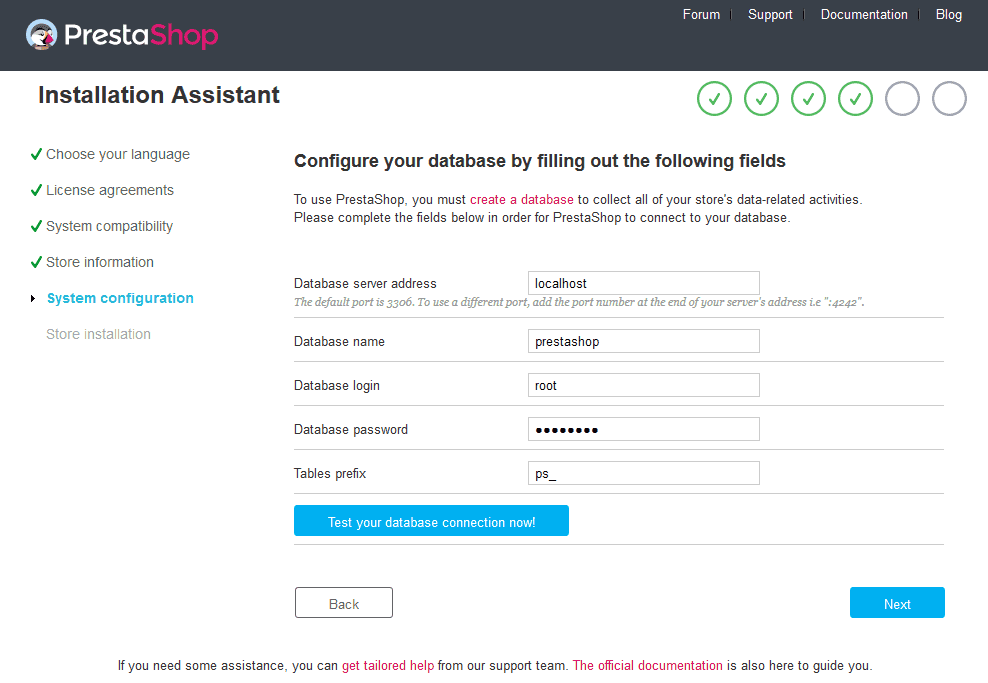
Now you need to connect the database, enter database name, user login and password. Leave the password field blank if you’ve created the database without password.
Delete or rename “install folder” as engine prompts you.
You can check detailed tutorial for installing PrestaShop on localhost here.
2. Installation on Hosting Server
Most hosting companies have the so called one-click installation. It means that you can install a script or a platform like PrestaShop via your hosting control panel. The exact process may differ depending on the hosting provider, but here are the general steps.
One-click installation
Log into your hosting control panel. Go to 1-click install.
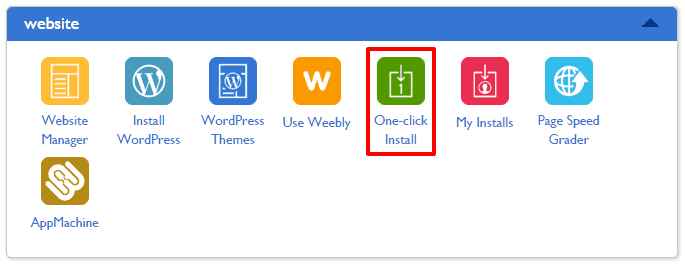
Click “Install new script”. Find "PrestaShop" and click it.
Choose, from the provided list, the domain name with which you are going to use PrestaShop. On the next page, you will be able to fill out your store info, like store name, first and last name, email, password.
Note that one-click installation will install the latest PrestaShop version which is available with your hosting provider. If you need another version, check the manual installation below.
Manual installation
Just as with local host, you will need to create a database for your future store:
Go to your hosting control panel, find MySQL Database (name may differ) and click it.
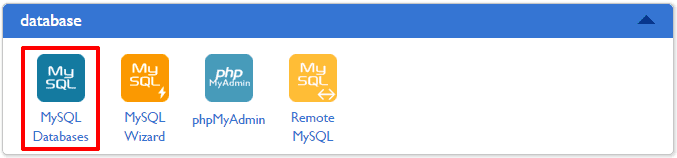
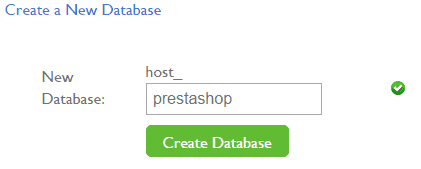
Click “Create new database”, give this database a name.
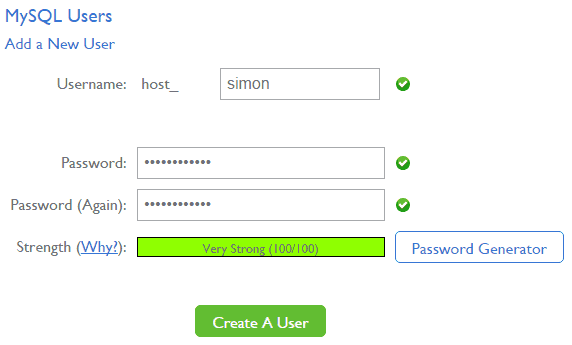
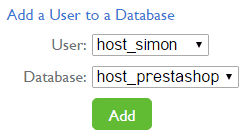
Create the database user, enter user name and password.
Note that the database creation process may differ depending on the hosting you are using, so please refer to your hosting provider’s tutorials for a detailed guide.
Let’s install PrestaShop now the same way we did on localhost before.
Download the PrestaShop version you need (it is recommended that you use the latest stable version) at https://www.PrestaShop.com/en/developers-versions or the latest release at https://www.PrestaShop.com/en/download.
Unzip the archive.
Go to the PrestaShop folder and add files to the new archive.
After that, upload the archive to your hosting server via FTP (FTP means File Transfer Protocol and it is used to transfer files between your computer and server.) You could use such famous FTP clients as Total Commander or FileZilla.
Unzip package on your web server.
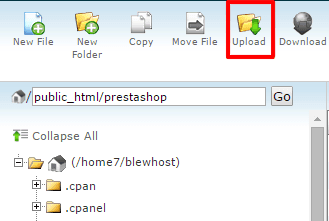
Go to PrestaShop directory on your server now, installation will start automatically.
Select the installation language and accept the license agreement.
Fill out required fields: shop name, first and last name, password, password confirmation.
Now you need to connect the database, enter database name, user login and password, click “Test your database connection now!” to check whether you have entered correct access details.
Done. Now you can check your store front end or log into the admin panel.
3. PrestaShop Cloud
PrestaShop also offers an all-in-one solution called PrestaShop Cloud, where you can get hosting, domain name and pre-installed PrestaShop engine. Installing it is very much alike to registering on any site online.
So let’s also review how to create a store in PrestaShop Cloud:
Go to https://www.PrestaShop.com/, click “Sign in” at the top right corner and click “Create an account”.
Fill out the form: email address, first and last name, login and password.
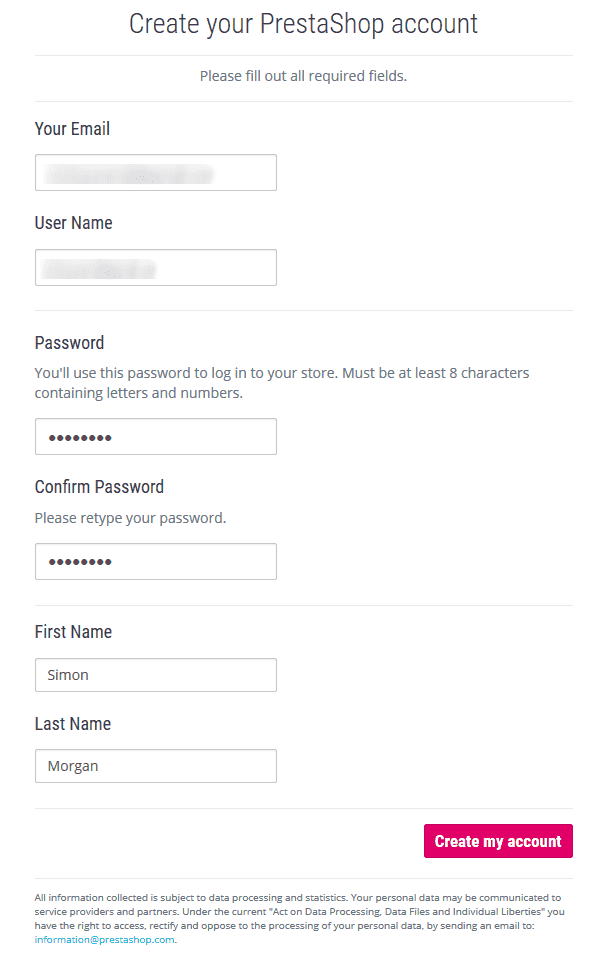
Check your email and confirm your account.
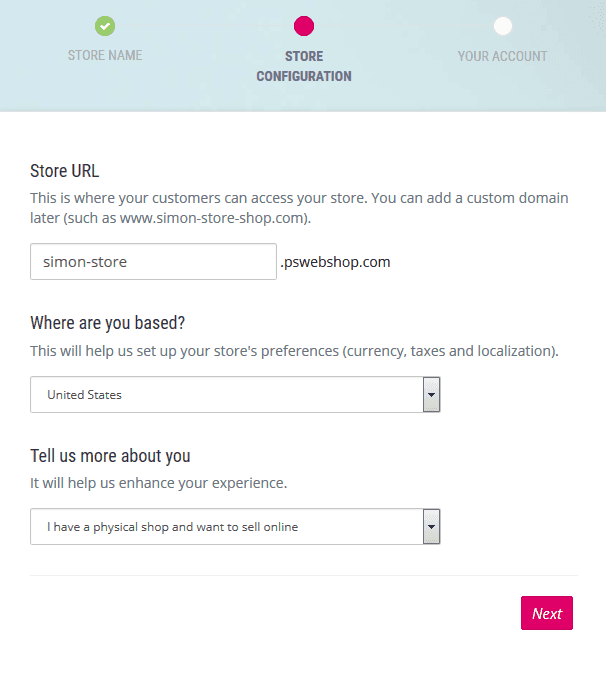
Now go back to https://www.PrestaShop.com/ and click the Cloud tab.
On this page, you need to enter the subdomain name (you have to choose it even if you are going to use your own domain name), location and select one of the options in the “Tell us more about your field”.
On the next page, just enter first and last name, store email, password and create the store.
Check the confirmation email, click the validation button and it will take you into your new store admin panel.
If you've installed the engine successfully, check out the collection of PrestaShop themes from TemplateMonster. A good theme can simplify your work with a website drastically.
PrestaShop is known for its ease of use. Installation is the first stage when you really see how easy it is. Have any thoughts or advice? Feel free to share them in the comments below.

Simon Morgan
Simon is a TemplateMonster sales operator who helps small businesses and startups by day and passionately rocking on the stage with his bass guitar by night. Simon is a truly creative spirit and idea generator who can draw almost everything he imagines.