How easily can a WordPress site be set up by a non-developer like me?
How easily can a WordPress site be set up by a non-developer like me?
Two of the most common ways to install the WordPress engine on your hosting server are these: using the hosting “quickinstall” tool, or manually. In this guide, we will cover them both in detail.
You’ll Learn About:
- How to set up WordPress with “quickinstall”
- Why it is better to install WordPress manually
- How to install WordPress manually step by step:
You have bought yourself a hosting plan, got a domain name and, of course, your ideas for content on your site are always with you. The only thing left to do before you can start fulfilling your online dream is installing your site’s engine. Thousands of WordPress sites are being launched every day and everyone says it’s easy. But what are the exact installation steps? We will cover how to build a WordPress website.
1. How to set up WordPress with “quickinstall”
A while ago respectful hosting companies created a tool for their users to install the most popular web site platforms in several clicks. Once you’re logged in to your hosting control panel you can see the “Quickinstall” or “Autoinstall” option. Just click on the WordPress icon in that section for the magic to begin.
You can install the engine into your site root folder or a sub-folder. This will influence how your site URL looks accordingly - www.yourdomainname.com or www.yourdomainname.com/subfoldername.
Add your email (use a valid one to receive an automatically generated password for your site), a name you want WordPress to call you in your Dashboard, and your site title. Click on the “Install” button and wait a few seconds for WordPress to be installed.
There you have it, your brand new WordPress site. To log in to your admin Dashboard, add “wp-admin” to your domain name like this www.your-site-url.com/wp-admin . Use the name you used during the quickinstall and the password that was delivered to your email as login credentials accordingly.
Just in case, I am including direct links to detailed tutorials on quickinstall tools from popular hosting providers.
Bluehost
HostGator
GoDaddy
InMotion hosting
2. Why is it better to install WordPress manually?
Installing any engine using the quick install tool is very easy. Nevertheless, that is not the perfect choice in terms of safety and control of your data. Call me a control freak, but I like to keep my passwords to myself. Moreover, manual installation isn’t that hard or long. Even when you do it for the first time, it’ll likely take you less than half an hour. And the outcome will certainly make you feel like a web guru.
3. How to install WordPress manually
Engine upload
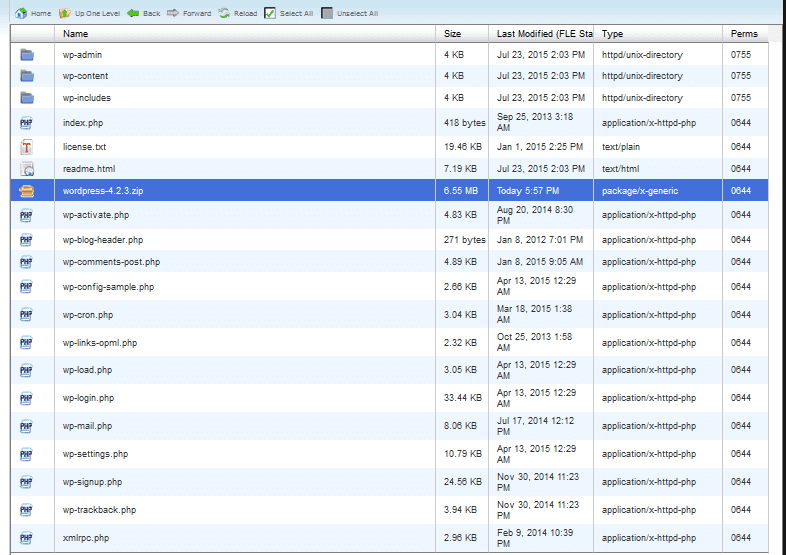
The first step is to download the WordPress engine from www.wordpress.org.

After that, locate the file manager in your hosting control panel and upload the WordPress zip to the folder from where you want to launch your site.
Database and user creation with your hosting MySQL Databases tool
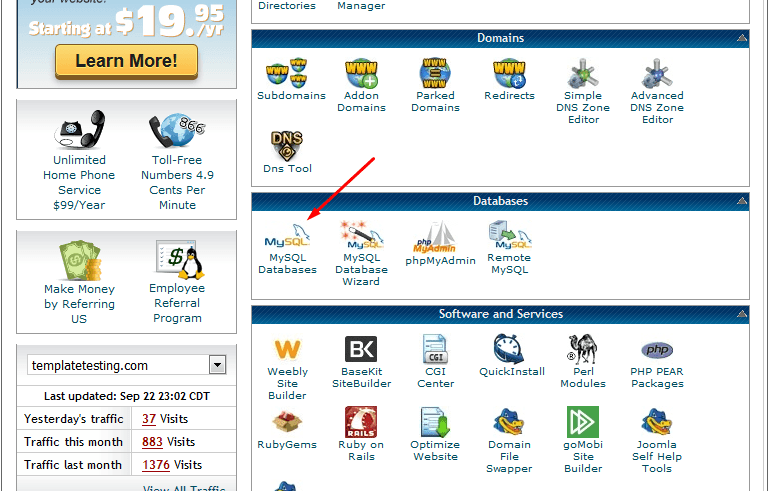
The database is where all the content of your site will be stored. To create it, navigate to your hosting Cpanel main page again and open the MySQL Databases tool. If your hosting uses another type of control panel, it may look different, but still has to include the MySQL Databases tool in the main menu.
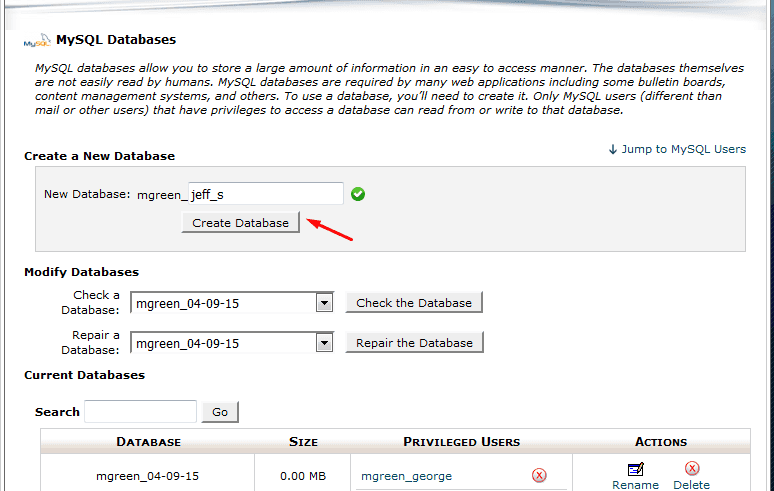
Create a database with your custom name.
Create a user and add your user to your database as described in the screenshot below.
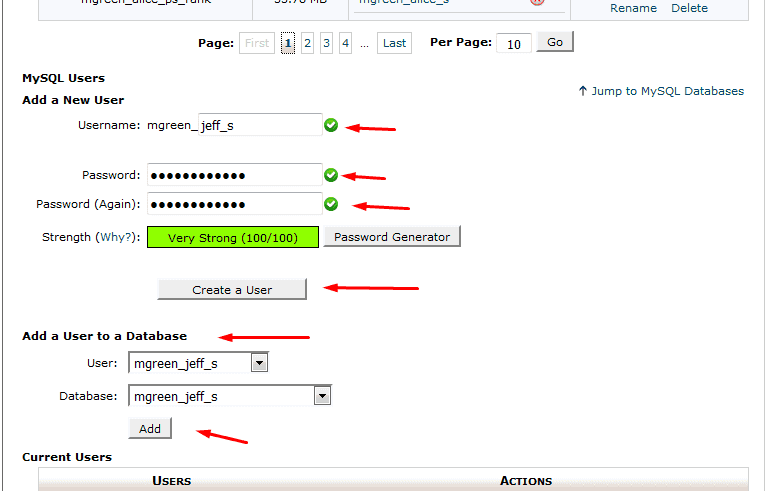
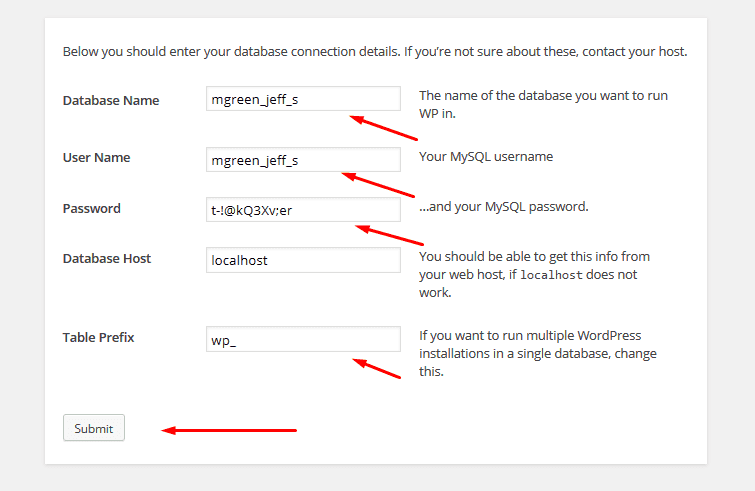
Make sure to have your database name, user name and password noted down for further installation steps.
When you’re done with database and user creation, the hardest part is already behind and you’re ready for the next step.
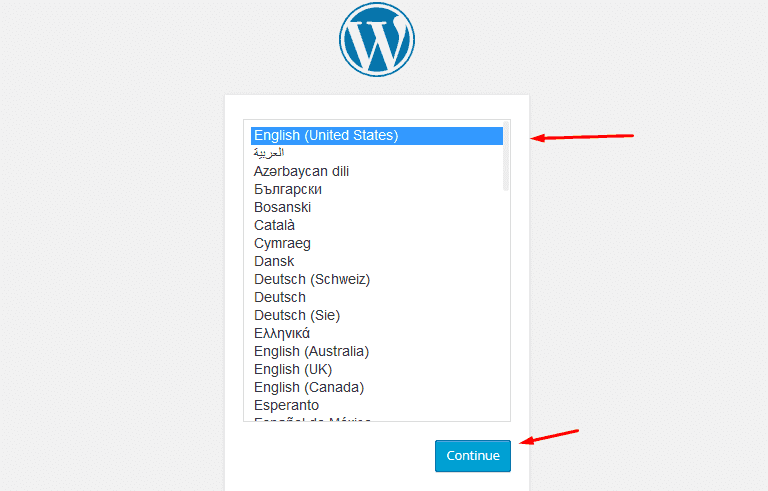
Open your site url in your browser, choose the language of your site and click “Continue.” You’ll easily be able to change the language in your Dashboard at any later moment.
In the window that opens, fill in your database and user details to connect your files with the database. Click “Submit.” Those details will now be stored in the wp-config.php file in your WordPress site folder. This file will be created by the engine automatically.
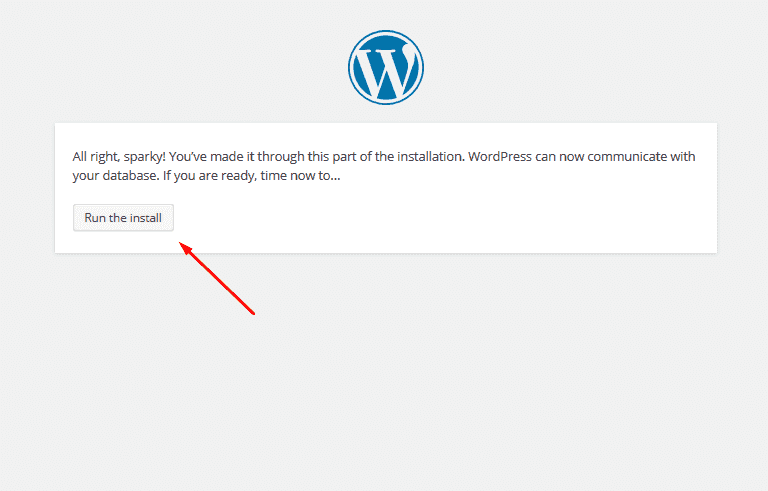
If all of the details match, you’ll see the success window with WordPress telling you that everything is great. Click “Run the install.” That’s the last technical thing you will need to do.
The Window that opens next is fun and easy. You choose the title of your site (what appears in the browser tab when people open your site), your admin name (that will be your login, and WordPress will call you by that name), your admin Dashboard password and email. All those settings can easily be changed in your Dashboard later.
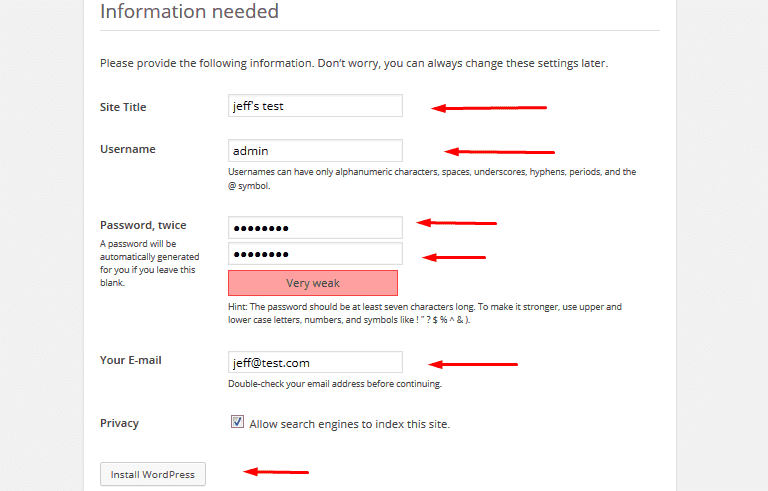
Click “Install WordPress” and enjoy one more Success window.
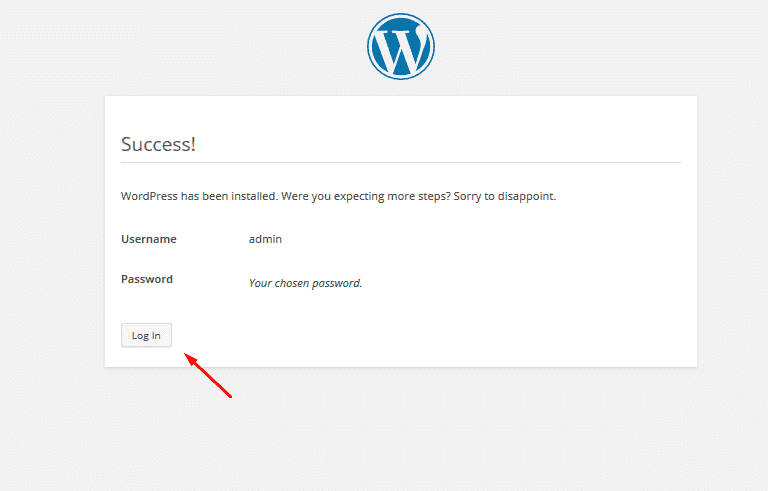
Click "log in" to see the result of your work. There is your Dashboard.
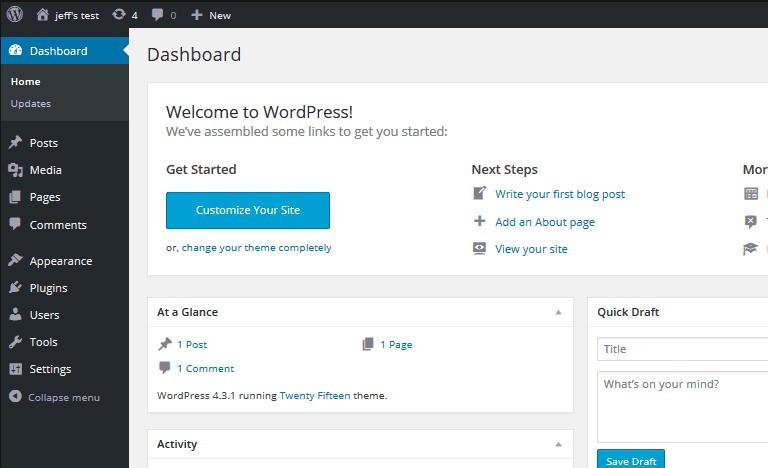
We have just installed WordPress manually. That wasn’t too hard, was it? Now you can find a perfect WordPress theme and start building your website.
Now you are ready to start working on your online project. If you have tips on making WordPress installation even easier, feel free to share them in our comment section below. Also, make sure to subscribe to our updates to receive more of our guides.

Jeff Bell
Jeff is a 20 year old Tech Support Operator at TemplateMonster. Helping our clients to edit and customize their sites every day, he knows what they need most and how to make it as easy as possible. More than one satisfied client already promised to call their child after him. Being a semi-professional high jumper in the past Jeff leaves no issue unresolved.