

This article is going to show you how you can customize the options within Adobe InDesign so that you can place content within your book. If you haven’t already laid out your book then go ahead and check out my previous article here. There is also a great video tutorial you can watch. Once you have your book laid out, you need to set up the master page.
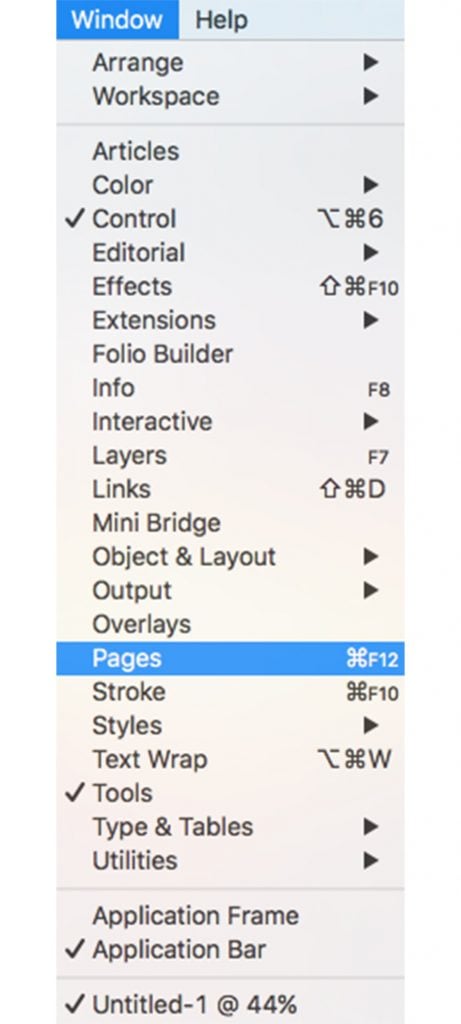
Master pages are great for adding options to your book that you want to have on every page, typically in the header and footer. This would be things like the page number, any symbols, the book title, author name, chapter title, et cetera. In order for you to edit the master page, you need to go to the pages title on the right-hand side of your screen. If you don’t see the pages tile on the right side of your screen then you can go to the “window” menu on the top of the page and hover down to “pages”, click on it and it will show up on the right side of your screen.


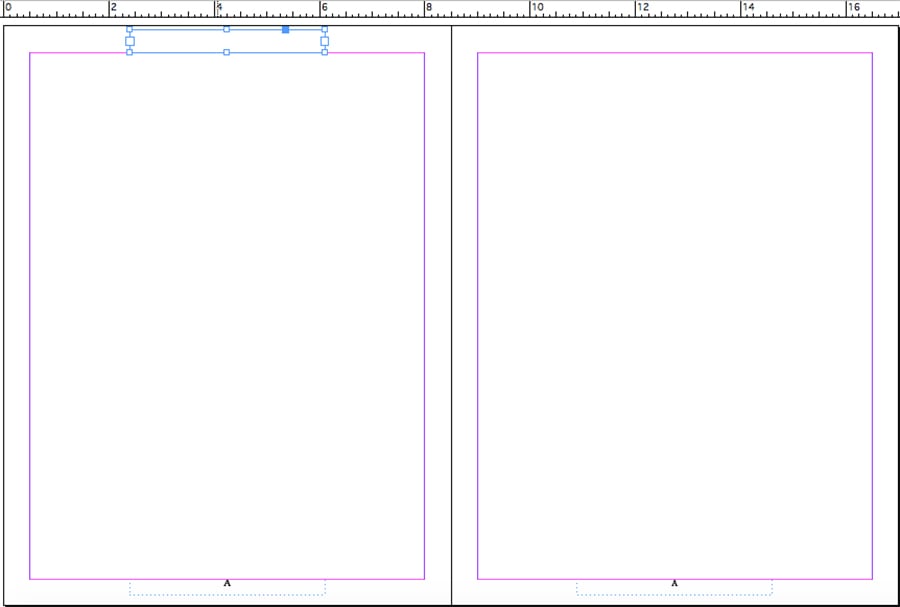
Then, once you are in the pages menu, double click on “A Master”. There may be a different letter, but what you want is the master page. It is above your other pages and is not displayed in your book. It is sort of the hidden page. When you click on that your current working document will disappear and you will see two blank pages side-by-side. These are your master pages. Whatever changes you make here will be made to the entire document. Therefore, be very careful what you are placing on these pages. Of course, you can always undo something, but it is best not to have to deal with the hassles of making an error.
Page Numbers
Now that you are on the master page the first thing to do is place a page number on the bottom. This page number will display on every one of your book pages and will be automatically updated so that your pages will be consecutively numbered. In order to do this, you are going to use the “Type Tool” and drag a box where you want to place your page number. Then you will go up to the menu and hover over “Type”. Go down to “Insert Special Character” and when the next menu opens go over to “Markers”. When the markers menu opens you will see several options for the page number. Since you are writing a normal book you will select the “Current Page Number” option.


You will see that there is now a small “A” in the text box you created at the bottom of the page. Of course, this could be some other letter depending on the name of your Master Page. Since the default is A Master you will most likely see an “A”. Don’t worry, when you navigate back to your regular book pages this “A” will be automatically replaced with the appropriate page number. You can feel free to edit the font, size, and placement of the page number. If you make any changes, be sure to do so on the master page so that it will apply to all of your page numbers.
Now that you have the page number on one side you need to do the same to the other. Go ahead and perform this little trick by copying the box you made over to the other side. Simply switch over to your “Selection Tool” (the one that looks like an arrow) and hold down the “Alt” or “Option” key. Then click on your text box and drag it over to the other page. You will see some lines appear to help you line up your placement of the new object. When you get it where you want, simply let go. Now you have the exact same format on both pages.
Book Title
Adding the book title will work exactly like the page numbers. All you need to do is grab your “Type Tool” and drag another box. I like to place mine up in the header of the left page. Then simply type out the book title and it will appear on all of the pages of your book. There is no automation with this feature because you are typing in the text yourself. That means that whatever you type in will be the same on all of the pages. Therefore, you can place the title, author name, or whatever you want to remain constant on all of your book pages.

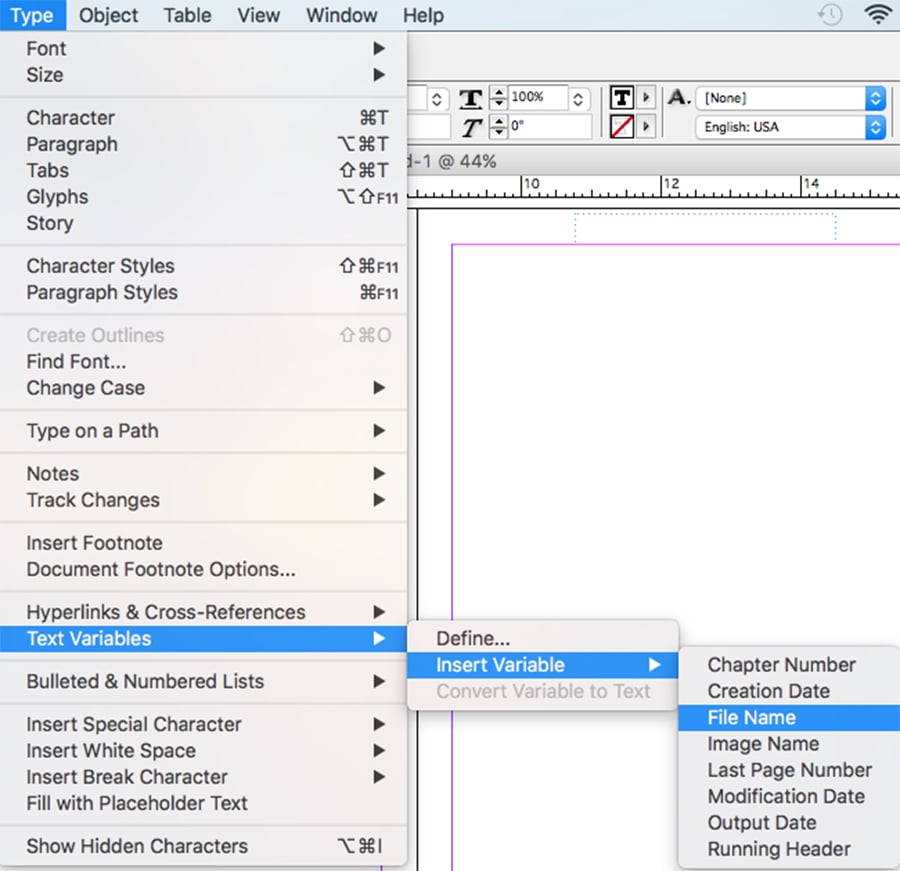
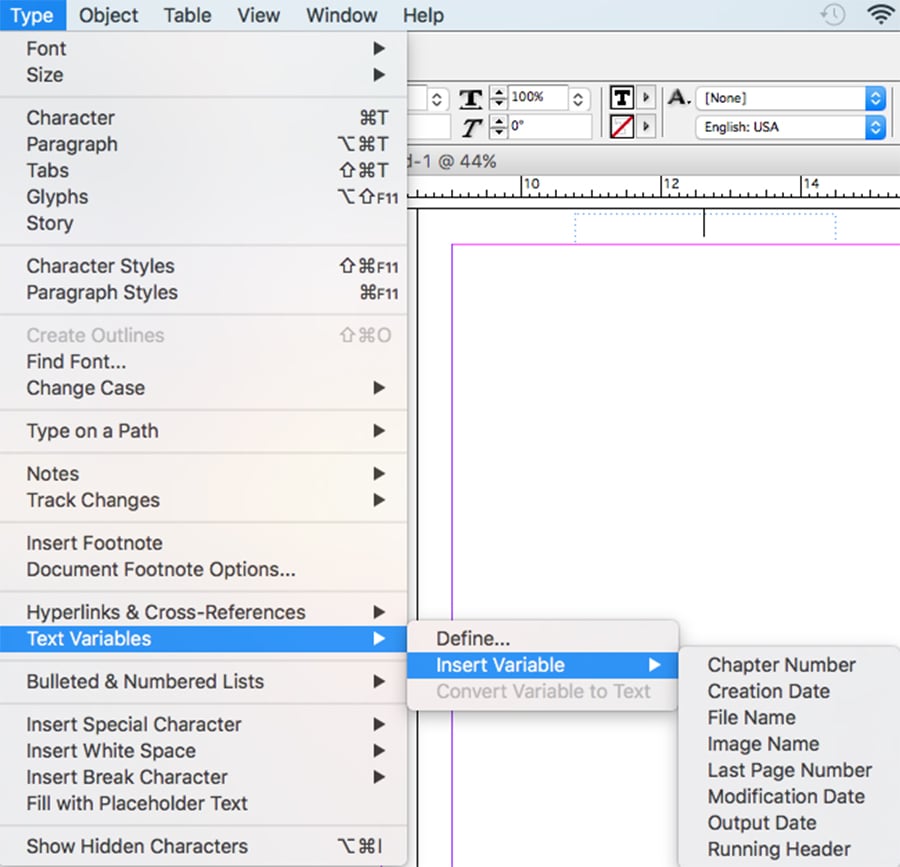
In addition, if you prefer, you can have your book title automatically placed on each of your pages like you did with the page numbers. To do this you will navigate to to the “Type” menu. Go down to the “Text Variables” and then over to “Insert Variable”. Then you will select the “File Name” option. Of course, you file name will have to be the same as your book title because that is what will be displayed on the top of your pages.

Chapter Title
Placing the chapter title is another simple step exactly like the page numbers. Once again, you’ll use your “Type Tool” and drag a box. I like to place my chapter titles in the header of the right page. Then you will go, once again, to the “Type” menu. Go down to the “Text Variables” and then over to “Insert Variable”. Now you will see several options that you can use for your header. You can choose one of these options and see what it does on the main pages of your document. You may have to use trial and error to select several of these options until you find one that displays the content you want displayed.

Define Your Own Variable
However, if you aren’t finding anything that automatically displays what you want, then you can create your own text variable by using the “Define” option. Now you will see a popup that allows you to define your new text variable.
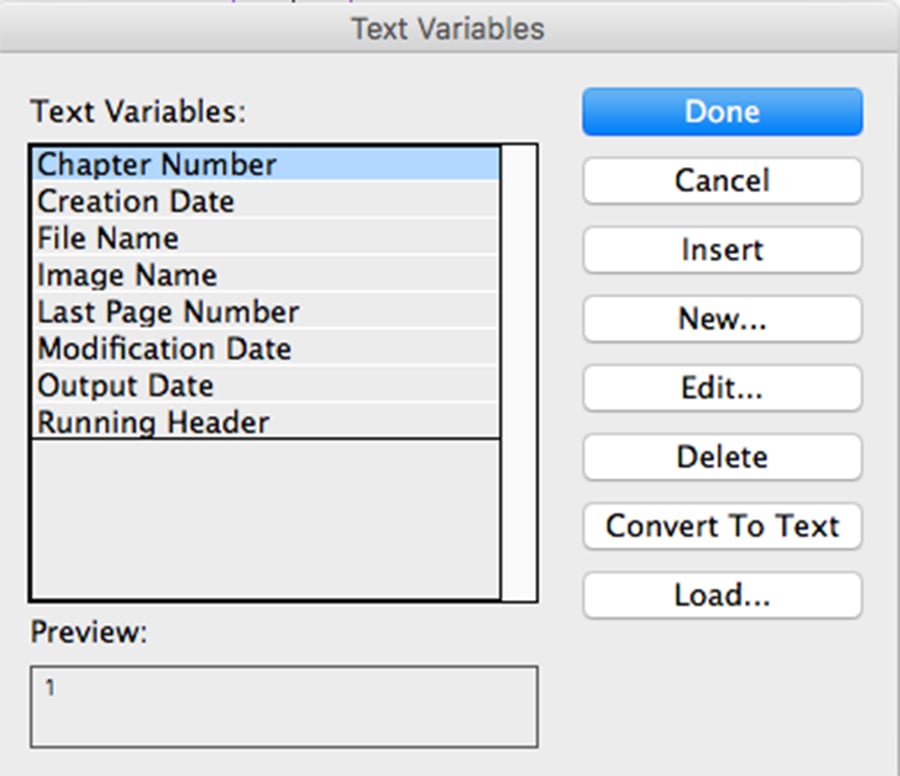

Select the “Running Header” option at the bottom and then click the “New” button on the right. Now you will see another popup that allows you to create a new text variable. Go ahead and give it a name. Then you will change the “Style” setting to whichever paragraph style you are going to use when you write each of your chapter titles on your book pages. If you don’t have any created then you will want to create a paragraph heading for your chapter titles then come back to this. Then you can choose whether you want to use the “first on page” or “last on page”. That means, if you have more than one block of text with that same paragraph style, which block do you want to show up in your header? Leave everything else in the default setting and then click okay.


Now you have created a new text variable that is specific to your own chapter titles. Go ahead and place it in the header and it will automatically populate all of your chapter titles on each of the pages.
Conclusion
Of course, there are so much more things that you can do with your master page. You can place many different symbols, markers, and other text objects. However, for now, that is a good start. Go ahead and experiment with placing different objects and seeing how they display on your regular pages. It takes practice and learning what buttons do what will take you some time. Don’t worry there will be much more InDesign articles in the future that you can read to help you out. You may also wish to check out all of the other articles on my personal website.
Another thing that might help you is this video I made in cooperation with How To Video Channel on how to do everything in this post, which may help you understand it a little better. If you have any questions, be sure to post them in the video comments. We will be sure to help you out as best we can.
Related Posts
How To Layout A Book In Adobe InDesign
Free Ways to Grow Your Website: $0 Budget Ideas [Free eBook]
4 Steps That Will Help You Sell to Multiple Decision Makers [Free eBook]


P.S. Don't forget to check out our design studio website templates.