

- What is Google Slides?
- Google Slides vs. PowerPoint: Which is going to be your option?
- How to Use Google Slides? Google Slide Tutorial
- How to Convert PowerPoint Presentation into Google Slides
The first thing that springs to mind when we hear the word presentation in PowerPoint. This powerful Microsoft giant indeed offers awesome options for creating a visual presentation unfairly leaving behind its worthy alternatives. In this google slide tutorial, you will find out about one of these alternatives – a relatively young and promising program for crafting outstanding presentations. We’re talking about Google Slides. Regardless of the purpose of your presentation and its subject matter, Google Slides definitely has something to offer.
So, let’s explore this tool and its features together!
What is Google Slides?
Google Slides is a free program for creating presentations. It is a part of Google’s web-based software office suite together with Google Docs and Spread Sheets. The program is available in two formats – as a mobile app and a desktop application on ChromeOS.
The working principle of Google Slides is similar to PowerPoint’s. You can use templates and stuff them with text, visuals, and effects or create a presentation completely from scratch.
The good thing about Google Slides is that it is possible to work on presentations with other users in real-time. Every user has its own icon and a cursor in a specific color, so the members can track each other’s actions and see all changes in the revision history.
Recently, Google added the “Explore” option opening access to a library with layouts and images. Furthermore, the newest version of Google Slides contains “Action items” that allows assigning tasks to the team members.
The developers are still working on the improvement of the program making it a worthy alternative to the PowerPoint software. Still, a logic question might arise in the heads of the users: which of these two giants is actually better for creating presentations?
Let’s try to analyze the statistics and estimate the findings in this Google Slide tutorial.
Google Slides vs. PowerPoint: Which is going to be your option?
Without a doubt, it’s only you who decides which software to choose. After all, all of us have our preferences, tastes, and needs. Nonetheless, the statistics from Google Trends shows that PowerPoint presentations are still a little bit more popular in the US:


Indeed, certain factors explain this statistic. A long-lasting history of Microsoft full of rises and falls, its vast experience, and understanding of the user’s demands helped this giant to create a full-fledged presentation program with plenty of features.
For instance, it definitely gets full marks for a variety of options for both beginning and advanced users. If you need to work with complicated transitions, tables, charts, animations, use different fonts and styling options, then you will find something suitable for sure.
Speaking of the library of templates, PowerPoint also takes the leadership position. Along with editable default templates, it has a great number of third-party providers that offer thousands of free and paid templates for all occasions.
The fact that the third-party template development for Google Slides is not as widespread as in the previous case might also be the reason most users still make a choice in favor of PowerPoint.
Nevertheless, it is important to note that the situation in recent years has changed. Thus, as for March 2019, the demand for both programs is almost equal. Probably, a user-friendly interface, the recent successful updates, and rich features help Slides to attract more and more users. In addition, Google Slides catch up with PowerPoint in terms of its offline functionality. The idea of having access to presentations even without access to the internet sounds good.
Therefore, it can be assumed that the demand for Google Slides will only increase in the following years. Taking it into account, it makes sense to figure out how this presentation program works.
Though working with Google Slides is simple and convenient indeed, beginners might need some brief guideline to its main and hidden options.
How to Use Google Slides? Google Slide Tutorial
Now, we will go through the main steps of the process of creating a presentation with Google Slides.
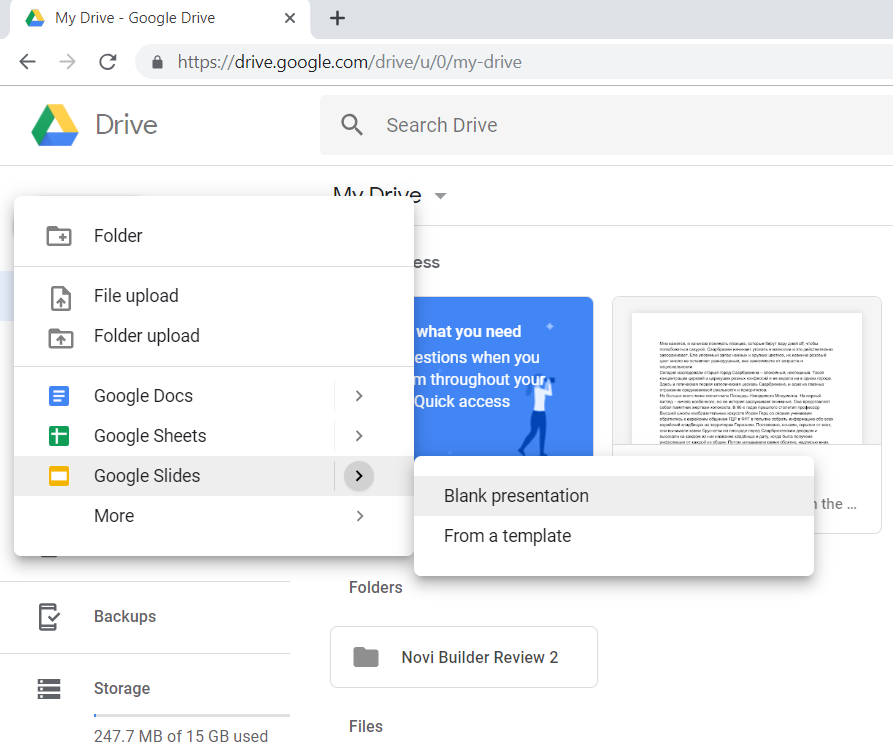
So, first, go to Google Drive > New > Google Slides. There, you will see two options – create a blank presentation or use a template:

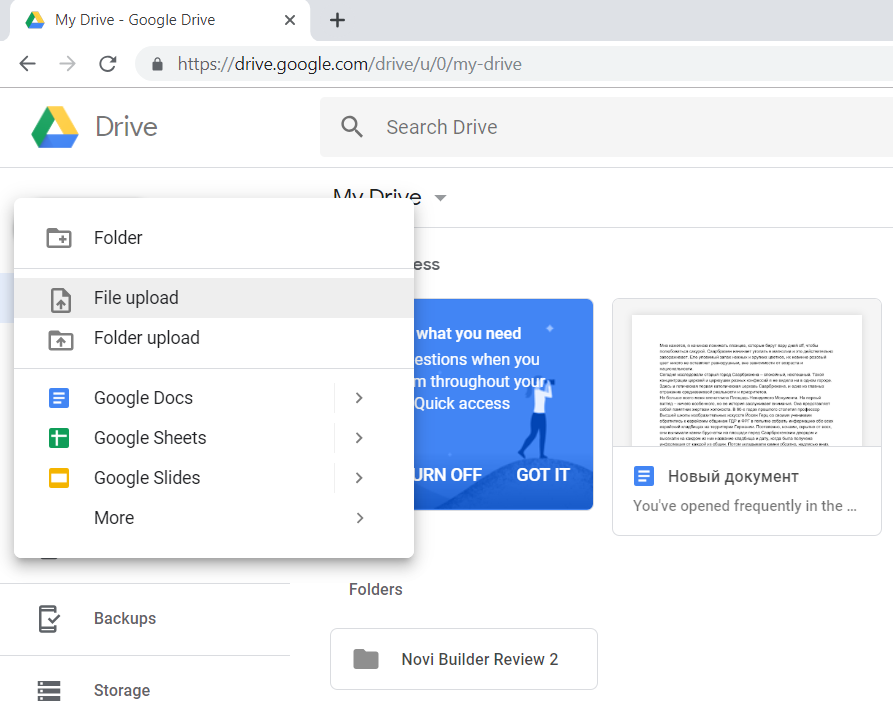
If you already have an existing presentation you want to edit in Google Slides, just go to New > File upload and choose the one:

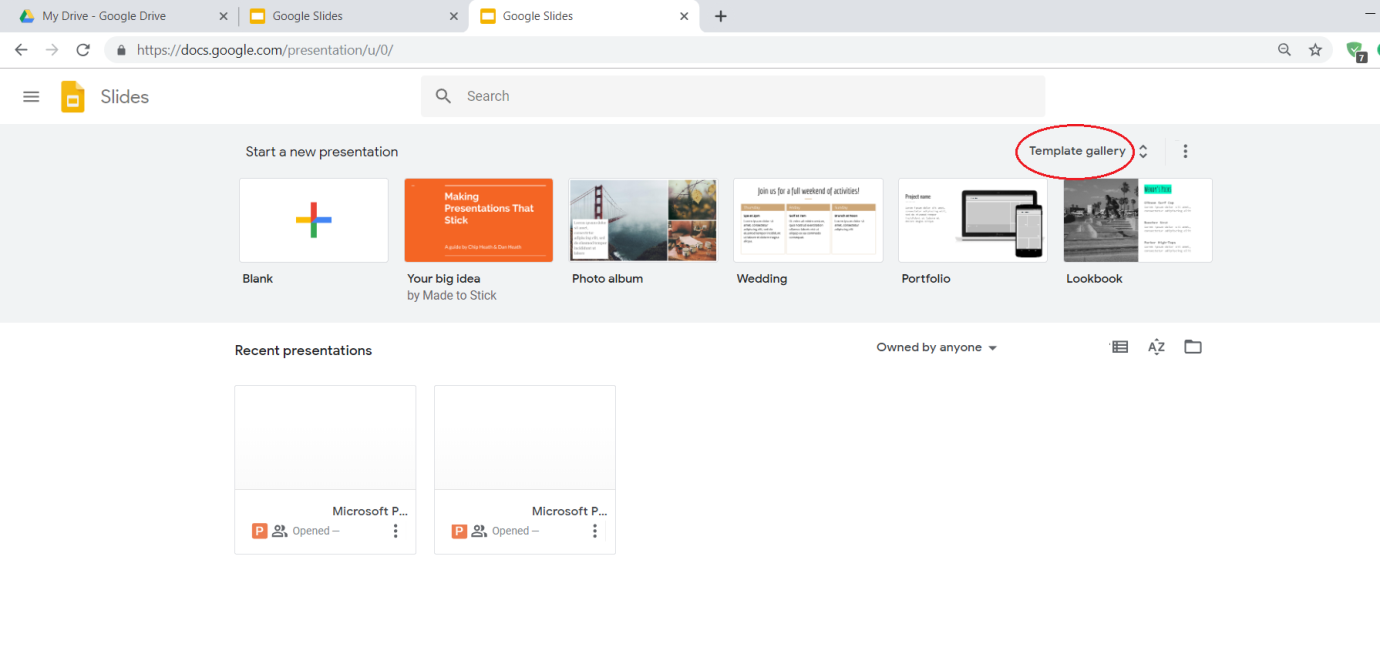
Another way to get started with it is to go directly to Google Slides where, by the way, all your previous presentations are stored. Here you can create a new one. You can also choose a template from a gallery:

So, let’s start with creating a blank presentation.
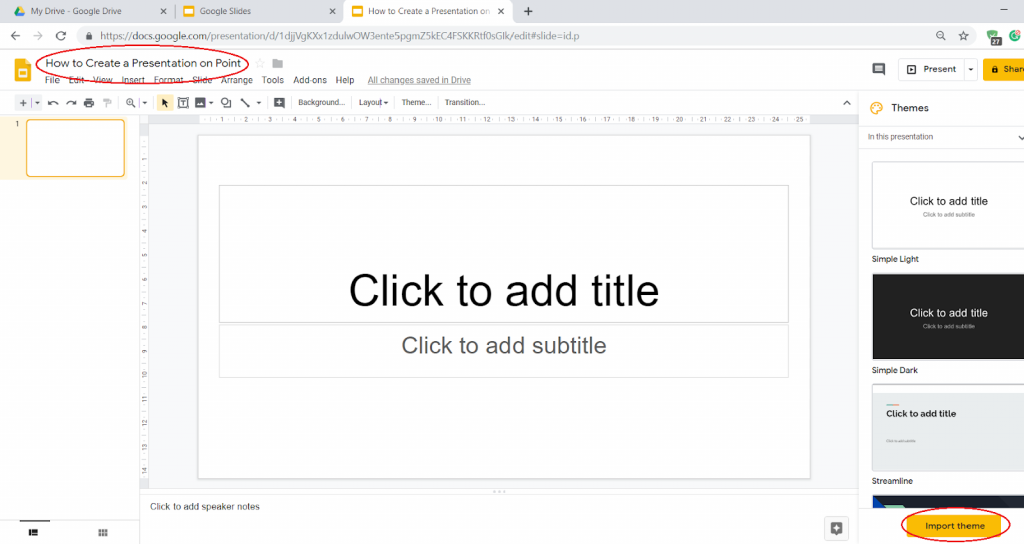
First, you can choose the theme for your presentation. You can pick a theme from the library or import a new one. Then, you can add a title to your presentation (at the top left corner) and choose the page size:

In order to set up the page size, go to File > Page setup:

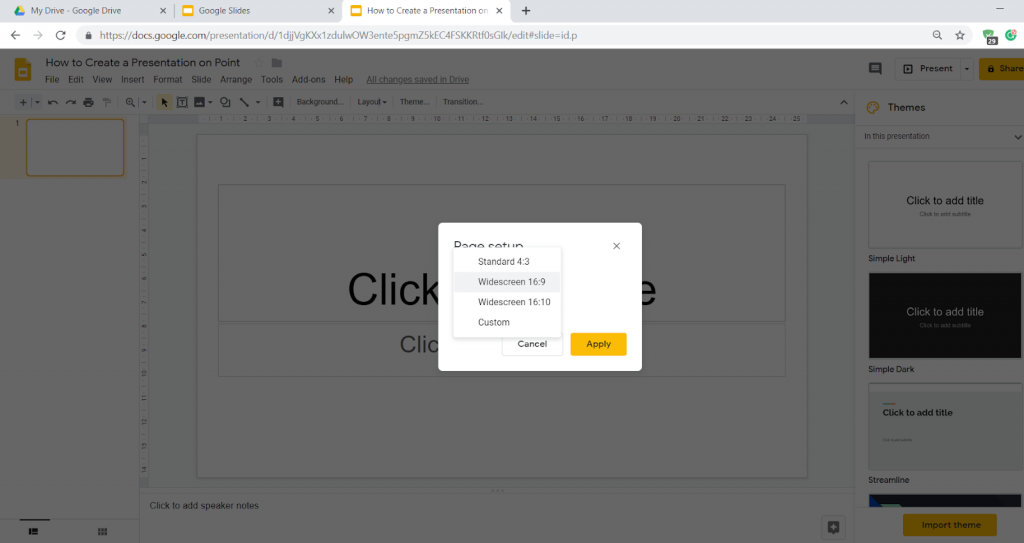
Many people prefer their presentations to be a standard ratio, although it is up to you.
Work with Text
Then, start filling the presentation with text – add title and subtitles to the slides (just like you do in PowerPoint). In order to modify something use the toolbar at the top.
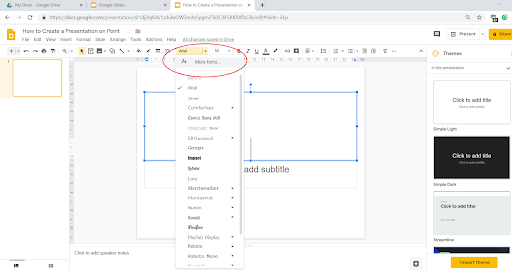
If you want to change the font but don’t have your favorite one in a library, you can add it by clicking the More fonts button:

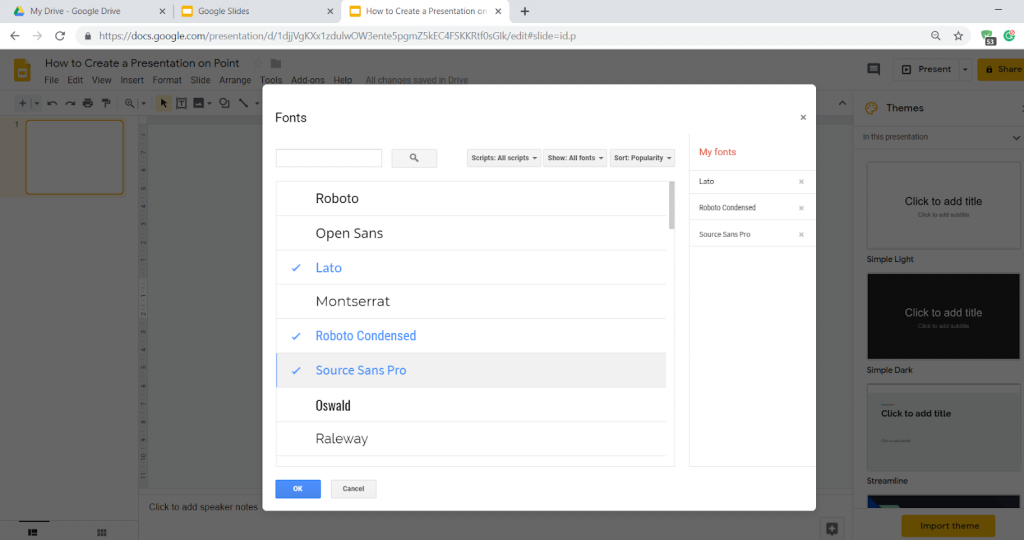
Simply put a check near the font you would like to add and you are done with it:

Note that some functions won’t appear at the toolbar until you highlight the text you want to edit.
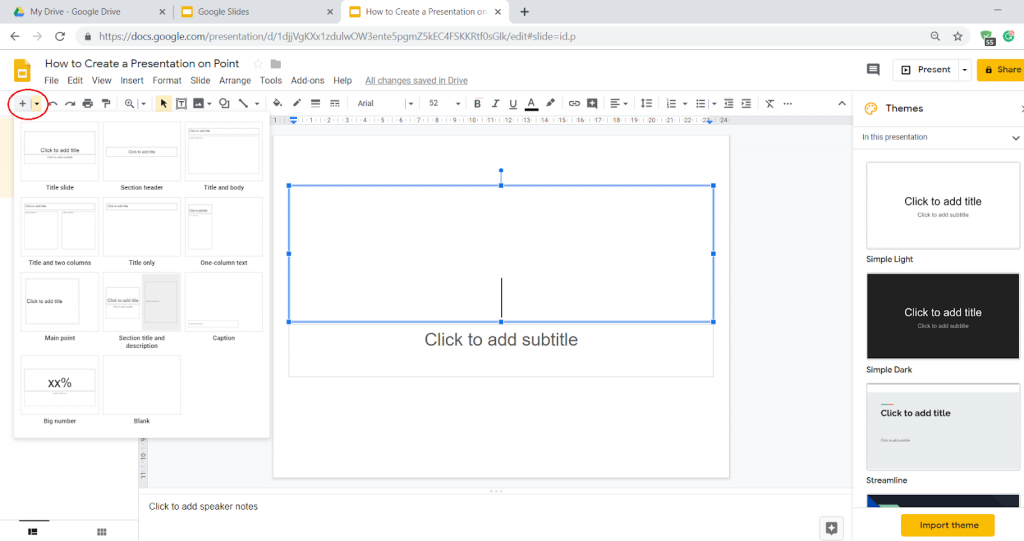
Next, to add a new slide, click the Plus button or a drop-down arrow to get a specific layout:

At the toolbar at the top of the page, you can change the background, the layout, and the theme of the slide. It means that you can have a unique look of each slide if needed. For those who prefer a single style of the presentation, it makes sense to create and edit the Master slide that will influence the look of other slides in the presentation. Just go to View > Master and make the set up:

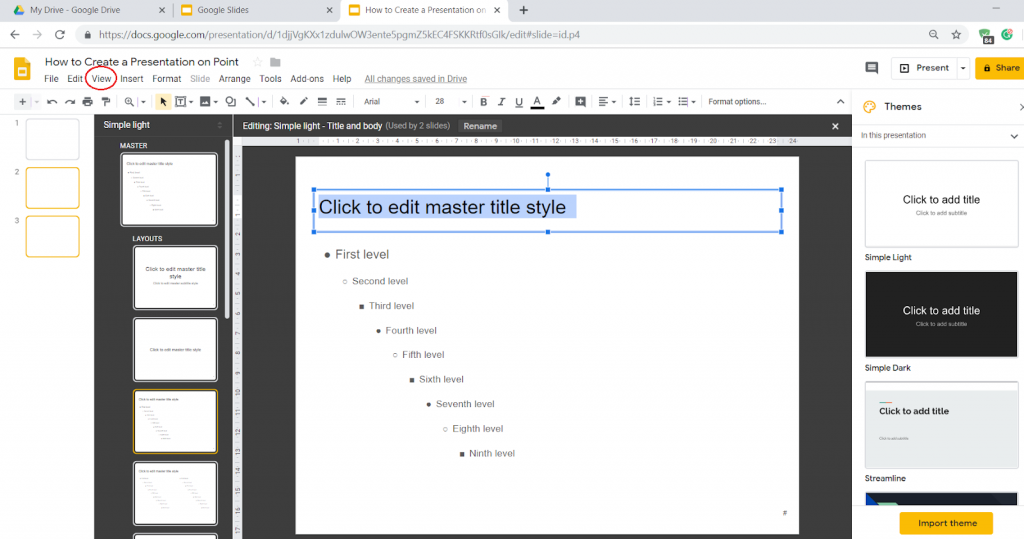
Now, all the new slides will have a specific font, spacing, and other features.
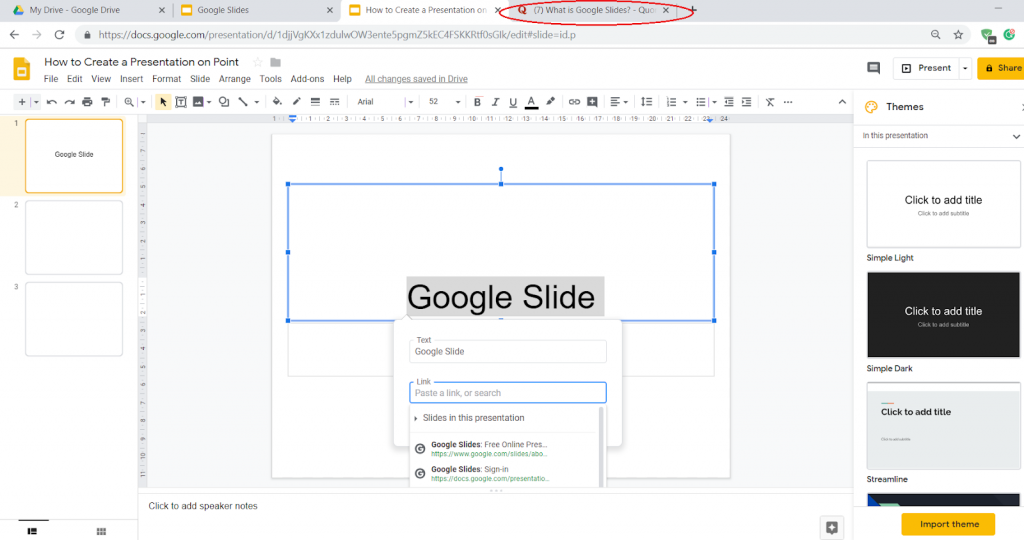
Another amazing thing about Google Slides is the fast and simple work with links. If you want to add a link to the text, just highlight the text and click on the link icon at the toolbar. You can link the text to a specific slide or to a URL. When you start adding a link, the system makes the suggestions basing on the content of your slide or your previous search inquiries, which is also super handy:
If you want to make changes to all of the items on the slide or delete all of them, just press Shift on your keyboard to organize them into one group. Now, you can move them and modify them all together or delete all of them at once.
Google Slide Animation: Work with Visuals and Animation
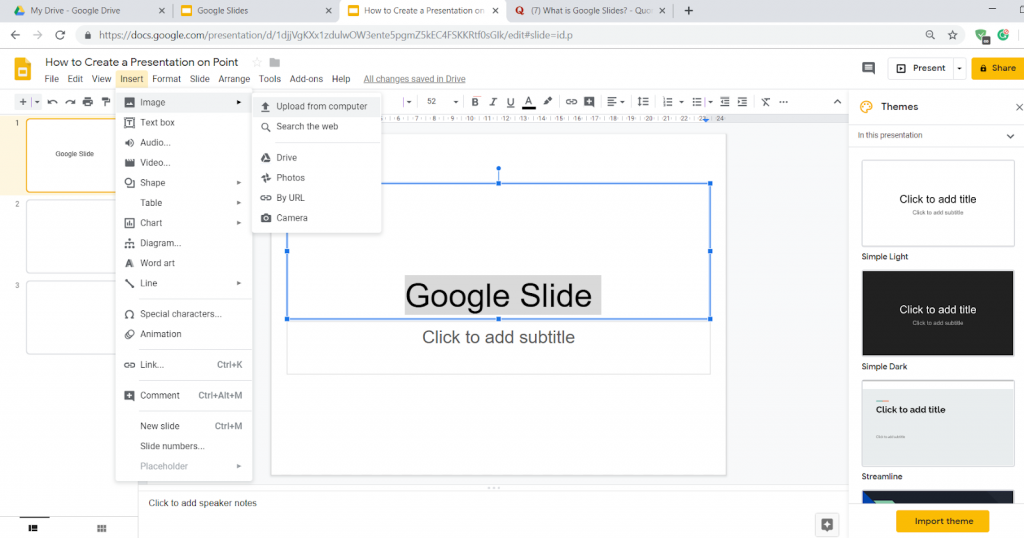
You can add images to a slide by clicking the image icon at the toolbar then going to Insert and uploading an image from your computer or search the web.

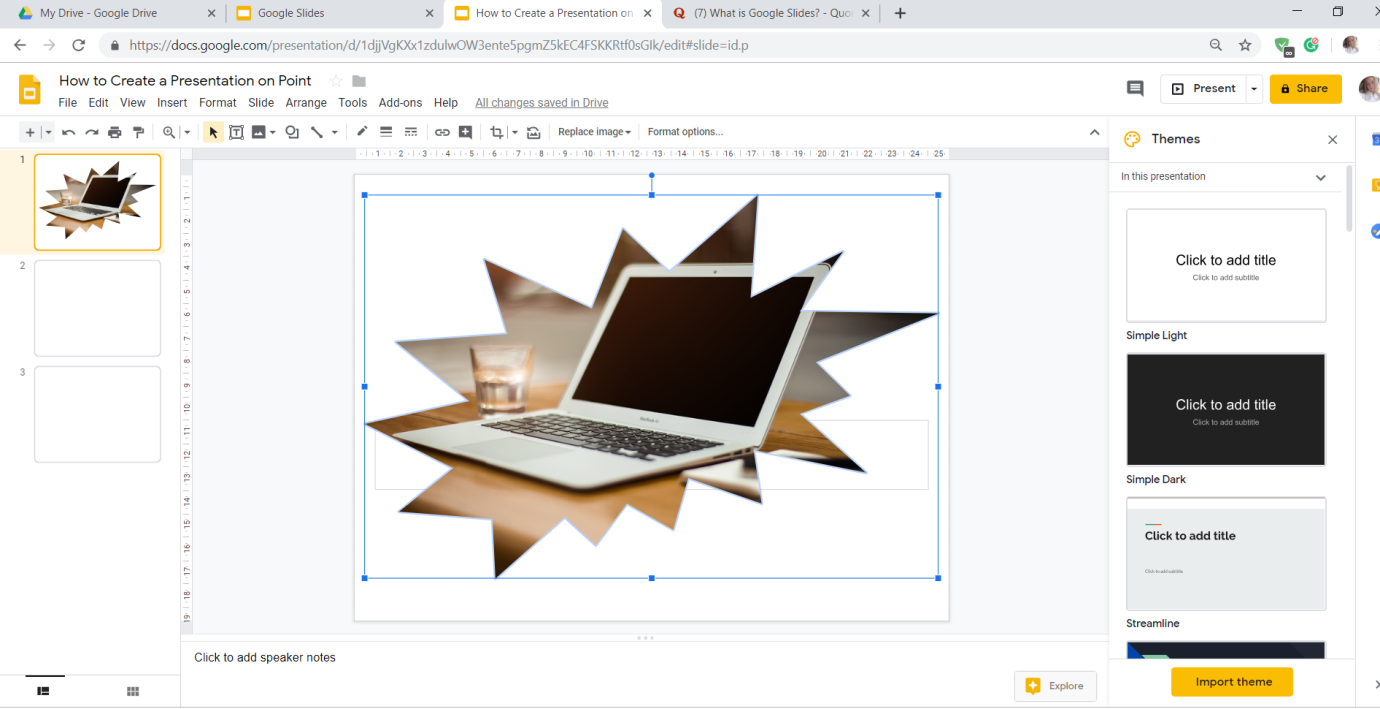
If you have an image on your desktop, you can simply drag it into the slide. To crop the image, just click on it two times and modify the size with the blue box. By clicking the drop-down arrow, you can change the shape of the image:

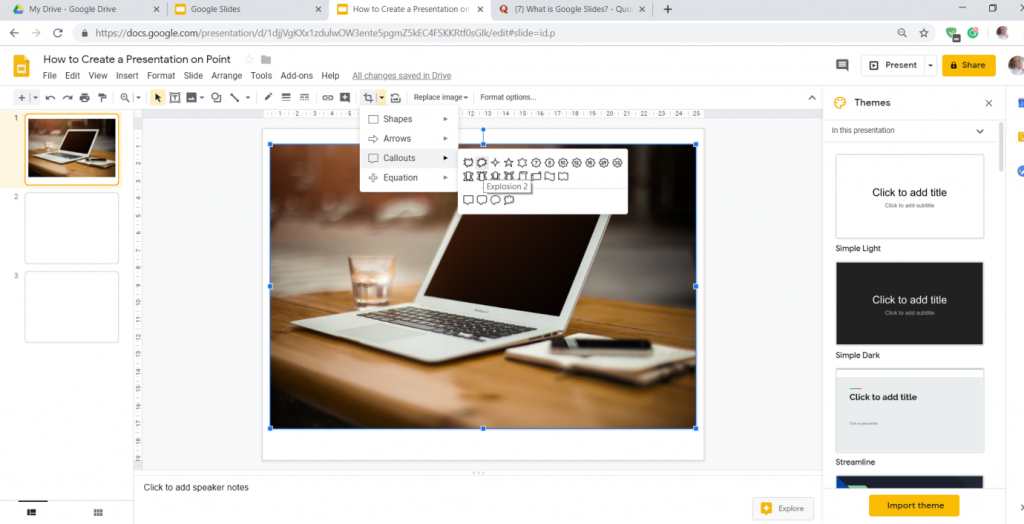
For instance, it might look like this:

It is possible to make a snapshot, insert an image by its URL, from the Google albums, Google Drive, or Google stock images.
In order to add a video, go to Insert > Video and add it from YouTube, Google Drive, or paste its link.
Moreover, you can add a chart. To create one, go to Insert > Chart. Click the drop-down arrow to change the data:

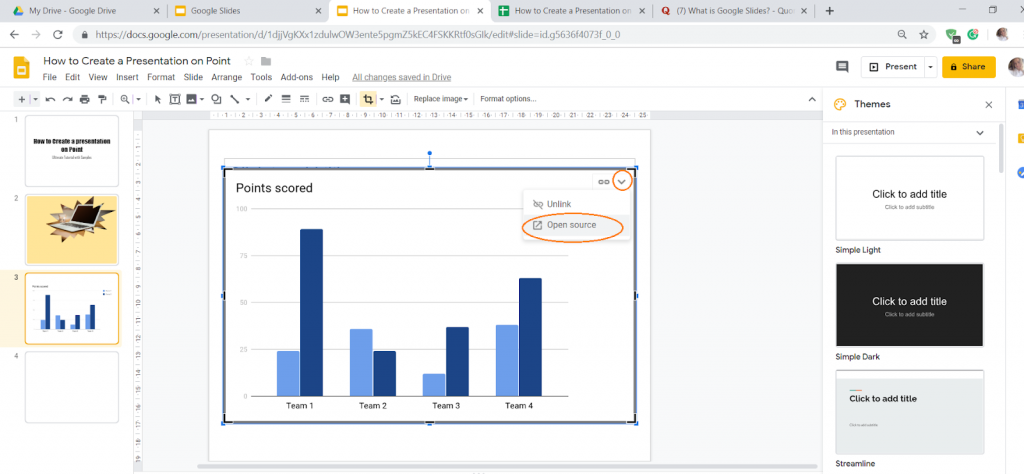
In this case, you will be automatically redirected to Google Sheets where the editing process takes place. After you make all the changes, go back to the Slides and click the Update button.
You can also add a table in just a couple of clicks. Go to Insert > Table and identify the dimensions. Furthermore, you can copy the data from the Sheets to a table. For this purpose, press Control + C for Windows and Command + C for Mac to copy the data and press Control + V for Windows and Command + V for Mac. All data will appear in the table.
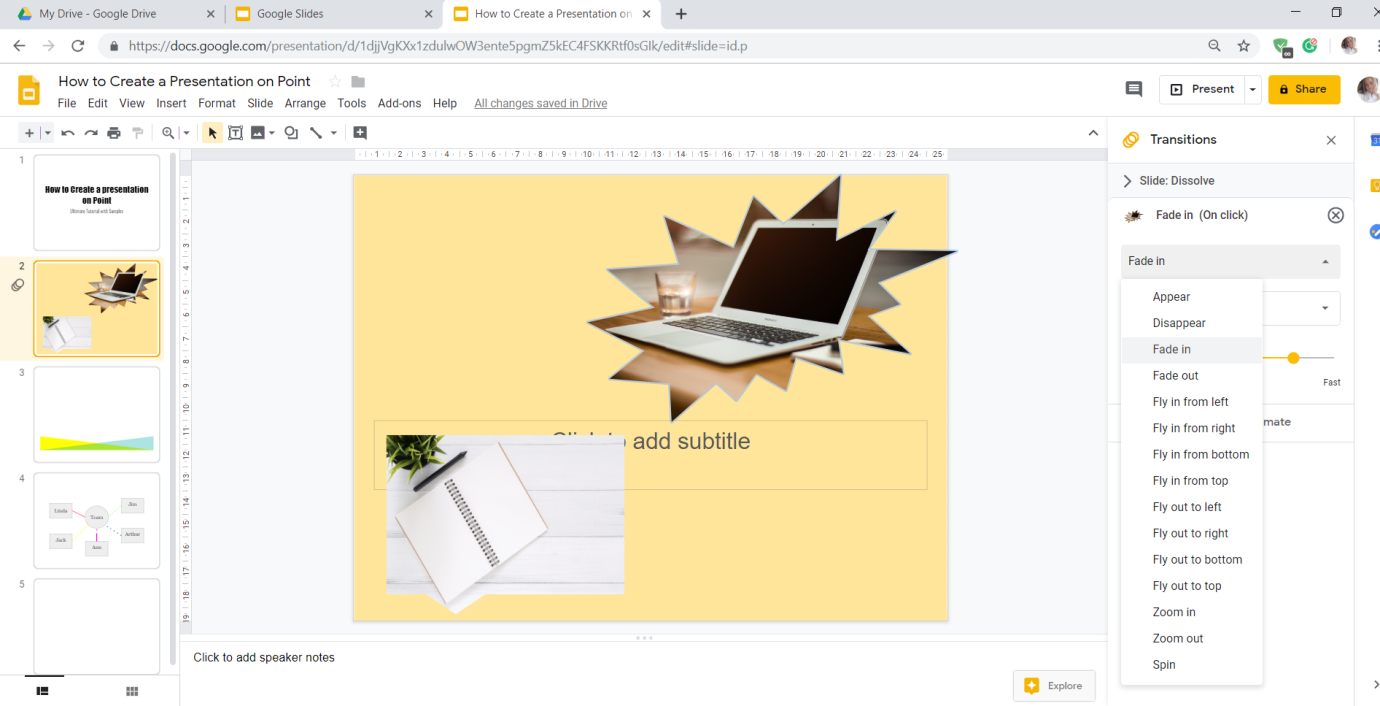
One more feature I would like to cover is animation. If you want the object in your presentation to be in motion, click on it, and go to View > Animation. On the right, click on Add Animation and choose an animation type, a start condition, and a speed:


Afterward, click Play to enjoy the result.
If you want to add a special effect for a slide transition, go to Slide > Change transition or click on the Transition button on the toolbar:
Work with Shapes
The next big part of the Google Slide tutorial will be dedicated to working with shapes. With their help, it is possible to create decorative Google Slides borders, mind maps, simple images, and more.
Initially, there are shapes, arrows, callouts, and equations. All of them can be used for different purposes. As mentioned, it is possible to create decorative Google Slides borders.
First, choose a shape. Then, click and drag to create one:
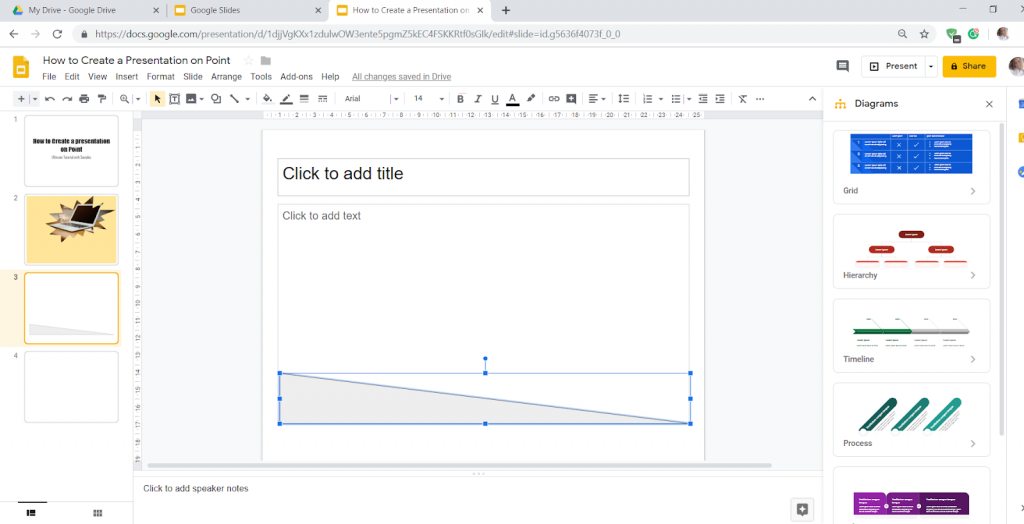
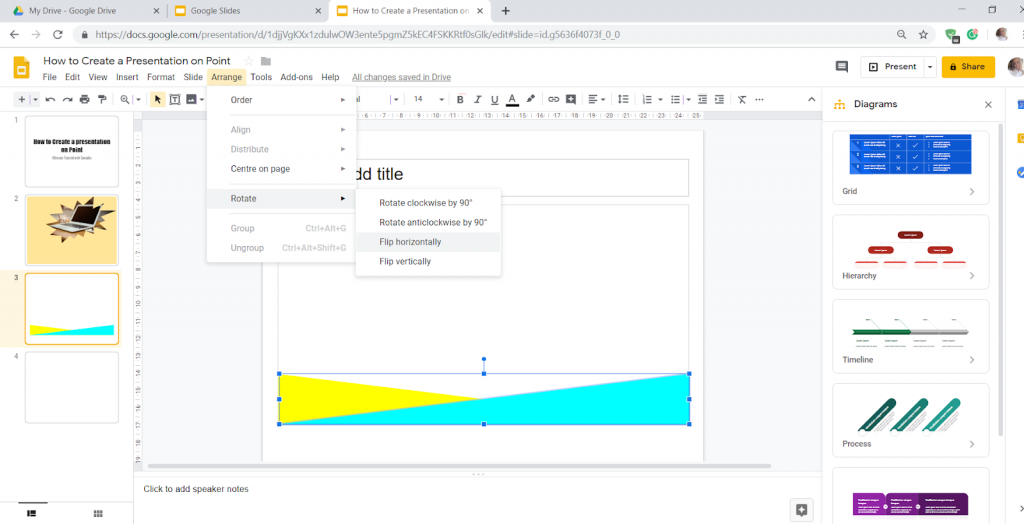
You can change its size and color, as well as a line color (you can make a line transparent). You can rotate the shape by using the small circle at the top and flip it by going to Arrange > Rotate > Flip:
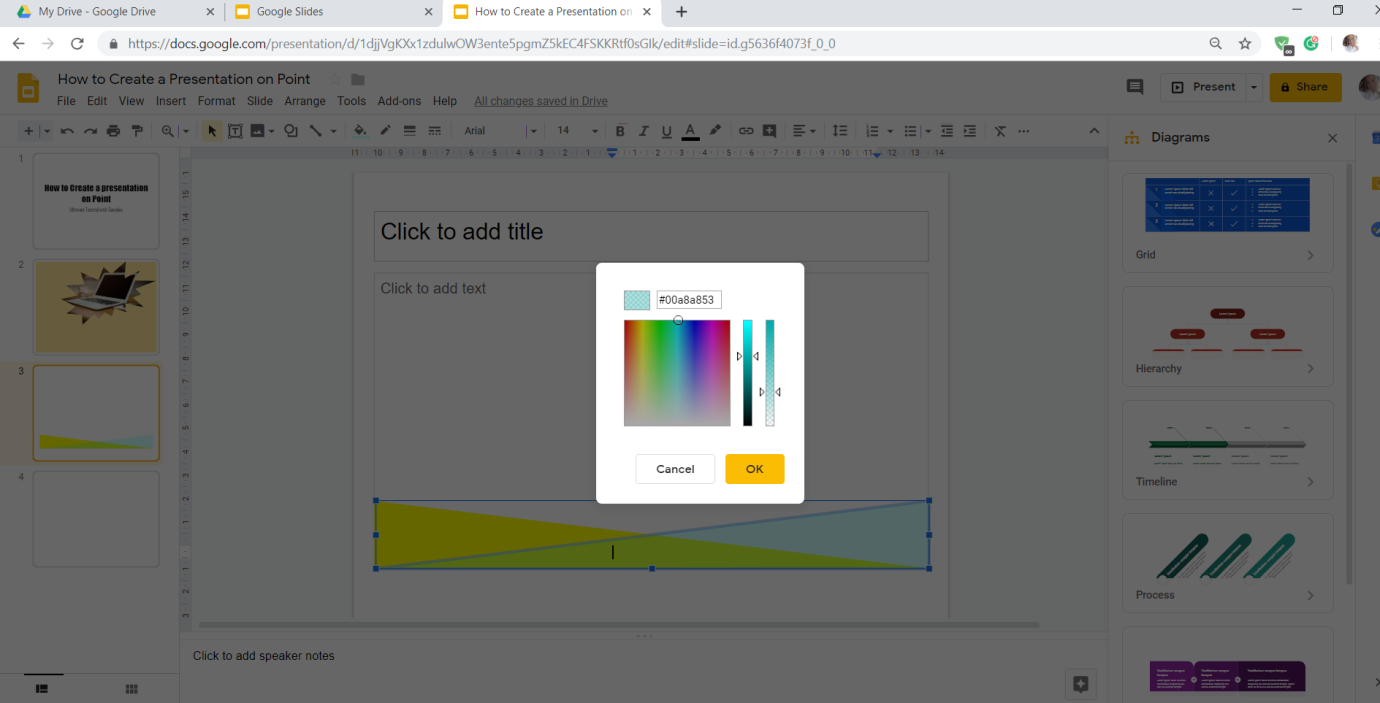
You can customize the color of the shape by clicking the color icon at the toolbar and going to Custom to change the darkness/lightness of the color, as well as its opacity, or insert an HTML code:

Now, we have a decorative Google Slides border:

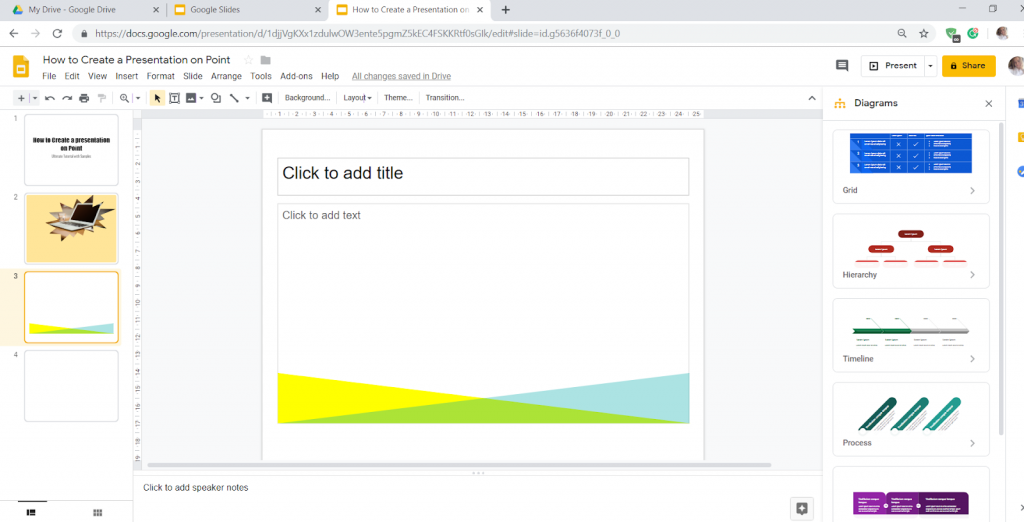
Obviously, you can play with shapes, colors, sizes, location, and other settings to create your own unique borders.
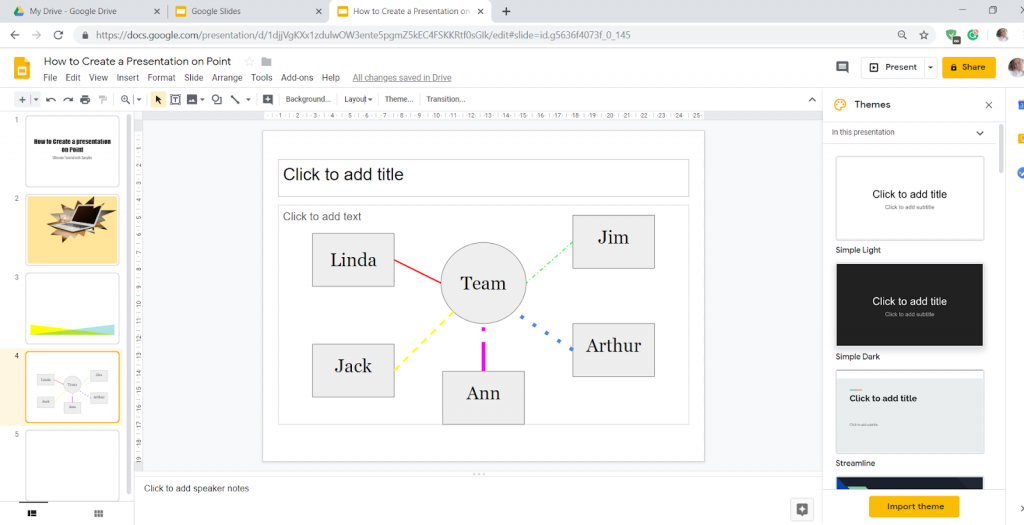
You can also use shapes to create mind maps.
To craft one, add a couple of shapes to the slide and add text. Then, select a specific type of line. Let it be a simple one. When hovering over the shape, you will see little dots which can connect one shape with another:


As you can see below, it is possible to change color, weight, and dash of the line:

Additional tools that can also be useful for the presentation are Elbow and Curved Connectors, Curve, Polyline, and Scribble (especially great for making signatures).
As mentioned before, the best part about Google Slides is that you can share the presentation with others, then add and receive comments in a couple of minutes. To give access to others, press the yellow Share button at the top right corner of the page, add the email addresses of the people you want to share the presentation. Choose the type of access you want them to have and click Send.
If you want to add a comment, click on an item, then click on the comment item on the toolbar, and leave feedback:
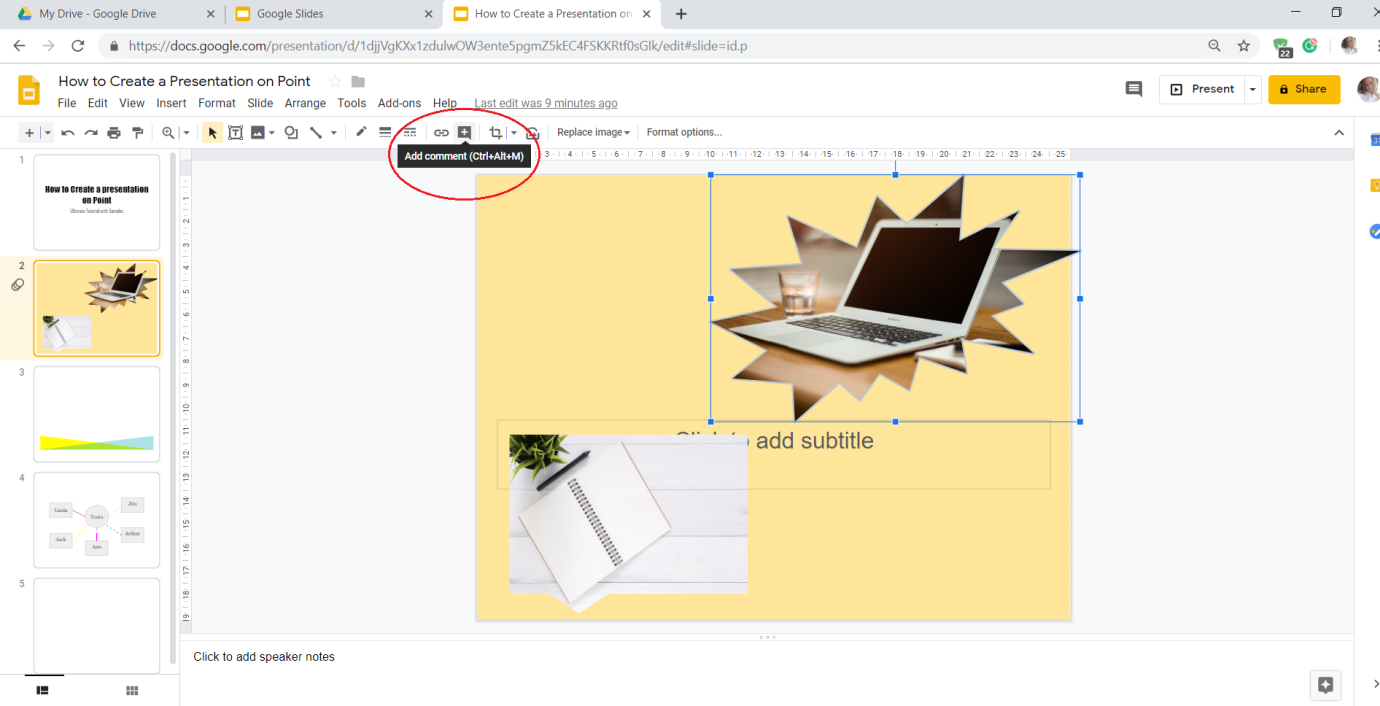
If you want to leave a comment for a specific person, just type his/her email address when writing a comment and put the check near “Assign to” if this task needs to be completed.
When you go to File, you will see what further actions can be taken to your presentation (publishing somewhere via a link, moving to a certain folder in Google Drive, making a copy, downloading a specific slide as a PNG or a JPEG image, etc.). Moreover, you can see who made the changes to the presentation in the Revision History.
How to Convert PowerPoint Presentation into Google Slides
The last issue I would like to cover in the Google Slide tutorial is how to convert PowerPoint presentations into Google Slides (because it’s possible and it’s very simple).
First, go to Google Drive and open a folder where you want to drop the PowerPoint presentation:

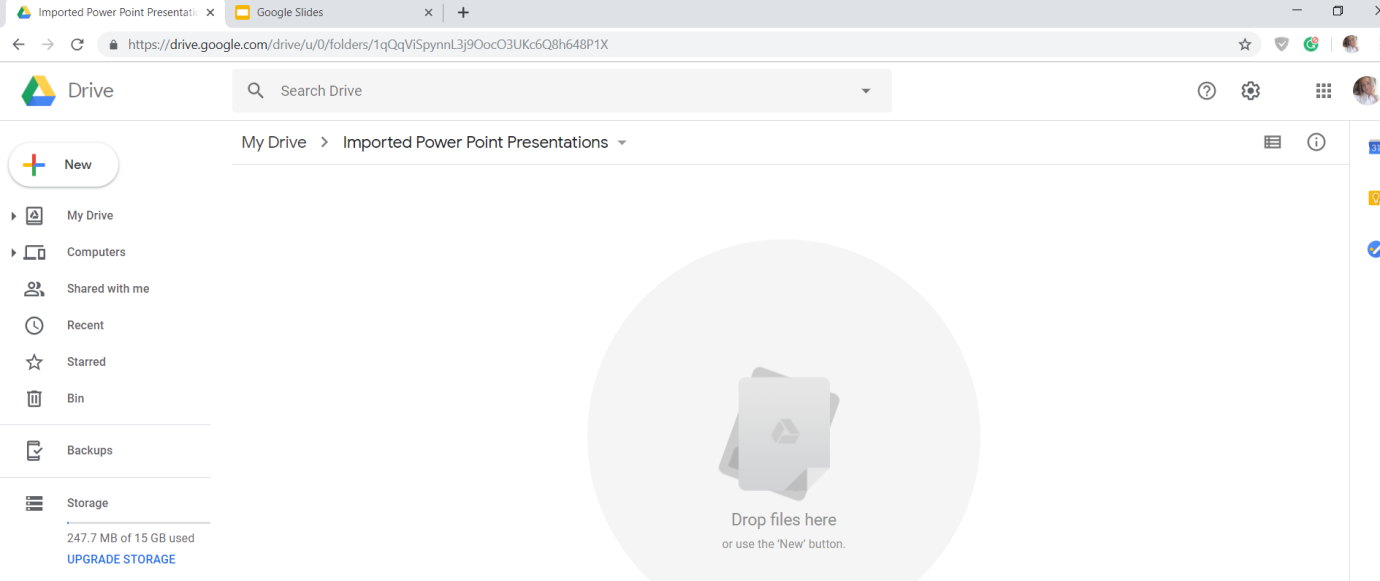
Then, open File Explorer in Windows and find the PPTX file. Click on the presentation in File Explorer and drag it into the Google Drive (“Drop files here” area). Now, you will see the presentation in your Google Drive.
The file is ready to be converted. Double click on it and see the sign “Open with Google Slides” in the top center of the screen. If you don’t see this option, click to the drop-down arrow and choose the right option. The file will be converted automatically.
Now, you can edit the presentation in Google Slides.
We’ve come to the end of the guidelines that covered the most frequently used options to create splendid presentations with Google Slides. Even if the program still misses some opportunities offered by its older brothers, its functionality will definitely be enough to convey your ideas in the most attractive way.


Adding all sorts of objects to the demonstration is often considered an easy task. It is an effective manner to showcase your job and to create custom slides that look thousand times more uniquely qualified plus appealing to your viewers. Their color, the size and many other adjustments can be changed to further be able to customize them.
Inserting a shape is usually a pretty simple and straightforward task, it’s not any more different here in Slides.
1. Click the Shape tool on the tool menu toolbar in order you expand the full shape options menu. You are able to then pick a category and one of the shapes you like to use.
2. Clicking and then proceeding to move the file is one of the next steps to take. This way you will easily begin to draw the shape into a size of your liking.
3. When the object appears on the requested slide now you can modify its colors, transparency and many others. Using a combination of all kinds of shapes you can create absolutely unique custom shapes that are limited only by your imagination!
Google has added a long time ago a way in which you are able to order and edit the contents of objects and shapes and opacity with the app Slides, together with a few other adjustments which you can also then use in order to enhance the viewers’ experience. You can reach for the menu by going into the toolbar & format menu, and the right-click menu as well.
Changing colors in a shape on Slides is something pretty simple and very easy to understand by everyone. Using different colors in your visualization is very useful and an easy way to add personality and perfection to your whole slide, thus reaching the ultimate perfection that you have always been aiming at for the whole time.
Simply pick the shape and then you can head to the toolbar menu options and press the color graph and begin to pick your one of favorite colors, or the colour that will be best suitable for your assignment or task!
Adding borders is another very easy yet amazingly effective way to personalize and customize all of the shapes and slides. It adds that unique line with a colour and design of your own choice that is only limited by your imagination. Importing a wide range of order to your slide as we already mentioned is pretty simple — click on the weight line icon on your toolbar then all the choices for changing will show up for you!
Read Also
Design in PowerPoint: Step-by-Step Instructions on How to Create Awesome Slides
Going Retro: Bring Creative Style to Your Presentations with Vintage PowerPoint Templates
Get These 10 Free Joomla Slideshow Extensions
100 Best Business Presentation Templates 2019. Cool! Great! Awesome!