

Anyone who’s been using WordPress for some time has had some experience with WordPress shortcodes. In fact, shortcodes have become a very straightforward way to output large and complex pieces of code to your posts or pages.
But what is hidden behind that complexity? How do shortcodes actually work?
Very often shortcodes may seem scary for beginners, partially because there’s little understanding of how things work behind the scenes. It is one thing to use a shortcode built by somebody else in your plugin or theme, and a totally different thing is to build one on your own. Don’t worry though, today you’ll have a better understanding of what is happening under the hood and learn how to can create shortcodes yourself!
Creating a Very Simple Shortcode
Let’s start off by opening our functions.php file, which is located under wp-content > themes > your-theme-name > functions.php.
At the end of the document add the following function:
function my_first_shortcode() {
  return 'Yay, it works!';
}
This is a simple function that returns only one string. Now in order to run it with the help of a shortcode we need to add one more line of code:
add_shortcode('test', 'my_first_shortcode');
That’s it!
We have created a shortcode named test by invoking a built-in WordPress function add_shortcode(). What this function does is register a shortcode so that WordPress is able to recognize it.
The first argument of the function is the name of your shortcode, you can name it whatever you want. The second argument is the name of the callback function we’ve created previously. It’s called a callback function because we’re calling it right after an action occurred, in our case the invocation of a shortcode.
Now in order to see your shortcode in action, open up your WordPress admin panel, add a new post or page, and in the content field type your shortcode name in square brackets like this:
[test]
Then save your post, and open it in a new tab. You should see this message:
Yay, it works!
WordPress Shortcodes with Parameters
Now that we’ve created a simple shortcode, let’s make our task a bit more challenging, and build a shortcode with parameters.
For the sake of experiment, we’re going to build a shortcode that outputs a simple anchor tag with some attributes.
Here’s the code of a callback function we’re going to use:
function shortcode_with_atts( $atts ) {
  $a = shortcode_atts(
  array(
    'href' => 'http://templatemonster.com/',
    'anchor' => 'MonsterPost'
  ), $atts);
  return '<a href="' . $a['href'] . '" target="_blank">' . '</a>';
}
The function to which we should direct our attention is shortcode_atts(). It’s a built-in WordPress function that is basically matching your custom attributes with default ones.
The first parameter of shortcode_atts() is an array of default attributes. You won’t be able to use an attribute in your shortcode unless you specify it in this array.
In our example we chose two parameters, a link address and an anchor text.
array( 'href' => 'http://templatemonster.com/', 'anchor' => 'MonsterPost' )
The second parameter in the shortcode_atts() function is $atts. For now it’s empty, but it will contain a list of custom attributes that you’ll be entering when adding a shortcode to a post.
In order to make our custom attributes actually appear in the shortcode it’s very important to include a parameter in our function and name it the same as the second argument of the shortcode_atts() function.
function shortcode_with_atts( $atts ) {
    $a = shortcode_atts(
        array(
            'href' => 'http://templatemonster.com/',
            'anchor' => 'MonsterPost'
        ), $atts);
The shortcode_atts() function is replacing the default attributes with custom ones and returns a sorted array of attributes. When an attribute is not specified, a default one is used instead.
We assign that array of attributes to a variable $a.
Now if we want to use any of the specified attributes in our function, we just need to work with it as we would with a simple array.
$a['href']
Finally, let’s return a string that will contain our shortcode attributes. We’re concatenating pieces of the string using a dot operator (.).
return '<a href="' . $a['href'] . '" target="_blank">' . $a['anchor'] . '</a>';
The callback function is ready, so we can use it to register our new shortcode in WordPress:
add_shortcode('link', 'shortcode_with_atts');
In order to see it in action, open a post in your admin panel and type the following line in your WordPress editor:
[link href=”https://www.templatemonster.com/wordpress-themes/monstroid2.html” anchor=”Monstroid 2”]
Now if you open that post in a new tab you’ll see this link:
If you don’t enter any attributes, the default values are going to be used. In this case, it’s a link to our blog:
MonsterPost
Of course, this shortcode doesn’t do anything special, so let’s use our newly attained knowledge to build a shortcode that does something cooler, for example outputs an automated screenshot of any website you enter.
Create Automated Website Screenshots with a Shortcode
In the last section of this post I’d like to show you an example of how you can apply your shortcode knowledge to create something useful.
In order to create a screenshot generator we’re going to use an API of mShots, a service built by WordPress.com.
Basically in order to create a simple screenshot you would need to use the mShots API, that is this link - https://s.wordpress.com/mshots/v1/ and combine it with the link of your website, e.g. http://templatemonster.com/.
In practice it looks like this:
https://s.wordpress.com/mshots/v1/http%3A%2F%2Ftemplatemonster.com/?w=900&h=450
It may seem messy, but if we take a closer look, we’ll see that it makes sense.


After the API part you can see your link with encoded characters, which is a pre-requisite for URL strings. Each of the characters is represented by a hexadecimal code, preceded by a percentage sign (3A = :, 2F = /, etc.) After that we add two parameters to denote the screenshot width and height.
If you enter that string in a browser address bar, you should see a screenshot of our blog:


Now that we know which URL we want to build let’s create a shortcode, so that we don’t have to type everything manually each time we need to make a screenshot.
The code for it would look as follows:
function take_screenshot( $atts ) {
    $a = shortcode_atts(
        array(
            'link' => 'http://',
            'width' => '900',
            'height' => '450',
            'alt' => 'screenshot',
        ), $atts);
    // Generating the output string
    $o = '<img src="';
    $o .= 'http://s.wordpress.com/mshots/v1/' . urlencode($a['link']);
    $o .= '?w=' . $a['width'] . '&h=' . $a['height'] . '" ';
    $o .= 'alt="' . $a['alt'];
    $o .= '" />';
    return  $o;
}

add_shortcode('screen', 'take_screenshot');
Similar to the second example, we’ve created a list of default attributes that would be used when no other attributes are specified.
The most important attribute here is link, and you have to specify it each time when creating a shortcode. You can also set width and height attributes according to the layout of your blog, so there is no need to specify them every single time.
Since the return string is quite long here, for the sake of readability I’ve created a variable $o (output) which concatenates the string piece by piece using the .= operator. What it does is basically add a new string to the current value of the string. Instead of writing $o = $o . ‘string’, we can write $o .= ‘string’.
Another function used here is urlencode() that encodes non ASCII characters, so that they could be used in a URL.
The last step would be to register our shortcode using the add_shortcode() function.
add_shortcode('screen', 'take_screenshot');
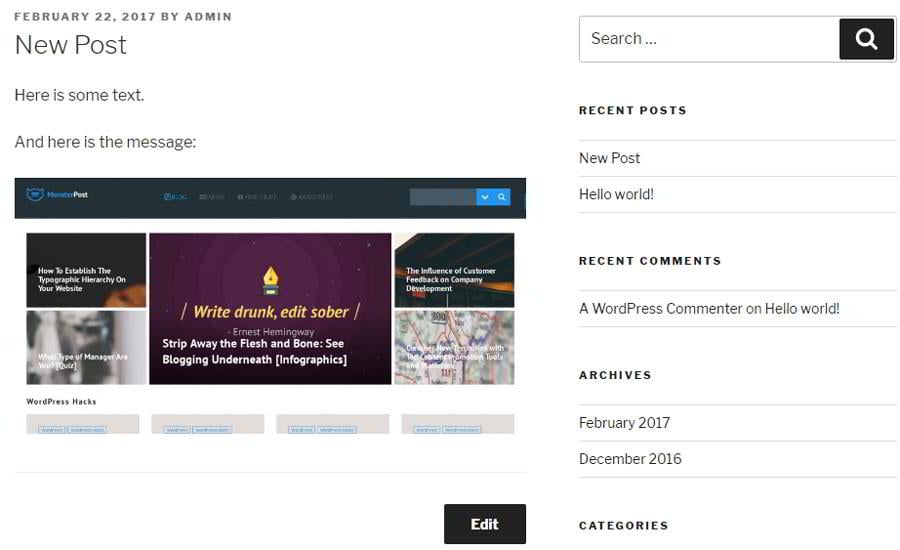
Now you can open your WordPress editor and try out our shortcode in action:
[screen link="https://monsterspost.com/" alt="MonsterPost"]
If we view the post we can see that the screenshot is there, and our shortcode is working properly.

Final Thoughts
Shortcodes are extremely useful pieces of functionality in the WordPress ecosystem, which enable us to make complicated things easier and faster. Although having a collection of pre-built shortcodes that come with a theme or plugin is helpful, very often there may arise a necessity to create your own shortcode. In this guide, I have tried to lay out the main concepts and principles in the shortcode creation which would be a stepping stone in your further exploration of WordPress core features. And, if you need to freshen your website creation skills, check out our great guide on how to build a website based on WordPress CMS.
Good luck with hacking!