Lesson 7: Working with Page Templates
This lesson is a part of the How to Build & Maintain Elementor WordPress Website? course.
Hi, everyone!
On Step 6 we’ve checked the process of editing and creating pages with Elementor builder, now let’s see what are the page templates and how we can use them.
Let's roll.
In WordPress theme development, a template defines part of a web page generated by any WordPress theme.
For example, header.php is a default template used in most WordPress themes. It defines the header area of web pages generated by WordPress. The header file will typically be loaded on every page of your WordPress site, allowing changes to be made to a single file, that will apply across the entire website.
In terms of Elementor builder template is a designer-made page layout that you can import as a file, and use on any page of your Elementor-built website.
You can check this video tutorial by Elementor there you will learn how to make use of the Template Library which is an awesome feature of this builder.
How can templates help you?
I’d like to share with you some ideas on how you use page templates.
- When you import a page template you can use it on any page of your website just insert it via Elementor builder interface using the template gallery.
- When you’re building a page you can save it as a template, later you can export the same template as a standalone file, and share it with your client or your mate.
- You can save the whole page as a template, a single section for further use.
- You can use templates in the page body, headers, or footers.
- You can export all pages of your website as templates and those will serve as a backup version, of a certain iteration of customization.
- Use page templates to create new landing pages with the speed of light.
- Use page a template for building a Coming Soon page, Elementor builder allows activation Coming Soon or maintenance mode without using third-party plugins. You access this following the path Elementor >> Tools >> Maintenance Mode.
If you’re going to use the Monstroid2 theme and a free version of the Elementor builder you can make use of a separate library of sections, and pages called Theme Parts.
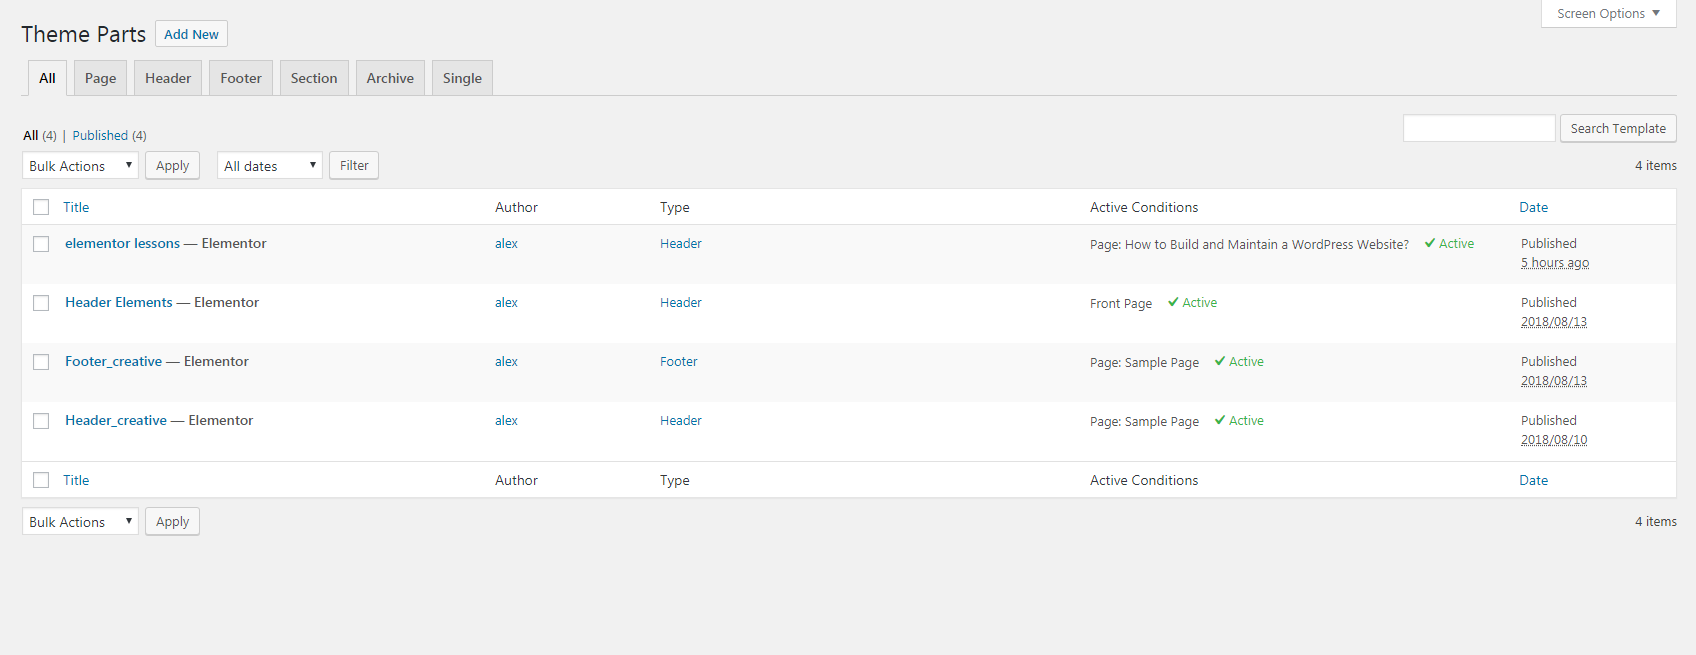
As you can see there are tabs that stand for the templates that cover all parts of your website.
Now let’s check the template that I’ve just created, you can see it on the screenshot above, I called it elementor lessons.
I’ve made a test landing page and assigned it an elementor lessons header that’s displayed only on this page.
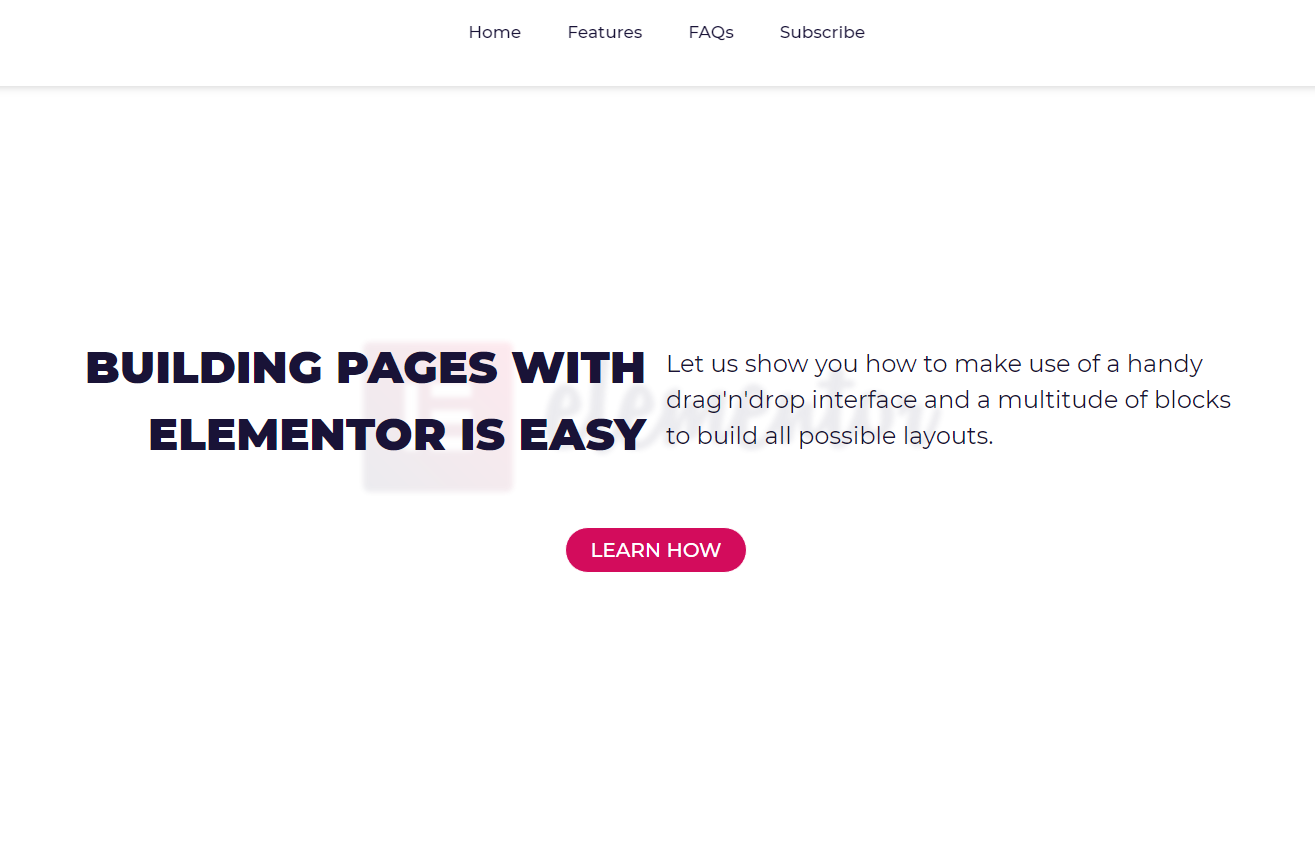
So basically it’s a landing page with anchor menu when you hit any menu item certain page part will load.
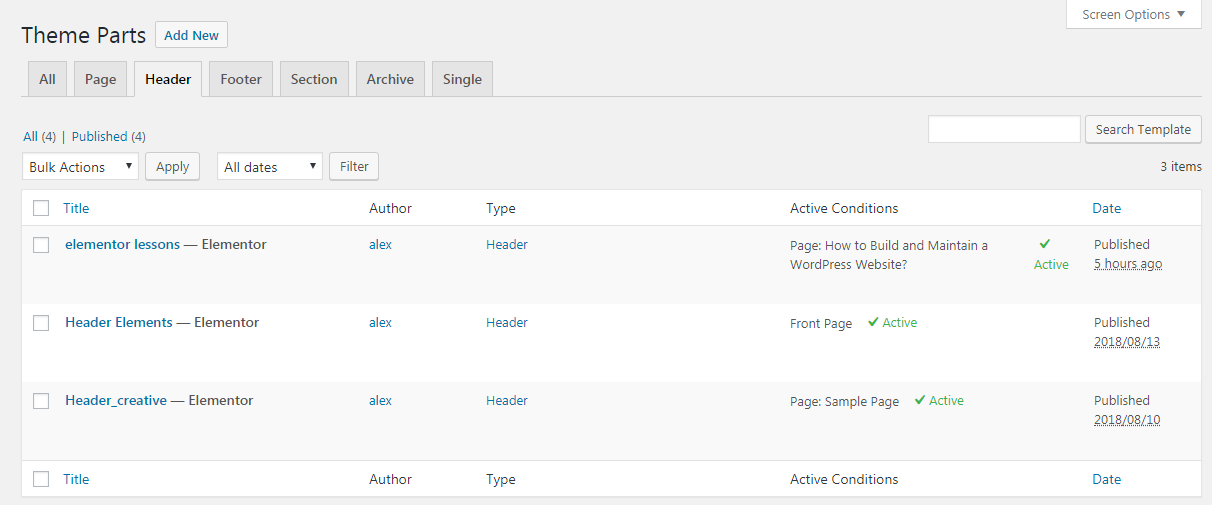
So if you want to create a separate header for some page on your Monstroid2 powered website you need to:
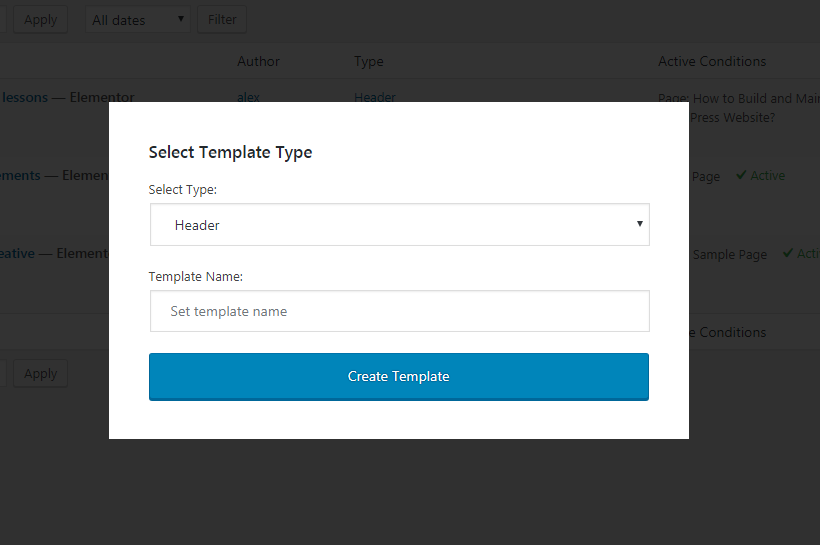
- Go to the Monstroid2 menu item, then click on My Library and then click the Header tab

- Click on the Add New, to choose the template type you want to create, and give it a name

- When Elementor builder loads you will see a blank page

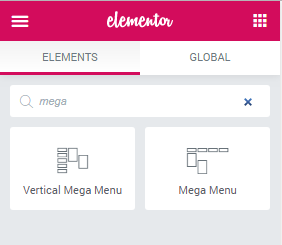
- Now you can create a new header since you’re you can either create it using a set of elements or use a template from the library.
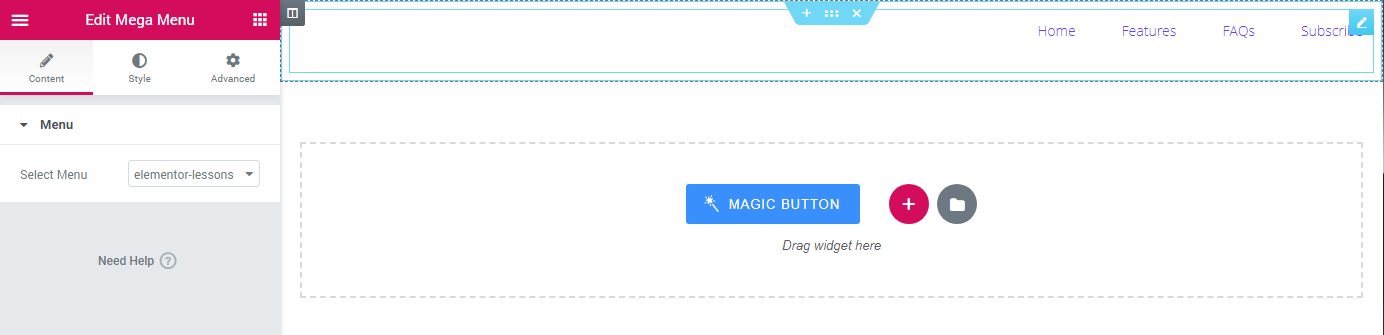
- I made a super-simple header, one section that contains a Mega Menu element

- Just so you know if you’re building a new page that requires anchor menu, you need to create a new menu for the same page. I’ll show you how you can do it a little bit further.
- When you choose the menu in the Mega Menu element you will note that it loads with default styles of the theme, and it needs to be tweaked a little bit

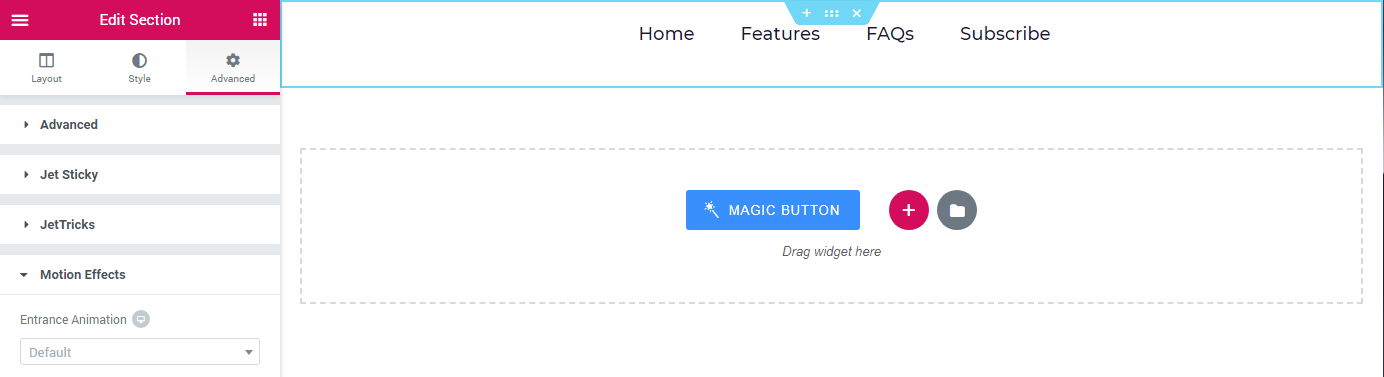
- As always go to the Style tab to make all the necessary alterations.
- Here’s a list of my settings for the Section:
- Layout > Content Width > Full Width;
- Style > Background > Background Type > Classic > Color > #ffffff;
- Advanced > Jet Sticky
- Sticky Section > Yes;
- Box Shadow > Color > rgba(0,0,0,0.2);
- Here’s a list of my settings for the Mega Menu element:
- Menu Container:
- Menu Items Alignment > Center;
- Main Menu Items:
- Typography > Montserrat;
- Text Color > #191337;
- Size > 18;
- Weight > 500;
- Hover > Text Color > #d30c5c
- Menu Container:
- Result

Now let’s go back to the anchor menu.
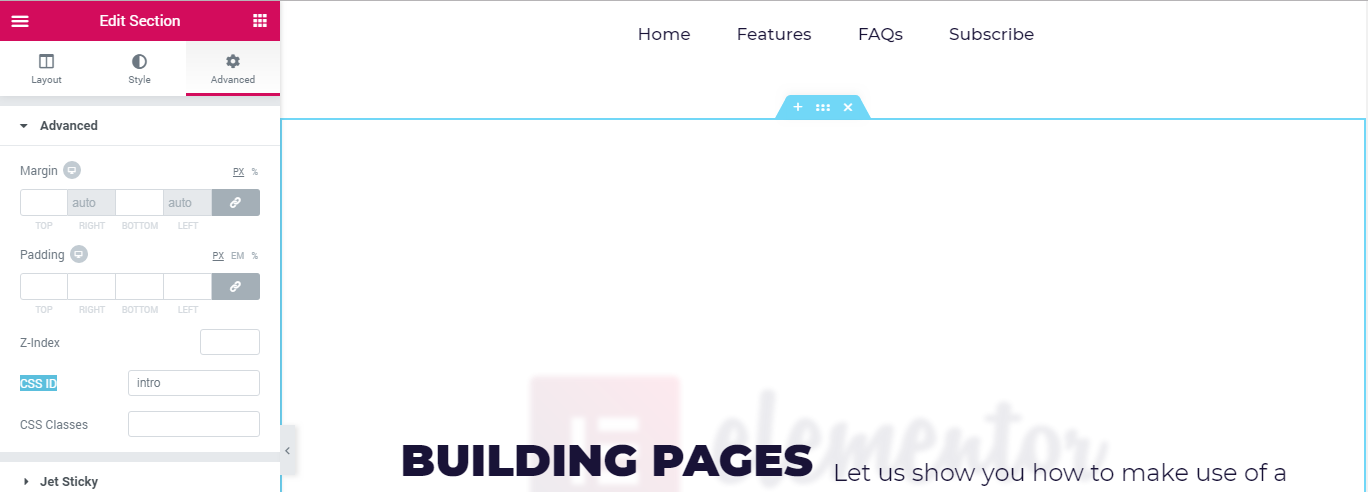
When you’re building any page you can assign its section the CSS ID through the Advanced tab.
In the menu, you will have to use the same ID’s as you have set for the page sections. Here’s a small lifehack for you, Elementor has a great feature called the FINDER, use the shortcut CTRL / CMD + E to open it, it’s working on any page of your website even on front-end.
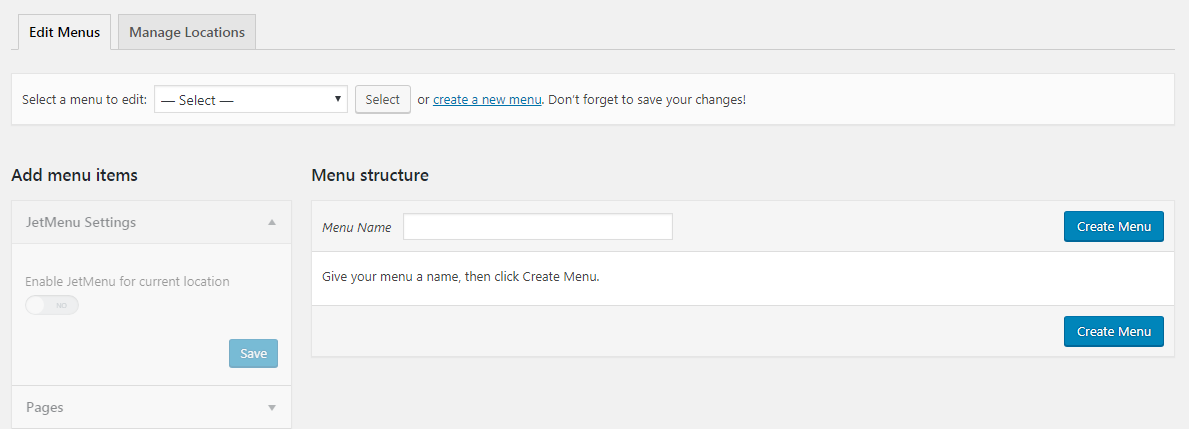
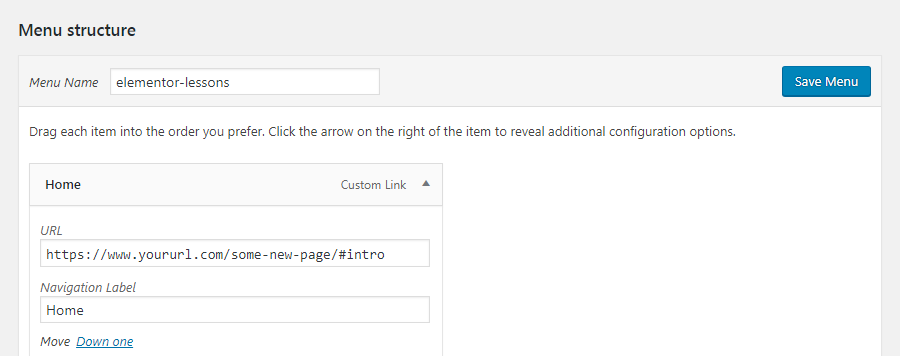
So when you’re done building the page open finder, and type in menu to open the Menus editor

Then hit create a new menu link, give it a name, and then hit Create Menu
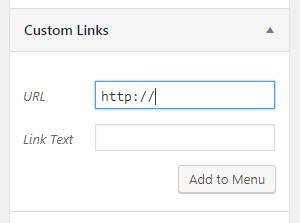
Use the Custom Links section to create new menu items
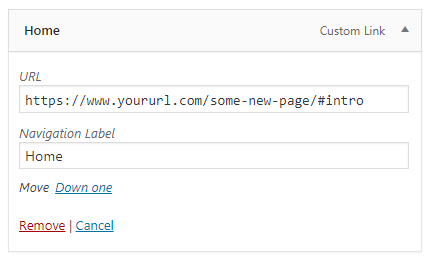
The structure if the anchor menu item should be following: page URL + #css id, for example, https://www.yoururl.com/some-new-page/#intro, don’t forget to use the # symbol otherwise menu item won’t work.
The CSS ID is the one you wrote here

When you’re done editing your menu don’t forget to click on the button Save Menu.
In one of our next lessons, I will show you how to create a mega menu with the help of a JetMenu plugin.
Now let’s simulate a case when we need to reuse one of the templates we’ve created previously.
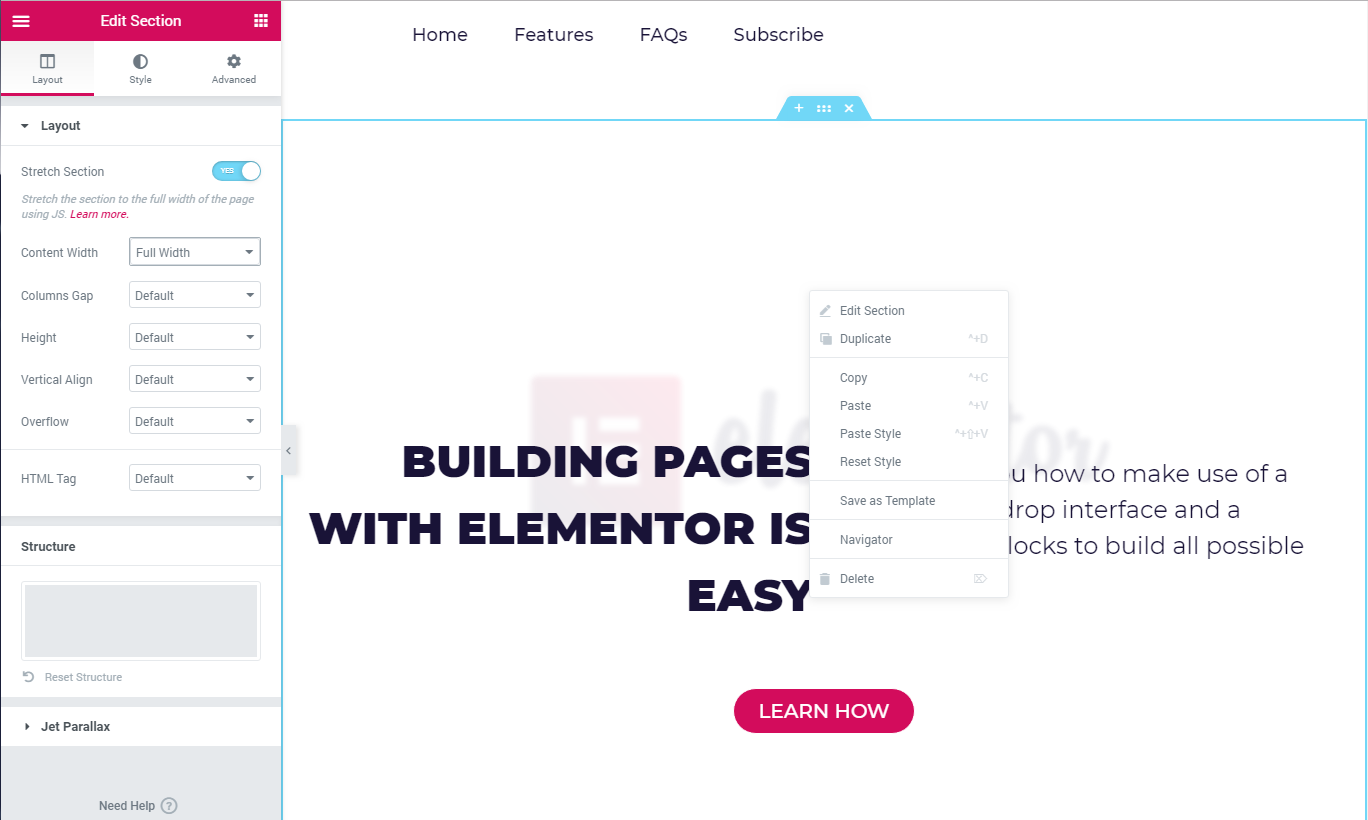
To save a section as a template you need to right-click it and then choose Save as Template
On the next step, you need to choose a name for your template.
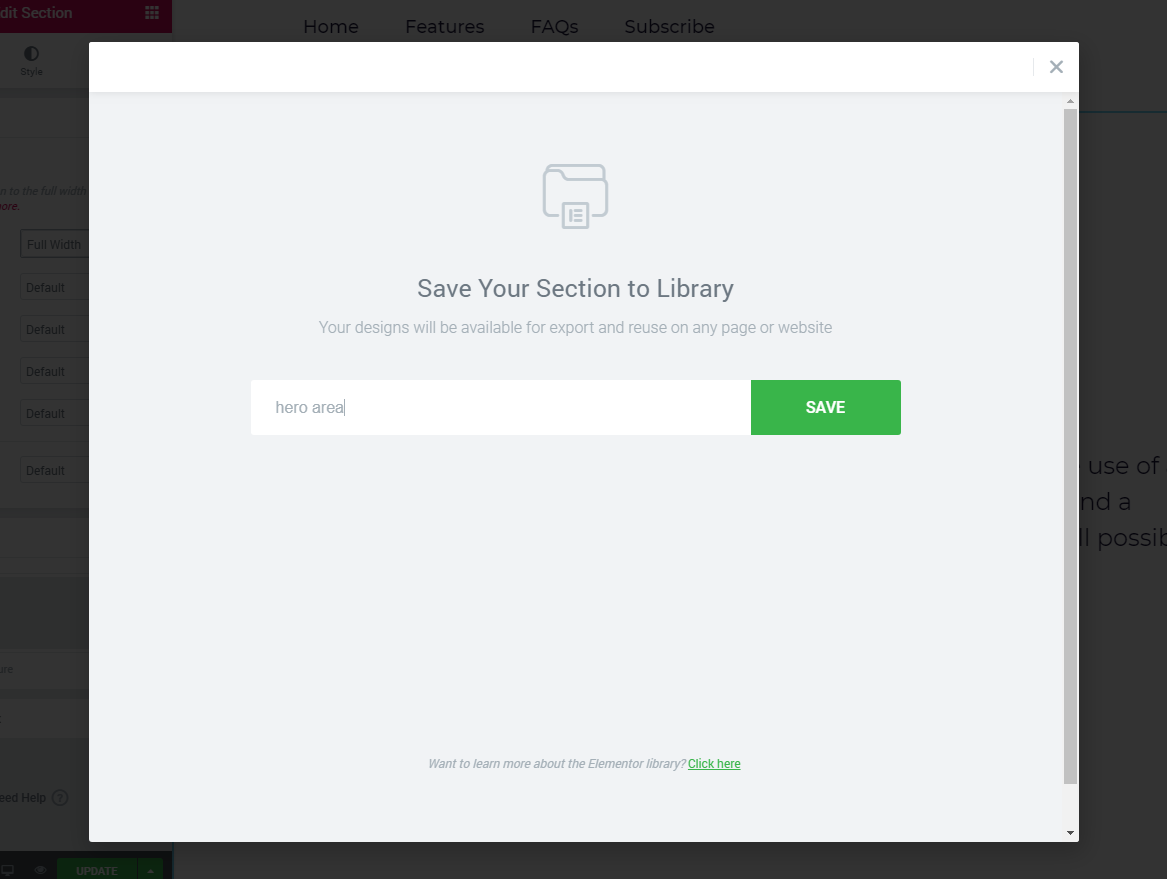
That’s it, you’ve saved your section as a template.
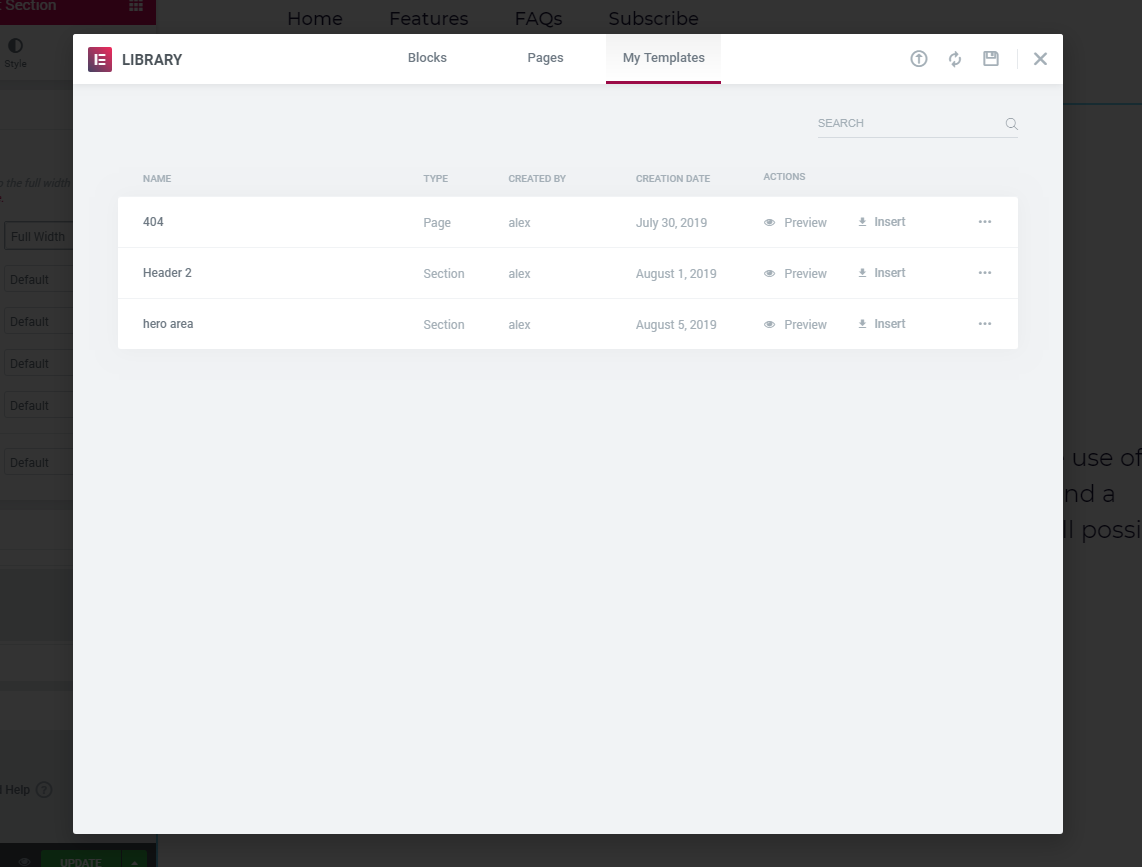
From the My Templates tab in the Elementor library, you can access all pre-designed templates you have.
If you click on three dots you can choose from two options Delete or Export.
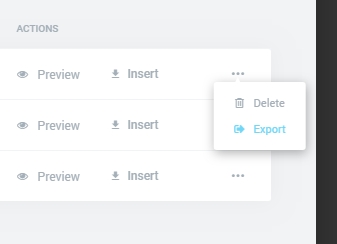
When you export a template you will get a JSON file that you can use on any other Elementor-powered website.
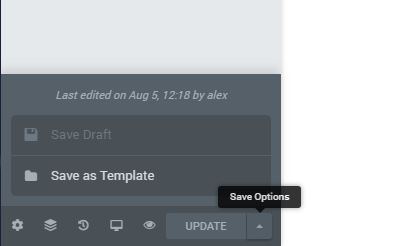
Now let’s see how we can create a template from a whole page.
In the bottom left corner, there’s an Update button, right next to is there’s a small arrow pointing upwards, when you click on it you will see additional Save Options.
There you will find a link Save as Template. Click this link when you want to create a template of the whole page.
Please note! If you’re using Elementor PRO, or you have built some functionalities using third-party plugins for Elementor, certain areas of your template may not be functional on websites without Elementor PRO, or the plugins you have used.
End of the lesson.