Lesson 1: What's HTML, CSS & JavaScript?
If you want to get official proof of knowledge in website development with HTML CSS, you can pass a test in our Certification Center and get a personal e-certificate from TemplateMonster confirming your skills.
I would like to advise you not to forget about the lessons and learn it right after you have opened it. Quite often people may forget about it after some time, which means the following lesson will be not as useful as it could be.
In our tutorials we are going to guide you through the bare essentials. To ease the process of website customization/setting up and not cram your heads with loads of info, we’ve divided the guide into five separate tutorials. Studying info from each of them should take no longer than an hour or so.
HTML is the base on which the whole web world is built. All the other tools are just add-ons, allowing you to add more complex functionality to your web resource. HTML5 is a new open software platform that is used to create interactive web interfaces using text and multimedia tools (videos, graphics, audio recordings and other elements). By using HTML5 and CSS3, web developers are able to create comfortable, stylish, modern and functional web resources.
What are HTML website templates?
You probably already know that HTML (HyperText Markup Language) is the language which is used in order to display pages in web browsers. It is a set of codes that are inserted into text files to achieve color, font, graphic and hyperlink effects on web pages. It is also used for the creation of interactive forms and inserting images and other objects into web pages. HTML is usually used with CSS.
An HTML website template is a pre-made site consisting of HTML pages, which include built-in text, photos, layouts, fonts and other content and support files. HTML templates are created with HTML or XHTML, including CSS and JavaScript code. If you get such a template for your future website, you just need to fill it in with your custom information. In other words, you get a ready-made design which you customize according to your needs. Such templates come in zip-file format, which are simply uploaded to a hosting company. The file contains all source code, supporting documents, and files.
HTML & CSS
Cascading Style Sheets is another language which stands for layout styles on the web pages. CSS defines colors, fonts, backgrounds, spacing, widths and heights, and other design elements. Although it is a different programming language, you can’t build web pages using only CSS. This language is used only to format HTML-website style. The code can either be included in a page with HTML-code or be in an externally linked CSS-file.
Basic HTML page markup
Since you’re going to run HTML website you need to be aware of the page structure so you can quickly find a necessary that you need to edit. Even though there’s a visual HTML editor you will still have to make certain code manipulations.
To get a deeper understanding of HTML you can either enroll to coding course or get a book like HTML5: The Missing Manual by Matthew MacDonald, in this book you will all the aspects of HTML markup language, its relations with CSS, JS and will complete bunch of assignments that are aimed to help .
Let’s start with a simple bare-bones HTML5 page:
 <!doctype html>
 <html lang="en">
 <head>
   <meta charset="utf-8">
   <title>Basic HTML5 Page Markup</title>
   <meta name="description" content="Basic HTML5 Page Markup">
   <meta name="author" content="MonsterPost">
   <link rel="stylesheet" href="css/styles.css?v=1.0">
 </head>
 <body>
 <h1>Homepage Headline</h1>
         <p>This is a paragraph.</p>
   <script src="js/scripts.js"></script>
 </body>
 </html>
When this code is rendered by a browser, it will look like this:
Doctype
If you open the source of any webpage the first line of code you will be <!DOCTYPE html> , it tells browsers which version of HTML the page is written in.
HTML Root Elements
Right after the doctype goes <html> element which wraps around all content in a web page. The <html> element always contains the <head> element and one <body> element.
Head Element
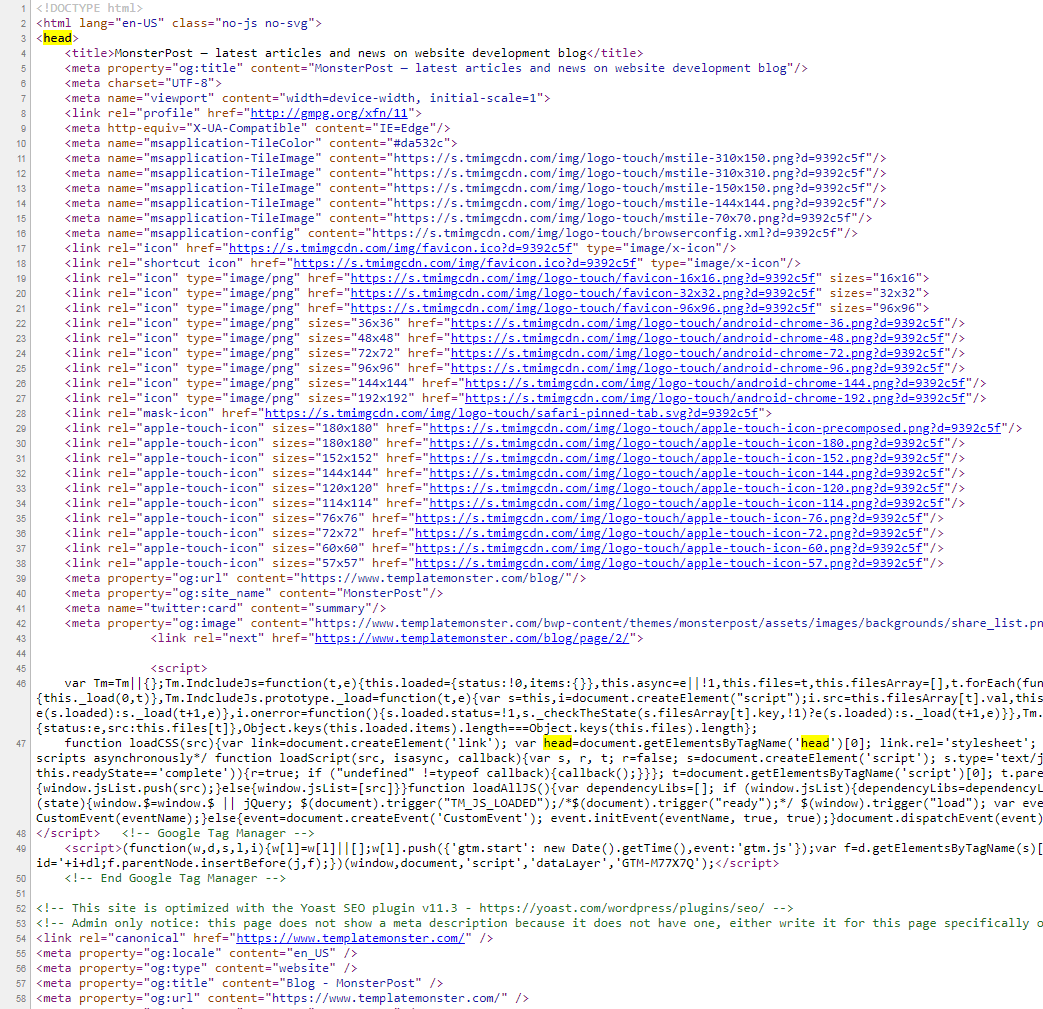
Basically the HTML element is the container that includes a bunch of non-visible parts of the page that are rendered by browsers. These parts may include metadata, scripts, tracking codes, and so on.
The head element also contains the <title> which is displayed as the tab title in your browser and is also read by search engines to identify the title of a page.
Here are some other HTML elements that can be used inside the <head> element:
Body Element
The HTML document contains only one <body> tag. Any piece of content that’s located in a web page is wrapped inside the body element.
In terms of our blog, when the head element is closed right after it the body element is opened.
Nesting of HTML Elements
Most of the time HTML elements are called containers. Containers have a proper nesting to ensure correct rendering of content across all browsers, will be readable by screen readers, and will be able to be targeted by CSS and JavaScript.
In terms of HTML, nesting is exactly what it means: all element are placed inside one another.
In the basic HTML page I showed above each element’s opening tag has a closing tag and contains other elements within it.
Right now I’ll use HTML comments to help you get the idea of opening and closing tags.
The HTML comment is a really cool thing, you can use it anywhere in your page and it will be some sort of a bookmark or a separator that will remind you where some section ends and another one begins. HTML comments are not rendered by browsers, so you are free to use as many as you need.
This is how the comment looks like <!-- your html goes here --> .
 <!doctype html>  <!-- doctype declaration -->
 <html lang="en">  <!-- opening HTML tag -->
 <head>  <!-- opening head tag -->
   <meta charset="utf-8">
   <title>Basic HTML5 Page Markup</title>  <!-- title tag -->
   <meta name="description" content="Basic HTML5 Page Markup">
   <meta name="author" content="MonsterPost">
   <link rel="stylesheet" href="css/styles.css?v=1.0">
 </head>  <!-- closing head tag -->
 <body>  <!-- opening body tag -->
 <h1>Homepage Headline</h1>  <!-- h1 headline -->
         <p>This is a paragraph.</p>  <!-- paragraph -->
   <script src="js/scripts.js"></script>
 </body>  <!-- closing body tag -->
 </html>  <!-- closing HTML tag -->
Most used HTML tags
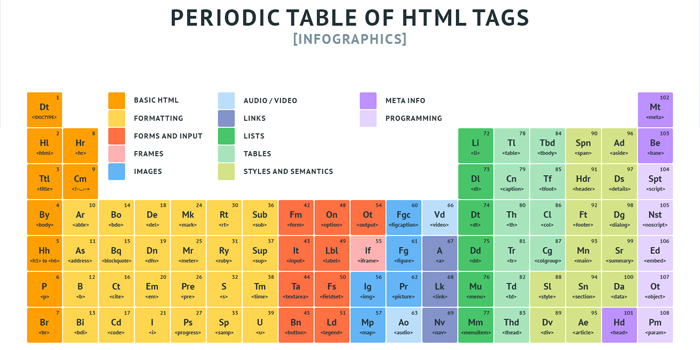
Some time ago we’ve released an HTML tags cheat sheet in a from of a Periodic table of elements.
Using this guide you’ll be able to comprehend the structure of HTML tags.
What about CSS?
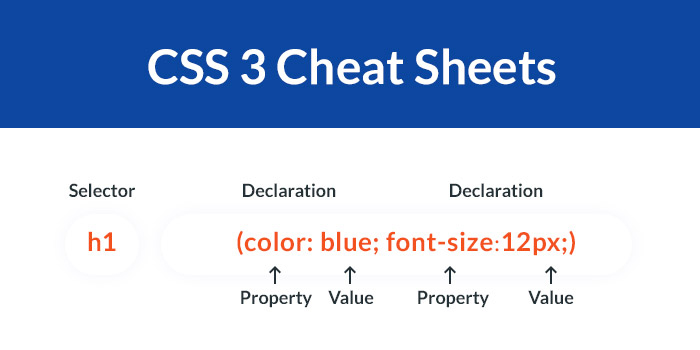
If we compare page markup with the human body, then CSS would be our skin and hair, it’s the thing that gives us the human form, and the beauty to web pages we love so much.
In case you want to learn CSS much deeper you can use the same book I’ve mentioned above - HTML5: The Missing Manual by Matthew MacDonald .
HTML & JavaScript
JavaScript is another programming language commonly used to create interactive effects within the browsers. It allows you to implement complex multimedia objects to web pages, such as animated graphics, 2D/3D maps, video galleries, etc.
As well as CSS, JavaScript can be included along with website template HTML code or be written in an externally linked .js file. JavaScript provides a dynamic and user-friendly website interface.
HTML & jQuery
jQuery is a JavaScript library that simplifies creating JavaScript “client-side” functions. Its syntax makes it easier to create animation, navigate a document, and handle events. Such functions as slideshow animation, “on click” or “on hover” events and other effects are embedded into HTML pages using a jQuery library file.
Basically, this is what HTML web templates are built from.
Let’s sum it up:
- HTML is used to structure web pages in paragraphs, headings and tables and to embed media files;
- CSS goes along with HTML coding and is applied to set up the style of pages;
- JavaScript is applied to HTML templates to create and control animated multimedia.
Zemez Responsive Navbar JavaScript
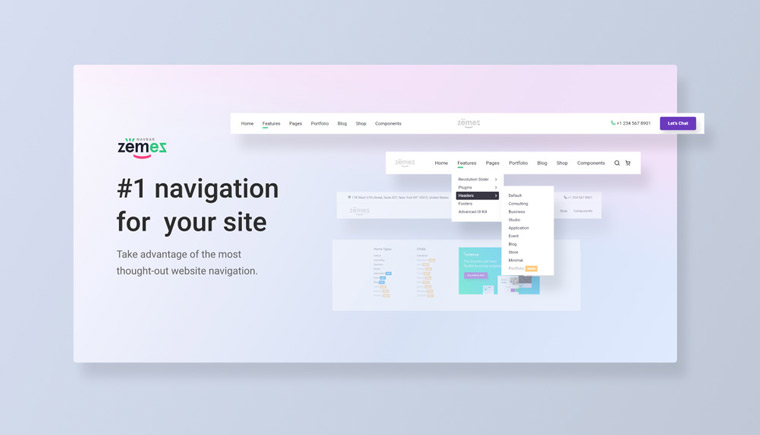
Website navigation is one of the most important tools for managing user behavior. The more convenient the navigation is, the more likely the visitor will find the necessary information, perform the target action, and then return to the resource again. Zemez Navbar JavaScript is a perfect solution to create a responsive navigation menu.
Are you curious about what is inside the pack? How about 8 beautiful layouts to select the best option for your website? To add more, you will get 100% responsive and highly customizable interface, fixed and fullwidth layouts, sticky navbar, and much more. The script has already been tested on the biggest products, so now you have an opportunity to integrate it into your website.
More features:
- Edge 15+, Firefox 54+, Chrome 51+, Safari 10+ supported
- SASS and PUG files included
- Dropdowns & megamenus
- Mobile app style look
- Dark & light color schemes
This tutorial is a part of the "How to Build and Maintain an HTML5 Website?" free course.
