5 Image Manipulation Techniques You Can Use to Cut Load Time by 80%
When a website loads like a snail, visitors are usually happy to leave and take the next best option that they find on Google. An extra few seconds can significantly impact your success on the web. A study by Gomez and Akamai suggests that you could lose as much as half of your visitors if your pages are not optimized.
So, what causes slow page loads?
Many factors could slow down your page, such as a heavy theme or a build that’s not optimized for production, etc. However, images tend to top the list of things that can significantly slow down a webpage. Although you would want to have the best pictures to showcase your business on your website, using raw, uncompressed images is always a bad idea. For instance, an image size of 7MB can be resized to 100KB and the load time can be reduced from ~3 seconds to just under 1 second. This translates into a 70% reduction in load time. Your audience won’t even know the difference because compressing images do not necessarily mean reducing its quality.
If you’re using static assets, there popular tools that you can use to compress images across different platforms. For dynamic images, you’d have to use a plugin or a cloud service to fix the issue. This post covers the top five ways to improve the performance of a website by optimizing images.
Compress Static Assets to Get Images at Reduced Size
Images with a higher resolution almost always put additional pressure on the hosting servers your website uses. In case you are using a shared hosting service, while at the same time utilizing large file size images, then your SEO efforts are at a loss. Various image optimizer tools help reduce the size of the image files without hindering the quality of the image.
An adequately optimized image boosts the loading speed of your landing page and increases the chance of you getting a higher ranking in the Search Engine Ranking Page (SERP). Some of the most popular tools for reducing the size of an image, without hindering its quality, are – TinyPNG.com and Compress Photos.
Alternatively, you can use a programmable API to resize a batch of images. There are lots of resizing tools available on GitHub. If you’re using JPEG, you can select an appropriate compression technique and a quality setting that reduces the image size without having any noticeable visual drawbacks.
Let’s see how good the modern image compression algorithms are. Here’s is an image of a dog from Flickr and the size of the image is about 650KB. You can find the original image here.

There are specific visual details that the user wouldn’t probably want to lose here. Let’s reduce the size of the image to 80% of its original size. Here’s what we get:

The size of the reduced image is 80KB, and a typical web user wouldn’t be able to distinguish the differences between the two. You can further reduce the quality, but 80% is usually a safe line to draw.
Move Self-Hosted Images to the Cloud

If your web application supports user uploaded images, or you deliver static images or profile pictures from social networks, in most cases you would need to manipulate them to be able to fit the graphic design of your website or your mobile application. To be able to manipulate & compress images on the fly, you will need to use a combination of a server and object storage like S3 or use an image optimizer solution that runs on the cloud. The good news is that the dynamic image solutions are cheaper than running a server and you’re never out of options. The more popular ones are.
Cloudinary
Cloudinary provides you with the ability to transform your images into any required format, dimension or style. It can also optimize your image to provide the minimal file size needed for enhanced user experience.
Cloudinary achieves this by implementing dynamic change transformation as well as delivery URLs that access the images. Users are empowered to change the required transformations at their discretion, and all the transformed images can be re-created on demand and delivered to users via optimized caching.
Imgix
Imgix optimizes, transforms and caches your image library completely to enable fast loading websites and applications. It is able to do this via a simple and robust set of URL parameters. Some of the key features of Imgix include:
- Ability to Design Without Constraints
- A Powerful and Robust set of APIs
- A CDN designed explicitly for Images
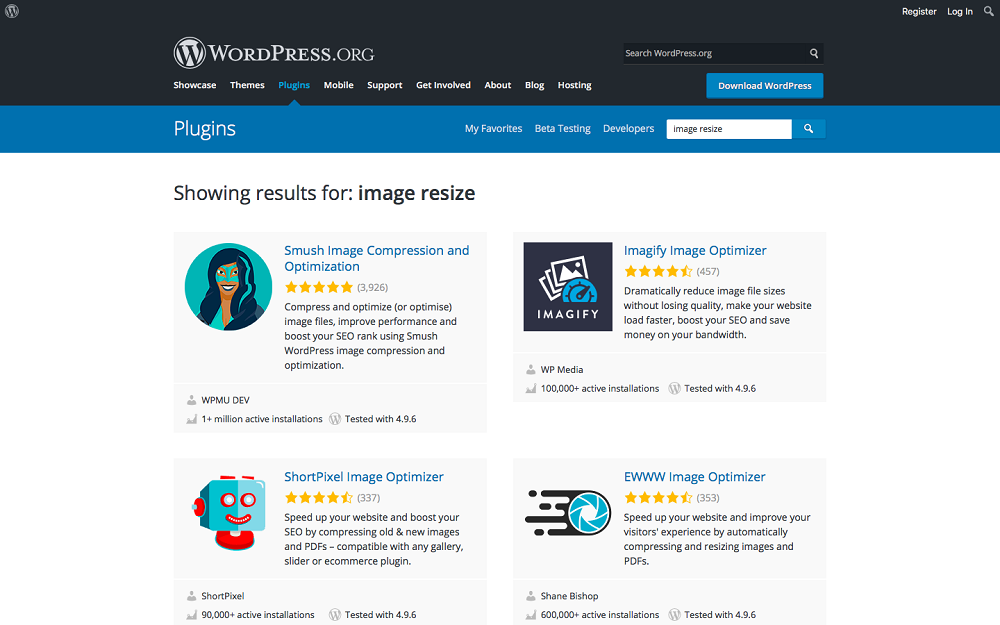
Use Tools and Plugins if You’re Using a WordPress Site

As we already know, high-resolution images that tend to reduce the page load time drastically is a waste of important resources. To help counter this, some WordPress centric plugins include tools that can be used to compress images and thereby help in load time and, in turn, your SEO efforts. Some of the more popular ones are listed below.
SHORTPIXEL
ShortPixel is a WordPress Plugin which automatically compresses all images on your site keeping a backup of the original images if needed. It increase your website’s SEO ranking, by optimizing any image or PDF document on your website. It optimizez all the JPEG, PNG or GIF as well as the new Google image format WebP. It is compatible with WP Retina 2x – all retina images are automatically compressed.
If you don't want to install the plugin you can use the online compressor engine for free. You can compress also pdf documents.
WP Smush
WP Smush is by far the fastest, most user-friendly and best-performing plugin for image compression on WordPress website. It allows users to compress JPEG, GPG and PNG images by up to 32 MB, either in bulk or individually.
WP Smush works by stripping the metadata from the JPEG files, optimizing them for compression and converting specific GIFs into indexed PNGs. The plugin allows users to set up an automated command whereby all images are automatically compressed while uploading them onto the site. WP Smush is also equally compatible with NextGEN Gallery as well as WP Retina 2x for higher quality image display while retaining the lowest possible file size.
EWWW Image Optimizer
The EWWW Image Optimizer automatically optimizes images as they are uploaded onto the site. It also can optimize images that have been uploaded previously. This plugin can also convert images to the specific file format that produces the smallest image size so that it has the option to apply reductions for PNG images as needed.
CW Image Optimizer
The CW Image Optimizer is another plugin that automatically optimizes images as they are uploaded onto the site while also optimizing images that have been previously uploaded.
The plugin has been fundamentally based on WP Smush.it. The difference, though, is that CW Image Optimizer uses Linux little utils image optimization tools. For the user, this means that your images never leave your server. The installation process for little utils can be a little complicated. Therefore, this plugin is not precisely for amateurs. Other plugins included in this list might be a better option in this case.
Imsanity
Although Imsanity can be a little overwhelming to use at times, its feature image in the WordPress Plugin Repository should not scare away first-time users. This free-to-use plugin is able to automatically resize images to render them more suitable for use. One of the better features of Imsanity is its ability to specify maximum dimensions, i.e., Width, height, and quality. Imsanity can also convert BMP files to JPG so that images can be scaled as needed.
Select the Right Image Format
In short, there are three basic principles here:
- Begin by choosing the most appropriate universal format – GIF, PNG, JPEG
- Experiment and choose the best settings for each format – quality, size of the palette, etc
- Think about including WebP and JPEG XR for modern clients
If you have lots of images that need to be rendered, you should consider transforming your image to the latest WebP format because they offer up to 50% reduction in size compared to JPEG images of same quality. All the modern browsers support WebP and JPEG XR and hence compatibility shouldn’t be an issue.
In addition to the different compression algorithms, there are also some image formats that can support various features like animation and transparency channels. Therefore, the choice of the most appropriate format for a specific image is, in most cases, a combination of the sought after visual results and the functional requirements. This is indicated in the table below-
| Format | Transparency | Animation | Browser |
| GIF | Yes | Yes | All |
| PNG | Yes | No | All |
| JPEG | No | No | All |
| JPEG XR | Yes | Yes | IE |
| WebP | Yes | Yes | Chrome, Opera, Android, Other browsers using a JavaScript Shim |
This flowchart by the developers at Google should help you decided the right format for your project.

Vector Images and Icons for Web Design
Earlier websites were designed using a fundamental principle – the ability to cater to the maximum pixel width of the most commonly used displays. Now, however, designers need to think in terms of user experience. And this includes some different devices and screen sizes. The problem arises when designers attempt to scale their pixel-based images to these different sizes.
In cases like these, vector images are relatively easy to work with. They can be controlled via code, which usually results in smaller sized files. The format that most web vectors prefer is SVG. Furthermore, you can compress the size of these files because they natively support compression. Similarly, you can use a font icon library like Font. Awesome can help you remove pixel clutter, make your design more responsive and improve your pages’ performance.
Good Morning Images Pack
By clicking the button you agree to the Privacy Policy and Terms and Conditions.

Read Also
How to Create a Rollover Image Effect
TOP-13 Photobanks Distributing Stock Images for TemplateMonster Themes
WordPress Copyright Hacks. How to Prevent Image, Video & Copy Theft
Adobe Photoshop Tricks to Give a Stunning Look to Your Images
Get more to your email
Subscribe to our newsletter and access exclusive content and offers available only to MonsterPost subscribers.

Leave a Reply
You must be logged in to post a comment.