

If you have an online business, you know that monetary matters require careful and precise handling. For your site user, it is much more convenient if he/she sees all the prices organized in one place. That way there is no need for them to contact you and wait a long time for an answer. Everything is at hand.
That's why today I will help you add a price list to your site with the help of Elementor Page Builder. For this, you need to ensure that you also have JetElements plugin installed. This plugin contains a lot of useful widgets for creating and editing your website content, including the Price List widget. If you’re ready, let’s begin!
- Open Elementor and search for the Price List widget in the Elements Panel field.
- Grab it and drop it onto a section on the right.
- On the left in the Content tab, you’ll see a number of items with certain settings inside.
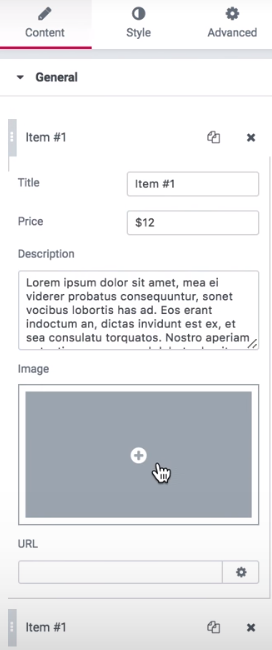
- Change the title, price, and description of each item to whatever you need.
- You can also make it clickable if you add a URL.
- To make it more attractive, add an image from the Media Library.
- Note, that you can add as many items as you need with the help of the Add Item button.
- Now move on to the Style section.
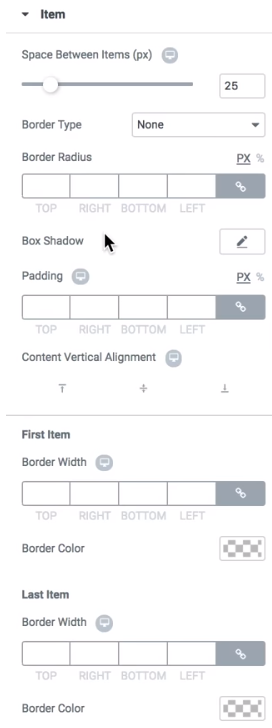
- In the Item tab, you can increase or decrease the space between items, add the border type which will surround every item with a border, edit content vertical alignment, and change the border width and the border color specifically for the first and last items in your list.
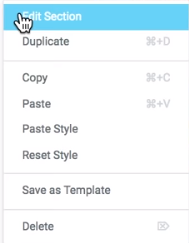
- To set a background for your price list, hover over the section, right-click and choose Edit Section.
- On the left, in the Layout tab toggle Stretch Section option to “yes”. This will allow you to stretch the section to the full width.
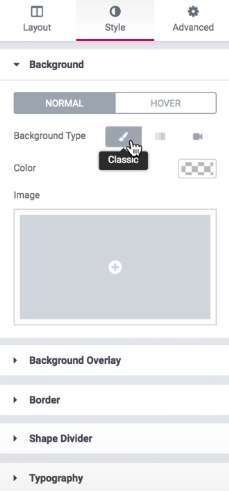
- Then go to the Style section, choose classic background type and add the image from the Media Library.
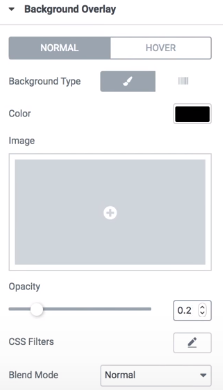
- After that, add a background overlay.
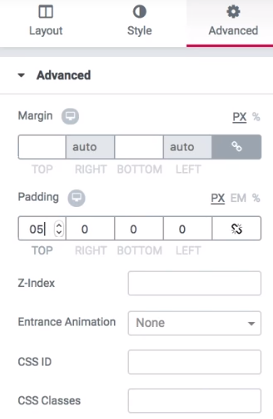
- Then go to the Advanced settings and customize padding.
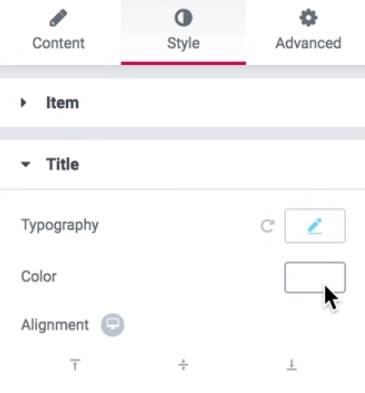
- Now let’s go back to the Style section and change the typography setting for the text elements in our list so they look nice on this background.
- Then go to the Price tab. Here you can change the price minimal width and set the color for the price.
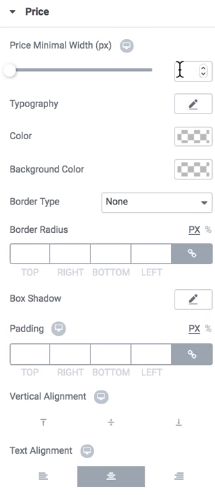
- Also, you can add a certain border and change the border radius, add padding, and set vertical and text alignments.
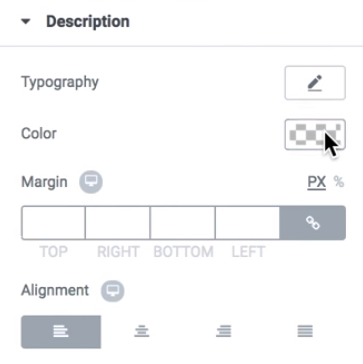
- Then move on to the Description tab and customize typography settings and the margin.
- The next step is the settings of a separator which goes from the title to the price. You can change its type, color, width, alignment, and margin as you wish.
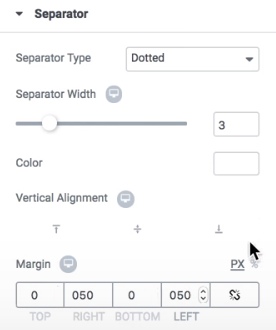
- If you don’t want any separator to be visible in your price list, simply decrease the separator width to zero.
- And if you want to add some space between the title and the separator or between the separator and the price, just increase the margin on the right and left.
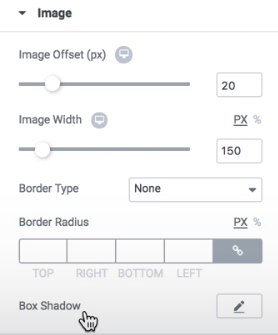
- Then move to the last tab where you can edit the parameters of your images, add the border, change its radius, and apply the box shadow.


Do you often work with Elementor content editor? Then, you’ll be pleased to know that you can access it together with the other tools from the same place. While everything is gathered in one place, you don’t have to spend much time searching for the needed element online. We are talking about ONE subscription service recently launched by TM and including over 8,500 items.
Paying $19/month you’ll access premium plugins (e.g. Jet add-ons), WordPress themes, graphics, eCommerce, and other templates. While being a regular MonsterPost reader, you also have a chance to save on subscription up to 5%. All you have to do is just apply promo code BecomeThe1 to your shopping cart and proceed to checkout.

Final Say
And here is your price list! As you see, with the help of JetElements plugin it is easy to create and customize it. I hope you enjoyed the process. If you have any questions, just write them in the comments below.


Read Also
How to Create Pricing Tables with Elementor Page Builder
How to Create Testimonials Using Elementor Page Builder
Elementor Tip: Pie Chart Circle Progress on WordPress with Elementor Page Builder
Elementor From A to Z: Sheer Selection Of “How To” Tutorials