How to Create Product Attribute in Magento 2
Attributes are considered to be an integral part of the product catalog of any online merchant. This is because the appearance of these attributes significantly help web browsers search for products more quickly and easily. Therefore, creating product attributes should be given priority when shop admins configure their Magento stores. If you are a newbie or you want to learn more about product attribute, the following is a detailed instruction for you.
The guidance below includes three steps to create product attributes in Magento 2.

Step 1: Provide Attribute Properties information
From the Admin Panel, choose Stores. In the Attributes section, click on Product
Select Add New Attribute option
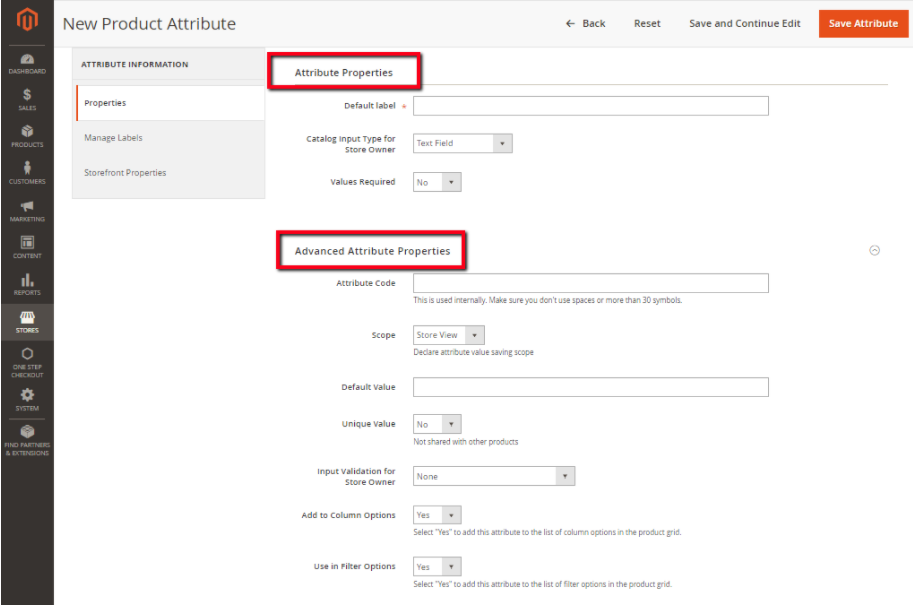
From the Attribute Properties:
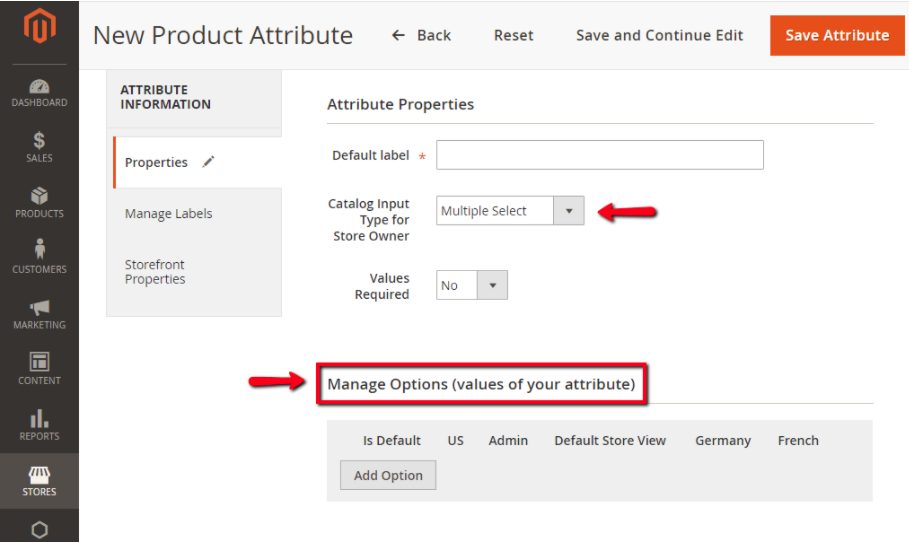
In the Catalog Input Type for Store Owner, choose one type from the listed options for your store. There are 11 options in total including:
- Text Field
- Text Area
- Date
- Yes/No
- Multiple Select
- Dropdown
- Price
- Media Image
- Fix Product Tax
- Visual Swatch
- Text Swatch
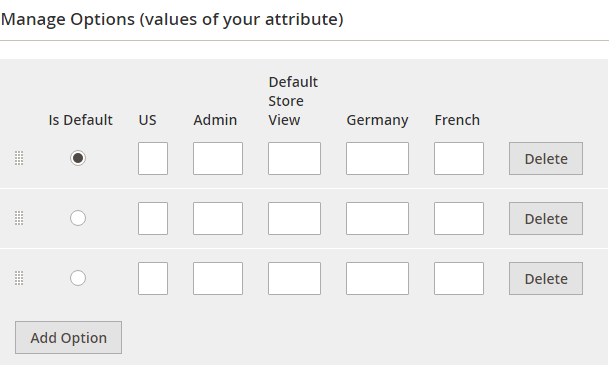
- From Manage Options, navigate Add Option and click on that button
- Choose Default option when you want to use the default value.
- In case your store has only one store view, provide the Admin value to apply for your store.
- In case you want to have multi-store views, fill in value for Admin and each store view.
- To create more options for the list, select Add Option
- From the Values Required box, turning on this function by clicking Yes to ask buyers to select an option before any purchase.
Advanced Attribute Properties field, take some actions as follows:
- Attribute Code: in the field box, fill in a unique Attribute Code with characters are typed in lowercase and no spaces between them.
- Scope: Choose one among three available variants *Website, *Store view, and *Global to determine the position of your attributes
Step 2: Configure Manage Labels
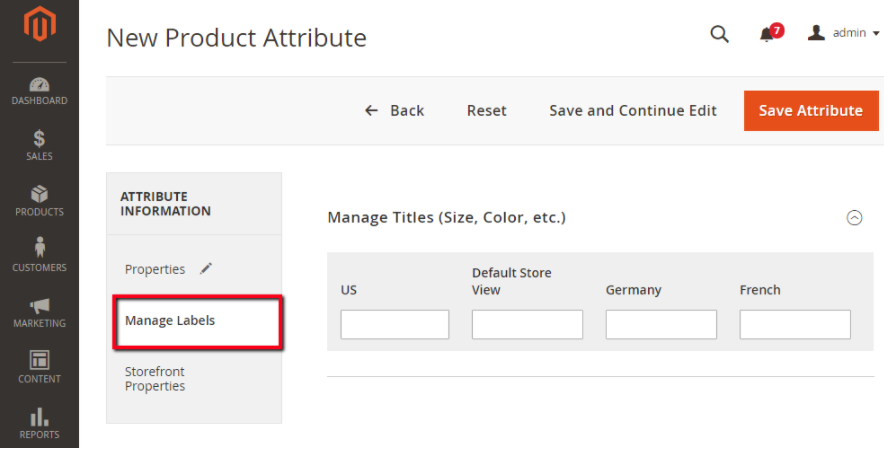
First, you have to navigate Manage Labels
In Manage Titles, provide default title for your store. In case your store supports several languages, you can enter translated titles in accordance with each language in the field box.
Step 3: Complete Storefront Properties
After accessing Storefront Properties, manage this section by conforming to the following steps:
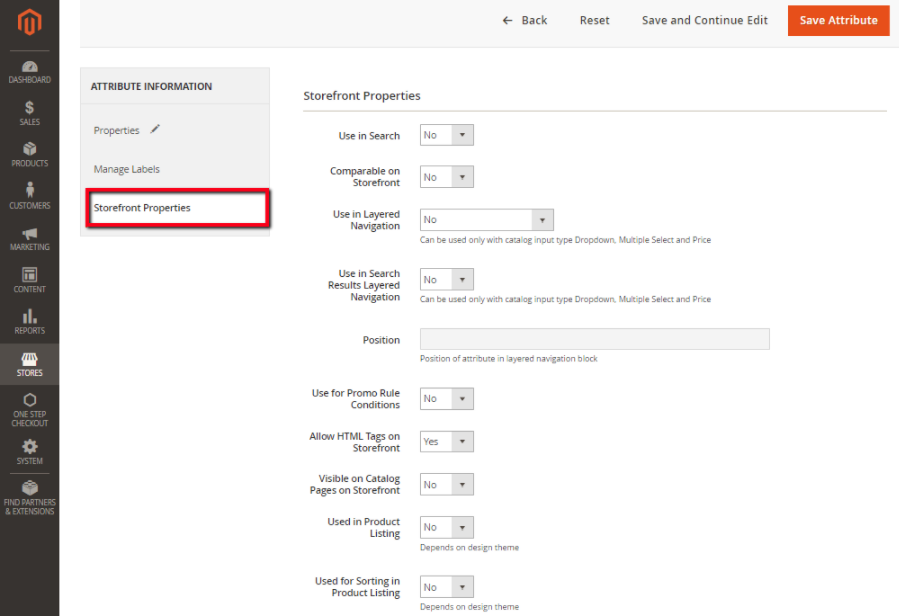
- Use in Search: select Yes option to allow this attribute to be available to search
- Comparable on Storefront: choose Yes to add the attribute into Product Compare function
- Use in Layered Navigation: set Yes to enable customers to use the attribute as a filter
- Use in Search Results Layered Navigation: select Yes if you want to display the attribute in layered navigation on the result pages
- Position: fill in with a number to determine the position of the attribute in the layered navigation block
- Use for Promo Rule Conditions: choose Yes to apply the attribute in price rules
- Allow HTML Tags on Frontend: turn on this function by selecting Yes, so the content will be formatted with HTML
- Visible on Catalog Pages on Storefront: allow the attribute to be included in catalog options by choosing Yes
- Used in Product Listing: select Yes to put the attribute into product list
- Used for Sorting in Product Listing: set Yes to this field to include the attribute in sort parameters
After finishing this configuration, click on Save Attribute to complete.
In short, learning how to create new attributes for your stores can provide your customers with more diverse options when looking for their needed products. This is a great way to satisfy your customers as it gives them the feeling of making personal choices. If you care about increasing customer satisfaction by offering more personalized options, Mageplaza Layered Navigation extension is highly recommended for you. With this extension, buyers can search for their wish items.
Read Also
F2 Free Magento Theme from TemplateMonster Compared to Luma
Get more to your email
Subscribe to our newsletter and access exclusive content and offers available only to MonsterPost subscribers.


Leave a Reply
You must be logged in to post a comment.