How to Enable SSL in WordPress and Protect Your Clients?
Today we will learn how to secure your WordPress website with the help of an SSL (Secure Socket Layers) certificate.
Do you need SSL at all?
SSL certificates are not free, that’s why you should think twice before getting them for your domain. This technology is used for protecting sensitive data in the first place: credit card numbers, social security numbers, passwords, etc.
This type of security is highly beneficial for:
- Online stores;
- Software-as-a-Service (SaaS) businesses;
- Social networks;
- Banks;
- Forum boards;
If your website is a simple blog, which never processes sensitive data, you don’t actually need an SSL certificate (at least, until Google decides that it is necessary to have one in order to rank high in its search results).
The process of acquiring an SSL certificate varies for each individual hosting provider and Certificate Authority.
So, let’s assume that you have already purchased one of such certificates for your domain. Now we are going to make sure it works smoothly with your WordPress website.
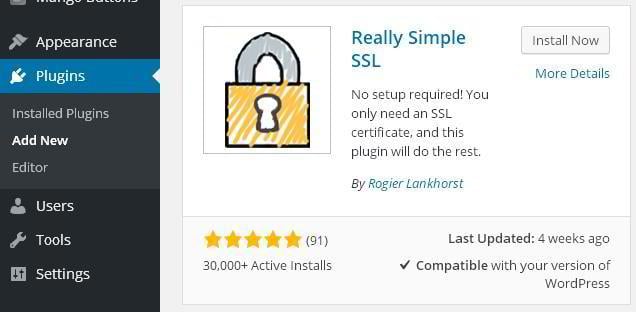
We will use this plugin:

Really Simple SSL is a highly rated tool for making your WordPress-based website fully compatible with Secure Socket Layers. It changes the URL of your website from http:// to https://, and also fixes all the internal links, and redirects all the incoming requests to https://.
To install this plugin go to the Plugins > Add New section of your WordPress dashboard.
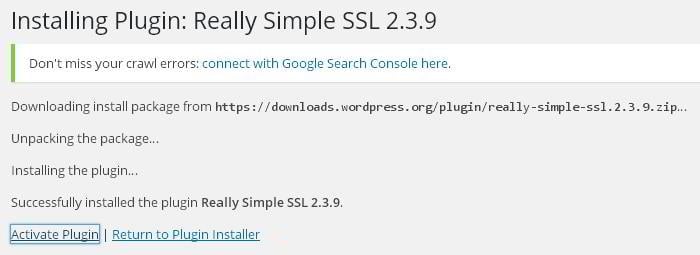
Here, search for the ‘Really Simple SSL’ plugin, install and activate it.
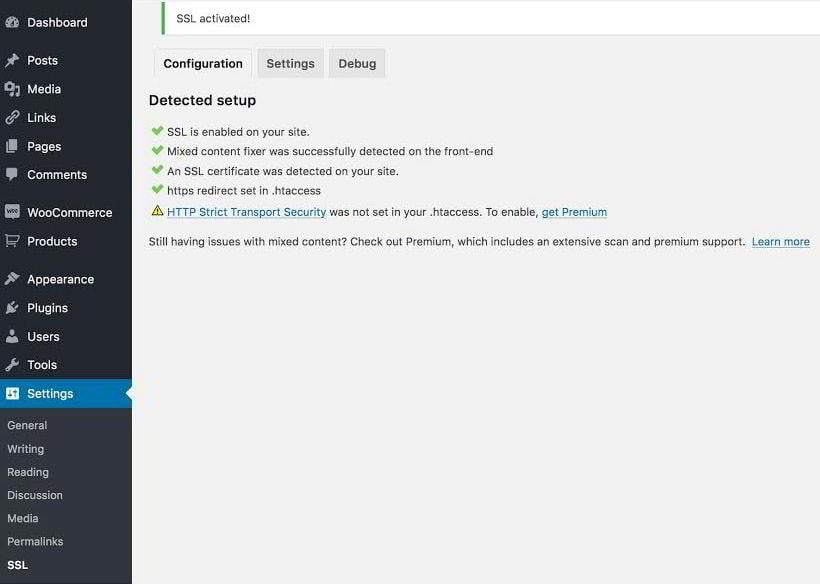
To check the status of the plugin, go to Settings > SSL, or Plugins > Installed Plugins > Really Simple SSL > Settings.
Here, hit the ‘Go ahead, activate SSL!’ button.
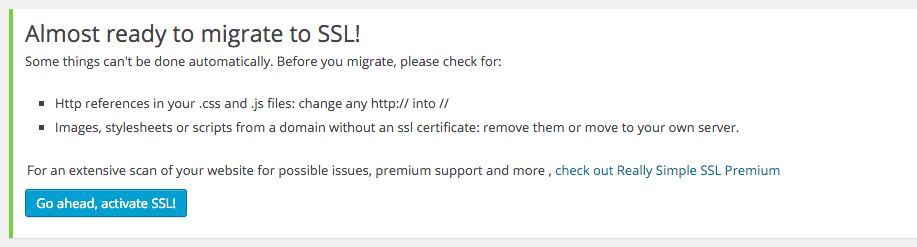
That’s all you have to do (basically, that’s why it has ‘Really Simple’ in its name). Congrats, your WordPress website is officially secure!
Now you know how to set up your WordPress website for compatibility with Secure Socket Layers. Stay with us and learn new WordPress hacks and tricks every day!
[mc4wp_form id="74928"]

Coffee addict, social media junkie, data miner contributing technical articles and informative pieces to MonsterPost. Reach him on Medium.
Get more to your email
Subscribe to our newsletter and access exclusive content and offers available only to MonsterPost subscribers.

Leave a Reply
You must be logged in to post a comment.