Google Slides Timeline Template: Step-by-step Guide
- How to Make Google Slides Timeline Template
- Step #1: Get Hold of Your Template
- Step #2: Copy the Theme, Rename It
- Step #3: Get Rid of Extra Slides
- Step #4: Add or Modify Text
- Step #5: Adjust Coloring
- Step #6: Replace Icons
- Step #7: Removing/Adding an Element
- 15 Stunning PowerPoint and Google Slides Timeline Templates to Present Your Project Successfully
- Now Over To You
They say that a ‘picture is worth a thousand words’. This holds particularly true if you need to present a series of events in a logical manner. For this purpose, take advantage of building a Google Slides timeline template.
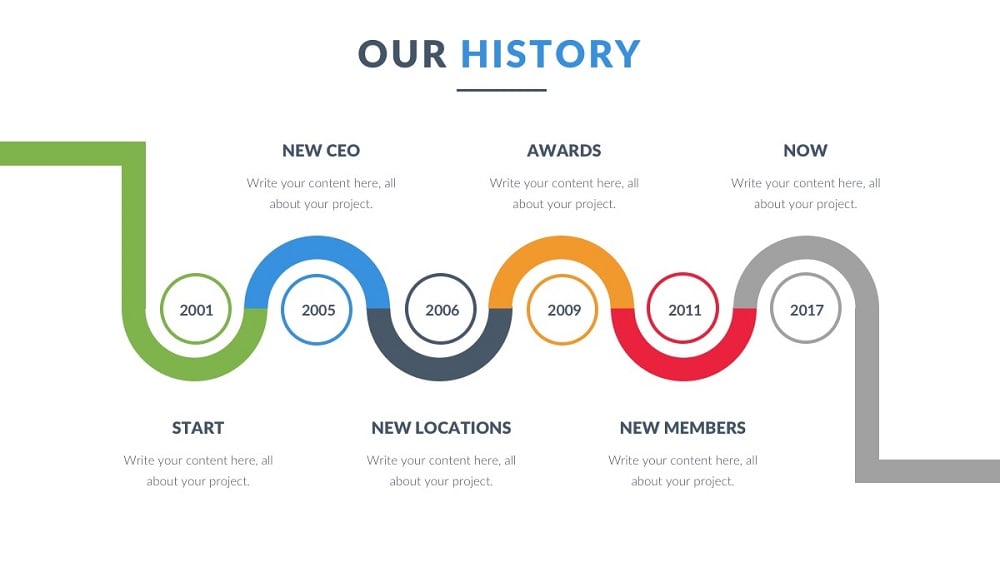
In fact, building a chronology from scratch may be a pretty time-consuming task for a newbie. Moreover, even if you work hard on it, it’s still likely to look less polished than professional designs. That’s why it makes perfect sense to create your timeline using a Google Slides theme. This will save you time designing a custom timeline and provide a sound basis for your upcoming presentation.
Are you eager to learn more about working with Google Slides? Then, check out our ultimate guide.
How to Make Google Slides Timeline Template
Step #1: Get Hold of Your Template
You should start by finding a nice theme for Google Slides, the design of which matches your needs. Make sure that the theme you choose includes one or several chronology slides.
The good news is that you don’t have to look far to find such a theme. A rich collection of awesome themes for Google Slides is available in the TemplateMonster marketplace.
For example, the Varied template includes multiple designs for timelines and planning slides. Moreover, this presentation bundle offers you more than 200 awesome slides in total. With it, you’ll polish not only the chronology slide but other slides as well.
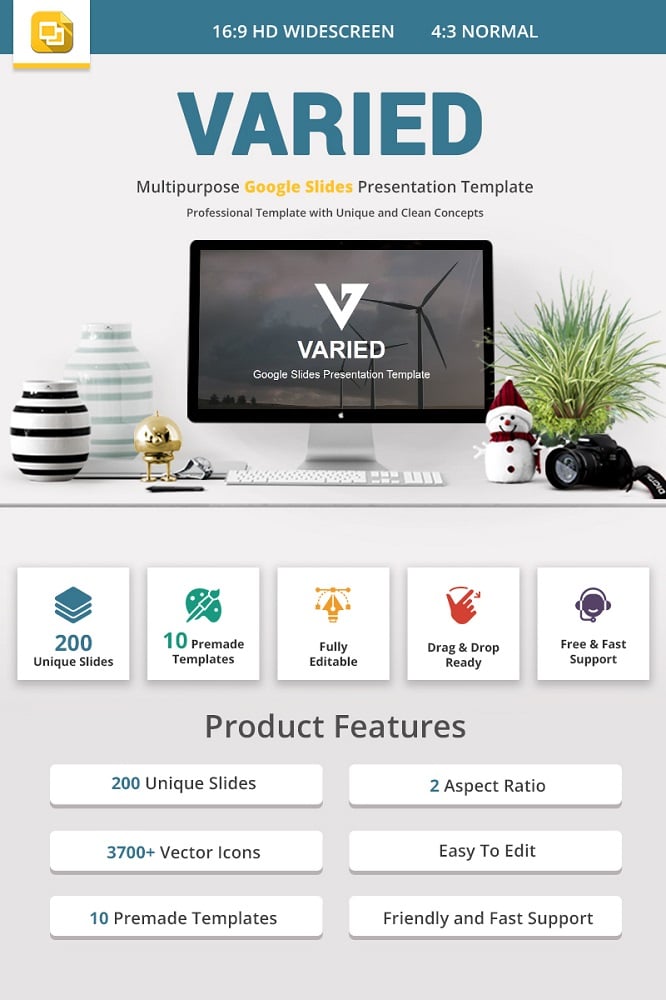
Once you’ve purchased the theme of your choice, download and unzip it on your PC. Inside, you’ll see the presentation folder. Upload this folder to your Google drive.
Step #2: Copy the Theme, Rename It
Your template is already on Google Drive. However, don’t edit it directly if you plan to use this template any time in the future. Instead, create a copy of it, from which you’ll work upon.
To make a copy of a presentation file, right-click on it and select ‘Make a Copy’.
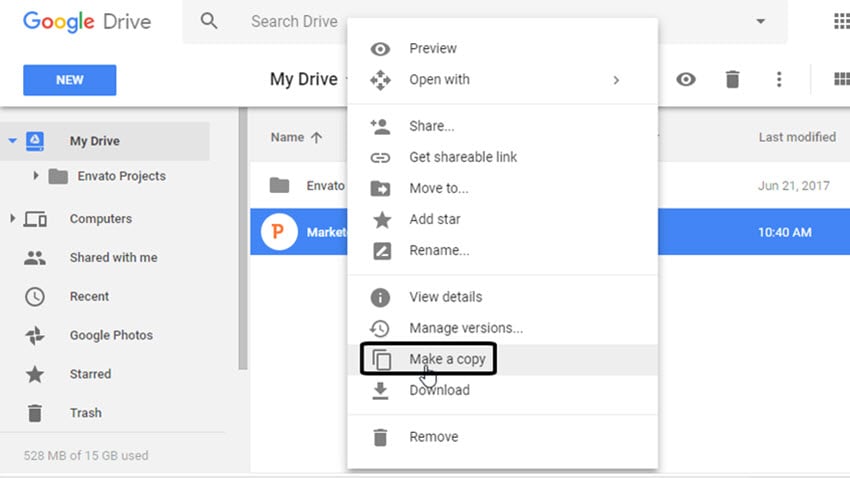
Once you’ve done this, you’ll see the file named ‘Copy of [Your Template]’ next to your existing theme.
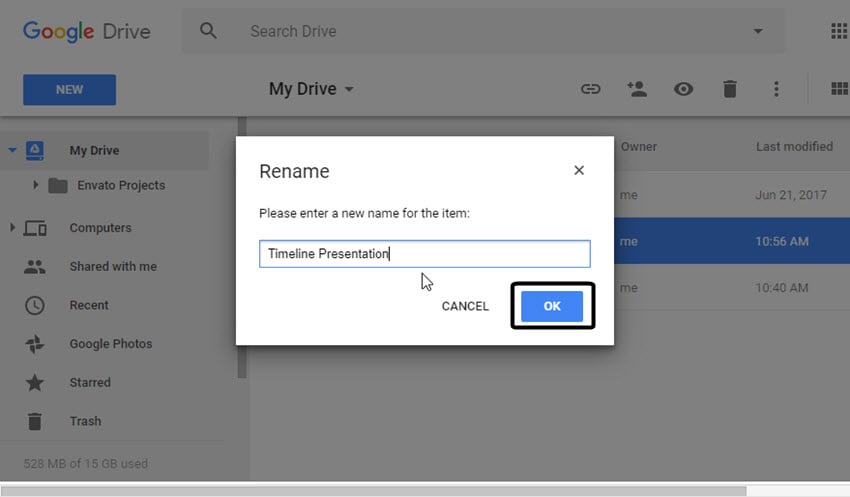
Now, right-click the new file and select ‘Rename’. Click the ‘OK’ button once you’re done entering the new presentation name.
Step #3: Get Rid of Extra Slides
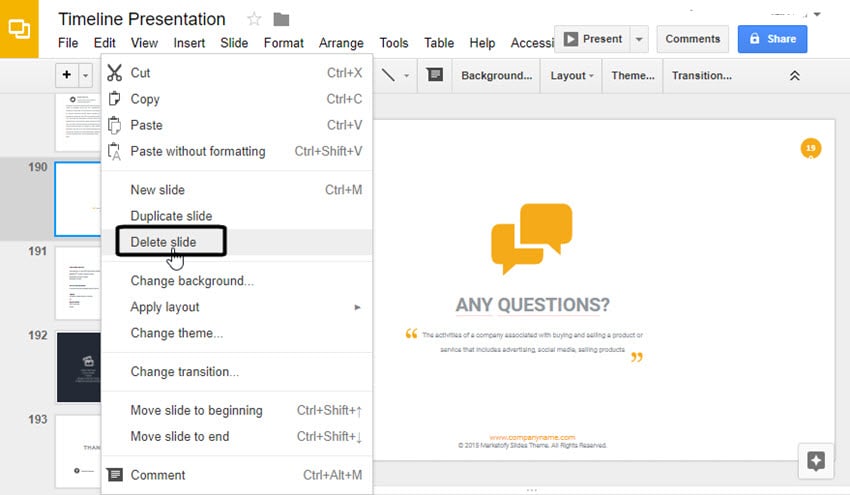
Next, you’ve got to discard the slides other than the chronology slides that you’ll use. To do this, open up your presentation. You’ll find the slides list on the left.
To remove the unnecessary slides, you just have to select all of them using Shift + left mouse button click. Next, right-click the chosen slides and choose the ‘Delete Slides’ option. Now, your presentation contains only the timeline slide you’ll be working with.
Step #4: Add or Modify Text
So, now you can dive headfirst into editing your timeline. It’s pretty logical to start with the adjustment of text, as it’s pretty straightforward.
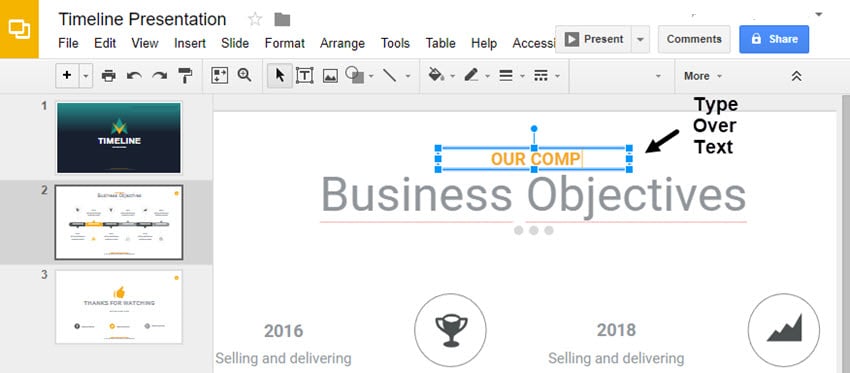
To modify a text string, select the words you want to replace with a mouse. Type in your custom text instead. You can remove the text when needed. To make a string of text larger or smaller, click one of the blue box holders and move it accordingly.
Step #5: Adjust Coloring
Fortunately, with Google Slides, you can easily re-color both text and graphics. Let’s see how you accomplish these pretty awesome adjustments.
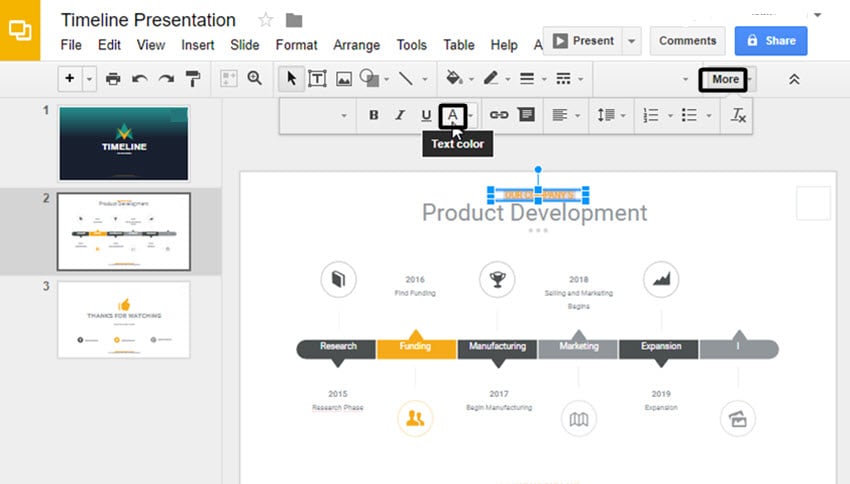
To re-color a certain string of text, you’ve got to first select it with your mouse. Then, press ‘More’ on the top right and you’ll see the ‘A’ sign within the panel. This is the tool you need to recolor text.
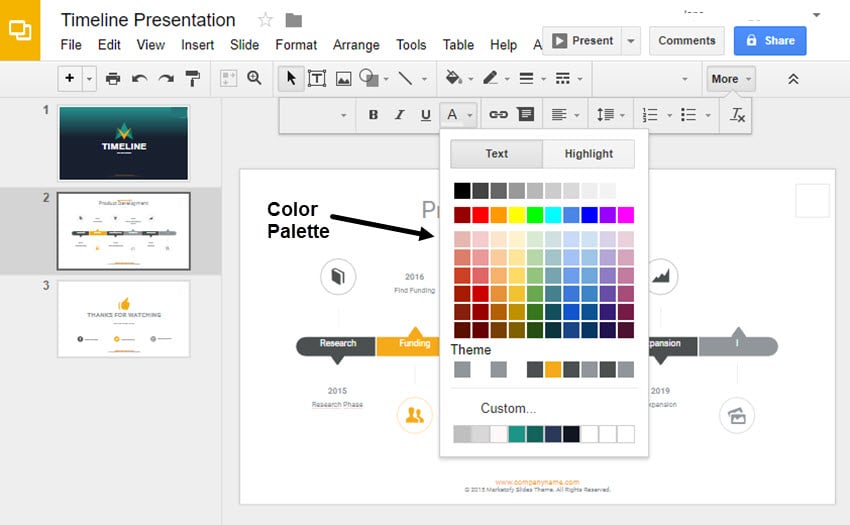
After you click the ‘A’, you’ll see the color palette drop-down in front of you. Opt for the color you want to apply.
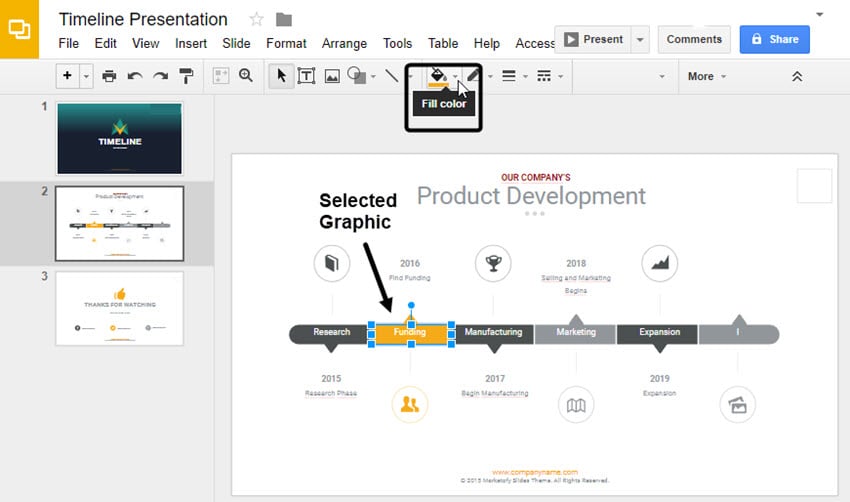
Now, let’s assume you want to change the color of a slide block. Click it and choose the ‘Fill Color’ sign on the top. Select and apply the needed color.
In our case, we see that the small arrow on top remained unaffected. No worries! It’s just a separate element that you also need to click and recolor.
Step #6: Replace Icons
There’s a chance you won’t be happy with the icons within the chronology slide of your template. That’s ok, you can customize them.
First of all, select the icon that you want to replace. Then, right-click on it and select the ‘Cut’ option. The unfitting icon is now gone.
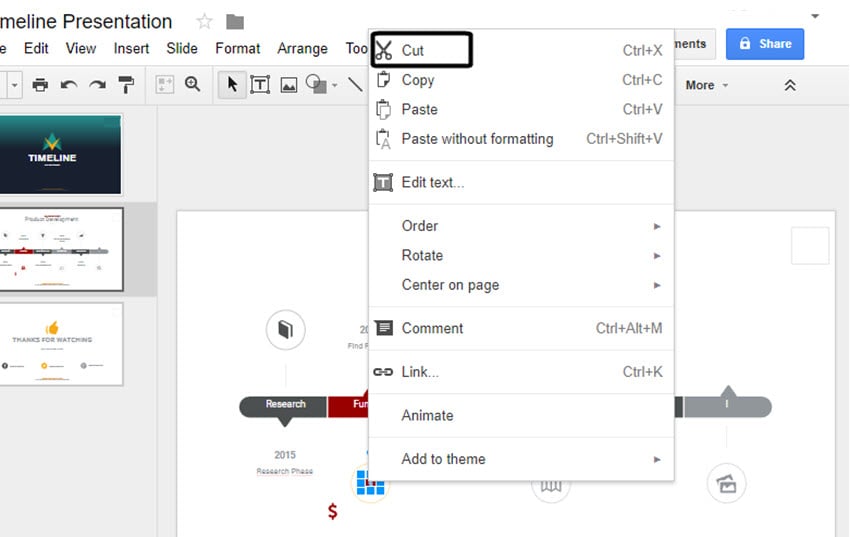
It’s time to add your alternative icon. Most likely, you can find a set of icons within your template files. Copy the desired icon from the folder with icons and paste it directly to the necessary place within the slide. If you have a custom icon that you’d like to employ, you can insert it to your slide in a similar manner.
Step #7: Removing/Adding an Element
The number of Google Slides timeline sections in the template may differ from the one desired by you. Let’s see how you can control the number of slide blocks without distorting the professional look of the chronology.
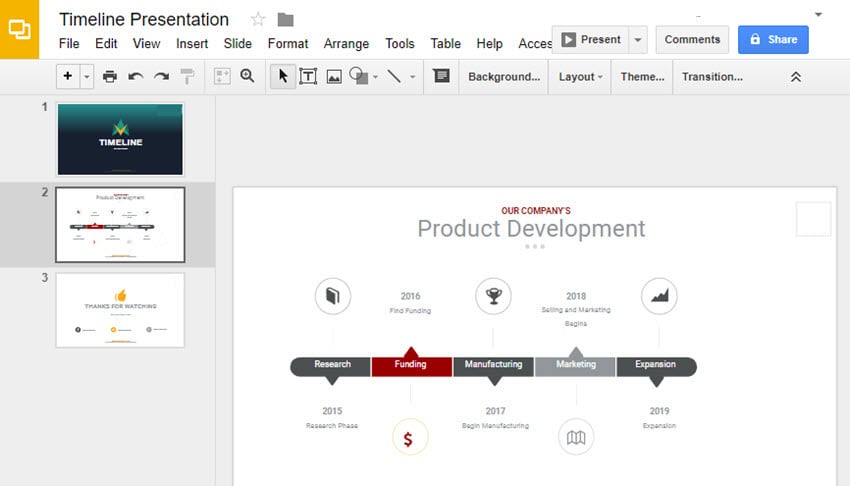
To remove the final timeline block perform the following:
- Delete the penultimate fragment of the chronology, its text and icon.
- Move the last fragment to the left to fill in the gap. Move the icon and text.
- Adjust the text and coloring of the last block to match the slide style.
To add a block to the timeline, perform the following:
- Select and move the existing chronology to the left/right.
- Copy one of the existing blocks to where you need the new block to reside.
- Adjust the coloring and content of the new block to match the formatting of your chronology.
15 Stunning PowerPoint and Google Slides Timeline Templates to Present Your Project Successfully
There is a wide variety of Google Slides timeline templates in our collection. Each of them is unique and has its characteristics. Today we are going to have a look at the best free and premium representatives.
Build Creative - Construction And Architecture PowerPoint Template
To present the services clear and straightforwardly is essential for any construction business. With this template, it will be easy to set up the right speech structure, show your best projects, and represent team members. As the layout is fully editable, you will be able to add, remove, and emphasize any crucial block and step of your presentation. And with an elegant timeline option, there will be no doubts that all the plans will come true.
Touch - Minimal Stylish PowerPoint Design
If you are a creative person and would like to present your latest works, you are lucky to come across this magnificent design. It has multiple layout options, so you can choose the one that suits you best, whether the classic black-and-white one or stylish neon-blue. It will correctly depict the mood of your art and concentrate all the attention on it.
Educated - Education Creative Keynote Template
When it comes to education, it is necessary to understand that you should impress your future students at first glance. It will light them up with the wish to study. This template is made with care about the viewer, and it looks modern and clear. You can present all the benefits of your college and show different faculties’ plans with the timeline. And, of course, get your students acquainted with future professors!
Elegant Business Plan PowerPoint Model
Any startup needs an outstanding initial presentation to evoke the interest of the investors. The slideshow should be attractive, exceptionally informative, and catching. With this SmartTech template, you will excite your viewer. It has a bright, minimalist layout with a calm color scheme and infographic options, so it will be easy to show your plans and perspectives.
Creative PowerPoint Template With Nature Elements
Pastel colors, organic elements, and excellent structure - everything in this template is made for your speech’s convenience and maximum informational content. This design will be a perfect tool for presenting your creative works; it will emphasize their originality and frame them beautifully. Plus, you can show essential statistics and action steps for the future with various timelines and infographic options.
Peach Color Minimalist Google Slides Template
This attractive option will be a perfect match for fashion and beauty business presentations. It is warm, calm, and serious at the same time. Due to versatile layout options, you will make a presentation remarkable and unique by combining them or changing them according to your needs with an easy drag & drop editor.
Pink-And-Marron Science PowerPoint Template
The elegant layout of this template is made following the latest trends in the fashion world. Minimalist abstract pictures, pink tones combined with a clean white background make this template truly attractive and unique. Besides, you will receive more than ten slides, including a timeline model and template documentation. Make your speech impressive with this beauty!
Bright Business PowerPoint Design
Such a design will surely not leave any viewer indifferent. It is made in neon colors, which is very fashionable and stylish, and besides, it looks even more unusual with abstract geometric shapes. With this template, you will receive more than 15 slides for various content - informative, infographic for statistics, and illustrative to demonstrate your works and successful projects.
Minimalist Geometric Black-And-White Google Slides Template
At first sight, this template makes you fall in love with its simplicity and straight shapes. Then you see the additional options it has, such as team members, diagrams, timeline, and fall in love with it even more! The calm design, combined with abstract geometric shapes, makes it memorable and distinctive. With this template, it will be easy for you to show all the advantages of your project and achieve success.
Elegant PowerPoint Template With Geometric Shapes
This template will draw attention to your speech. It looks simple, and with a sense of style, it is pleasant to look at it. And due to its easy editing, it's also a pleasure to work with. It has an excellent structure that will help you with the speech aspects. You will also receive documentation with tips on usage for the template.
Cartoonish Timeline PowerPoint Template
Everyone chooses the style that is closer to him and what he likes. In this template, you can find the perfect combination of the serious and the comical, thanks to the cartoonish renderings. This option is suitable for brave and creative guys who like to experiment with design and create something unusual.
Soft Purple Roadmap Google Slides Design
Looking for a trendy, modern template for one that will highlight your business? This beauty is exactly what you need! You will get an exciting design for your speech with beautiful visual graphics and timelines that make your intentions clear to any viewer.
Stylish Education Google Slides Model
Would you like to make a cool presentation for your school and save time? Download this template completely free of charge and edit it according to your needs. It has a consistent style, excellent color palette, and harmonious block placement.
Now Over To You
Today, we’ve taken you through the journey of customizing a template to jumpstart a delightful Google Slides timeline. Now, you know how to work with the template files and modify the blocks, icons, colors, and text of your chronology.
Need some ultimate guidance on working with Google Slides? Learn how to craft a splendid presentation with this detailed tutorial.
Have you tried creating a timeline using a premium Google Slides theme? Share your experience in the Comments.
Stay tuned for more!
Google Slides timeline template FAQ
You can show any chronology of events using the timeline. Still, it is always better to show a picture than to take a slide with a lot of information. A timeline is basically a chart, so you need to select a chart in Google Docs, and fill it with all the relevant data.
There are many ways to create a timeline. But the most common are: insert the timeline into PowerPoint from another program (create, copy, and paste), and create the timeline with SmartArt (open SmartArt, select the most appropriate chart, and edit it).
Templates are always the best choice if you want to save your time and effort. And TemplateMonster can help you with that. Our site offers a huge number of templates with features that will provide you with fast and comfortable work. You can use the following templates for the timeline creation: Process Flow Diagram Google Slides, Digital Marketing Google Slides, Varied Google Slides.
Read Also
How to Embed a YouTube Video in Google Slides
Google Slide Tutorial: How to Craft a Splendid Presentation
100 Best Business Presentation Templates. Cool! Great! Awesome!
Get more to your email
Subscribe to our newsletter and access exclusive content and offers available only to MonsterPost subscribers.


Leave a Reply
You must be logged in to post a comment.