


- Step One: Preparation
- Step Two: Adding the Background Image
- Step Three: Adding Scrolling Effects
- Step Four: Working with the Heading
- Step Five: Creating Motion Effects
- Final Thoughts
If you work with Elementor Page Builder, you know that this visual editor significantly accelerates the process of creating a website as well as allows those users who do not have any coding skills to create a functional, professional, and fancy-looking site. So if you have no experience in coding but you want to (or have to) launch a website either for your company or a personal blog, a lovely Elementor theme is no doubt the way to go for you.
Even though this very tool is super easy in use, you still might face some problems when you want to add some of these fancy effects to your site. One of these effects is hero section scrolling, so how do you add a flawless scrolling effect that will make your site look super fancy? And how do you create cool elementor motion effects? Well, this is exactly what we are going to figure out today, so keep reading.
Step One: Preparation
Open Elementor Editor and create a section. Set the Fit to Screen height, however, if you want the effect to work on mobile devices, it is better to set the Minimum Height option and set the VH to 100.


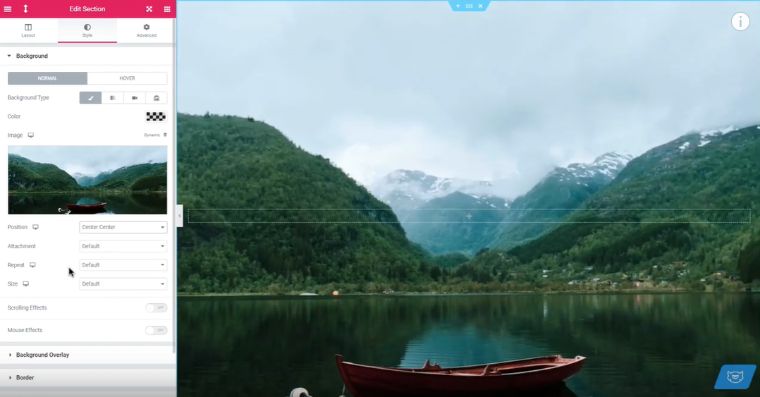
Step Two: Adding the Background Image
To add a background image, you have to head to Style and select the image you need from your computer. After you are done with that, you can set the position (Center), size (Cover), and attachment (Fixed). With these settings, the image will stay still on the background while other elements scroll.

Step Three: Adding Scrolling Effects
Here you want to start with the Transparency section, so you click on Transparency, head to the Direction section, and select Fade Out. After that, set the Viewpoint at about 52% for the first slide and 80% for the second one. When you are done with that, head to the Blur section > Direction > Fade Out > Level (set the level of blur you need) > Viewpoint (set at 52% and 80%).

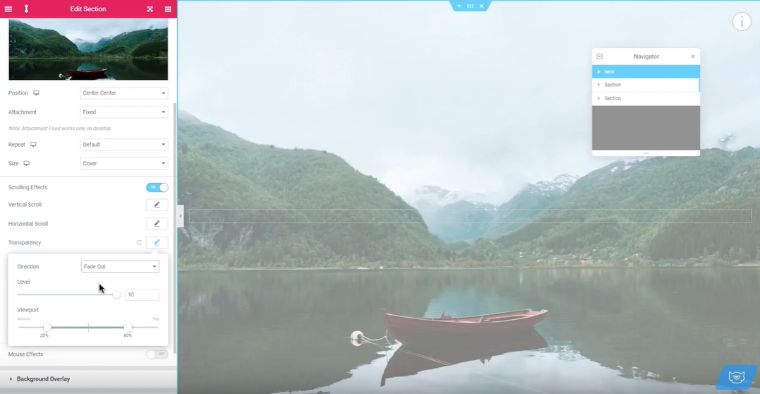
After that you want to go to the Scale section and make sure that the Direction is at Scale Up, the Viewpoint is 52%/80%, and set the Speed at 3 or 2.
To make the effect smoother, you should go to Settings > Style > Body Style and change the body color so that it fits the color of your other section’s background. In this way, the transition between the sections is going to be flawless and discreet.


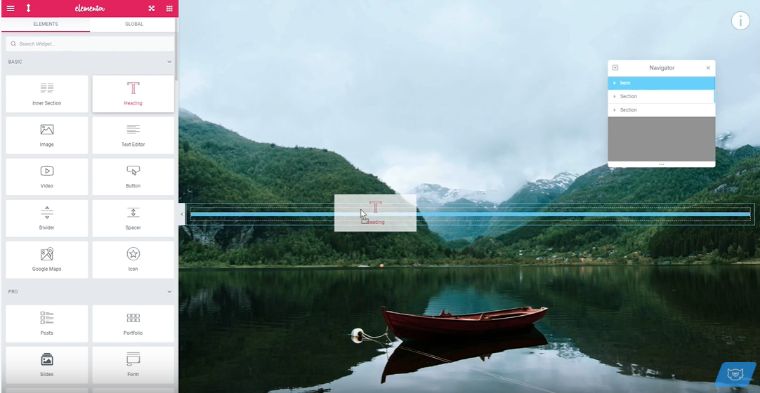
Step Four: Working with the Heading
You probably want to add an animated heading to your page, so here is how you can do that. Head to the Elements menu and click on Heading to add it to your page. As the heading is on your page, just click on it so you can start editing it. Change the title and add a link if needed. Then go to Style and choose the color, size, and font so the heading will perfectly fit the design of your entire website. You might also want to align it to the center, but this choice is completely up to you, so feel free to experiment.

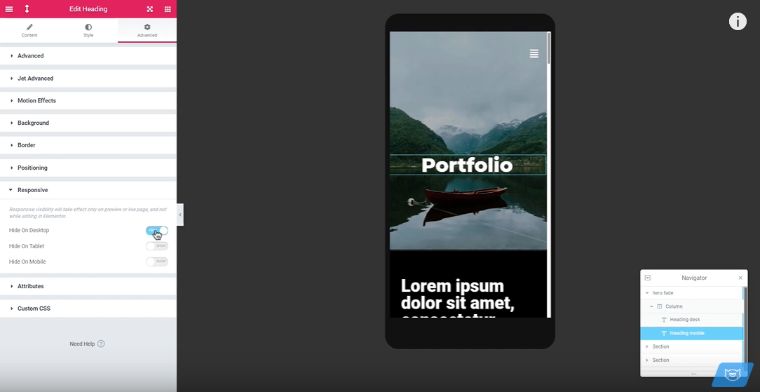
Head to the Advanced Settings > Positioning > Fixed, then go to Offset and set it at 45. In this way, the heading will not move on the page. However, on the mobile version of your website, this very setting will not work. If you want to create two versions of headings, go to the Advanced Settings > Responsive and click on the Hide On Tablet as well as on the Hide On Mobile.
Then create another heading for your mobile version of the website, go to Positioning > Default, and in the Responsive section choose Hide On Desktop.

Step Five: Creating Elementor Motion Effects
First things first, you have to accept the fact that using motion effects on mobile devices is not a good idea simply because they make a mobile version of the site cluttered and difficult to navigate, which usually annoys the users. We are going to work on the motion effects for the desktop versions.
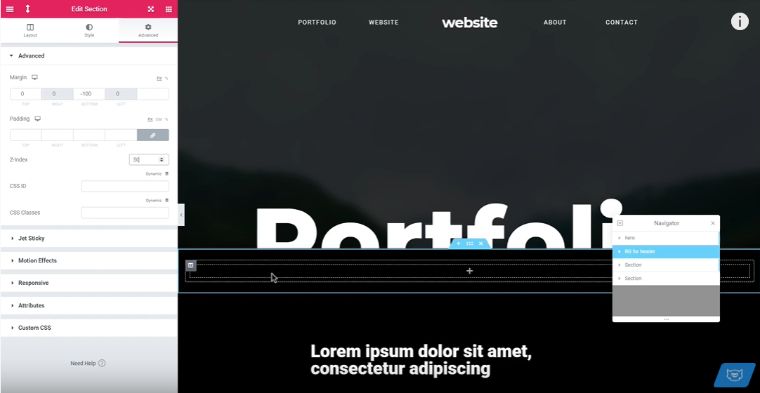
To add some fancy motion effects to your site, you have to head to the Advanced Settings menu and open the Motion Effects tab. Click on your header, open Advanced Settings, and set the Z-index to 50 so this section will be on top of the other sections on the page.
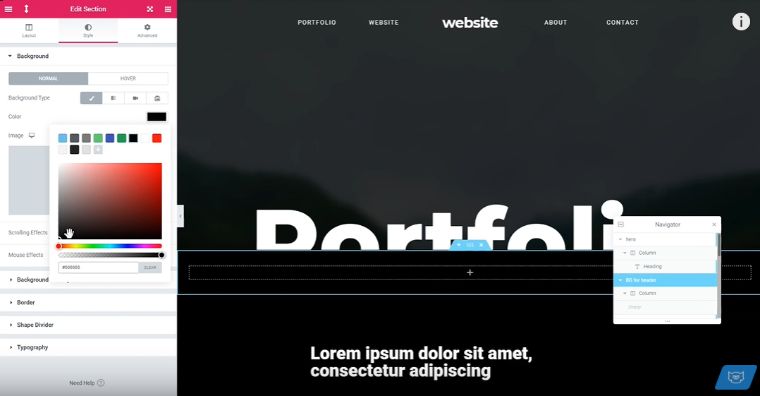
Then go to Motion Effects tab > Sticky > Top > Sticky On > Desktop. After that head to Responsive > Visibility and switch on Hide On Tablet and Hide On Mobile. When you are done with that, change the color of the heading so it matches the color of your background. So now you have a sticky header that moves along with the page as it scrolls.

Final Thoughts: elementor motion effects
As you can see, working with Elementor is super easy and even exciting, so by now, you should be a motion effects expert. If you would like to get more details as well as more visual explanations, make sure to check out this very video tutorial. You might also want to visit TemplateMonster YouTube channel and find even more interesting videos and tutorials dedicated to website building and web design, so do not hesitate and tune in.
Did you succeed using this guide? Let us know in the comment section down below!
Read Also
Neomorphism Elementor Pro Tutorial
Elementor Contact Form Guide: How to Style and Customize Contact Forms with Elementor Page Builder
3 Easy Ways to Create Parallax Effect [Free Elementor Webinar]
4 QUICK Elementor Tutorials Under 5 Minutes + 2 Motion Effects Explainers