Elementor Contact Form Guide: How to Style and Customize Contact Forms with Elementor Page Builder
How to Style and Customize Elementor Contact Form with Elementor Page Builder?
- Benefits of Using Contact Form or Why You Need the One on Your Website?
- Step-by-Step Guide: How to Style and Customize Elementor Contact Forms
- How to Add Contact Form 7 Using JetElements Add-on for Elementor - Tutorial
- Review of Top-5 WordPress Themes with Contact Form Integration
Benefits of Using Contact Forms or Why You Need the One on Your Website
If you have a website based on WordPress, you should know that the platform features a neat and convenient contact form. It does not matter if you run a personal blog or business website; a contact form may improve the two-way communication with your site users and subsequent engagement. Prior to going through the instructions explaining how to style and customize the contact form, let’s check out the benefits you’ll get using this kind of web form.
- Get feedback. The contact form is an efficient way to gather reviews from your clients or readers. This will show you what mistakes you make and help you improve them. Feedback also points out the strong features of your website that you may be proud of.
- Filter spam. When you have a contact form, you should not post your email address somewhere on the site; this way, spammers have no chance to attack your email box. A contact form only lets relevant users get in touch with you for a significant reason.
- Contact forms can be used for feedback, support requests, business proposals, sales requests, etc. This simple kind of web form can be multipurpose.
- It decreases your bounce rate, which makes the site’s ranking much better.
- Improved conversion rate. A contact form keeps the visitors on your site longer to explore it.
These and many other advantages prove the idea of using the contact form on the website for better performance.
Today, we are also glad to present you the ultimate pack of items needed for websites building. This is ONE subscription service including more than 8500 web elements in a single bundle. You may get plugins and extensions, WordPress themes, graphics, CMS, HTML, and another kind of templates. Everything you might have ever dreamt about at the same place for $19 monthly.
Furthermore, you may use different items as many times as you need for as many projects as you work on. In case you are a reader of MonsterPost, you have a great chance to save 5% on a subscription. All you have to do is just apply promo code BecomeThe1 in the corresponding field on the checkout page.
Step-by-Step Guide: How to Style and Customize Elementor Contact Form
Since we already know about the advantages a contact form brings, let’s move on to the step-by-step guide explaining how to create and edit it. In order to do that, you will need several tools such as Contact Form 7 and JetElements plugin or JetFormBuilder. We only need the first tool, because we’ve selected Imperion WordPress theme that already comes equipped with JetElements. This add-on allows you to expand the possibilities of Elementor Page Builder, providing a variety of useful widgets.
- Go to your WordPress dashboard, hover on the ‘Contact’ option and select ‘Contact Form 7.’
- Create an e-form. If the theme you use for your website comes with a premade form, you may not need to create the one on your own.
- Create a new section and split in two.
- Copy the columns and paste them below.
- Navigate to Elementor Editor > Elements > JetElements. Once the plugin is installed, you’ll get all the widgets in the editor.
- Find the Contact Form 7 widget and drag and drop it to the new column.
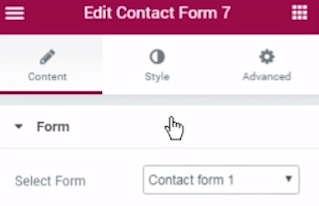
- Once done, you’ll be taken to the ‘Edit Contact Form 7’ section. On the ‘Content’ tab, you can select the style in the ‘Select Form’ dropdown.
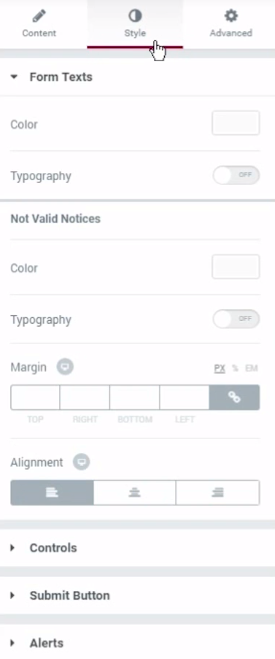
- Now go to the ‘Style’ tab. Here you can add a background to your contact form and tweak the typography. In the ‘Controls’ option, you may customize the look of the field, and while choosing the ‘Submit Button’ option, you can tune up the submit button placed on the bottom of the form. In the ‘Advanced’ option, select the padding.
These are the principal steps that should be followed to style and customize the Contact Form on your web resource.
Visit the recently launched Elementor Marketplace, which offers everything needed for working with Elementor — from WordPress themes to plugins and three types of templates. Here, you will also find the JetElements add-on for your Elementor-built site, which will help you create and experiment with the look of your contact form. Further, you may find a review of recently added WordPress themes supplied with Elementor Page Builder and the JetElements plugin.

How to Add Contact Form 7 Using JetElements Add-on for Elementor - Tutorial
Usually, a website owner needs some type of feedback form to interact with their visitors and users. One of the best is Contact Form 7. It is a simple and flexible feedback form widget. So, in this article, I will help you add Contact Form 7 to your website with the help of JetElements add-on for Elementor. Follow these step-by-step instructions and the installation will be easy for you.
- Login to WordPress Dashboard and go to Pages > All Pages.
- Select the necessary page and click Edit with Elementor option.
- Since you’re going to create your contact form at the bottom of the page, scroll down and add a new section.
- Then proceed with customizing its appearance in the menu on the left. You can edit three sections: Layout, Style, and Advanced.
- In the Style section you can select the background type and then choose and upload an image from the Media Library.
- With the help of the Advanced section, you can apply custom padding to your section.
- After that, go to the Elements search field, find Contact Form 7 widget, and drop it to the section area.
- On the left in the Content tab, you can select one of the existing contact forms from the dropdown list. Please note, that you can create a contact form template using a Contact Form 7 plugin beforehand.

- To style its appearance go to the Style section. It contains all kinds of customization settings which can help you make the contact form look really majestic.

- Let’s begin with styling up form texts in order to make them more readable.
- First, choose an appropriate color using the Color Picker.
- To change text typography, enable this option by toggling it to “yes”.
- Now you can see the additional settings, where you can select the needed font size, font family, and the weight.
- Below this, you can also customize invalid notices. Just select the color of the notice, change the font typography, and apply your custom values including margin and alignment.
- In the Controls block, choose a normal mode and switch the placeholder color to any other you like.
- Another step is to change the padding - just input the needed values in pixels in the corresponding fields.
- Also, you can change the margin values in the same way as the padding ones.
- Then select a border type and input your custom border width. In addition, you can change the border color to the one you need.
- After that, toggle the Box Shadow option to “yes”. Customize the shadow color, its transparency, the shadow spread, and the shadow position according to your needs.
- Now let’s customize the submit button.
- Change its color in a normal mode and enable the typography options for the button texts.
- Proceed with changing the font size, font family, font weight, and padding values.
- Also, you can set a custom border radius to make the button angle small and smooth and a certain border type.
- Now let’s return to the beginning of the tab and change the button settings in the Hover block, including button and button text colors.
- And the last step is customizing alert style.
- Here you can change the alert typography options, apply a custom border radius for the alert box and change the alert colors.
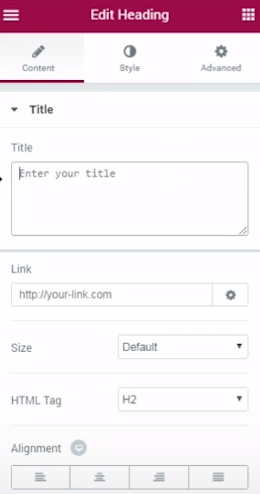
- Now your new contact form is ready and you can add a heading module just above it to create a heading that will engage the visitors to use it.
- Go to Elements Panel and search for the Heading widget.
- Grab it and drop it onto a place where you want to locate your heading.

- Change the default text in its Content section to a new one.
- Then go to the Style section and change the heading text color, alignment, and other style settings.
- Also, you can change the heading text typography to the one matching your contact form.
Review of Top-5 WordPress Themes with Contact Form Integration
Eventagy

Eventagy is a WordPress theme specifically developed for event agency websites. It is a perfect choice if you want to make your site steal the show and spread the word about it on the web. Equipped with Elementor Page Builder, the template allows you to create a custom content layout and apply different modules to your page. In conjunction with the JetElements plugin, the editor lets you create a neat and user-friendly contact form, enabling the visitors to get in touch with you on the fly. Meanwhile, the JetBlog add-on gives you an opportunity to establish a striking and professionally-designed blog. Among other helpful features available with the package are the following:
- A variety of pages for any purpose: Homepage, About, Services, Event, Blog, and Contacts.
- Mobile-first paradigm makes the theme a perfect piece for both small and large screens.
- A bulk of high-quality images are available for free.
- JetMenu plugin allows you to create a mega menu on your web page.
- A wide range of headers, footers, and blog layouts are available.
- WordPress Social Login allows your visitors to sign in via their accounts on various social networks.
- TM Timeline and much more.
Jointall
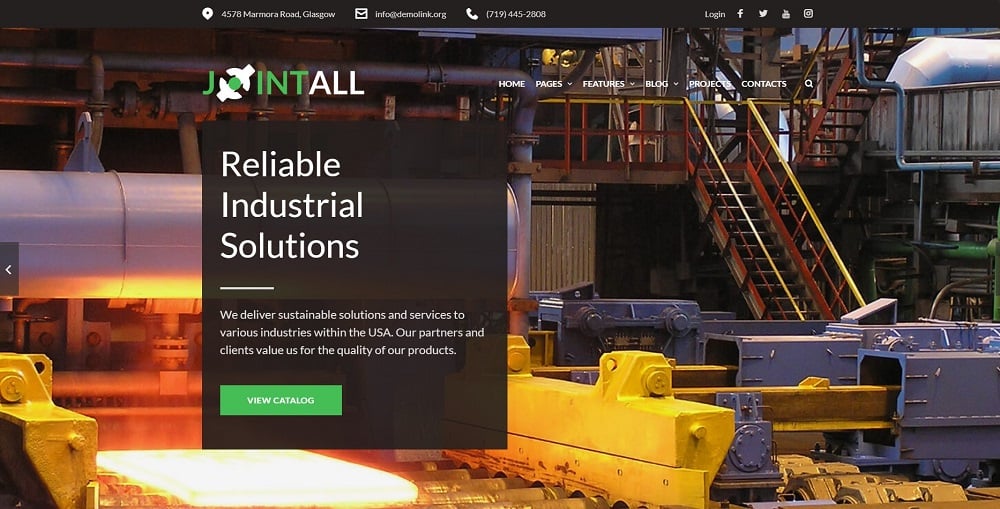
Jointall is a perfect solution for those running construction companies and launching a website for them. Going with this WordPress template, you’ll find a built-in Elementor Page Builder, which allows managing and customizing the content and setting up the information without any coding skills on your side. Elementor is supplemented by the JetElements plugin, which helps you apply different custom blocks to the web layout, including contact forms. Let’s check out the rest of the features in the list below:
- A complete package of widgets like Carousel, Google Maps, and many others for the Elementor editor.
- JetMenu plugin allows you to create a responsive mega-menu without any coding experience.
- WordPress Live Customizer enables edits in real-time.
- Google fonts integration lets you make your site look distinctive.
- Parallax Effect gives your visitors an illusion of depth in 2D environments on your website.
- Newsletter Popup and MailChimp integration.
- Ecwid package included allowing you to sell goods and services directly from the website.
Investory
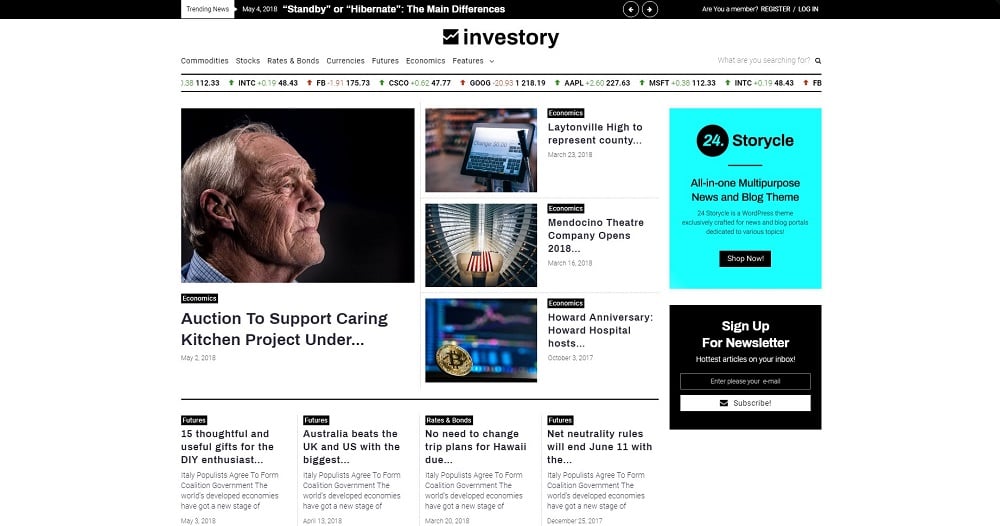
Try this mobile-friendly WP template for your corporate blog website. It is equipped with a drag-n-drop Elementor Page Builder that allows you to create custom page layouts without touching a single line of code. In addition to Elementor, you will also get almost a full set of Jet plugins, including JetElements, JetBlog, JetReviews, JetTricks, JetMenu, and others. JetMenu allows you to establish stunning mega-menus and apply different content layouts to them, while JetBlog provides you with Smart Tiles or Smart List options for your blog and lets you create a video playlist. With JetThemeCore also included in the set, you have a chance to create beautiful headers, footers, sections, archives, or single-page layouts. These and the rest of the powerful features make Investory worth using to advertise your website on the web:
- Striking pages for all occasions: Homepage, Blog - Classic, Blog - Grid, blog - Masonry, Blog - Justify, Blog - Single Post.
- Tons of high res images for free.
- Easy-to-follow documentation and 24/7 premium support.
- Cherry Socialize.
- 7 Blog layouts and 10 Single Post layouts.
- Cherry Search.
- Social Options and Commenting System, etc.
Cozy Desks

If you already run a coworking center but have not built a website for it yet, then take a closer look at this bright and professionally-structured WordPress theme. It is supplied with extraordinary plugins, which add an advanced functionality to your web resource. Integrated Elementor Page Builder offers a real-time customization mode and does not require any coding skills. To complement the editor, the Cozy Desks template features Jet plugins like JetElements and JetMenu. The first allows adding various content modules to a web page, while the second one lets you create a mega-menu without much effort. A few other functions can be found in the list below:
- TM Gallery add-on gives you an opportunity to display your high-quality images on the site.
- A set of Cherry Plugins includes Cherry Team Members, Services List, Projects, and Testimonials, allowing you to make your web resource look more trustworthy.
- Responsive design makes your website adapt to any modern device with any screen size and resolution.
- SEO support helps you reach the top of search results.
- Schedule block.
- Popup Manager and much more.
24.Storycle
The 24.Storycle WP theme is not a newly designed template. It is a well-known and best-selling WordPress product that is a perfect choice for news portal websites. Getting a full range of skins can emphasize any topic you need. Built-in Elementor Page Builder provides a drag-n-drop functionality and a great set of famous Jet plugins, like JetBlog, JetReviews, JetElements, JetTricks, JetMenu, JetThemeCore, and others. With the WooCommerce package, you will also be able to build an online store easy and fast. Among other features included in the bundle are the following:
- High-end Demos available with one-click installation.
- JetBlocks plugin with its Header and Footer Builder.
- JetMenu add-on with its Mega-menu Builder.
- 10 Single Post Layouts available out of the box.
- JetBlog plugins with a Text Ticker, which allows you to display posts in the prompt form of a news ticker.
- Vertical and Horizontal Playlists available as JetBlog add-ons.
- JetTabs plugin with its Tabs and Classic Accordions blocks.
- Sticky Sidebar at JetTricks plugin.
- Extended Posts Functionality presented by Reading Position Notification, Custom User Avatars, Estimated Reading Time, Post Views Smart Indicator, Select & Share, Source & Via Options, Social Logins, and much more.
Starting A Website: What Options Do You Have? [Free Ebook]
By clicking the button you agree to the Privacy Policy and Terms and Conditions.
Elementor contact form FAQ
Yes, it does. However, for a more advanced need such as accepting payment, you still need a dedicated form builder plugin. Elementor has no built-in feature to manage the form submissions.
Contact Form 7 Widget is an Elementor addon for the Elementor page bulider. With its help, you can easily drag and drop contact forms using a drop-down list.
Open the page where you want to add a contact form with the Elementor page builder. Find the Contact Form 7 widget, and drag and drop it to the page. Choose the form template in the drop-down list.
Read Also
Top 50 WordPress Elementor Business Themes
How to Create Testimonials Using Elementor Page Builder
How To Add A Background Video To Your Pages With Elementor
How to Create Pricing Tables with Elementor Page Builder
How to Create a Countdown Timer with Elementor Page Builder
Don’t miss out these all-time favourites
- The best hosting for a WordPress website. Tap our link to get the best price on the market with 82% off. If HostPapa didn’t impress you check out other alternatives.
- Monthly SEO service and On-Page SEO - to increase your website organic traffic.
- Website Installation service - to get your template up and running within just 6 hours without hassle. No minute is wasted and the work is going.
- ONE Membership - to download unlimited number of WordPress themes, plugins, ppt and other products within one license. Since bigger is always better.

Self-taught copywriter specialized in web design, marketing, and traveling. Graduated with a degree in German and English translation. Obsessed with guides, listings, and long-read blog posts. Open for new information and strives to explore more undisclosed subjects. Social Media Accounts: Fb, Twitter, LinkedIn.
Get more to your email
Subscribe to our newsletter and access exclusive content and offers available only to MonsterPost subscribers.

Leave a Reply
You must be logged in to post a comment.