How to Create a PrestaShop Store
There might be two reasons why you are here: You either like the PrestaShop CMS or you simply missed that we have the other manuals on how to create a fully-functional store. By far we have already explained how to create a store using the WooCommerce and Shopify. Let’s review another platform that has so much to give to you!
First of all, make sure you take PrestaShop very serious, these guys are doing a great job in creating a good-looking and convenient CMS for big stores and small shops.
So today we’re going to create a store using one of our PrestaShop templates.
In case e-commerce doesn’t sound interesting to you, we have plenty of premium themes for other platforms, make sure you check out our catalog!
Have you already tried PrestaShop 1.7 themes from the digital marketplace? The collection on PrestaShop themes compatible with the latest version of the eCommerce engine keeps on growing every week. There are themes suited for all purposes imaginable. See them in action and make your PrestaShop-based web store more powerful and feature-rich!
I will show you the basics of this CMS and how to get the things moving for you.
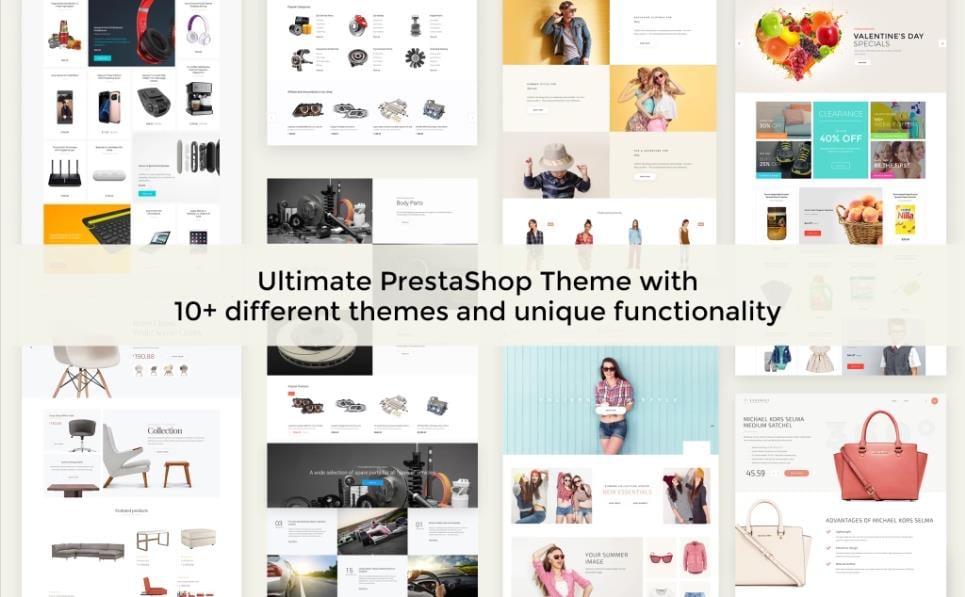
We offer plenty of premium PrestaShop templates, among themes, there are multipurpose themes that are very popular among our users. The reason is very simple: one-time payment for a template will give you more than just 1 niche template. You will get a theme that will have a few skins, these are going to provide you with an opportunity to create a store that will fit your needs completely.
Here are a few examples of what you can choose from:
NextPrest - Multipurpose Clean Ecommerce Bootstrap PrestaShop Theme
Nextprest is one of the most innovative PrestaShop themes from the digital marketplace. It runs on PrestaShop version 1.7. There are 4 ready-made demos included in the download package. Nextprest is an ever-growing eCommerce solution that it due to being expanded with more niche-specific skins with the release of every next update.
You can build your own custom-made layouts using NextPrest and Mega Layout Builder that's loaded in the theme's package. The intuitive drag-and-drop dashboard lets you create versatile layouts without any learning curve. You can boost the performance of your web store by means of 20+ exclusive modules that come pre-loaded into the theme. Thus, you can save an extra $720 on the online promotion of your site.
In order to provide online customers with the best shopping experience, the theme is pre-loaded with JX Search that adds live product search capabilities to your shop. Ajax Cart, Product Quick View, a fully-fledged blog, 100% responsive layout, and a bunch of other features are included to boost the performance of your web store. Give it a try to enjoy all benefits of effortless web development by yourself.

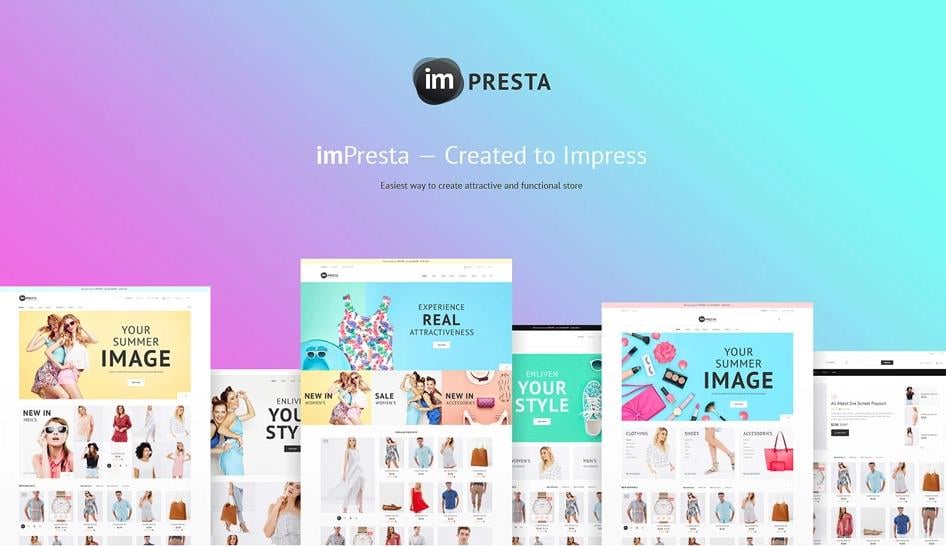
imPresta - Multipurpose PrestaShop Theme
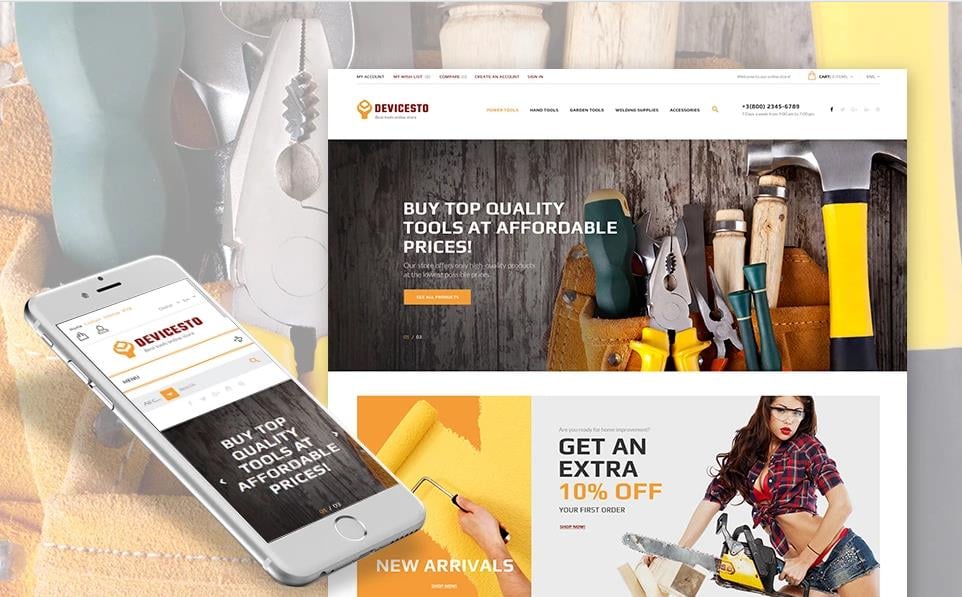
Devicesto - Tools and Supplies Store PrestaShop Theme
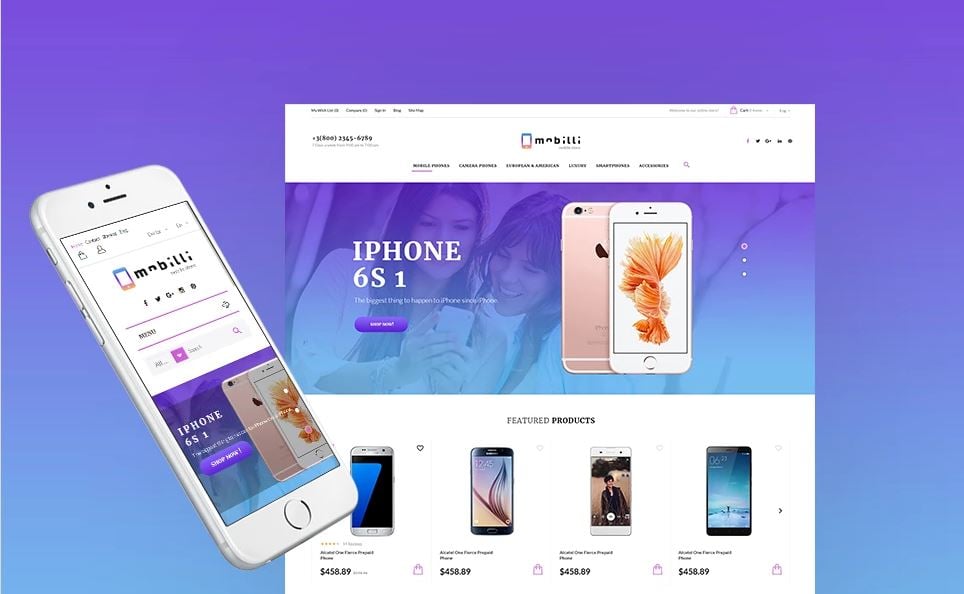
Mobilli - Mobile Phones & Accessories PrestaShop Theme
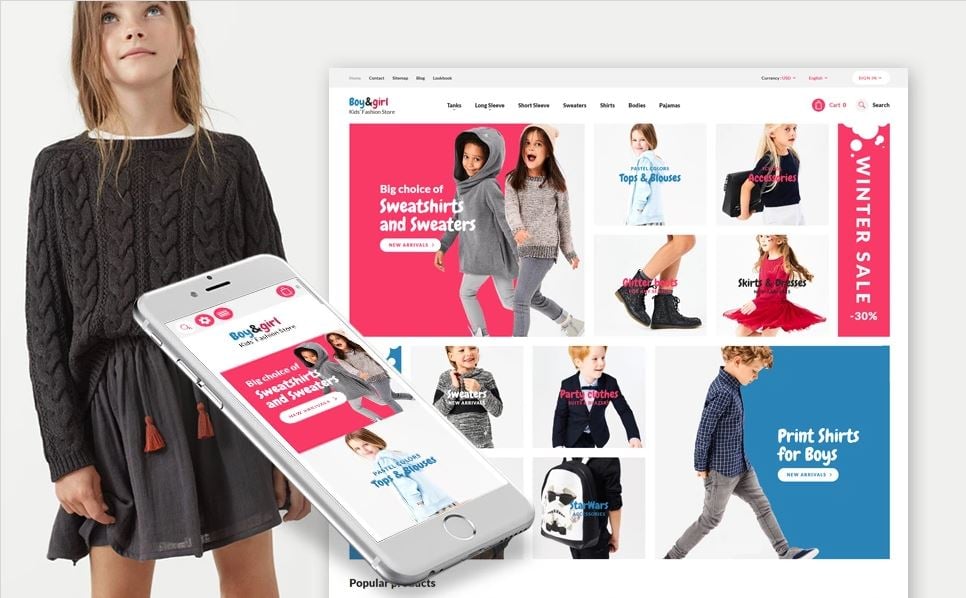
Boy&Girl - Kids Fashion Responsive PrestaShop Theme
I decided to use our Everprest theme, this is one of our multipurpose PrestaShop themes that belongs to the list of our bestsellers!
Let me show you my step-by-step guide on how to work with the PrestaShop theme and start your own store, I’ll show all the important moments, be sure!
By the way, I’ve already reviewed hosting, domain, and files preparation process and you can read about it in one of my previous articles!
Theme installation
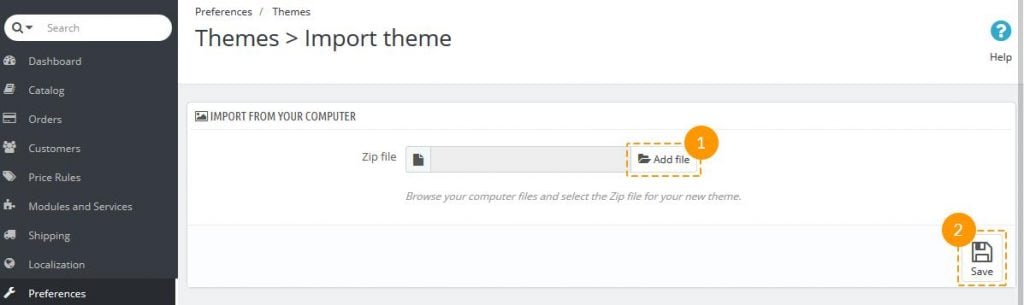
Log into your PrestaShop admin panel and navigate to Preferences -> Themes. At the top of the page, click Add new theme button (1).

Click Add file button (1) in Import from your computer section. Navigate to previously unzipped template package and open theme installation folder.
Select your theme .zip file and click Save (2).
The uploading process will be started. You will see the message that the theme has been successfully uploaded. Your new theme preview will appear in the list of installed themes.
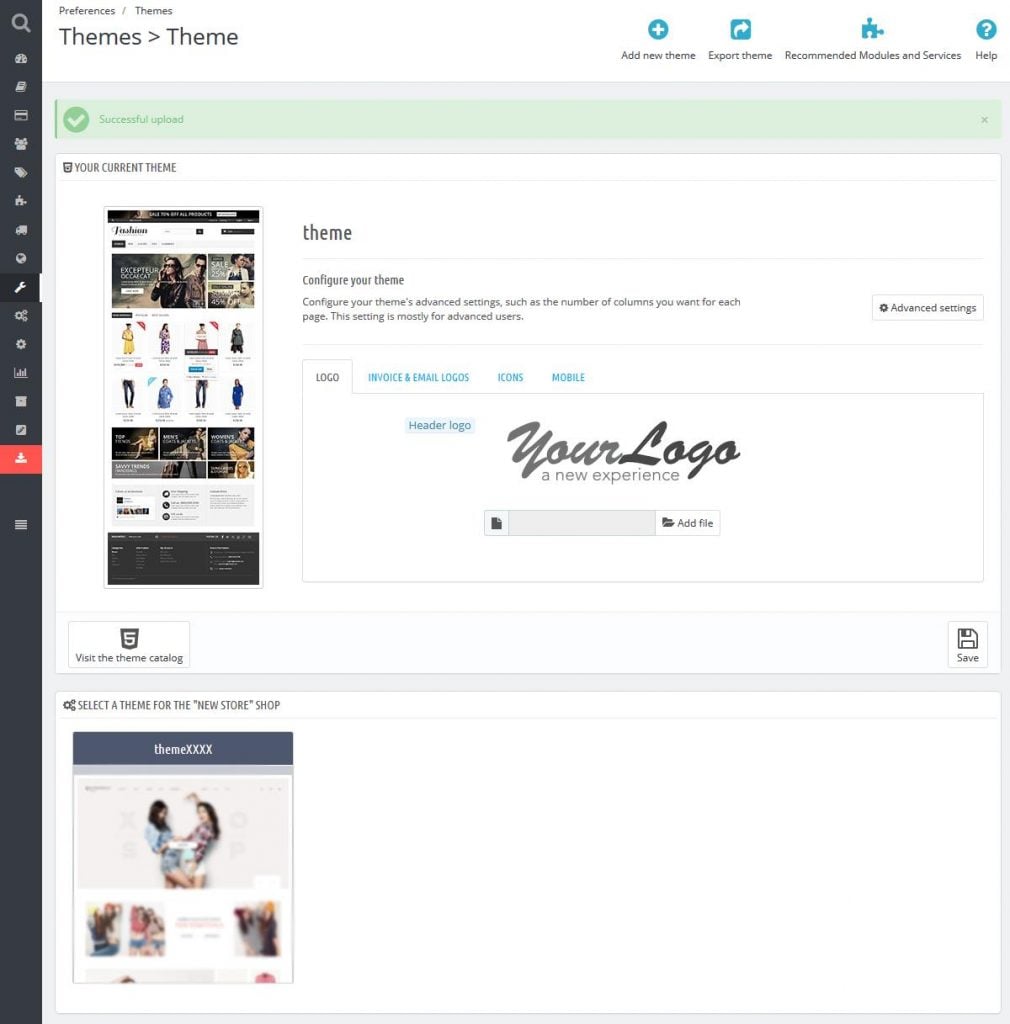
In order to activate the theme, hover the cursor over the theme preview icon and click Use this theme.
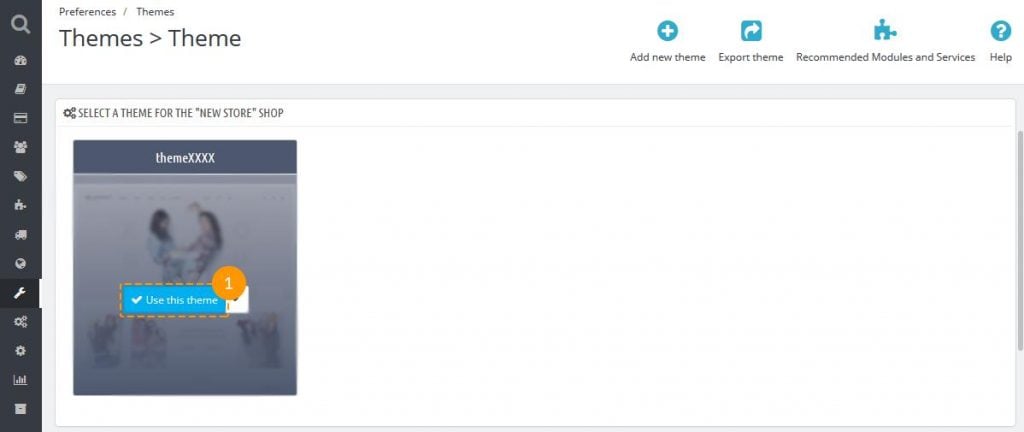
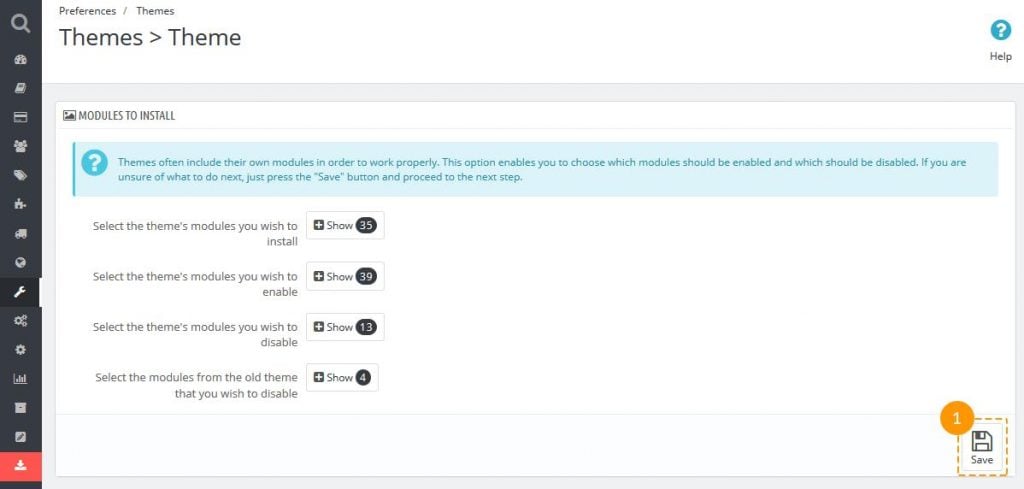
You will see the screen with the information about the modules used in the theme, the number of modules that are turned on and off.
Click Save in order to continue.
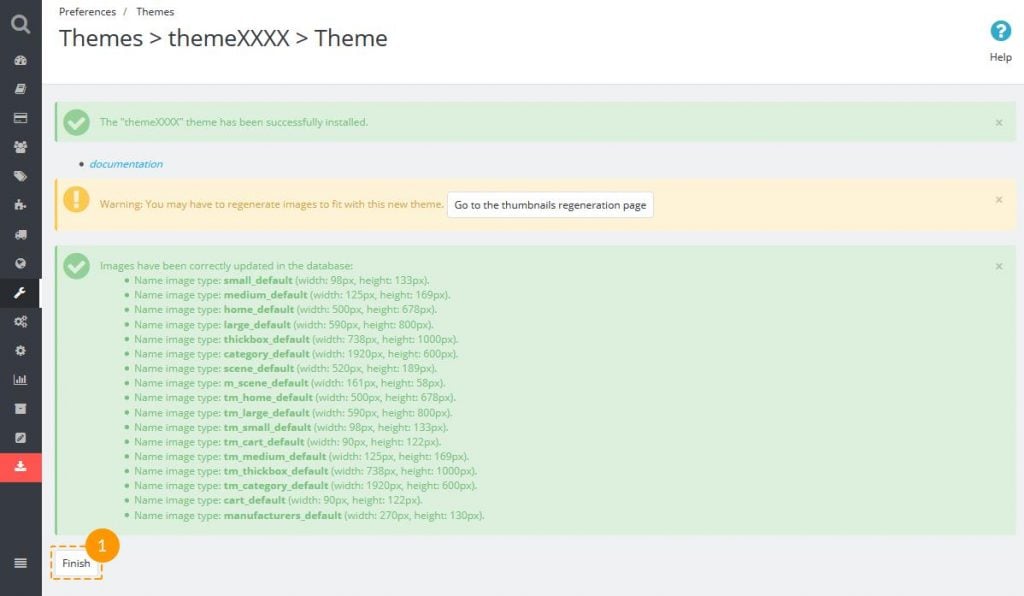
After this, you will see the pop-up with the message about successful theme activation: the theme has been installed successfully, images have been regenerated up to the defined in theme dimensions. To finish installation click Finish button.
Sample data installation
I bet you want your template to look just like our kick-ass demo, right? That’s not hard at all, you just need to upload the demo data.
In order to install sample data using the Sample data installer module, please follow instruction from the step 1 (Theme import) of this manual. Then in your store admin panel you'll see Sample data installer module.
Using this module you can easily install store sample data in few easy steps. Please do the following:
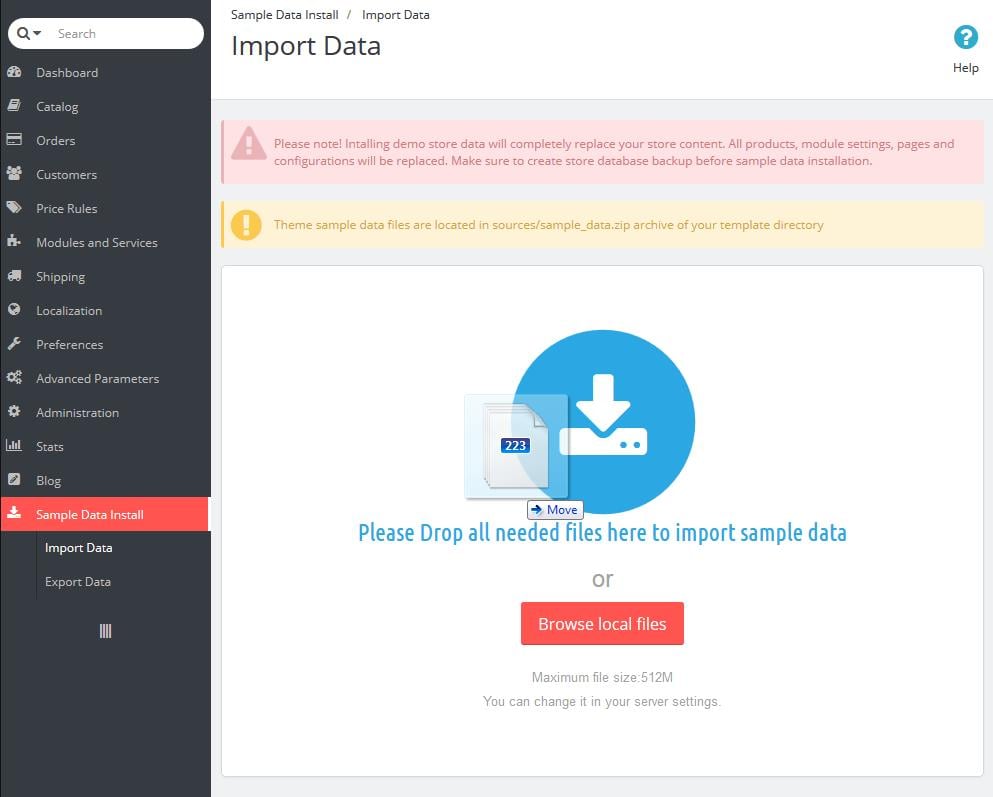
From the admin panel menu click "Install Demo Store" item.
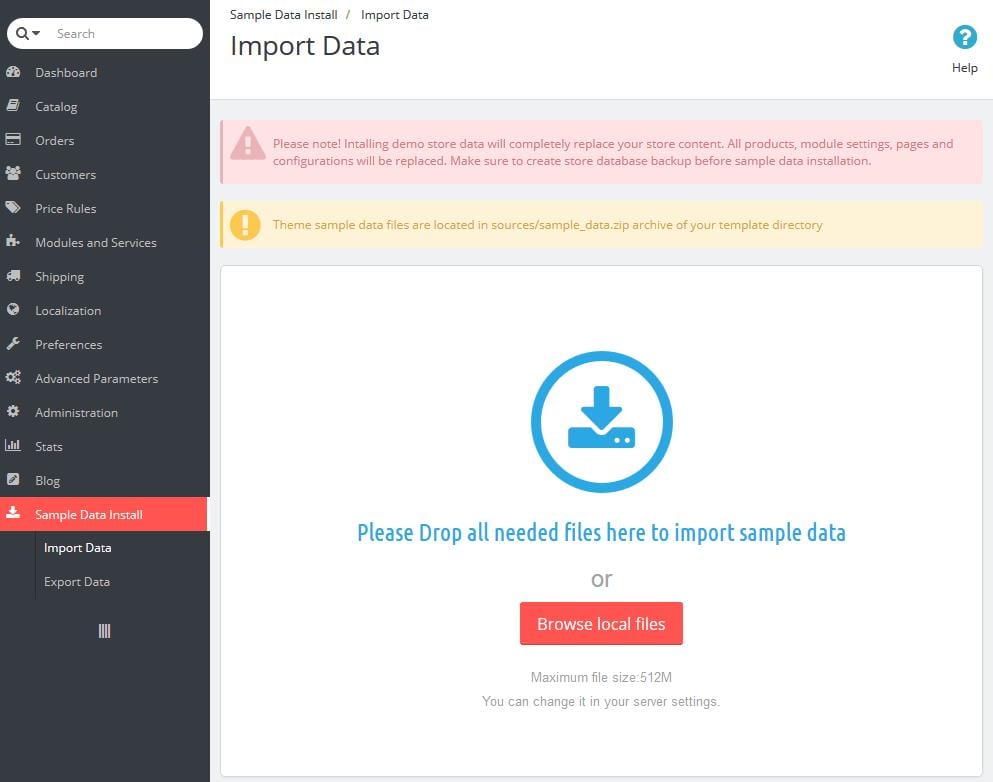
Select and upload sample data files from 'sample_data' directory of your template package. You can do this using the "Browse local files" button or dragging sample data files to the browser window.
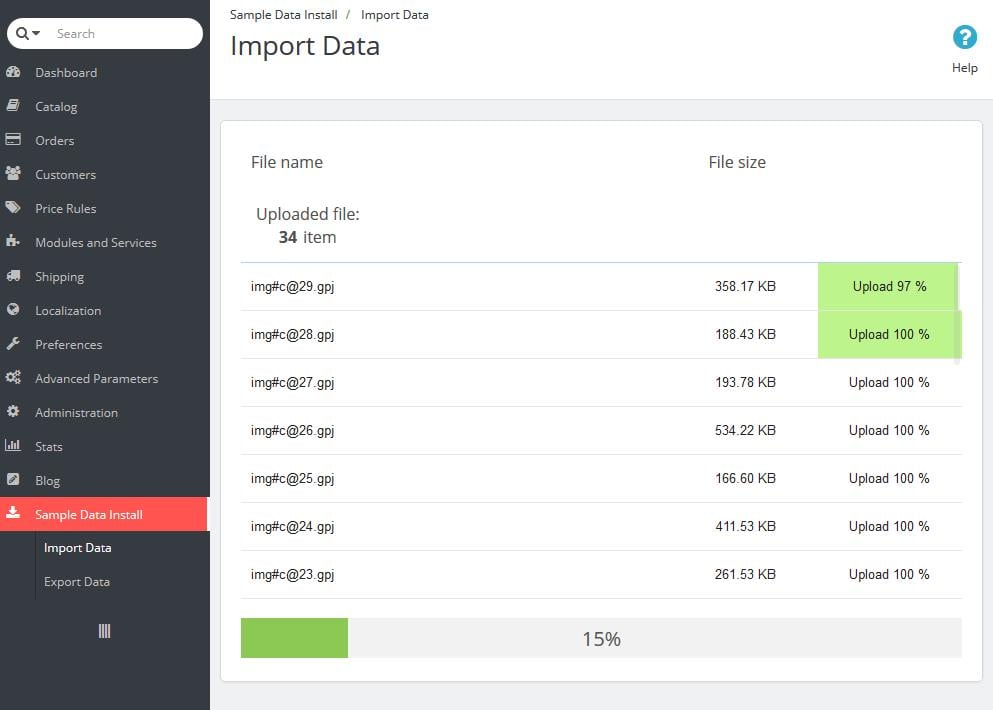
Wait until the files are uploaded.
Then click "Continue Install" button.

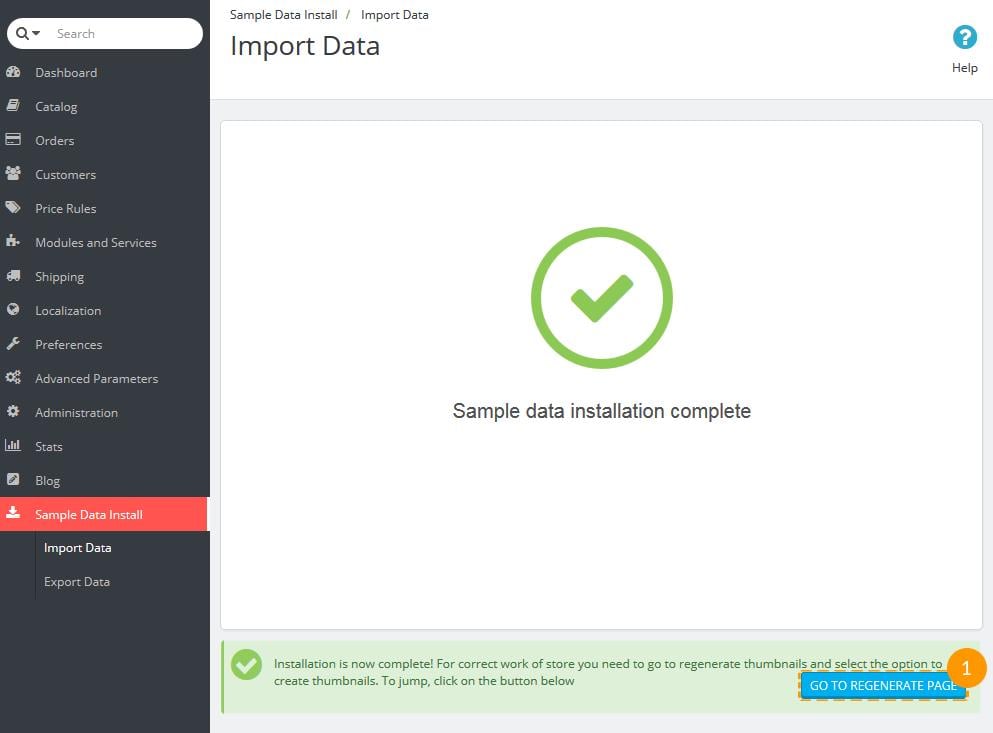
Then Sample data installer will automatically configure your store and other modules. This can take several minutes.

When sample data is installed successfully, you need to perform the last step - regenerate images. Click "Go To Regenerate Page" button.
To regenerate images click "Regenerate thumbnails" button.
How to install modules and configure images
Each template is provided with some specific module settings. To make the modules appear the same as on the demo preview, you will need to configure them. All modules can be configured in the PrestaShop admin panel.
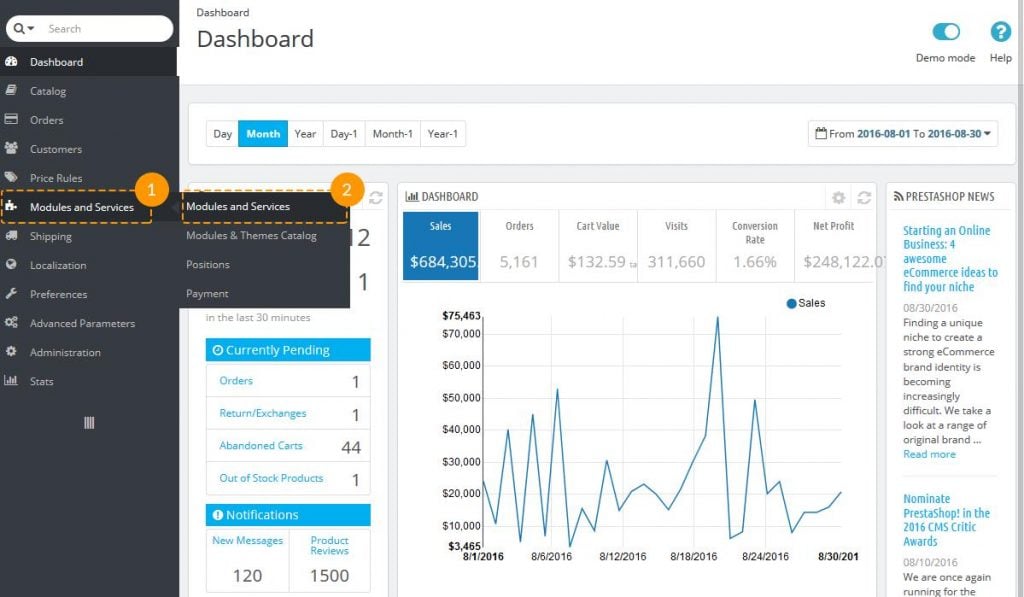
In your PrestaShop admin panel, select Modules and Services > Modules and Services from the main menu.
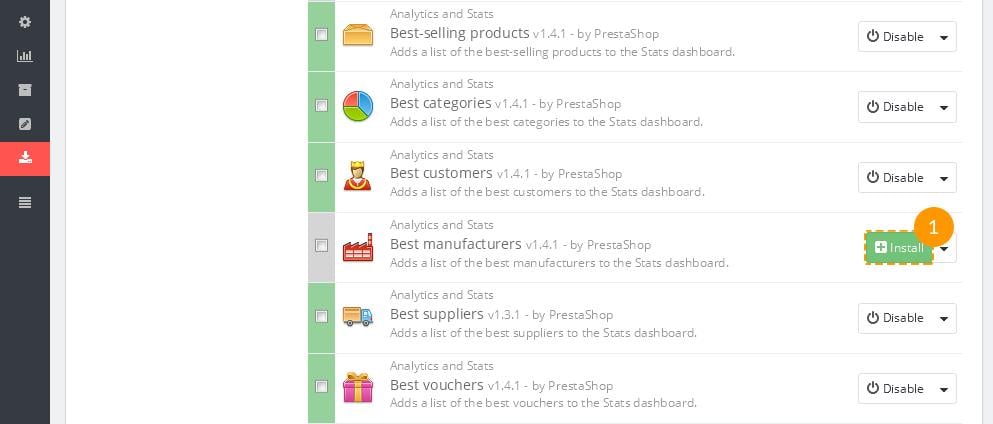
On the Modules page you can see the list of available PrestaShop modules. You may need to install some of them.
To install a module, locate it in the list and click the 'Install' button.
Using the module links you can activate/deactivate them (Enable | Disable links), reset their settings to default (Reset link), delete a module (Delete link) or configure it (Configure link).
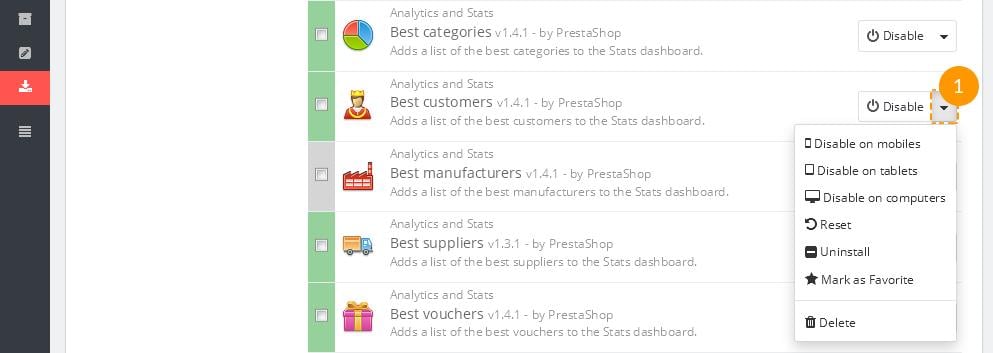
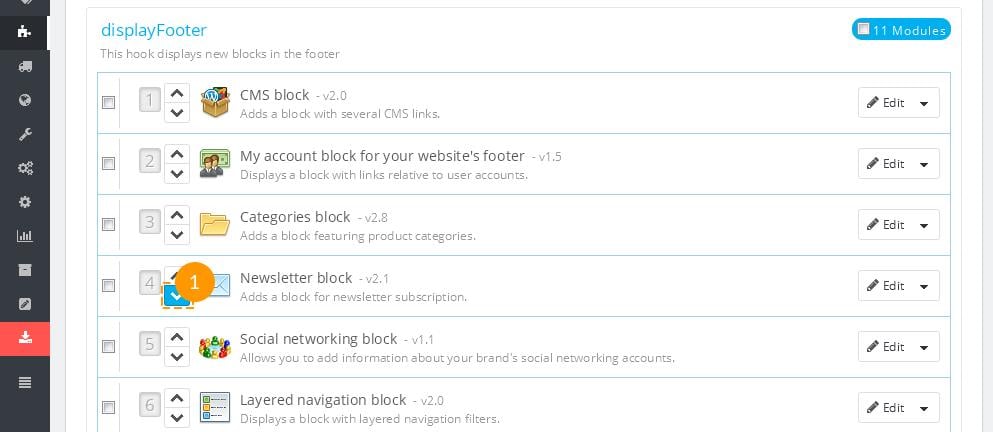
After activating the necessary modules, you need to assign them to correct positions.
In PrestaShop admin panel, select Modules and Services > Positions from the top menu. To place a module in the required position, just drag it up or down in the modules list.
In PrestaShop, you can use predefined image dimensions for product images, category images, manufacturers, etc.
For example, images of the 'home' dimensions are usually used for the product images on category listings, 'large' for main product image on the product info page.
To configure product image dimensions, open your PrestaShop admin panel, go to Preferences > Images and set the image dimensions as described on Configuration Page at the template live demo.
How to configure your general store information
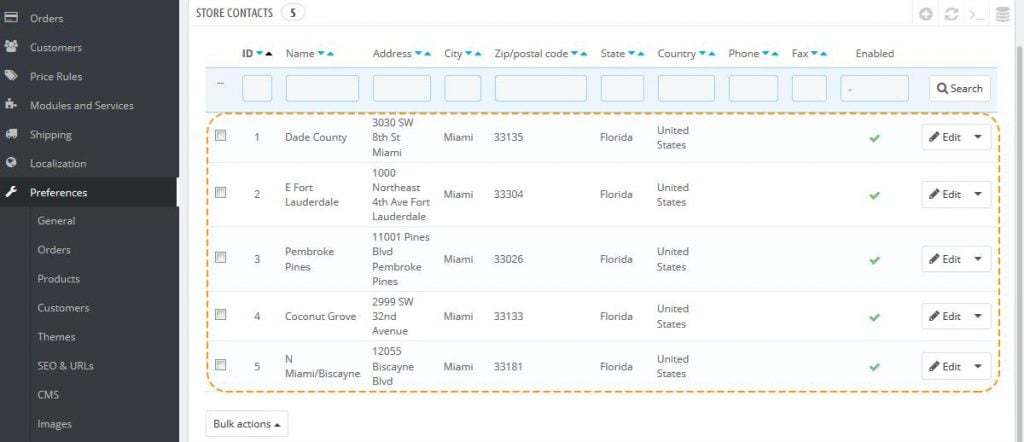
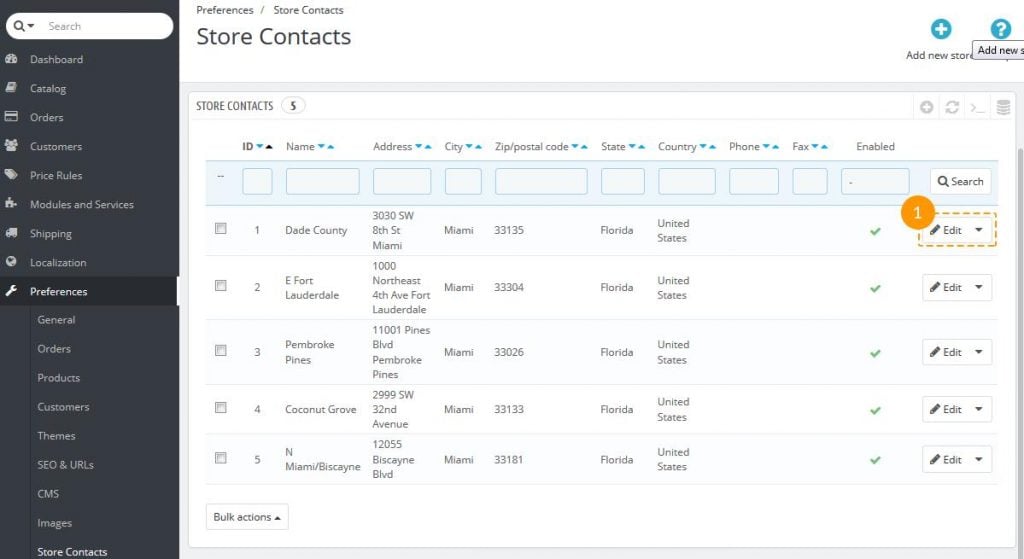
Open the PrestaShop admin panel and go to Preferences > Store Contacts.
First, you'll see the list of stores in Store Contacts section. Here you can enable/disable, add/delete or edit each store.
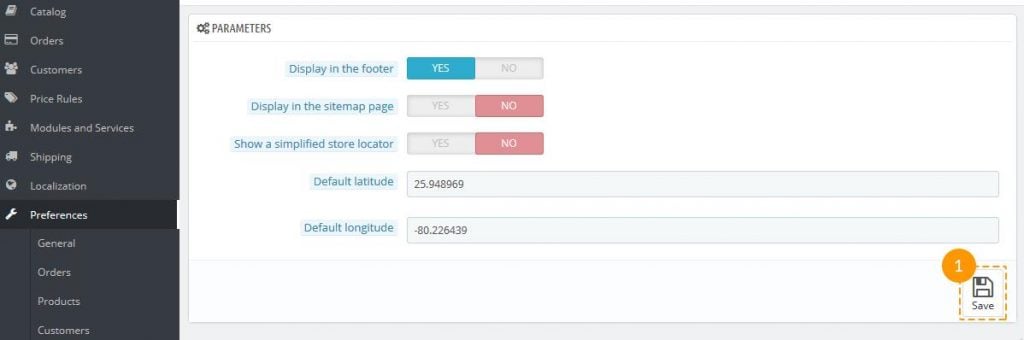
Below the list of stores, there's a Parameters section where you can edit the main settings concerning the mapping of your store. Change them according to your needs and press 'Save' button (1).
In Contact Details block you can change the main info about your store - its name (1) and other contact details. Don't forget to press the 'Save' button (2) after editing.

To edit the info on one particular store, choose the store you want to edit in Store Contacts and click 'Edit' (1).
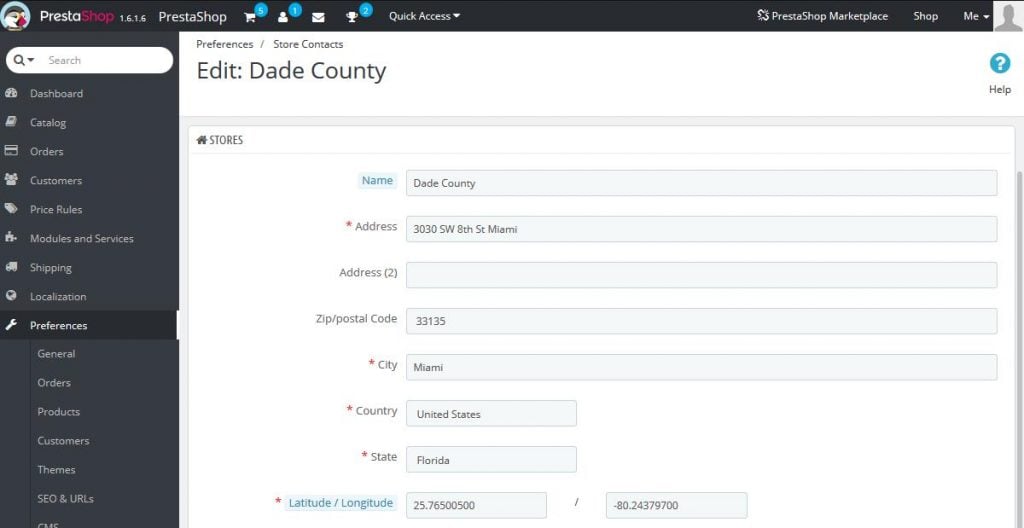
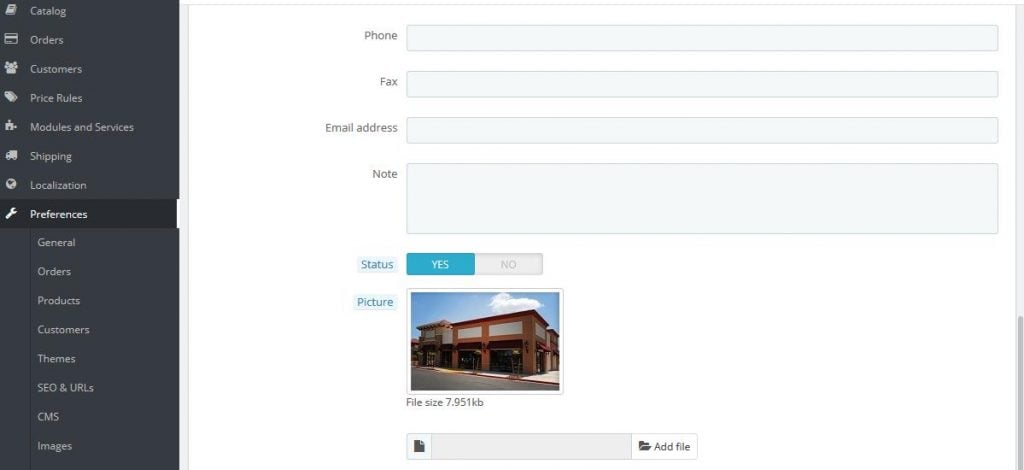
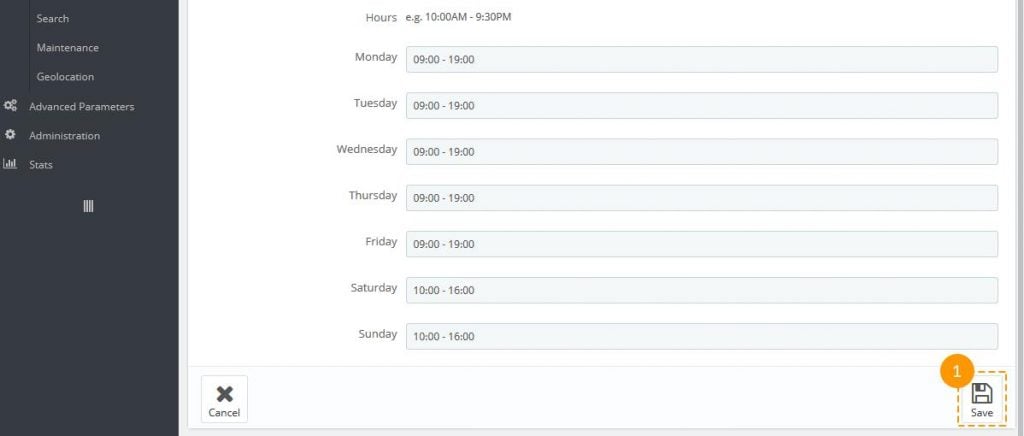
Here you can edit all info concerning your store contacts (such as store's name, address, status, picture, working schedule etc.)
After it's done, click the 'Save' button (1).
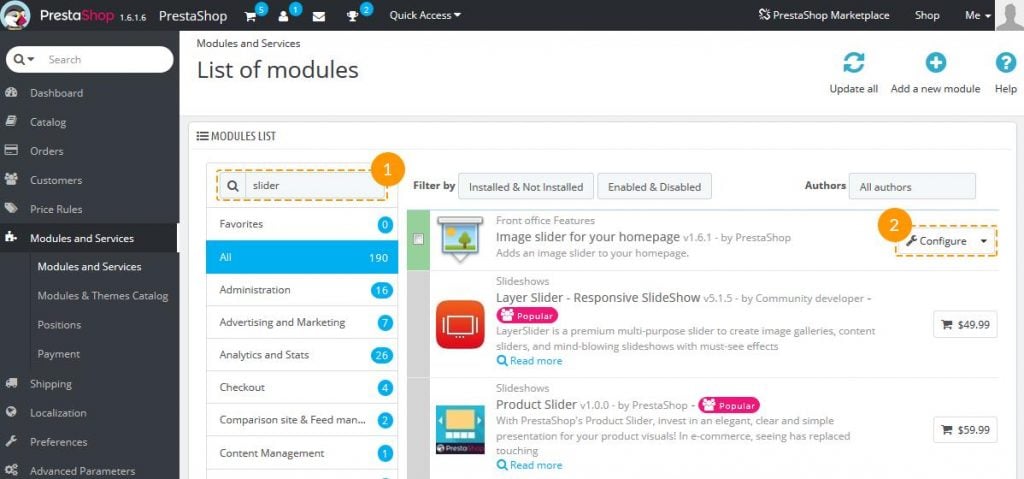
How to edit a slide in PrestaShop
First, find the Image slider for your homepage module in Modules list of Modules and services menu tab of your PrestaShop store (1) (it is located in the Front Office Features modules section).
Then press the 'Configure' button (2) to edit the module.
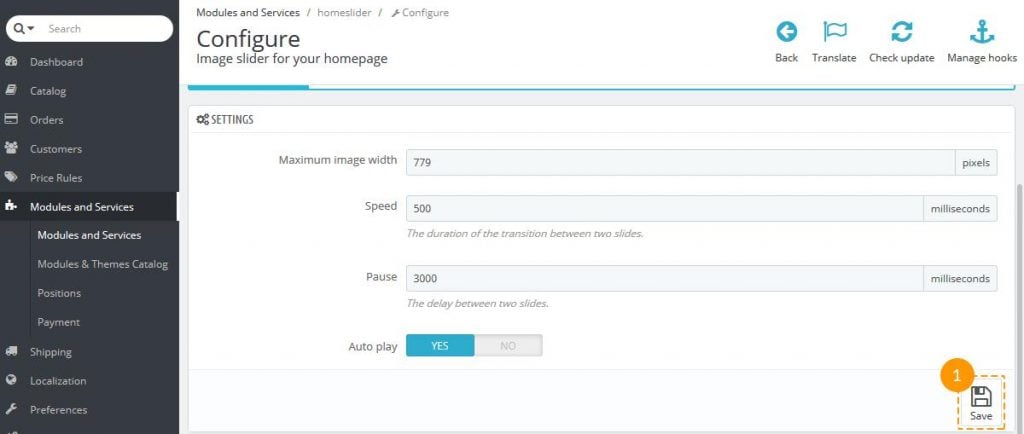
On the screen that appears next you'll be able to set the main properties of your slider like the maximum width of images, the speed of changing slides, the delay between two slides and autoplay option.
After you've changed it, press the 'Save' button (1).
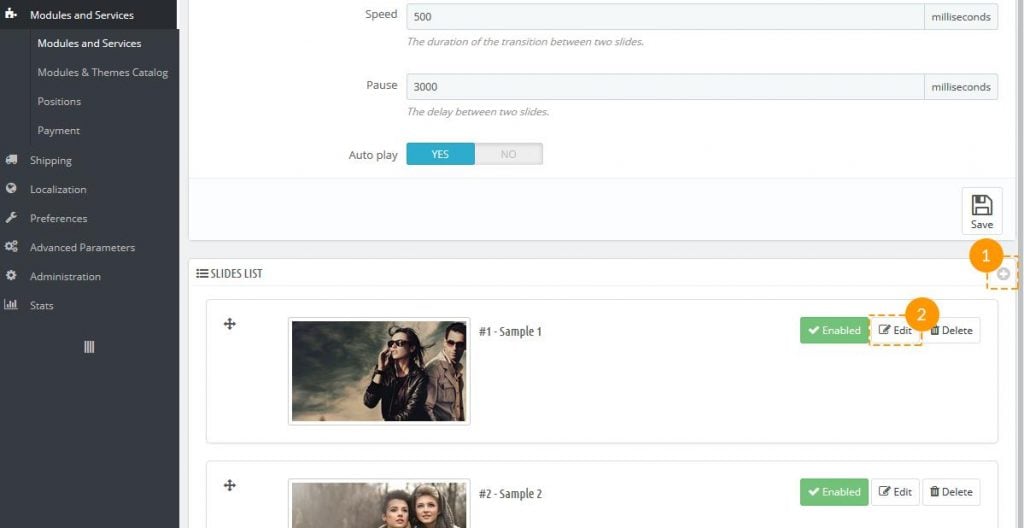
To add a new slide find the '+' button in the top right corner of Slides list section (1) and click it.
If you want to edit the existing slide, click the 'Edit' button (2).
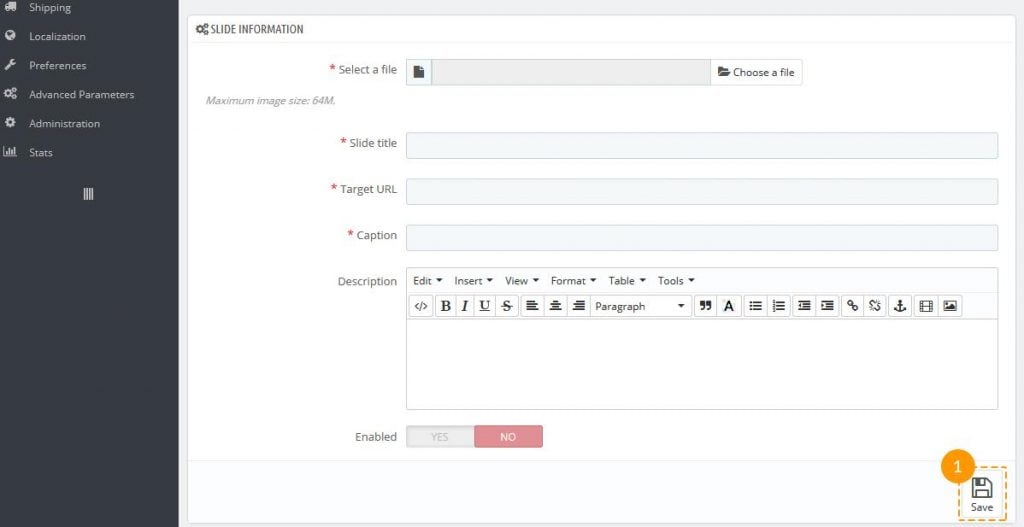
The further process is quite simple. In 'Slide Information' section fill all the required fields and 'Save' (1) it.
Theme configuration module management
Theme Configurator module handles a lot of things on your theme. Mainly, it enables you to switch some features on and off (social sharing buttons, top banner, payment logos, etc.), and perhaps more importantly, it lets you easily add/change images on your homepage.
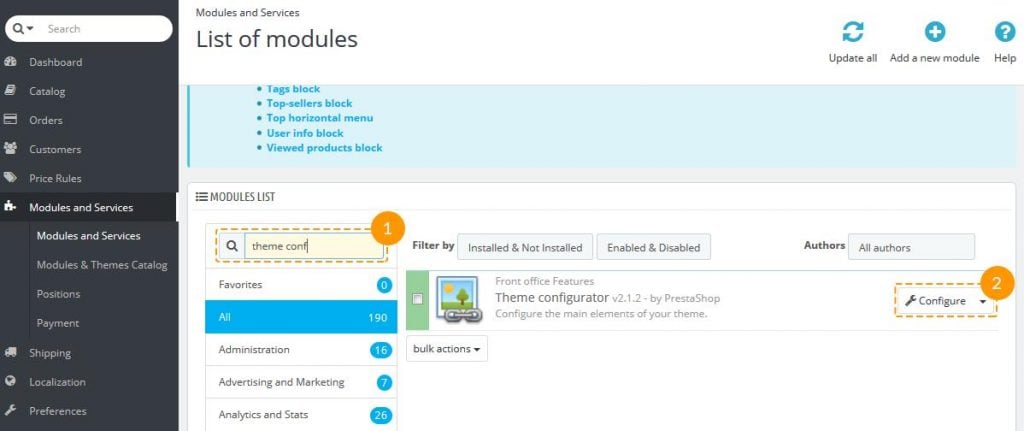
Log into your Prestashop admin panel and go to Modules and services (1) -> Modules and services (2).
Then find 'Theme Configurator' module in Modules list (1). It will show up in the right column. If it is not installed yet, click its 'Install' button. Once the module is installed, the 'Install' button will be changed to the 'Configure' button (2) which you need to click to configure the settings.
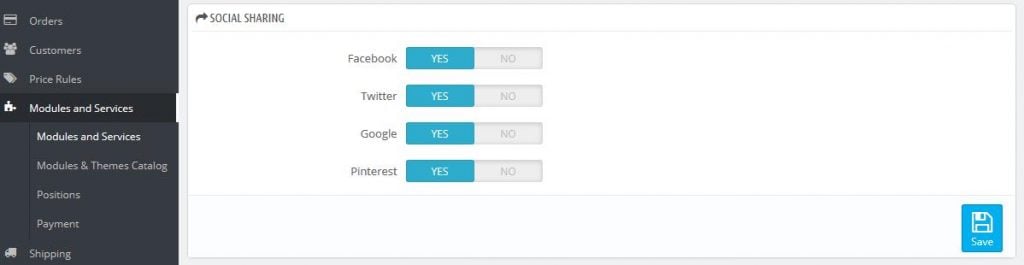
On the settings configuration page, you can see different blocks which you can switch on and off by clicking 'Yes' and 'No' buttons (1). Click 'Configure' (2) to configure the settings of a particular block:

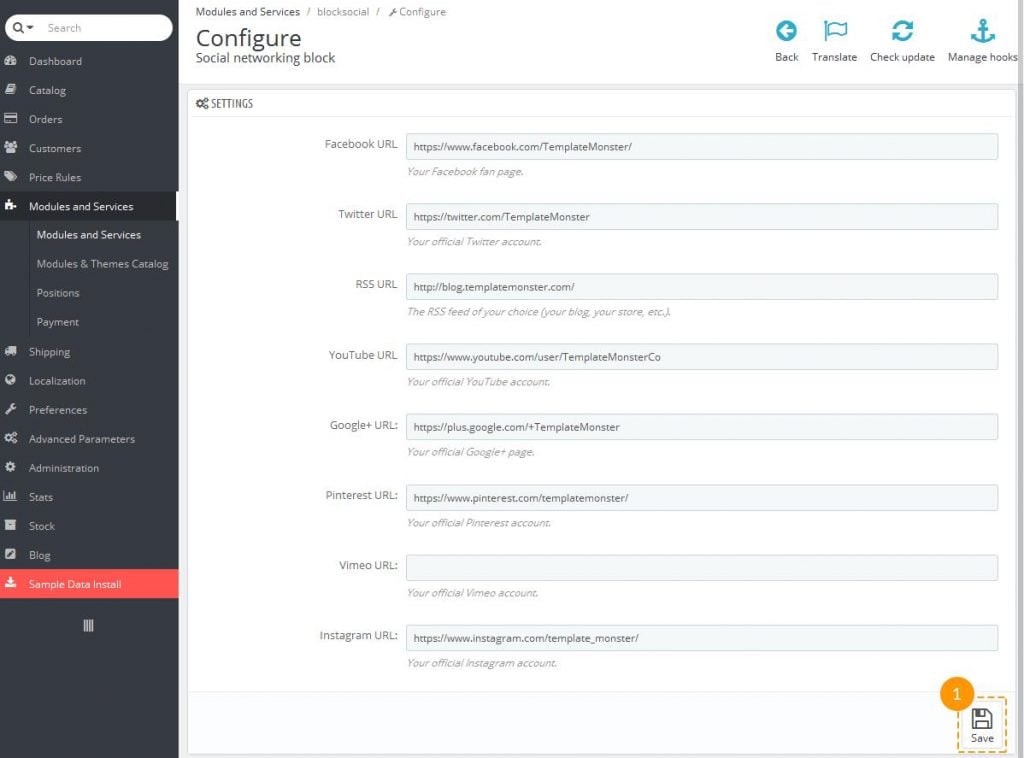
Display links to your store's social accounts: enter web addresses for the icons you want to display in this block and click 'Save' (1) when you are done.
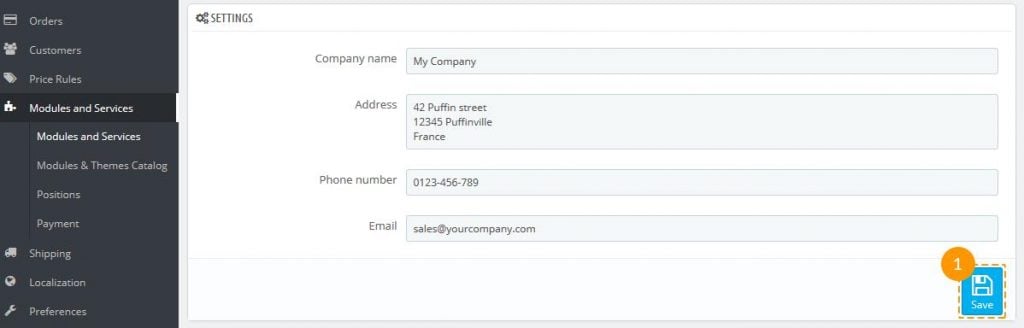
Display your contact information: enter your company name, address, phone number and email in the corresponding fields and click 'Save' (1).
Display social sharing buttons on the product's page: displays Facebook, Twitter, Google, Pinterest buttons on your product pages.
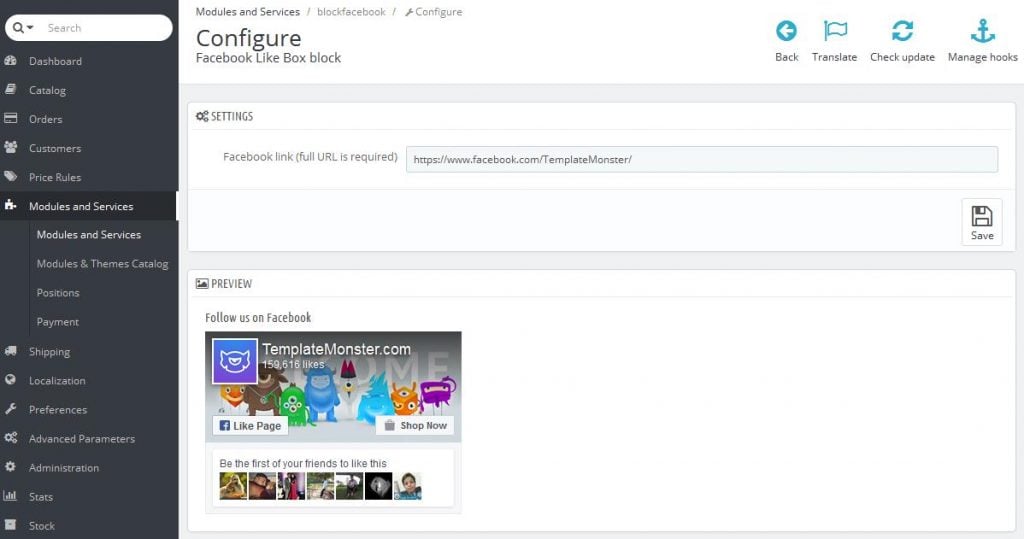
Display the Facebook block on the home page: displays 'Follow us on Facebook' block.
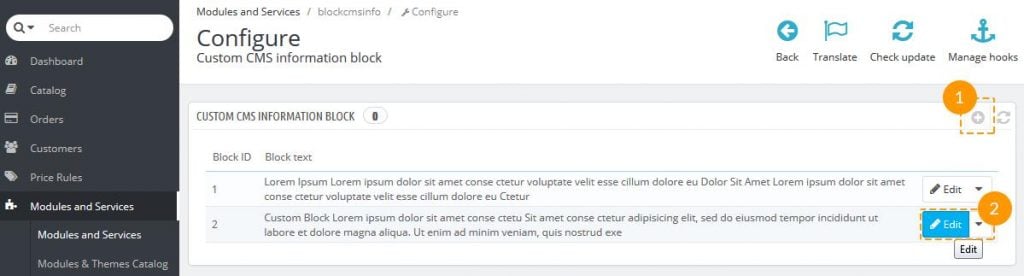
Display the custom CMS information block: allows you to add one and more info blocks for each language of your site. On the configuration page, click '+' at the top right (1) to add a new custom CMS block. Enter your text in the text field and click 'Save'. Or click 'Edit' (2) to change any block.
- Display quick view window on homepage and category pages
- Display categories as a list of products instead of the default grid-based display
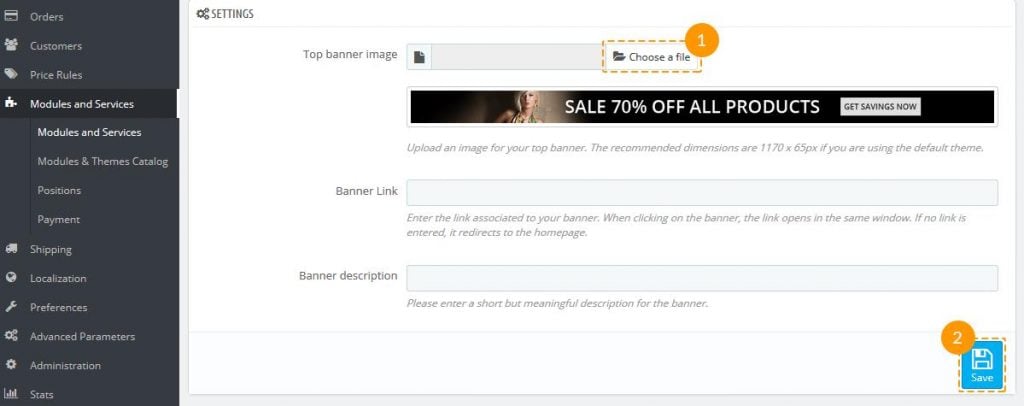
- Display top banner: Click the 'Configure' button. In 'Settings' you can choose another banner (1), change its link and description. After editing click 'Save' button (2).
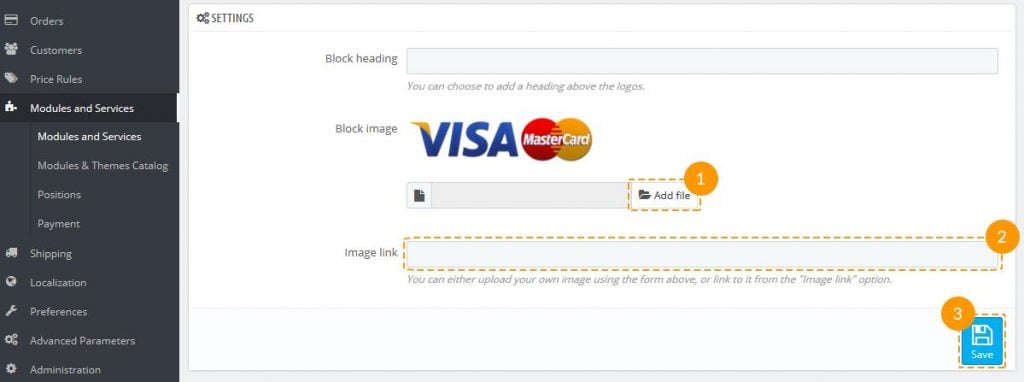
Display logos of available payment methods: allows you to upload your image and add a title/link for the payment logos on the product page. Click 'Add file' (1) to upload your own file for the payment logo or insert a link with the image to 'Image link' field (2). Then click 'Save' button (3).
- Display Live Configurator: only you can see it on the Front Page of your site when enabled.
- Display subcategories
- Scroll down to change/remove/add html content items.
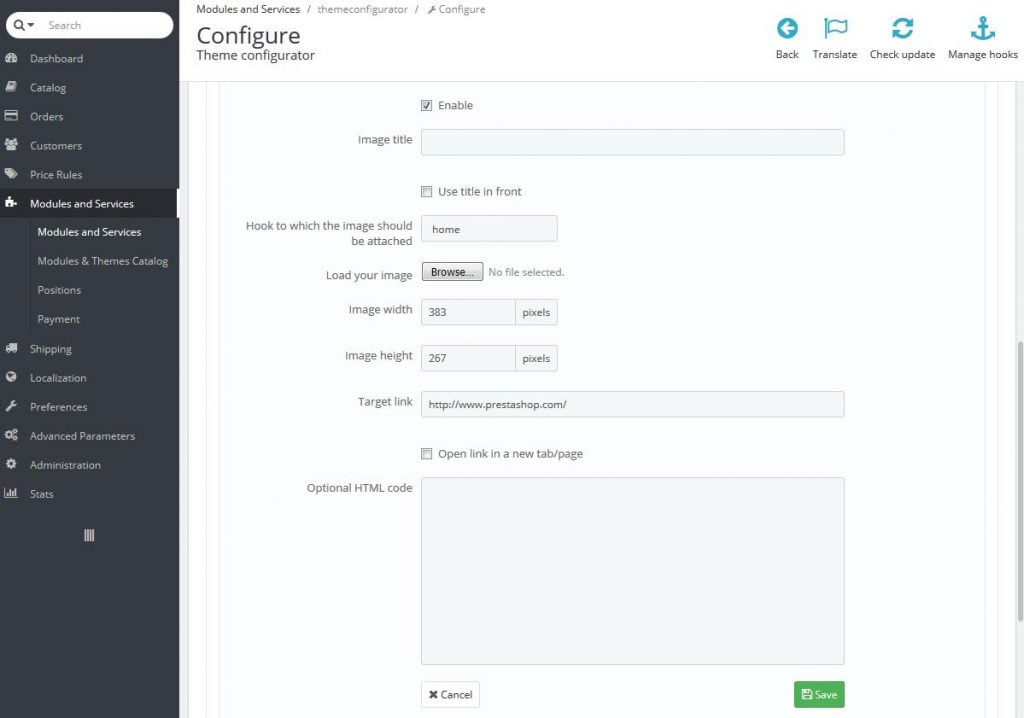
The default items that initially come with this module can be removed only when the Theme Configurator module is disabled or you can just unpublish them by unchecking 'Active' on the item configuration page. Enter the item title, hook it to one of the positions suggested (home, top, left, right, footer), click 'Browse' in order to upload an image, manually enter the image width/height values in pixels, specify the URL this item will be pointed to and enter your content in the 'HTML' filed. Then click 'Save'.
If you are running a multilingual site, click the corresponding language tab and repeat the same adjustments for it.
Click the 'Add Item' button to add a new item. Open the front end of your site to see the changes.
Final thoughts
These are just the basics that will help you to start your own store with PrestaShop. However, there is so much to learn and master out there in order to make your store stand out. Take a look at our PrestaShop themes, select one yourself and begin this amazing e-commerce journey. Once you buy a template, you will be provided with the documentation that will help you master all the needed ins and outs of the PrestaShop store!
Don’t miss out these all-time favourites
- The best hosting for a WordPress website. Tap our link to get the best price on the market with 82% off. If HostPapa didn’t impress you check out other alternatives.
- Monthly SEO service and On-Page SEO - to increase your website organic traffic.
- Website Installation service - to get your template up and running within just 6 hours without hassle. No minute is wasted and the work is going.
- ONE Membership - to download unlimited number of WordPress themes, plugins, ppt and other products within one license. Since bigger is always better.

Creative writer passionate about WordPress and all that technical stuff. Meet Alex in person on LinkedIn.
Get more to your email
Subscribe to our newsletter and access exclusive content and offers available only to MonsterPost subscribers.

Leave a Reply
You must be logged in to post a comment.