How to Implement 6 Major WordPress Website Sections Dynamically? (Part 2)
27 February 2014
Joseph Herb
Hello TemplateMonster fans. Today we will go furthermore deep in WordPress arena. In the first part of this tutorial, we have learnt how to create a WordPress website and 3 WordPress sections i.e. how to create design portfolio, how to create Simple image slider with Simple Fields in WP and how to create recent post. Moving forward, in this part, we are going to learn creating more sections and complete our WordPress website development part.
Section 4: How to Create Contact Form-Page in WP?
First of all, you have to create a page template. For that, you have to copy the page.php code into a new file named ‘page-contact.php’. Now, you have to add a comment at the starting of the contact.php file to ensure WP will treat the file as a page template. Check out the code:
Contact.php file looks like this:
In next step, you have to create a simple contact form by just pasting below given code within the entry-content div.
You cannot find anything hard with self-explanatory html code of the form. Just note the input type="hidden" I added on line 19: It will be used later to check if the form has been submitted.
In third step, you have to look after data processing and error handling. If contact form looks pretty good, but doesn’t send email, then what you do for checking if fields have been filled correctly. If we found fields correctly filled, we will get the blog admin email and send them the mail. Otherwise, no mail will be sent and errors will be showed. Just paste the below given code between the Page Template declaration and the get_header() function:
Here, we are going to ensure that form has been submitted and filled correctly. If you have found any error, you will find message is returned and the form isn’t submitted. Now, you have to show error messages below the related field. For example: “Please enter your name”. Below you will get the complete form page template that you have use as it is.
id="post-">
Thanks, your email was sent successfully.
Sorry, an error occured.
Lastly, you have to add jQuery verification as your form is working well. However, we are going to enhance it by adding a client-side verification by using jQuery and the validate jQuery plugin. It is one of the excellent plug-in as it enables to check that your form has been filled perfectly.
Firstly, you have to download the validate plugin and upload it into your theme file, which is available under a /js directory. Once done, paste the following into a new file:
$(document).ready(function(){
	$("#contactForm").validate();
});
Now, save it as verif.js in your /js directory and get ready to link the javascript files to our theme. After that, you have to open your header.php file and paste the following within the
and
tags:
	<script type="text/javascript" src="/js/jquery.validate.min.js">
	<script type="text/javascript" src="/js/verif.js">
Once it done, your form will be validated on the client side through the jQuery validate plugin.
Section 5: How to Customize Social Share Buttons in WordPress?
Every social channel manages their button in different ways and allows different levels of customization. One can find various alternatives for size, look and feel, connection annotations, share count, and so on. In this tutorial, we are going to discuss share buttons for LinkedIn, Google+, Pinterest, Twitter, Facebook and email.
Twitter Share Button
If you want to customize the Twitter Share button, you have to follow simple steps.
First of all, you have to go to Twitter Buttons by clicking here and choose “Share a link” button you like best.
Now, complete the form fields in Options and ensure to choose “Use the page URL” and “Use the title of the page” for share URL and tweet text respectively and add your Twitter username in the Via and/or Recommend section.
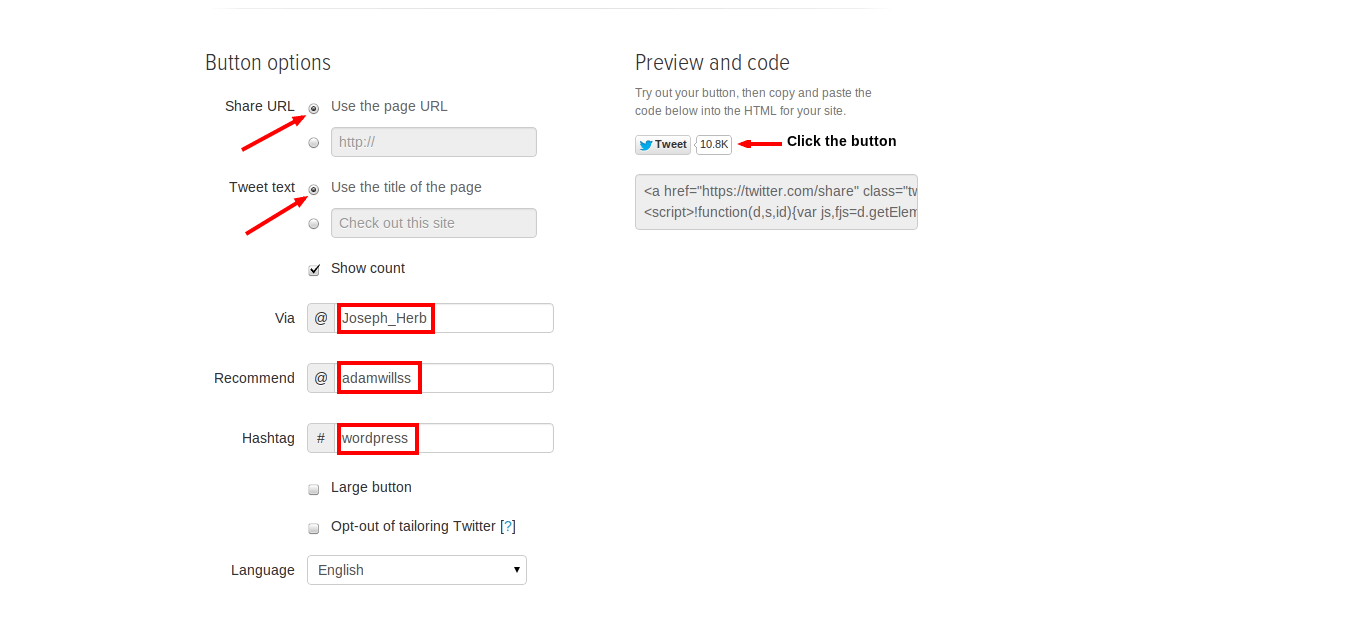
Then click the Tweet button to see how your tweets will display.
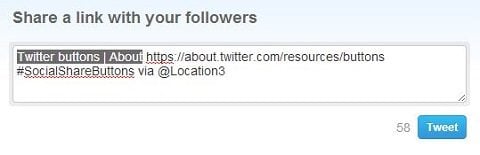
Once, you are satisfied with the tweets looks, then copy-paste the code into the HTML for your site in location you want to display button. Finally, save the changes and have a customized Tweet button.
Google +1 button
Google +1 button attributes consists of URL, image, page title, and recommendations. Users can have option of selecting from advanced options that includes how the +1 button loads that better fit to your requirements of the websites.
One of the best things about Google+ is it catches information to auto-populate in one of four ways, i.e. Schema.org, Open Graph Protocol, Title and meta description, and Google’s best guess from page content.
It is recommended to implement both Schema and Open Graph on your site to make sure the best rendering of the share message and make the most eye-catching communication.
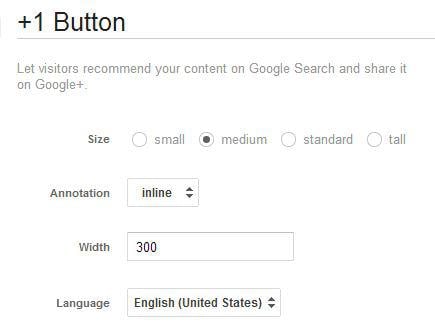
Now, move towards the Google Developers page and follow the instructions that given below to customize your Google+ button.
Firstly, choose the preferred button size, annotation format and width.
In second step, you have to choose the appropriate advanced options.
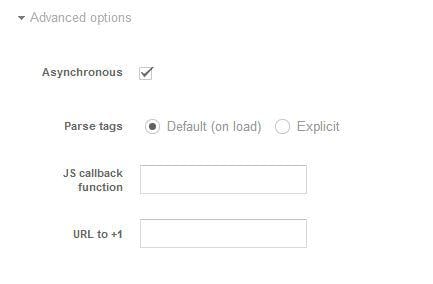
Now, you have to format your button and click “Want to customize your snippet?” See below for preview and code to customize the share message.
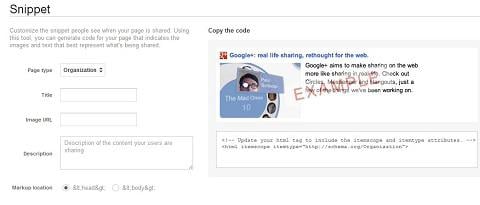
Furthermore, you have to copy the snippet code and the button code and paste them, where you want to appear your button.

LinkedIn’s Share button
LinkedIn’s Share button is simple than other social media networks. It includes title, description and image from the page. Moreover, one can also edit the post as well.
If you want to install the LinkedIn Share button, then visit this link and follow instructions.
You have to leave the URL to be shared blank and it will default to pull the current page. Now, you have to choose share count display.
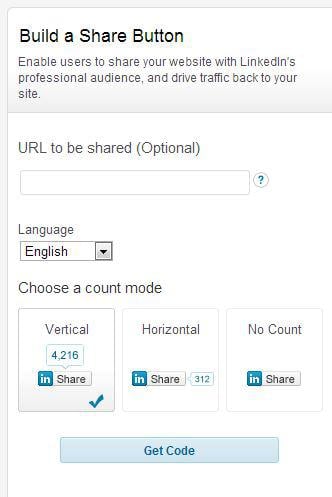
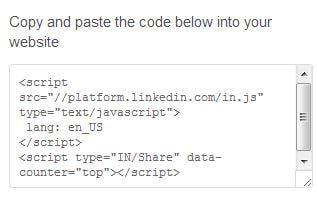
In second step, you have to see your button. Once, you are satisfied, you have to click “Get Code,” then copy and paste it where you want the button to display.
Your optimized LinkedIn Share button is ready!!
Pinterest Pin It Button
The Pin It button only works where an image is included as Pinterest is based on image. Any background images are ignored by the Pin It button in your CSS and pulls any content within tags that are at least 80×80px.
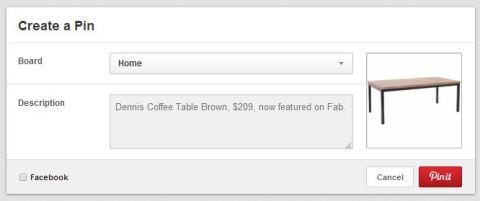
Moreover, if your page has various images, then it will display that specified in the HTML file.
A bit more advanced coding is required by Pin It buttons than other sharing buttons. Ensure to check with your web developer to ensure that you are using the correct URL, image and description. Visit the Pinterest Widget builder to get started when you are ready to create your button.
Facebook Share Button
Users will find two different types of buttons, i.e. Facebook Like and Facebook Share that allows users to share their content on Facebook and create a story on their news feed. Below are steps for adding Facebook Share buttons to your site.
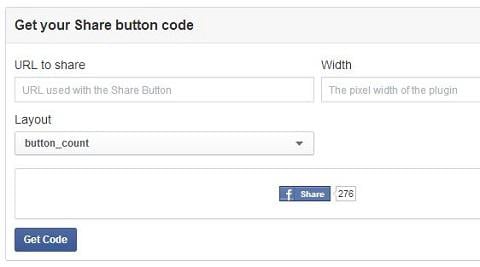
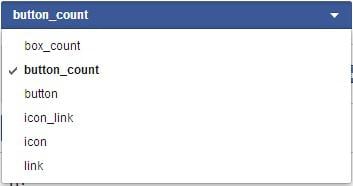
Step 1: You have to leave your URL field blank as it shares page default on which the button lives on. Now, enter the width appropriate to your page design. Furthermore, you have to select six different layouts that come with different designs and share count displays.
* * *
Step 2: In next step, you have to click “Get Code” and select between XFBML and HTML5.
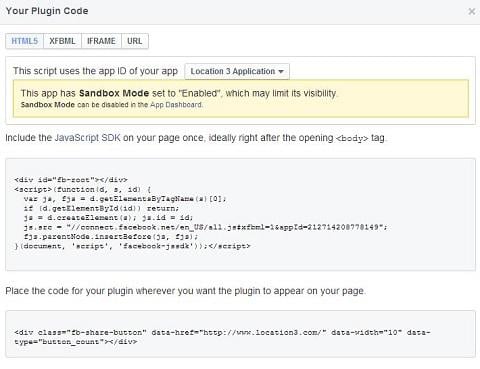
Step 3: Now copy the code and paste where you want to see this button.
Step 4: If you want to enable more appealing share messages, then add the proper Open Graph (OG) tags in your page. Some basic OG tags are site_name, URL, title, description, image and app_id.
An OG tag for a page title looks like:
Email This Button
Email buttons depends on which programming language you are using. No matter, which language you are selecting, but ensure to create a strong subject line and correct the URL that forces its recipient to click on the link to visit the source from any email device and platform.
Create button by your own or hire designer who create button relevant to your site. After that, you have to add below given codes that herald the user’s default email client and create a new message:
email button
Section 6: How to Build WordPress Theme(Framework)?
In order to start creating theme, you have to create a sub-folder in the wp-content/themes directory in your WP folder. We call that folder "tutorial_theme". You can also name the folder after correspond to the name. For that, you have to use FTP client or the File Manager tool in your cPanel, whatever you like.
In this tutorial, we are going to create a WordPress theme that includes of a header, sidebar, content area and footer. Starting create theme, we have create the following files into the tutorial_theme directory:
- header.php file that contains the code for the header section of the theme
- index.php is the main file for the theme that contains the code for the Main Area and will specify where the other files will be included
- sidebar.php file that includes information about the sidebar;
- footer.php file for handling your footer;
- style.css file for handling the styling of your new theme;
In next step, you have to create those files with simple text editor or you have an option of creating through FTP or the File Manager tool in your cPanel for making the files directly on your hosting account.
Now, just take a look to each file and see what it contains:
The header.php file
In this file, you have to add below given code:
Tutorial theme
HEADER
This simple HTML code with a single line includes a standard WordPress function and a php code. One can specify their Meta tags like the title of your website, Meta description and the keywords for their page in this file. Right after the title the line, one can also add:
With this code, you can simply load the style.css file and can handle the styling of your website.
The
part of the line is a WP function that actually loads the stylesheet file. After that, we have added the starting of a "div" with class wrapper that named as the main containers of the website. Class is set for it to change it through the style.css file.
In next step, we have to add a simple label HEADER wrapped in a "div" with class "header" that will be specified in the stylesheet file latterly.
The index.php file
The code in this file begins with that include the header.php file and the code in it in the main page. An internal WordPress function is used by it. Furthermore, in next step, you have to added the sidebar.php file with this line:
Moreover, in this file, you have to show your post categories, archives and so on. After this line, you have to add an empty "div" that allows to separate the Main Area and the Sidebar from the footer. Lastly, we add one last line: that include the footer.php file in your page.
The sidebar.php file
Following code will be added in this sidebar.php.
In sidebar.php file, we use internal WordPress functions that show the Categories and Archives of posts. The WordPress function returns them as list items and thus, we have wrapped the actual functions in unsorted lists (the
-
- tags).
The footer.php file
One should have to add these lines to the footer.php file:
The style.css file
One can have to add below given lines into the style.css file:
body { text-align: center; }
#wrapper { display: block; border: 1px #a2a2a2 solid; width:90%;  margin:0px auto; }
#header { border: 2px #a2a2a2 solid; }
#content { width: 75%; border: 2px #a2a2a2 solid; float: left; }
#sidebar { width: 23%; border: 2px #a2a2a2 solid; float: right; }
#delimiter { clear: both; }
#footer { border: 2px #a2a2a2 solid; }
.title { font-size: 11pt; font-family: verdana; font-weight: bold; }
Using this simple css file sets one can easily set the theme’s look. Furthermore, those lines also set the page’s background and the main parts of your site with borders for convenience.
After doing all such things, you will find your site like this:
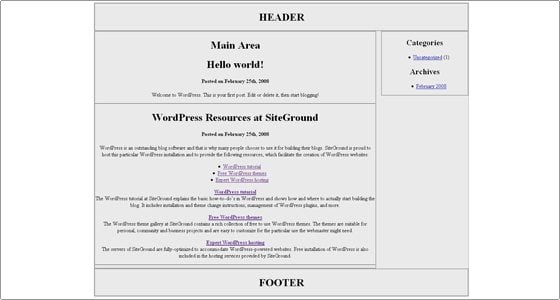
Finally, we have completed our tutorials parts. Hope you will like and it would be helpful for you in future. For more queries or any doubts, you can discuss with us through comment sections.

Joseph is a creative writer and application developer for industries like Health & fitness, Travel, Food, Restaurant, taxi, etc. See his works on Pinterest.
Get more to your email
Subscribe to our newsletter and access exclusive content and offers available only to MonsterPost subscribers.
From was successfully send!
Server error. Please, try again later.

Leave a Reply
You must be logged in to post a comment.