


The first popups originated from the trick Ethan Zukerman thought of for his Tripod webpage hosting in the early 90s. His users were complaining about the number of ads he placed over the website, so he decided to put the banners onto a separate page that opened when a user entered the page. That little piece of code still wasn’t a real popup like we see on every website now, but that is where it all started. On modern web pages, popups are used for different purposes, not only advertisements. Contact forms, policy warnings, and subscription suggestions are also often made like popups.


There are two things that upset users when it comes to popups: when they jump on you when you don’t want them; and when the look of it differs completely from the website’s style. Both of these problems appear when you use plugins that don’t seem to be of the highest quality. The biggest issue of most of the plugins beginner developers use for popup creation is lack of control over the resulting message. However, you could avoid all those problems if you use Elementor for website building. There are two brilliant plugins, created especially for Elementor Page Builder, that help you to create popups of every type, shape, and style you need - Popup Builder and JetPopups. As both of them are made of the same flesh Elementor was, the only question will be – which one of these plugins to choose? To help you make a decision I will do a deep review of both and you can compare their pros and cons. So, let’s go for it!


Downloading & Installation
This is not the most important criteria when you choose which plugin to use, but to try it you have to get it first. That’s why I’ll start from the very beginning and describe the process of obtaining it – the pricing, the necessary efforts, and simplicity of the installation process.
Popup Builder

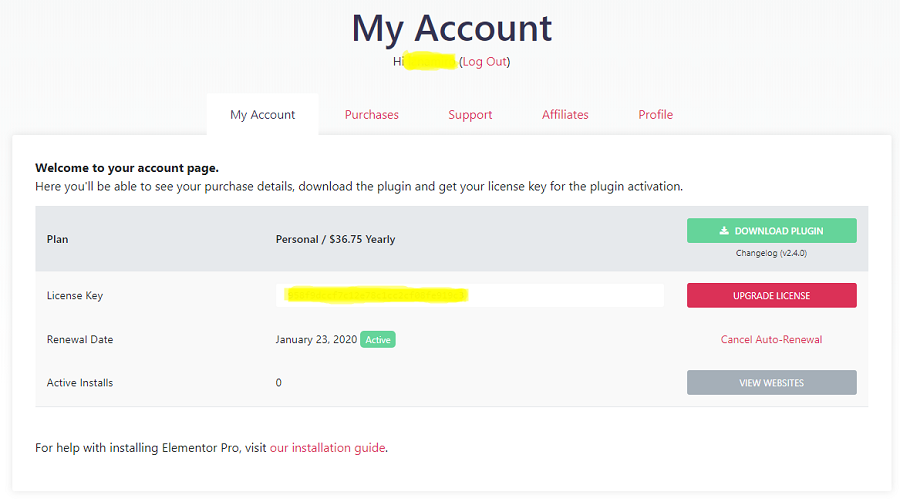
This plugin was created by the Elementor team, so it could be called its true “child.” It is the freshest update of Elementor, launched in January 2019 to meet the needs of clients. However, it is not available for users of the free version of Elementor. Popup Builder is included in the pro subscription plan. So, to get the option of popups creation you have to get Pro Elementor first. The simplest pricing plan that allows you to use the whole variety of Elementor goodies for one website costs $49 per year. So, from the first steps (buying Elementor Pro), here’s the algorithm of getting Popup Builder:
- Buy the Pro Elementor Page Builder.
- Go to your personal account and download the plugin.
- Go to your website’s dashboard, Plugins > Add new, click the “Upload plugin” button and choose the .zip file.
- When the installation is finished, activate the plugin with your license key.
- You’re done, and the Popup Builder is in the Templates > Popups tab.
That is rather a long way, but with the Popup Builder, you also get a huge collection of different Elementor things, like additional widgets, templates, and other tools.
JetPopups


A “family” of Jet plugins counts already more than 10 items and JetPopups is one of them. It was carefully created specifically for Elementor and expands the number of its available tools. This plugin is completely compatible with both free and paid versions, so you won’t need to do any additional purchases. JetPopups costs $15 and after you get it you can use it for a single website. If you need it for more than one project, you can buy the plugin under the developer’s license (it will cost $45) and use it for five websites. The algorithm for obtaining the plugin is a little simpler:
- Purchase the plugin from TemplateMonster marketplace. It will be downloaded to your computer.
- Go to your website’s dashboard, Plugins > Add new, click the “Upload plugin” button and choose the .zip file.
- When the installation is finished, activate the plugin.
- Voila! When you open the Elementor customization menu (clicking on “Edit with Elementor” button), you will find the JetPopups section in the left widget menu.
Popup Creation
Now, when the tools are here and ready, I can try creating a popup with both plugins and see how easy and understandable the functionality is. Next, I will create a basic popup and take a brief look at the customization options of Popup Builder and JetPopups.
Popup Builder
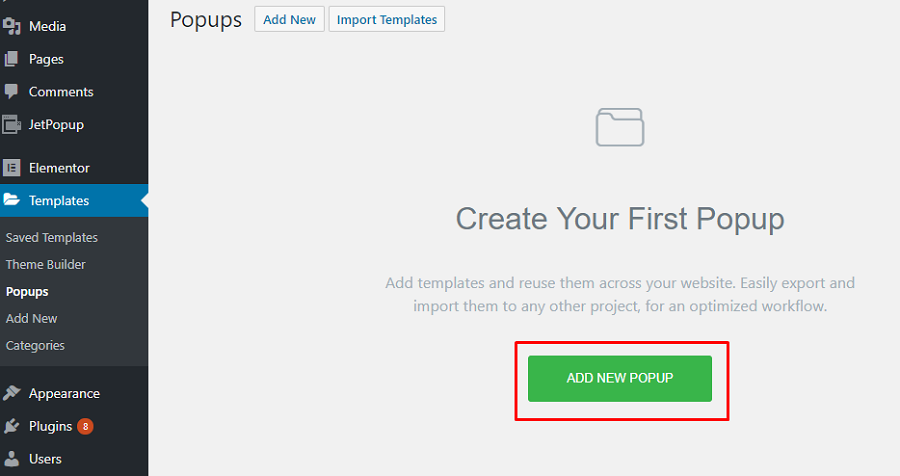
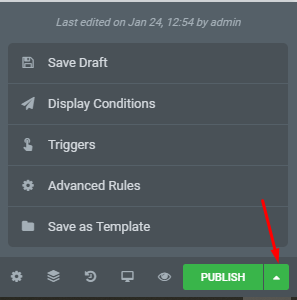
Within Pro Elementor popups are made separately from the website pages. To edit the website’s appearance, you open the page that needs customization, click “Edit with Elementor” button and do the styling. But to create (and then edit) popups you go to Templates > Popups and hit the “Add new popup” button.

Try Popup Builder Now
In the opened window you have to choose what template are you going to create (yeah, you can make templates not only for popups but for pages and other elements too) and name it.

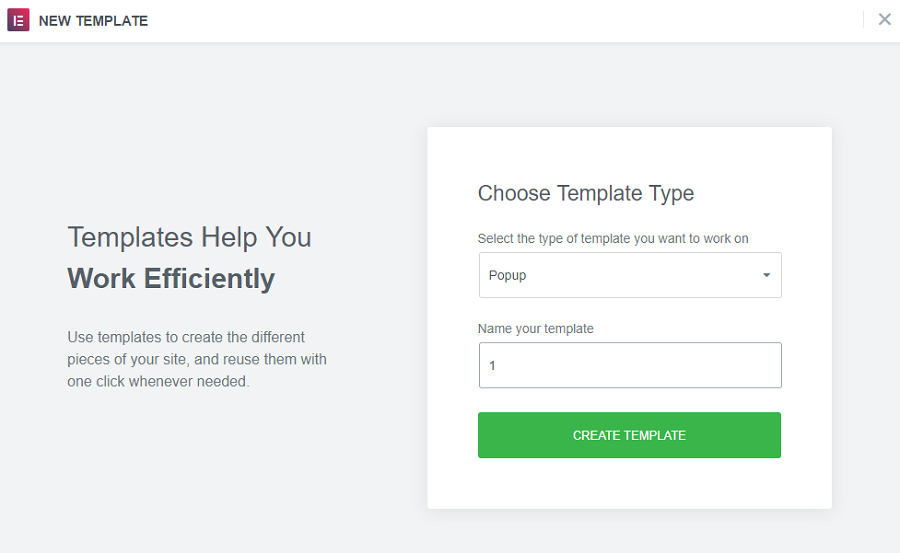
After hitting the “Create template” button you will be redirected to the Elementor customization menu. It is easier to customize an existing element by building it from scratch, so, first of all, you will be proposed to choose a fitting template.

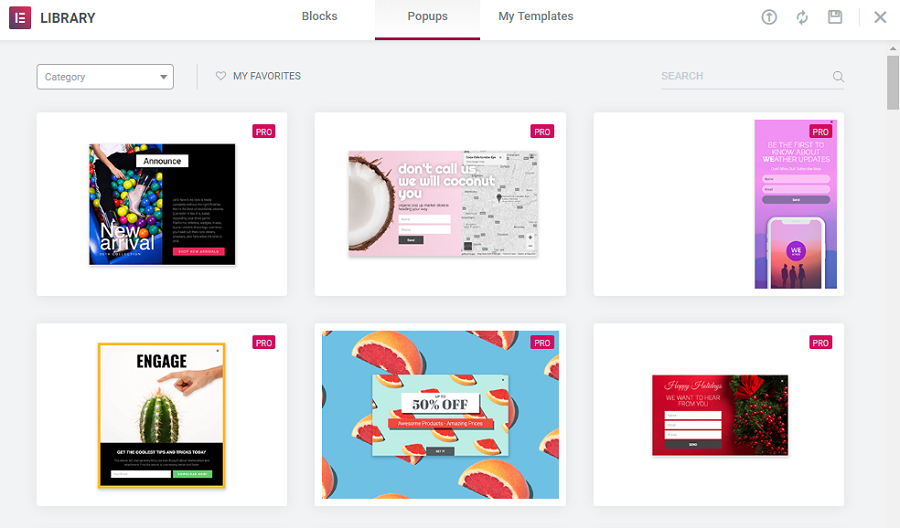
I chose one of the templates that were displayed at the top of the library list. Right after the choice is made you land on the Elementor work field you probably are used to. Customization options are placed in the menu on the left side of the screen. You have three tabs there. The “Settings” tab allows you to change the layout of the popup, rename the template and make a preview. On the “Style” tab you can customize the design – change colors, fonts, pictures, and borders. The “Advanced” tab has a set of additional sliders too; for example, prevent the popup from closing on ESC key.

As you can see – nothing too unexpected, if you have already used Elementor you won’t have any problems with this plugin. Here’s a detailed video that shows how to create a popup with the help of Popup Builder:

JetPopups
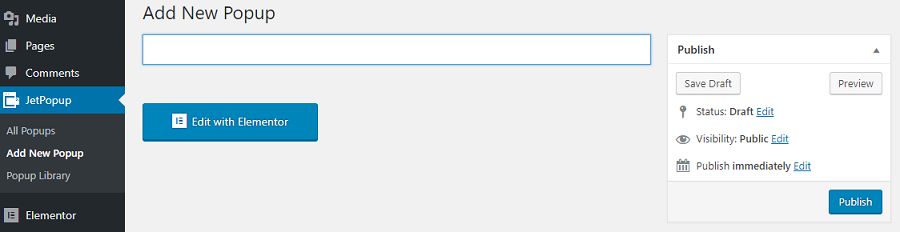
This plugin also adds a new tab to your WordPress theme dashboard and with its help popups are also created separately from pages. The ready-made popups are also stored in a tab named “Popup library.” To create a new popup, you can either push the “Add” button on the pre-made template you find a fitting or go to JetPopups > Add new popup, name the template and push “Edit with Elementor.”

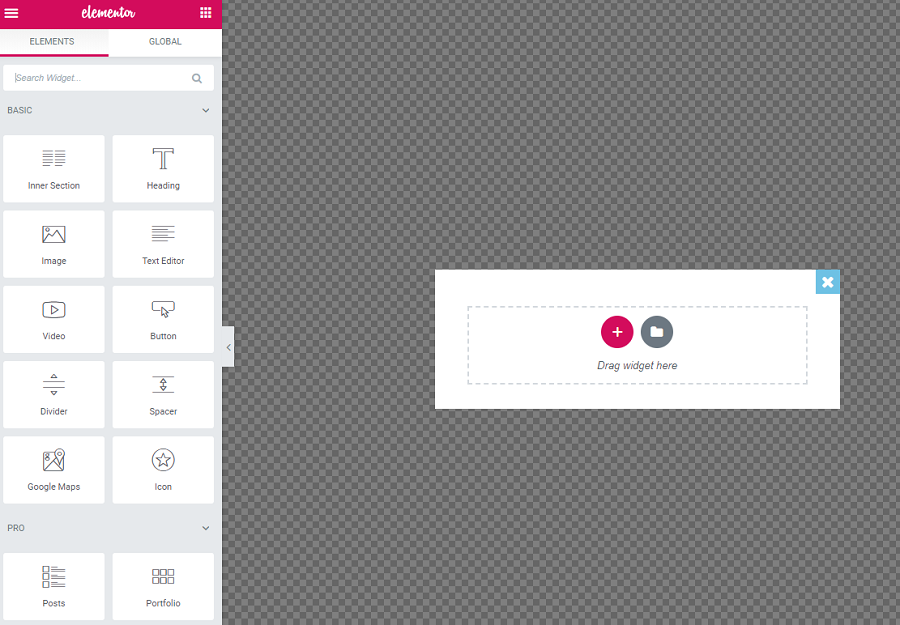
The work field looks a little different than the standard because you are now creating a smaller window. From the menu on the left you can add any kind of element to your popup.

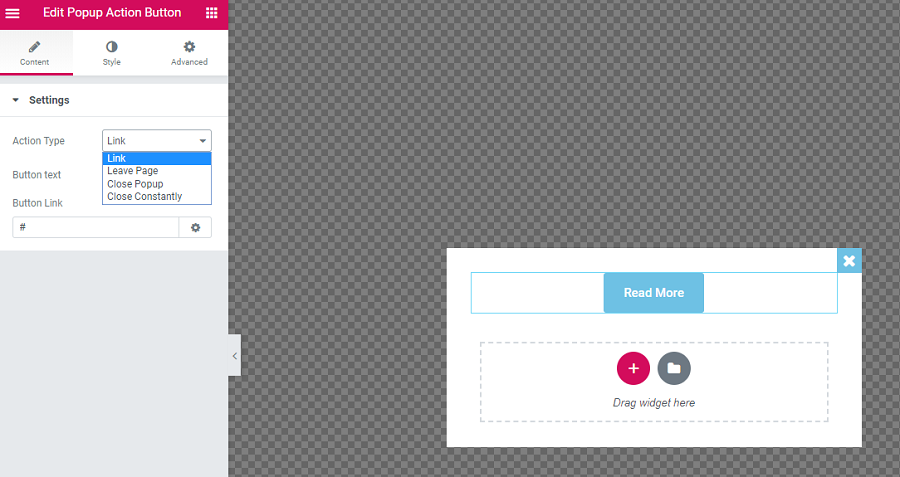
The JetPopups plugin adds to the widget menu only one element – Popup action button. It allows for defining the kind of action that will happen when the user pushes the button.


JetPopups has a little less obvious functionality but compensates it with detailed and useful video tutorials. Here’s the first of nine videos describing the details of this plugin usage:
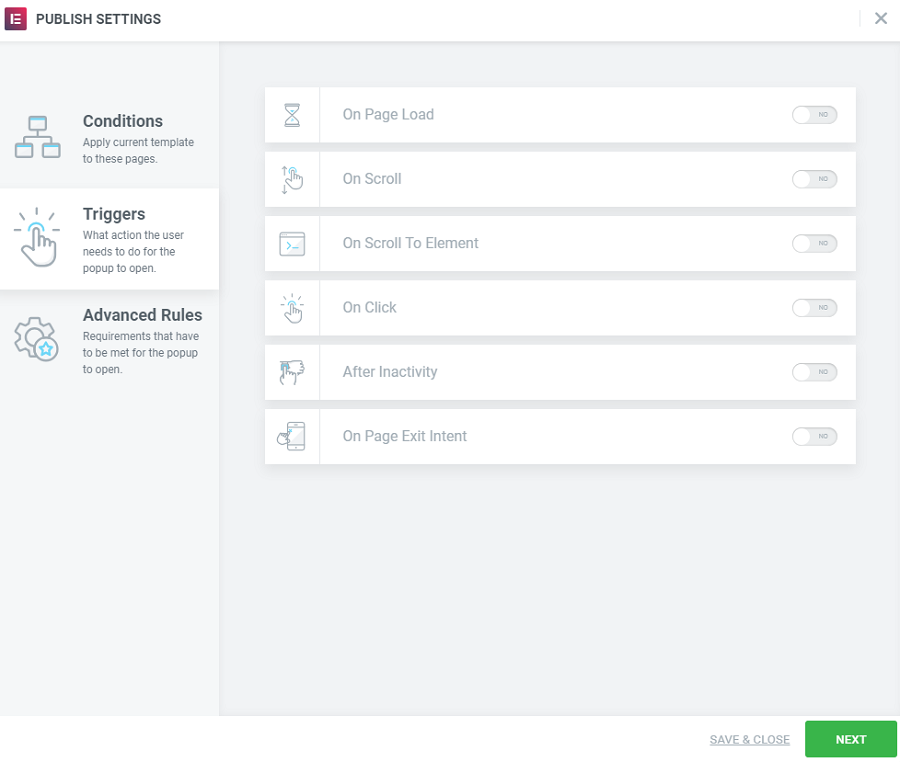
Triggers
To be useful and not annoy the visitors, popups have to appear at the right time. The conditions on which the popup is shown are called “triggers.” The more detailed the available conditions are – the more flexible the popup plugin is. Accuracy is very important if you don’t want your user to leave the site after the subscription form popup emerges.
Popup Builder


JetPopups

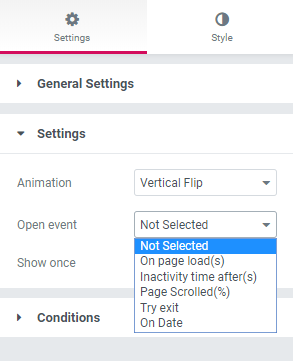

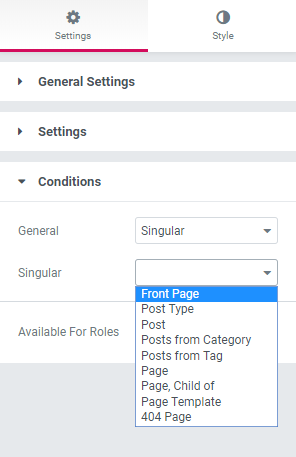
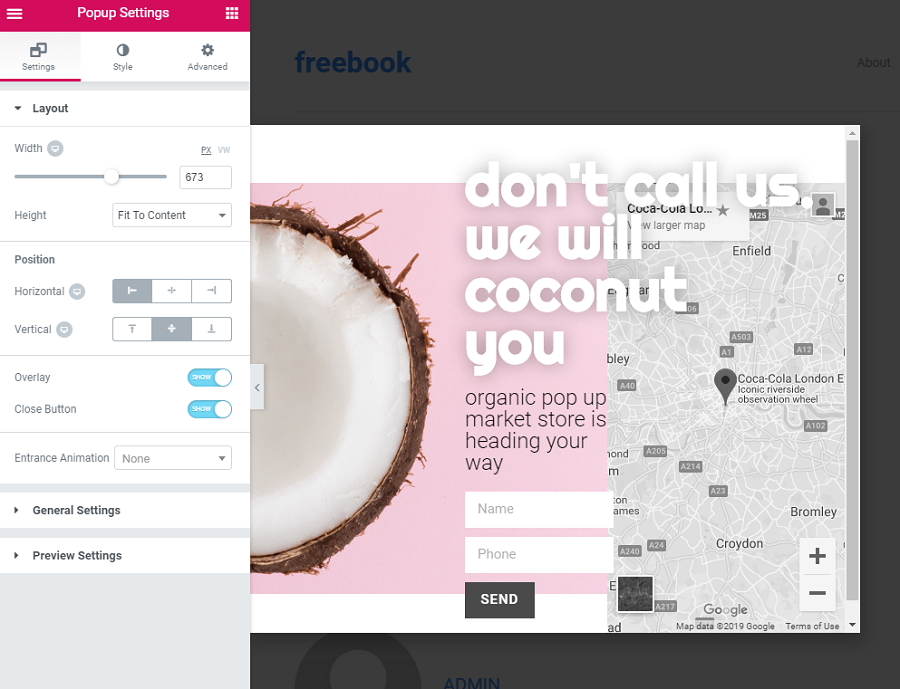
All the triggers, conditions, and opening events are gathered in the settings. After clicking the maintenance button you open the settings tabs and can set the triggers right away. You can define the percentage of the page after scrolling which popup will be shown or the number of seconds after which the user will see the message. The window can be shown only once or every time the user does the certain action (I strongly don’t recommend that – it will not make the users happy). You can also very accurately choose the posts or pages where that concrete popup will be shown. In general, this plugin is quite flexible and allows showing popups with great precision.
Positioning
The users will certainly not be able to avoid windows that jump out right to the center of the screen, but they distract people from the website and can be really annoying. Not every popup should be placed to the center, a narrow ribbon at the top will be less visible, but may be much more efficient. That means you need control over the window position and should be able to move all over the screen.

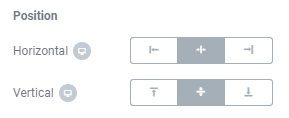
Both Popup Builder and JetPopups divide the screen into nine sectors and allow you to put your popup in any of them. Positioning is defined along the left-right and up-down scales. That is not very flexible, but it is quite enough for a popup.
Animation Effects
The way the popup slides (or rolls, or jumps) onto the page is very important. If the window moves too fast or too slow – it won’t be effective. Bouncing, tickling, and trembling should also be used with great accuracy. Animation effects make the website more dynamic, but they could also ruin the whole impression.

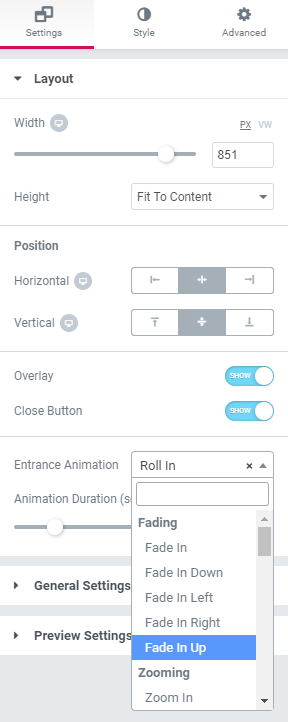
Popup Builder has 36 types of entrance animation effects, including different types of sliding, rolling out, zooming, bouncing, and rotating from different directions. All that, along with the animation duration, can be found in the “Layout” section of the Settings tab.


There are 13 animation types in JetPopups plugin, including fading, vertical flip, different slides, bouncing, and zooming. You will find it in the “Settings” section of the Settings tab.
Templates
In some cases, you want to have a popup with a specific structure and know exactly what it should look like. But that is a rather rare occasion; much more often you have no idea what elements your popup should contain. That is where templates come in handy. Even if you don’t use any of the pre-made samples, going through them could give you some nice insight. And, of course, customizing a ready-made element is much faster and easier than building it from scratch.

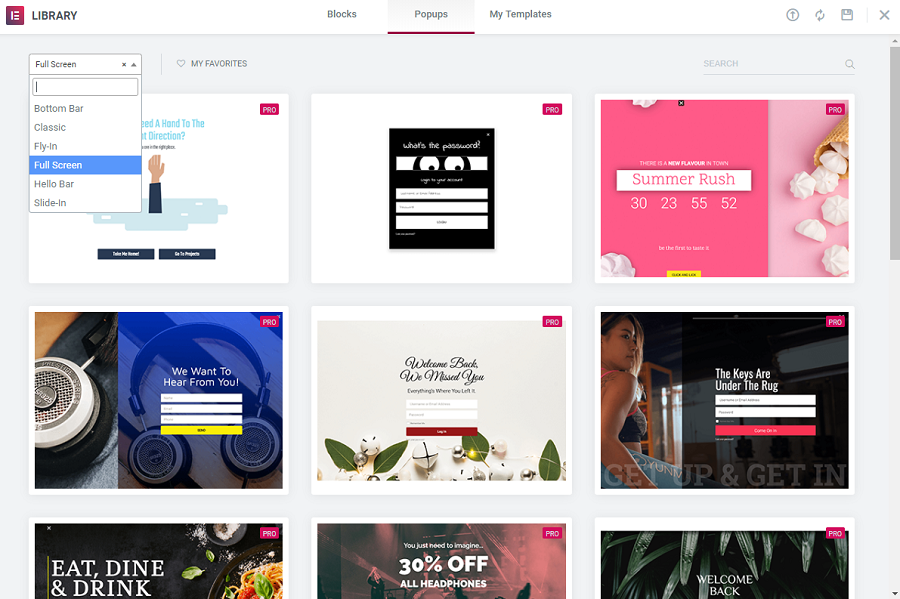
Popup Builder added a category to the Elementor’s library of templates. As I’ve already told you, you can see it right at the start of the new popup creation process. The assortment of popup templates is sufficiently large; there are more than 100 items. In the upper left corner there is a drop-down category sorting tool so you can speed up your search. The categories are understandable and it won’t take too much time to find the popup you need.

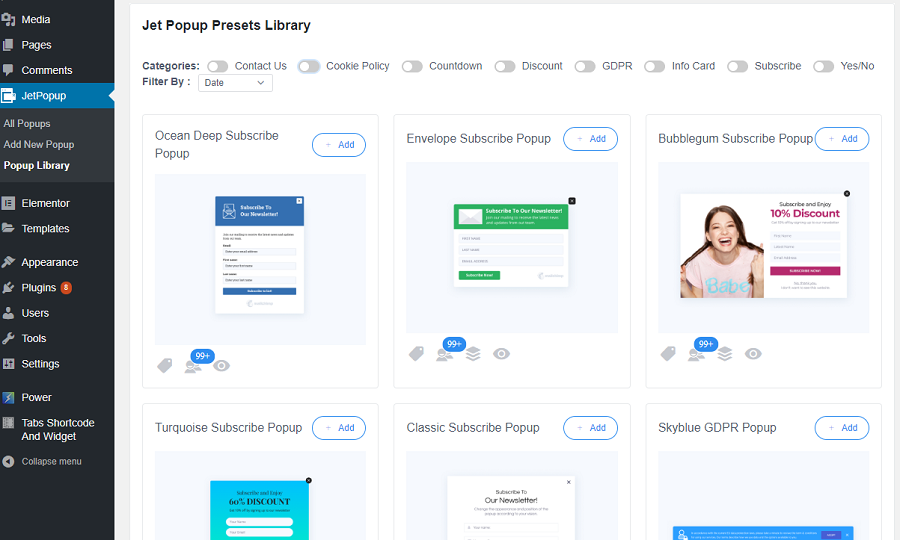
JetPopups also has a huge template library. All of them are stored in the Popup Library tab and have such convenient functionalities like the preview button and usage counter. There are more sorting options, the list could be set to show a specific type of templates and then they could be placed in some order; for example, according to the date of creation. I can’t tell the precise number of available templates, but there are certainly more than 100 of them.
Comparison Table
| Popup Builder | JetPopups | |
| Price | $45 | $15 |
| Templates | 100+ | 100+ |
| Triggers | 6 triggers, 7 advanced rules | 5 open events with additional settings |
| Animation effects | 36 types | 13 types |
| Tutorials | documentation | documentation, 9 video tutorials |
Conclusion
I can’t say which of these two plugins is better; it is too complicated to judge them. Every case and every person has his own requirements for choosing plugins. I guess you should define it by yourself – which of these two will be better for you? I wish you good luck with adding an awesome popup to your website!


Read Also
10+ Best WordPress Popup Plugins Approved by the Official WP Community
JET Plugins for WordPress Elementor Builder [Review]
Elementor Button vs. JetElements Button Widget
Top-30 Elementor WordPress Templates In 2019