TemplateMonster SaaS: Build a Website of Your Dreams Today!
Frankly speaking, I don’t know anything about managing the business.
I never started a little hand-made candy shop or candle factory, I have no idea how much money you need to spend, what licenses to get or when to pay taxes. I’ve never tried it and I consider it to be a complicated and time-consuming activity. But I have tried to create a website, and I know how much time one needs to spend on its development. I know which hosting is preferable, how to pick a domain name and a cool template, and I think that this is really easy.
I’m sure, that if I were a businesswoman, I would reverse my previous words and say something like: “Oh, come on, managing business isn’t hard when you know what to do, but creating websites is a really complicated thing”.
Of course, almost any person can learn to do almost everything he/she wants to (we have a detailed guide about how to create your website by yourself), but that will take some time and efforts, and business people can't afford to spend either.
So, you got a little business (let’s say you sell home-grown plants), you want a website, you don’t have time to sort it out and you have a small budget.

And you know what? That’s not a problem at all. TemplateMonster SaaS solution will help you with that and I’m going to lead you through the process and show how all the stuff works.
Wait a sec, what’s SaaS and why do you think I need it?
It means Software as a Service and that is a model of software distribution, where a company hosts different apps and give clients opportunity to use them. In simple terms, you don’t need to download and install something on your computer, instead, the company has them installed on the servers and you get an opportunity to use it.
You now think: “That’s sweet, but how it could help me?”, so I’ll give you answers immediately. Let’s go through your requirements:
- A website without efforts.
When subscribing for TemplateMonster SaaS solution you don’t have to think about hosting and domain name (you don’t even have to understand what’s that). All the technical part will remain unseen and you won’t have to worry about it. You will just choose a theme, customize it using your mouse, and we will do all the rest. The process altogether will take less than the hour and won’t be harder than creating an account on Facebook. - Low cost.
Before subscribing you can use a free 14-days trial to understand if you like it or not. I’m sure you will love it, considering that the hosting and website maintenance service will cost you only $9.9/mo. Yeah, I am serious, you get a cool website for the price, less than a cup of coffee in Starbucks.
So, let’s go through 3 simple steps and get you a gorgeous internet platform.
Step 1. Design
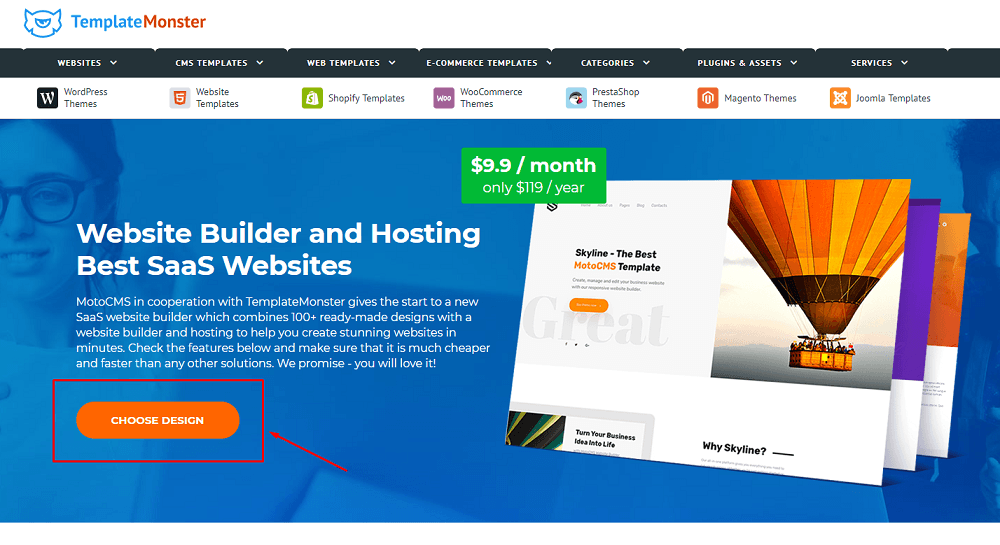
As we previously assumed, you are a happy plants distributor. Go to the TemplateMonster SaaS solution page and hit the big orange “Choose design” button. Everything starts with the appearance of your site.
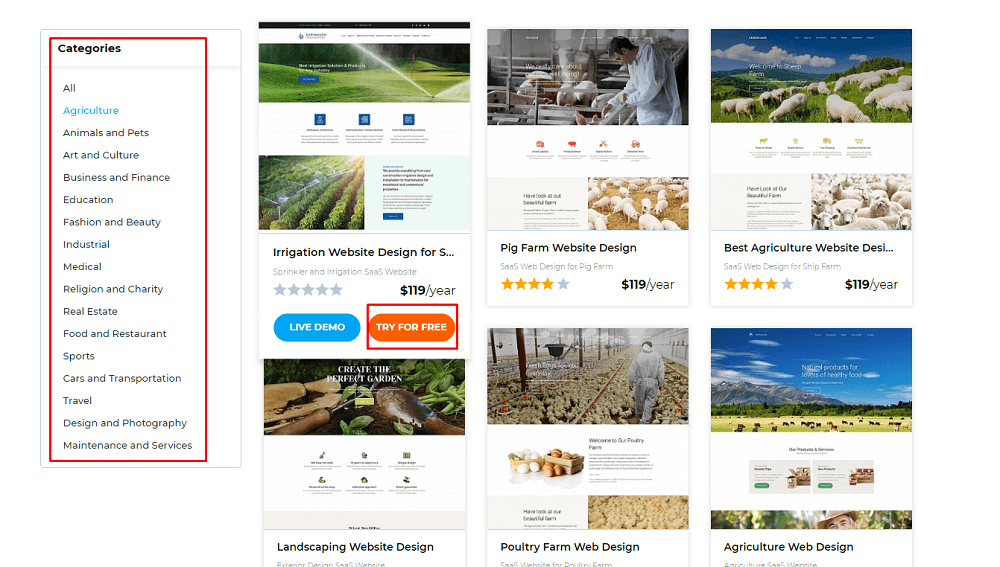
The system will move you to the ready-made designs catalog, where you can choose your business category and then pick up one of the dynamite templates. You are a plant seller, so let’s go to the “Agriculture” tab and choose (our weapon) a nice theme.
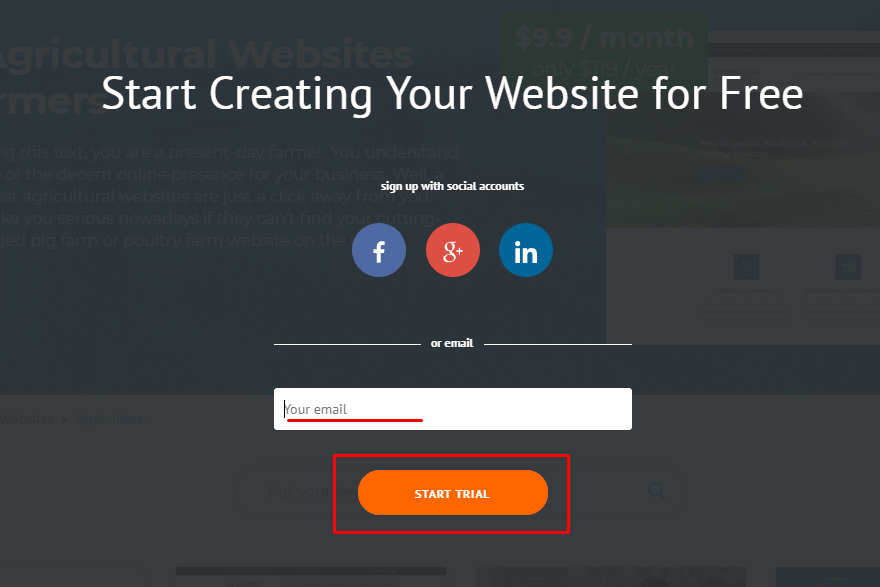
Subscribe with any of your social media or type your e-mail to the bar and click on “Start trial” button.
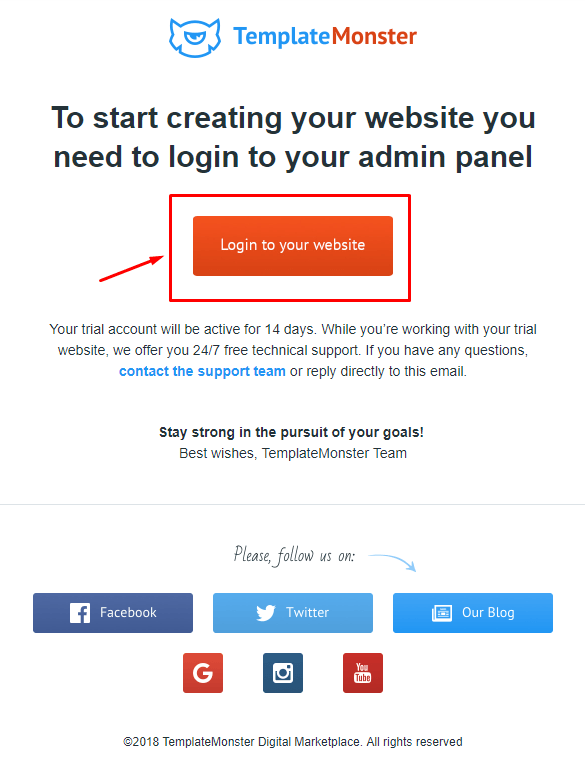
The letter is probably already in your mailbox, so check it and log in to your new website. The letter will look like that:
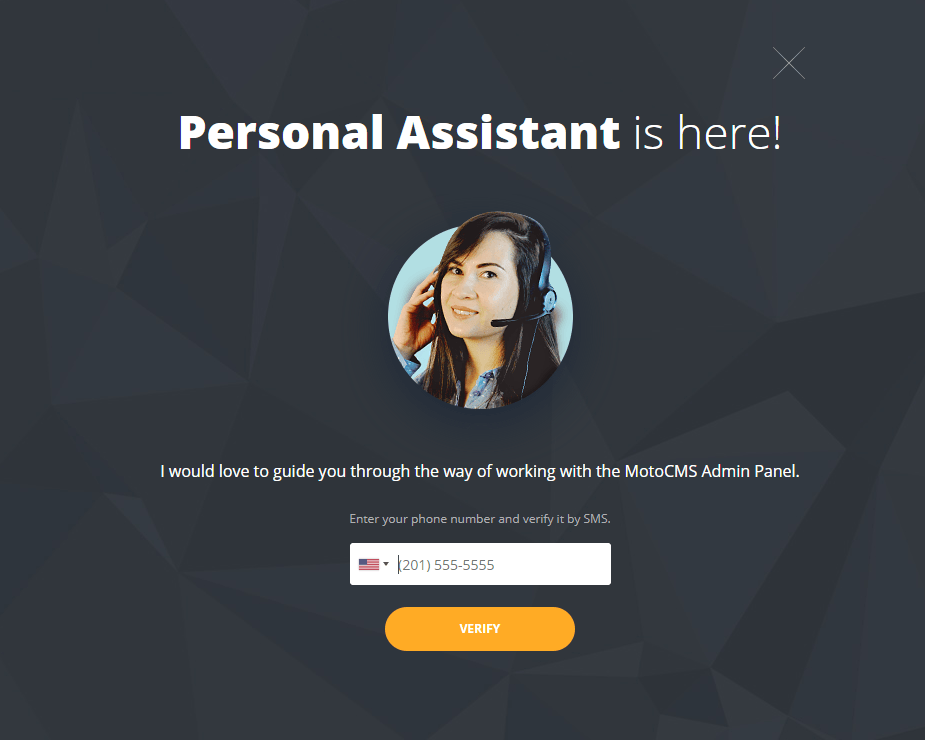
As this solution was created in collaboration with MotoCMS (if you're familiar with MotoCMS templates building a website will be a piece of cake for you), you will see a nice Moto loading animation and then receive an offer to contact a personal assistant.
If you need one – type your phone number in the bar and hit “Verify”. If not – just close this pop-up.
MotoCMS admin optimistically welcomes us in the future and at this point, you may become confused. Hey, what to do now?

Keep calm, everything is fine, you are now on your demo website. Look to your mailbox once more – the letter with login details will be already there. After you customize the website according to your taste, our team will make it alive.
The free trial version could show you builder’s functionality. The created website won’t be visible on the internet and available for visitors. However, right after you send the payment, you will get a confirmation e-mail and a friendly (neighbor Spiderman) tech support specialist will contact you and ask about the domain name you would like to give to your site. If you already somehow get the domain name – you can keep it, tech team will bound your website to it.
While support is registering your website you can start customization process and add content. Don’t worry, all the changes will be saved.
Step 2. Template customization
Your website’s control panel has 5 sections: Pages, Design, Media Library, Settings, and Blog. Each of them will help you to make the website more suitable for your business. Let’s briefly go through their functionalities.
Pages
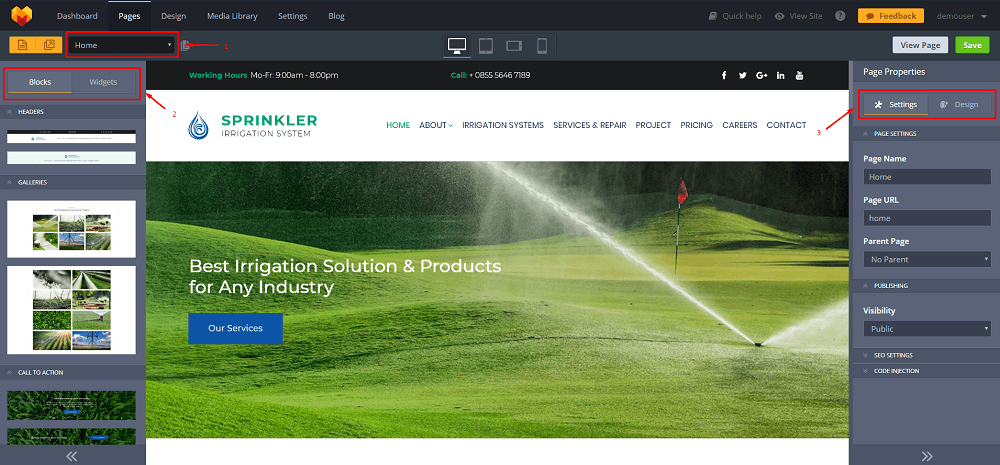
In this section, you will be able to customize the layout of every page in your website (except Blog page, it is customized separately, in “Blog” section) according to the needs. At first, choose a page in the upper left-hand corner (it is marked with “1” on the picture). You can either start to design existing page, such as “About” or “404”, or create a new one, hitting the button on the left. The pop-ups could be chosen or created from this bar too.
The left sidebar is a catalog of available designing blocks and widgets (marked “2” on the picture) you can put directly to the page that is placed on the center. After that, you can move and delete them without any issues using the mouse only.
When you choose the element and start working with it, right-hand sidebar transforms to a list of tools. According to the type of the element, you will get an option to change spacing, content width, adjustment, e.t.c. And beyond editing mode that sidebar (marked “3” on the picture) shows you page, publishing and SEO general settings. You can also choose layout and background in the “Design” tab.
Both “Pages” and “Design” sections have a set of buttons on the top of the screen that allows checking how the design will look like on different types of the screen and make some changes if needed.
Design

When the layout is ready and you like the result it is time to work on the design more accurately. The “Design” section allows you to spice up the pages and make them more original. It has five designing tabs:
- Text styles. You can (and, probably, should) re-write every phrase on the page, replacing the demo content with your own. In this tab, you get a set of options to change size, color, and font. You can choose a specific piece of text either picking the text type from the list or just clicking on it on the page.
- Colors. Don’t like the color of buttons? Here you can change it – and paint everything according to your taste. There is an option to generally change colors of elements on the whole page or you can choose the concrete one and change it solely.
- Background. Demo pictures are gorgeous, but probably you have your own vision of what should be placed to your website background. On this tab, you get an opportunity to download and set the best photo of your plants as the first picture your customers will see.
- Size and values. Here you are able to set the spacing between rows and columns, as well as choose the general spacing settings.
- Widgets. This tab allows you to change the appearance of every widget you place on the page. You can find it in the list or click on it on the page and customize all the features in the one window.
Media Library
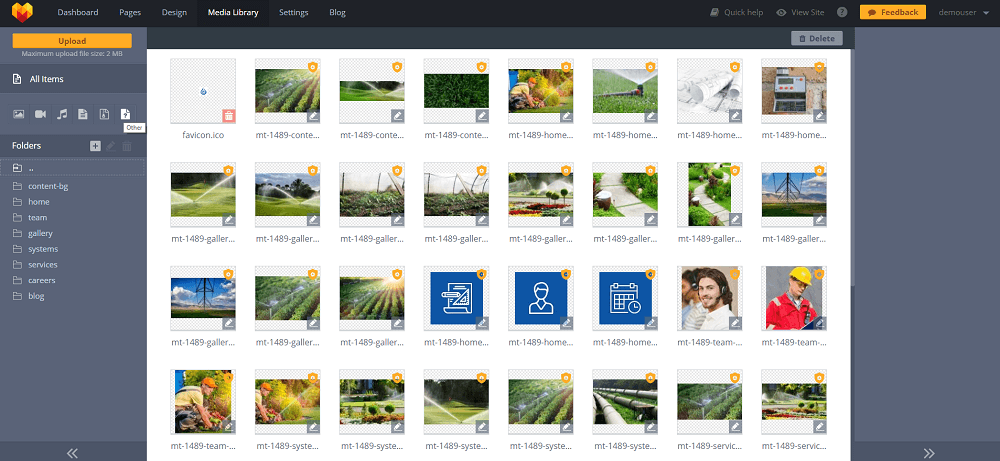
All the content you upload to the website is stored in the Media Library. Here you can pick any picture, video, document or music file and use it once more on the same website. Thanks to that, you have to download something only once, which makes page loading quicker.
Left-handed sidebar conveniently sorts the content according to its type (picture, audio, video, e.t.c) or the folder it is stored in. That helps you with navigation because every picture is located in the folder that has a name of the page you use it at. You can add, rename and delete the folders you don’t need and still be sure that necessary, protected folders won’t be deleted so easily.
When you choose a file, on the right-handed sidebar appear the information about it, such as URL, name, size, loading date and dimension. You can set the default title and default alt text there too.
Settings
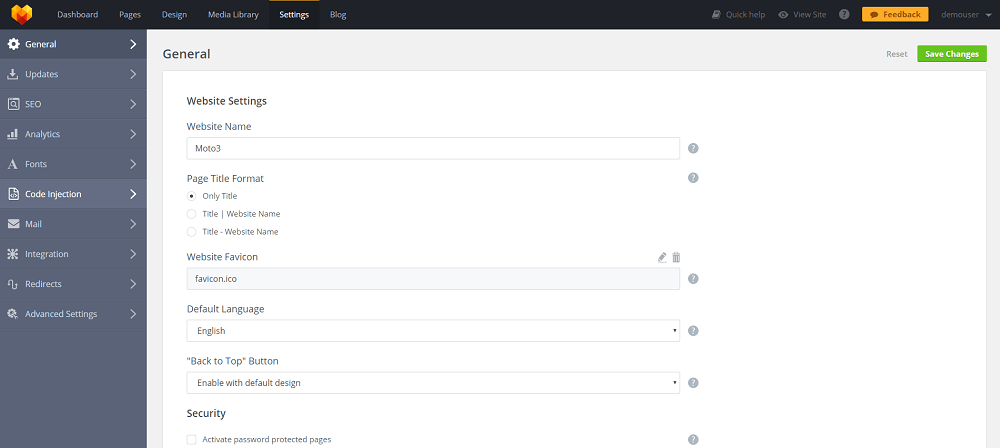
All the non-design features of your website are customized here. You won’t need to go through every single one of them, but you at least should know where to find them. There are ten tabs in this section, separated to make the navigation easier.
General
The control panel you see in this builder is similar to the MotoPress administration dashboard. That’s why for some of its parts exist video tutorials that will show you what presented features are used for. After all, it is better once to see than hundred times to hear.
Updates
Every software needs updates from time to time. New security measures, faster and more powerful software, you don’t want to miss it, do you? This tab is created especially for that and there will be no problem updating MotoPress engine, especially if you watch this video:
SEO
A very rare website now doesn’t use search engine optimization. Everyone would like his site to be on the top of Google search results rating. This tab has a few instruments that help you (or a person you hire to optimize your website) it that task. You can decide if to use permalinks, add “html” suffix to the URL, create a sitemap and customize its settings.
Analytics
This tab is for those ninjas that do Google or Yandex analytics and have an account there. Having a special code, tag od ID, you will be able to track it.
Fonts
All the fonts you use for the website are listed in this tab. Here you can edit their titles, add and delete new, non-default fonts. Here’s a short, but detailed video about new font adding process:
Code Injection
Experienced website builders sometimes want to add something unusual to their creations. In that case, they can inject some objects typing the code to the fields of this tab. If you are a beginner – pass it, you won’t need this tab soon.
When a user writes you a message via Contact Form (if you use it on your website, of course), it is sent to the default e-mail you used for registration of the account. However, if you want those messages to come to another mailbox you can set it at this tab.
Integration
This tab you can integrate such convenient apps like Disqus and Image Editing Component of Adobe Creative SDK. To make it more clear to you – check out this video:
Redirects
A website owner needs this tab when he changes his website URL. For example, for some reason, you decided to change the domain name. Surely, you don’t want your constant customers to lose you and start buying plants from another seller and that’s why you create a redirect from your old URL to the new one in this tab.
Advanced settings
All the rest features that didn’t fit other tabs are gathered here. You can set up the time zone here, choose the Maintenance error and Loading error messages, enable lazy loading and cookies notification.
Blog
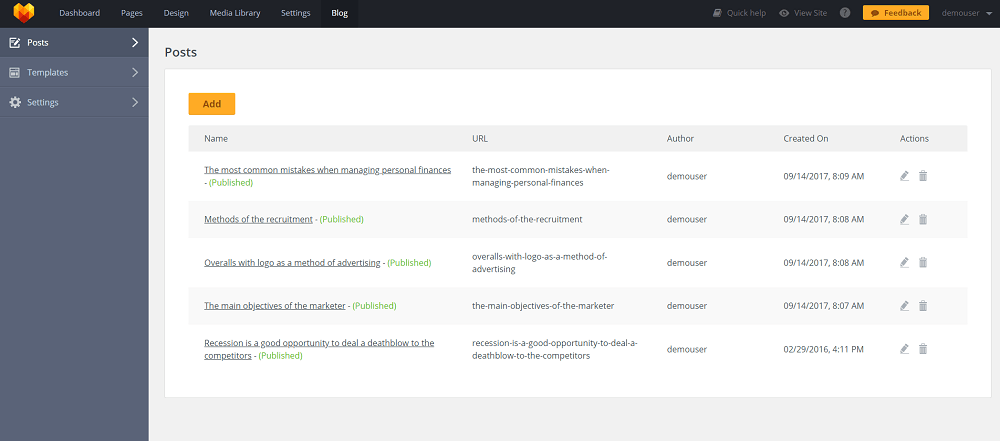
Most of the websites use blogs for different reasons. Latest news sharing, interesting themes analysis, improving SEO rates – the blog is a useful and multipurpose tool. To make managing easier and faster it is separated into a special section, where you can set the layout, design details, write and edit posts, using one of the three tabs:
- Posts. All the posts you write will be stored here. You can add, edit and delete them from this tab
- Templates. Blog layout, fonts, colors, location – all that stuff is customized here.
- Settings. A few finishing touches, date format and comments adding, you will probably come here once and leave it alone.
MotoCMS team shot a great video about blog functionalities, so if you need details – take a look:
Step 3. Be fabulous

Yeah, you have a website now and that means that the main part is finished. However, to start selling plants to new, hypnotized by your website, customers you need to make your internet platform successful and popular. It will demand efforts from you, but be sure it will be worth it.
Here are few little tips:
- Use your social media accounts to tell all your friends that you have a website now.
- Do a really cool product presentation
- Answer messages as soon as possible
Of course, those are not all the advice you should use at getting to the top. There are much more of them in our article about increasing website’s conversion rate. And don’t forget that one of the best teachers could be a competitor.
Have you ever been to a situation I described at the beginning of the article? Do you ever use a SaaS solution? Did I give you enough information about this offer? Please, feel free to leave comments and feedback in the section below.
Read Also
100+ Ready-to-Use Websites – TemplateMonster feat. MotoCMS Present
How to Create a Website and Make Money in 2018

A passionate WordPress monster since 2018. Loves professionally built website templates, is Elementor Page Builder fan and becomes extremely curious when it comes to trying some new site creation tools. Quora account
Get more to your email
Subscribe to our newsletter and access exclusive content and offers available only to MonsterPost subscribers.

Leave a Reply
You must be logged in to post a comment.