Animated Boxes: An Easy Way to Shake Up Your Website
The era of static pictures popularity ended with the first film. From that time the world of art started to pick up speed. The audience expects to see the moving picture almost everywhere now. The modern world sparkles and spins around with fantastic speed. It is not enough to create a website with beautiful pictures; you have to make it move and feel dynamic. Of course, it is very important not to overdo it, but if your website doesn’t have animation effects at all – you should think carefully about adding some. For example, animated boxes.
Three types of animation
A website built by a professional web designer from scratch can have many animation effects added to the code. Some websites are so complicated they are more like an interactive browser game. However, these guides are designed for the audience with a modest amount of coding skills. That’s why we’re taking a closer look at some simpler ways of adding motion to the WordPress website without a lot of difficult coding steps.
“Flashing lights” Blinking attracts attention much more than just a static light. This type of animation effect attracts the user’s attention to some part of your website (for example, a subscription button or a special offer). Blinking colors, “beating” of shape or size will make a visitor check to see what’s there.
Hidden panels. To make a visitor focus you sometimes have to hide excessive elements. The menus and additional information hidden in the moving panels improve the user experience and make the website more spacious.
Shapeshifters. The elements that change color, form, shape or picture when users interact with them are the simplest, but also the most attractive effects. Animated boxes are an excellent example of shapeshifters.
Pace yourself

When you acquire some level of mastery in a skill you can be caught by the desire to use it everywhere and for everything, but that would be a mistake. Remember, the average user evaluates your website for only about 10 seconds and if you haven’t interested him – he leaves. A web page overcrowded with blinking, bouncing and shimmering animation will become a hodgepodge that only annoys visitors, not entertains them.
Before placing an animation on the page think carefully and answer a simple question, “What do I need this animation for?” Every element should have a clear purpose to be placed in that specific spot on your site. If you thought out every detail and it fits your design - it won’t overload the appearance.

Easier than you think
If you look at the gorgeous animated boxes and think you will never be able to make something like that – you are wrong. It is easier than you think, at least with the proper tools. Elementor Page Builder not only simplifies the website building process but also has a set of very convenient tools – Jet plugins. One of them, JetElements, will help you create a great animated box with a few mouse clicks. If you have both those plugins installed, I’ll show you how fast and easy is it.
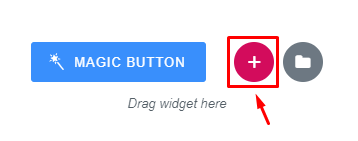
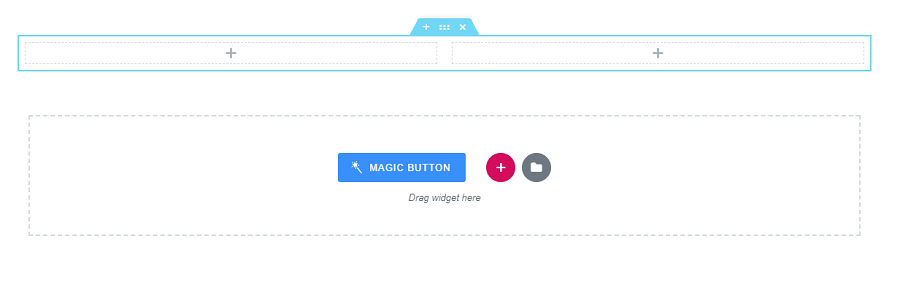
Create a new page in the WordPress administrative dashboard and click the “Edit with Elementor” button. Before adding animated boxes, you should click the “Add new section” button and choose how many boxes you need. I’ve chosen two.
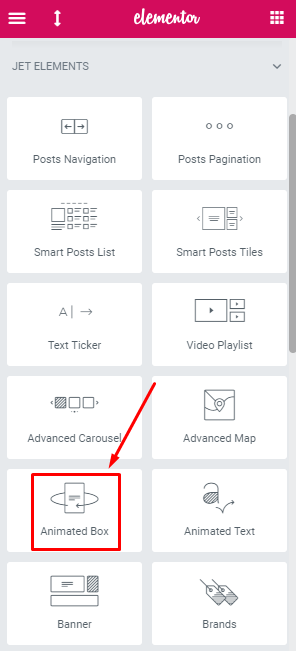
Now you have to decide where to place the animated boxes. Look for the “Jet Elements” section in the widgets menu and find “Animated box” there. Drag and drop it into each section’s field.
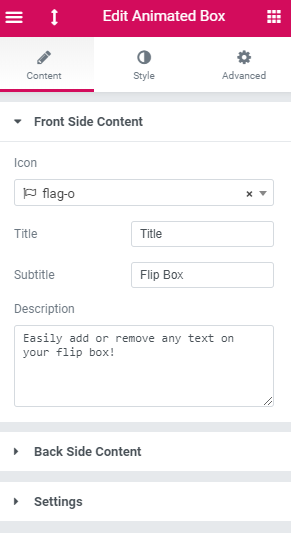
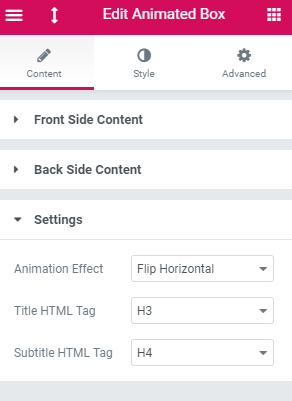
It’s time to do some customization. In the “Content” tab of the menu, you can change the side content and the type of animation effect (how the box will act when the user hovers over it). I will do the minimalistic front side, with the only icon at it and set the animation effect to “Slide Right” and “Fall Down” for the first and second box.
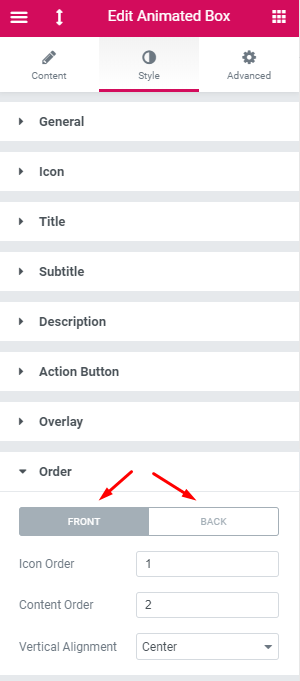
In the “Style” tab you get a toolbox filled with designing instruments. You can change colours, fonts and sizes, set pictures, change borders, paddings, and margins. Every section has a front and back switcher to customize both of them. Playing with the settings is really interesting and makes you forget about the time.
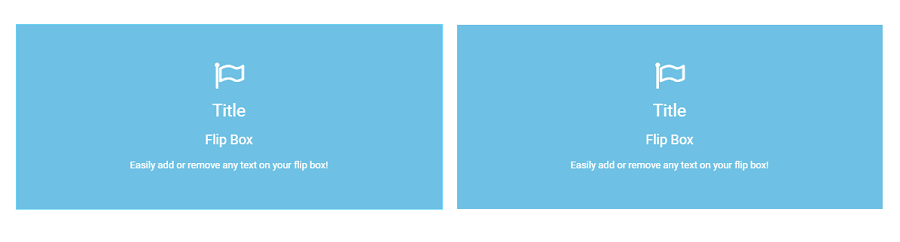
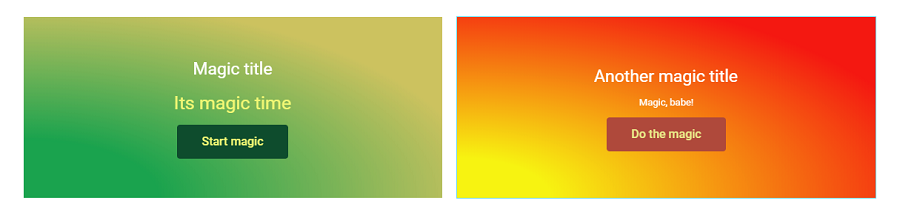
Here are the animated boxes I created. It took only a few minutes to do these simple things, so you will definitely be able to create something more eye-catching and fitting to your website style.

We shot a short tutorial video about creating animated boxes. It is a little more illustrative than just an article with pictures and you will be able to see how all those animation effects look.
For the tutorial, we used the Monstroid 2 theme, our newest template, completely compatible with Elementor Page Builder. It is also our hottest offer because the M2 package includes a complete collection of JetPlugins. This kind of a bundle costs sufficiently less than all the components separately, so if you are an Elementor fan – don’t miss it. It is like a bunch of web development instruments all in one toolbox.
I will be really pleased to hear your stories (and see some print screens) of animation elements you have created. Please, share the cases you used when building the design for a website in a comment section below.

Read Also
JET Plugins for WordPress Elementor Builder [Review]
Elementor Marketplace Just Hit the Web Templates Market
Top 30 Best Animated GIF Artists On The Web
JetElements: Build a Better Website With Our New Elementor Add-on

A passionate WordPress monster since 2018. Loves professionally built website templates, is Elementor Page Builder fan and becomes extremely curious when it comes to trying some new site creation tools. Quora account
Get more to your email
Subscribe to our newsletter and access exclusive content and offers available only to MonsterPost subscribers.

Leave a Reply
You must be logged in to post a comment.