Lesson 3: Buying a Hosting Plan + 1-Click WordPress Install
This lesson is a part of the How to Build & Maintain Elementor WordPress Website? course.
Hi, everyone!
In Lesson 2 we were looking at the most recommended hosting companies (from the perspective of our own experience) and I’ve presented for you a set of minimal pricing plans that will fit small business WordPress websites.
Let's roll.
In Lesson 3 we'll go through the purchase process, and will finally install the WordPress engine using a Softaculous app. Let’s roll.
As an example, I will use InmotionHosting. If you choose another option you will still have to go through the same steps.
I’ve recommended you to use the Launch plan, it can provide you with 2 websites and unlimited disk space, bandwidth, and emails.
Why do you need 2 websites: Live version and Staging version?
We’re here to help you build a WordPress website, so I’m going to speak frankly.
Consider your WordPress website as your cash cow. How will you treat it? Will you feed it? Will you wash it? Will you allow it to walk in a huge field?
Almost the same things you need to do with your WordPress website: feed it with up-to-date plugins and themes, give it enough freedom hosting it with a reliable provider, and so on.
So why should there be two websites? Any WordPress website needs a staging environment, the playground where you can try implementing new features, or where you will test newly discovered plugins.
WordPress plugins can be tricky, you never know if some plugin evokes a conflict or not unless you install it. Plugin conflicts can easily make your website go down.
In case you’re freaking out hearing words like conflicts, go down, 404, you can opt for our maintenance service that costs like your Netflix and Spotify subscriptions in sum - $29/mo. For this amount, our tech support will cover your six and you won’t have to worry about stuff like that. Find more details on the maintenance service page.
It’s much better when you break your staging website than it’s live version. Staging website can easily be restored from the backup, and your clients or visitors will never find that you broke it a few minutes ago, just because staging website can be accessed only by you, or your team members.
Now let’s go back to our hosting plan. As I already I’ll use the Launch plan from Inmotion hosting.

Click order now and you’ll go to the checkout page.
Checkout Step 1
There you’ll be offered to buy some additional items like Backup Manager, QuickStarter Website, and Dedicated IP.
As for me, no-one needs this stuff, so you can nark all of these items as No, Thanks.
![]()
But still, there’s one item that you can use it’s a One-Click Auto Installer.
This software will automatically install WordPress on your new account.
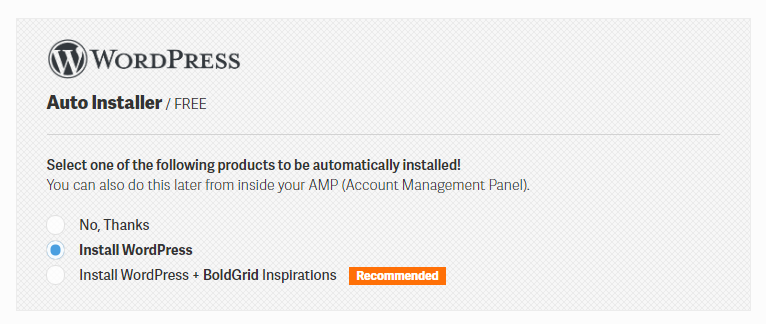
The second part of this Step is called 1-Click WordPress install, this is it, you can opt for effortless WordPress engine installation right from your cart.
Of course, there’s another way how you can do it, you can click No, Thanks radio button and install WordPress engine from inside your Cpanel using the Softaculous app. In this video, you can learn how to do it.
Checkout Step 2
After you click on the CONTINUE button you’ll be redirected to the next step, that where you will have to choose a domain name. We’ve already discussed how to choose a domain name, so this is the right place where you can get it.
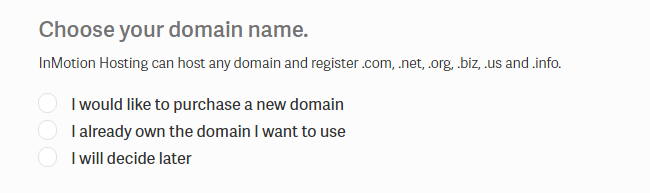
Choose your option and click on CONTINUE.
Checkout Step 3
On the next checkout step, you’ll have to create an account...
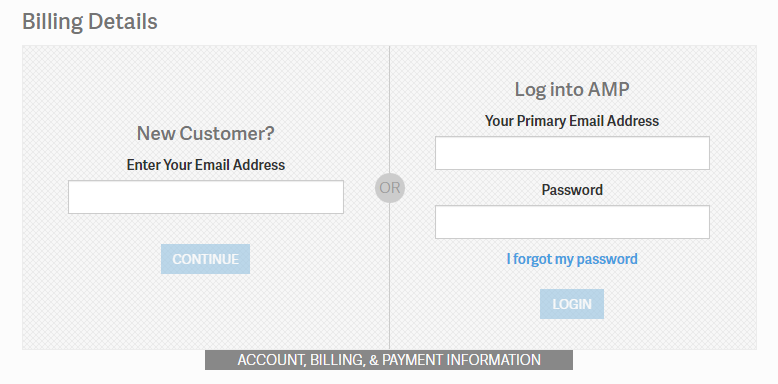
or log into your existing one to enter billing information..
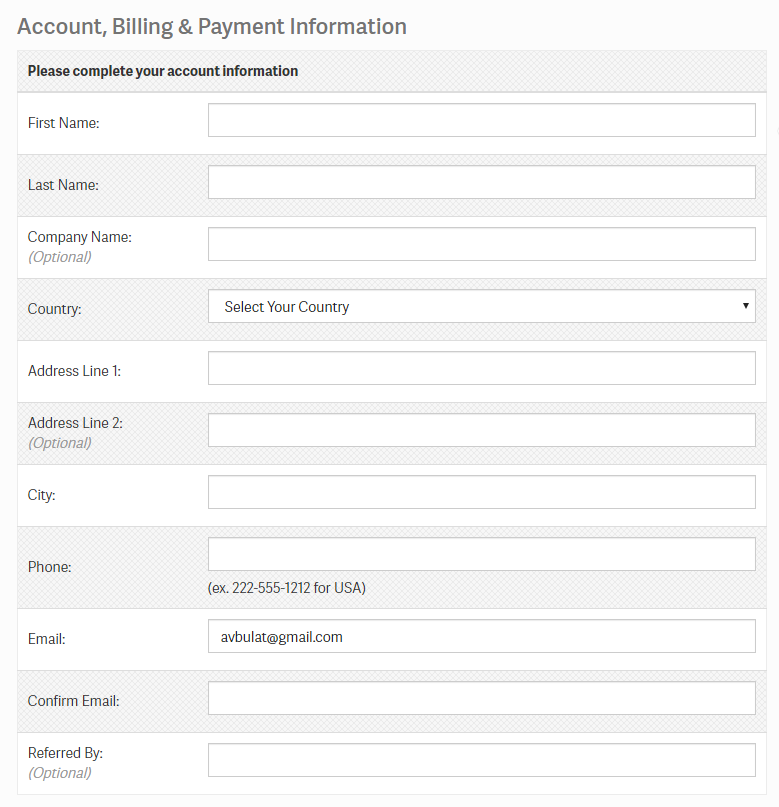
and your preferred payment method, either a credit card, or PayPal, or Check. When you fill in all the blanks click on the REVIEW MY ORDER, to check if all the values are correct.
After completing the payment you’ll a few confirmation emails from inmotionhosting.com, be sure to check your email.
There you will find an email with the login details into your Cpanel.
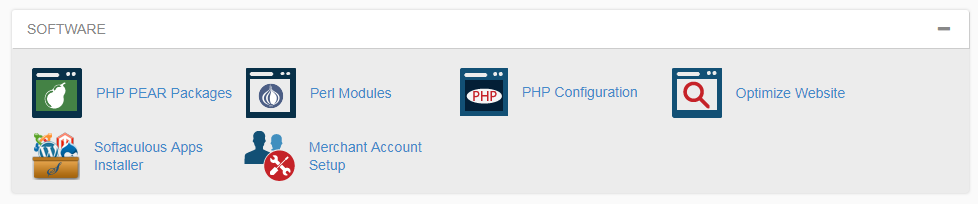
In case you missed the step that offered you the automatic installation of the WordPress engine, no big deal. We can use the Softaculous Apps Installer to install the engine.
Now you need to log into your Cpanel, there under the Software section in your Cpanel, you will find the app.
Here you can check a quick walkthrough video on how to use Softaculous Apps Installer.
Comments in the video.
Under the tab software, you can find the Softaculous Apps Installer, click on it.
WordPress engine is in the first row, click on Install.
On the next screen you can choose:
- the version of the engine
- the protocol (choose https:// if your hosting package has an SSL certificate)
- the domain that will be linked to this installation
- the directory (if you want your website to be accessed via URL https://youdomain.com/directoryname/)
- the name of the site, and admin credentials
When you enter all these values hit the Install button.
Additional information
- Bluehost vs InMotion vs GoDaddy vs SiteGround vs HostGator. Which One is the Best Choice?
- How to Install TemplateMonster WordPress Theme on the Cloudways Hosting?
End of the lesson.