A Highly Converted Elementor Popup – Step-by-Step Guide and Tips
- Getting started - What Plugins You Need to Create Elementor Popup
- Step-by-Step Guide with Images
- Examples of Elementor Popups
- Tips to Make a Winning Popup
- Final Word
Do you want to boost the success of your online business? I hope the answer is yes. To make it, you should implement popups and follow certain tricks to make them work for you. You have definitely seen popups on the web. They are a form of advertising on the internet. Typically, these are new browser windows formed using special plugins.
Pop-ups should encourage the reader to exercise a marketing-friendly action — sign up for newsletters, leave contact data, or employ some other action. With the right strategy, pop-ups are capable of increasing the number of subscriptions by several times while affecting sales growth. To create popup windows on your page, you'll have to install a particular plugin and adjust the settings. In this article, we'll discuss Elementor popup, the plugins you need to employ, and how to make a popup window using a complete tutorial.
Getting started - What Plugins You Need to Create Elementor Popup
We'll begin with a couple of preceding points to make things clear. So, you have or are going to have a WordPress blog, which is organized and maintained with the help of Elementor. The latter one is a drag-and-drop page builder for content and page layouts. It is simple and functional, and you will love how it assists you in constructing your custom site. To set up the WordPress popup form, it is necessary to install a plugin called JetPopup, which is a great tool to make Elementor popup.
JetPopup has a number of advantages. It constructs the popups in a drag-and-drop way, allows adjusting the style, setting trigger events, and implementing many stylish templates. With JetPopup, you can create a popup on opening to inform your guests about something important about you and your services, attach it to a specific widget, or make it show when the consumer wants to exit the site. You can set a specific date when the popup window WordPress will show, create a popup window when a visitor scrolls the page, or after some amount of time spent on the page. You can add a WordPress contact form popup, subscribe form, cookie policy form, discount offerings, and so on. Additionally, you can position the popup form for WordPress anywhere on the page. In general, there are many options that can enhance the productivity of your internet presence, so don't hesitate to get started and benefit from Elementor popup.
Step-by-Step Guide with Images
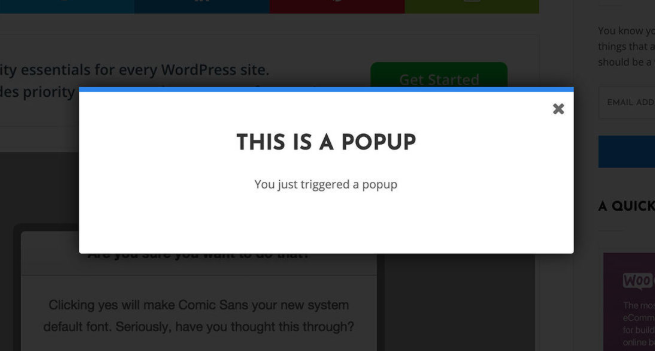
To make it effortless for you, we have devised the following Elementor popup maker tutorial. With the help of this popup tutorial, you’ll find out how to create a popup window. Also, the concept of a popup video is included:
Here is the complete guide on how to create a popup window.Step 1
Install and activate JetPopup on your site.
Step 2
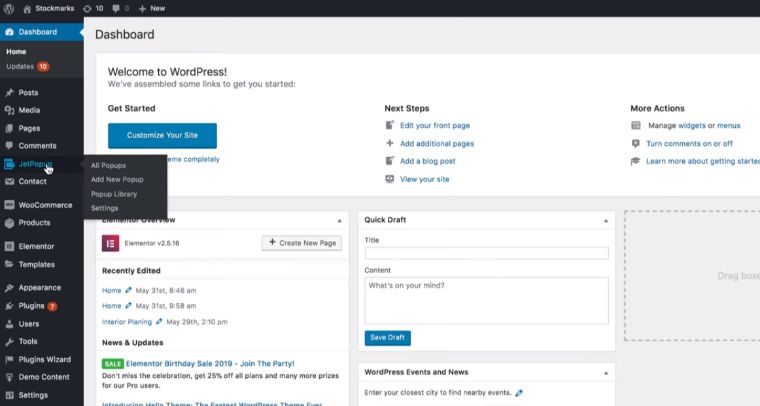
Open the WP dashboard and find the JetPopup menu.
You'll see it on your WP dashboard, then click on it to open the plugin JetPopup menu:
Step 3
Get familiar with options.
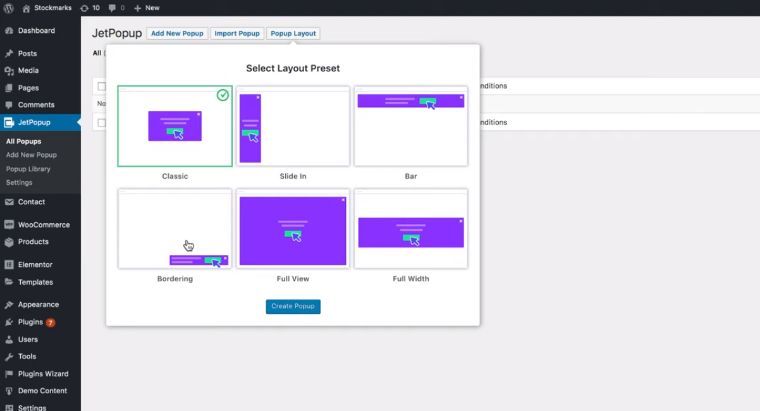
After clicking on Add New Popup, you’ll see a menu with three options: Add New Popup, in which you can generate your popup from scratch; Import Popup, where you can put the file with an existing idea; and Popup Layout, where you can pick the area your popup is going to be placed.
Step 4
Choose a pre-made template.
Instead of devising the popup template on your own, consider using the pre-made designs of popups templates. Find them by clicking on JetPopup - Popup Library:
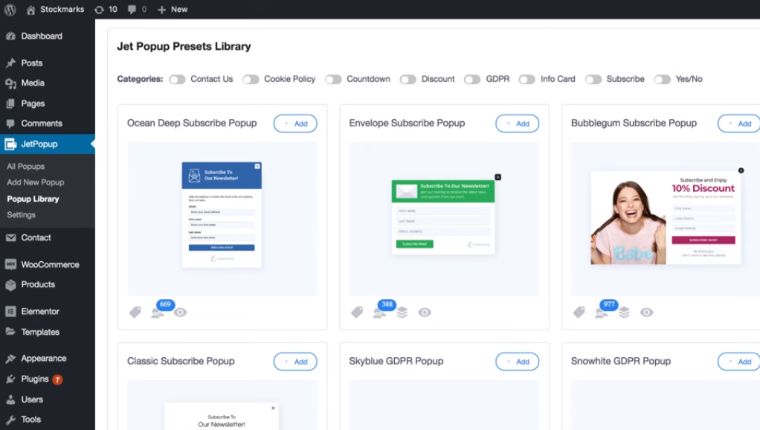
You can view this library and choose the categories for the WordPress popup window. You’ll be able to see additional data about the offered items, such as whether this Elementor popup template requires any add-on plugins and what particular plugins it needs.
Step 5
Customize the chosen template.
Let’s consider this discount Elementor popup template. Selecting it, push Add on the top right side of the template window; after making it, you’ll see the editor menu of this particular layout. Notably, all the points of it are customizable.
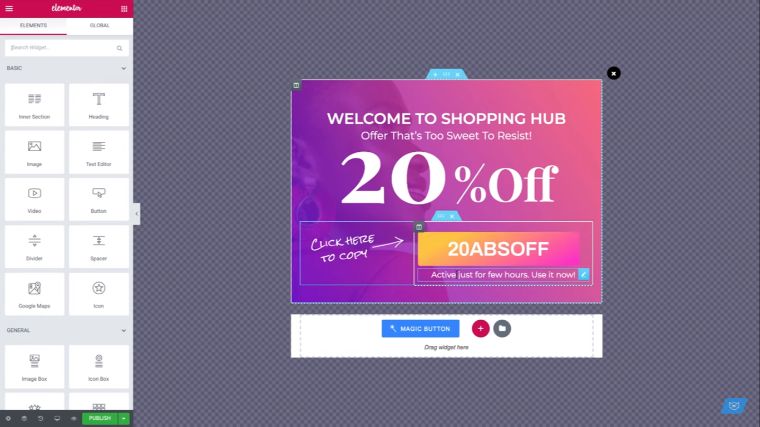
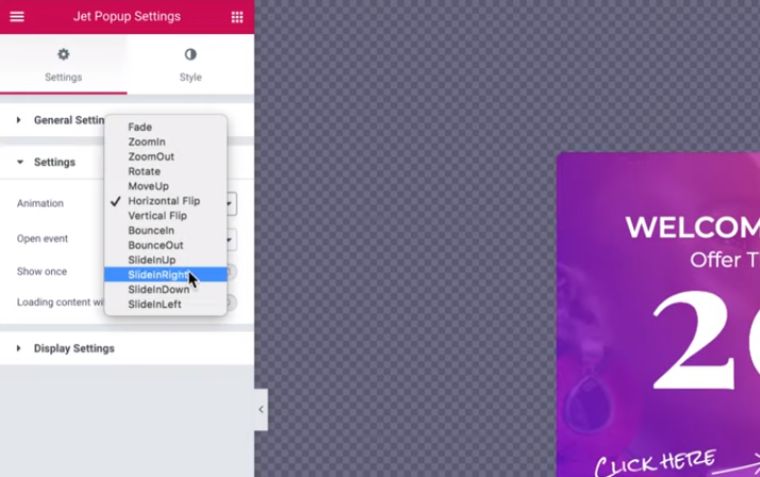
Now, you can adjust the characteristics, clicking on the settings button located in the bottom left corner of the panel. Here, you can put the title of the template and adjust the general settings, such as how and when the popup will appear on your site, pick the animation model, and decide about the trigger event, which is the action of the user that forces the occurrence of the Elementor popup window.
Here, you can also set the open delay, which means the amount of time after the trigger the popup window WordPress will show itself. Also, you can make the popup appear once or several times on your page screen. You may prefer a certain widget that the user will click on for your popup to arrive on screen, or pick the Try Exit mode, which makes the Elementor popup show when the visitor wants to leave your site.
Step 6
Adjust the display settings.
Click on the Display Settings button on the same screen. Here, you can select the roles for who will have access to make edits.
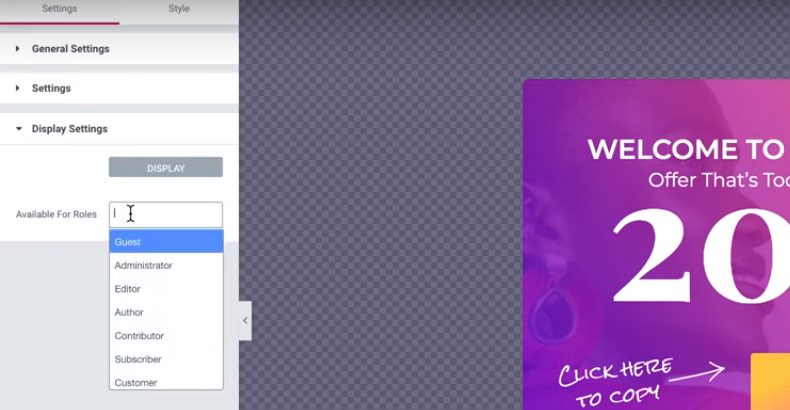
Choose the role and click Display.
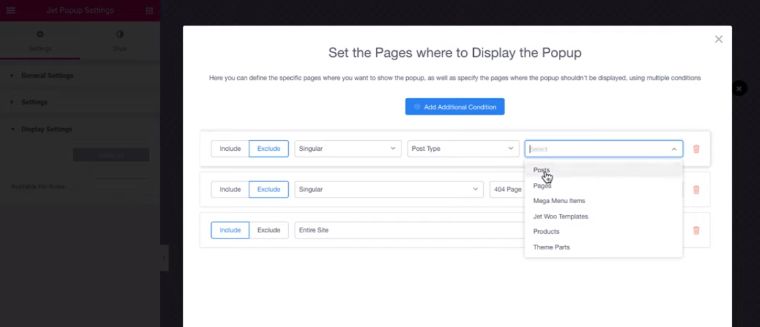
Here, you can select which pages the Elementor popup will be displayed. Push Add Condition button, and you’ll be offered an option to Exclude or Include particular pages of your site. Selecting the pages in the Exclude category, you define the pages where your popup will not perform and picking in the Include category, you adjust the settings for where the popup will show.
Step 7
Customize the style of your Elementor popup. You can save the adjustments and go to the Style settings.
There, you can customize the Z-index, which allows you to place the popup on the very top of your page. Also, you are able to alter the width and the height of the popup container, the position of the content and the popup itself, the background, the borders, colors, transparency, and the style of each element. Overall, the settings are very similar to the Elementor editor.
Step 8
Test your popup page WordPress. Now, you are ready to save the adjustments and test the results on your site.
Examples of Elementor Popups
Having dealt with how to create a popup window, you may want to see some examples of Elementor popup, which may appear on Elementor themes.
An announcement popup will help you to promote a new product or service, collection, launch the new project, notify your visitors about the changes in your business or site operation, policy updates, etc.

Tell your consumers about a current or upcoming discount, so they’ll definitely become interested in the offering.

Proposing a discount with the help of an on-click popup can bring you many clients. It is possible to ask for an email, where the client will get a discount coupon. In this way, you’ll get a subscriber and a client.

Alternatively, you may also offer a general subscription or contact us form popup WordPress on your site. Otherwise, consider employing a login and registration form popup.

To promote your internet presence, suggest that your visitors share or follow your site on social media, which is also possible with the help of Elementor popup.

There are also widespread cookies notification popups and menu popups, where you can suggest the next desired steps for the user, age-gate popups, etc.
Tips to Make a Winning Popup
The goal regarding a popup is to maintain a balance so that the impact of popups is strong enough to induce action, but not so annoying as to force the visitor to leave the site. To achieve this, there are several tricks for working with popups.
For example, popups may not appear immediately, but after a while, during which the visitor managed to examine the content and saw something attractive in it. It is usually believed that this happens after 60 - 90 seconds.
Another good method is showing a popup after the visitor has scrolled the page while reading. It is believed that if someone reads from 30 to 70% of the page, then he or she is interested enough in its content that they won’t leave because of popups.
The third common method is to determine when the visitor is preparing to leave the page. To do this, the movement of the mouse cursor is tracked. A simple algorithm determines when the cursor leaves a specific area. More sophisticated ones keep track of which direction the cursor is moving, and also if there isn’t the usual switching between the tabs of the same site (in this case, you do not need to show a popup window).
Final Word
All of the Elementor popups are created to enhance the effectiveness of your business. Your task is to use them smartly and not to annoy the visitor. Get the users engaged but not disgruntled. This is the main issue when creating popups for your site. Setting Elementor popup is simple as you have noticed from the popup tutorial, and adjusting it is an easy task. The main thing is to find the balance where your clients will click on the popups, get engaged, and your project will get the advantage of this.
Read Also
JET Plugins for WordPress Elementor Builder [Review]
How to Create a Hamburger Menu with Elementor Page Builder and JetBlocks Add-On
How to Create a Posts Carousel Using JetElements Posts Widget
How to Win at Popups: The Top Plugins, JetPopup and Popup Builder, Compared

Writer and editor with 4 years experience in research writing and 5 years in professional editing. The areas of interest include psychology, online marketing, web design, game design, art, innovation, and scriptwriting. Reach her on Facebook.
Get more to your email
Subscribe to our newsletter and access exclusive content and offers available only to MonsterPost subscribers.

Leave a Reply
You must be logged in to post a comment.