How to Create a Posts Carousel Using JetElements Posts Widget
Websites that are specialized in information distribution should be interested in displaying posts in the best possible way. I mean, it is the thing they do for a living, so they should spend some efforts to attract readers. However, the websites that add an article for other purposes (for example, to improve SEO rates) might also need a way to catch visitor’s attention. That’s when different post displaying layouts come into play.
The most dynamic of such display methods is post carousel. Some number of posts are shown in a row and that row constantly moves horizontally. When you look at it there’s an illusion that those posts are placed on a big carousel that swirls around, showing its different sides with different posts placed on them and that’s why it is called a post carousel.
[tweet_box]Create a Posts Carousel Using JetElements #WordPress #plugin[/tweet_box]
The easiest and most convenient way to add a post carousel to your website is with the usage of JetElements Elementor plugin. I have to admit that JetElements could help you not only with post displaying, but also add a sufficient number of available options for web page styling and organization. If you haven’t used Elementor by now – you should try. It helps web design beginners create a fascinating look without huge efforts. Here’s our Elementor Page Builder review. Check it out for details. So, it is fairly easy for Elementor adepts to add and customize post carousel to the page. Let me show you the process.

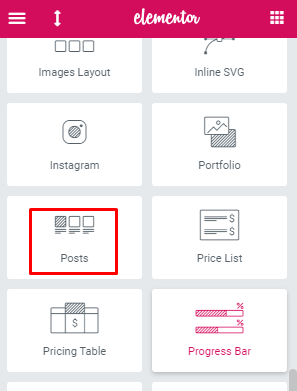
Go to the page you want to place post carousel on and press “Edit with Elementor” button. In the elements menu find the “Posts” widget, drag-and-drop it to the work field.
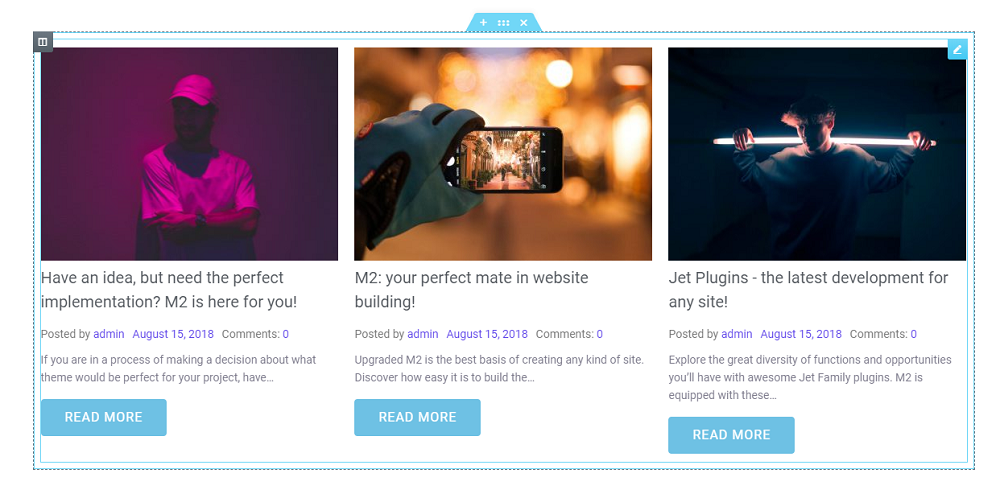
The result will look like this. The widget automatically displays the latest posts, but you can choose to show pages, mega menu items, products, or other stuff. By now it is not a carousel and it doesn’t look very attractive, but you can style it according to your taste.
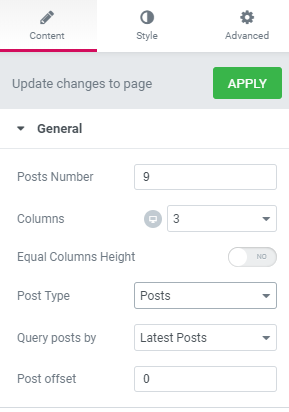
In the “Content” tab open the “General” section and set the “Post Number” to nine. The “Columns” option is setting the number of posts that will be visible at once.
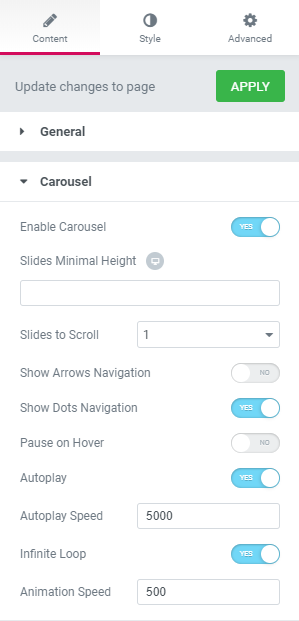
Open the “Carousel” section and enable the carousel effect. You can choose whether to show the arrows or dots navigation (or both), the autoplay, and animation speed.
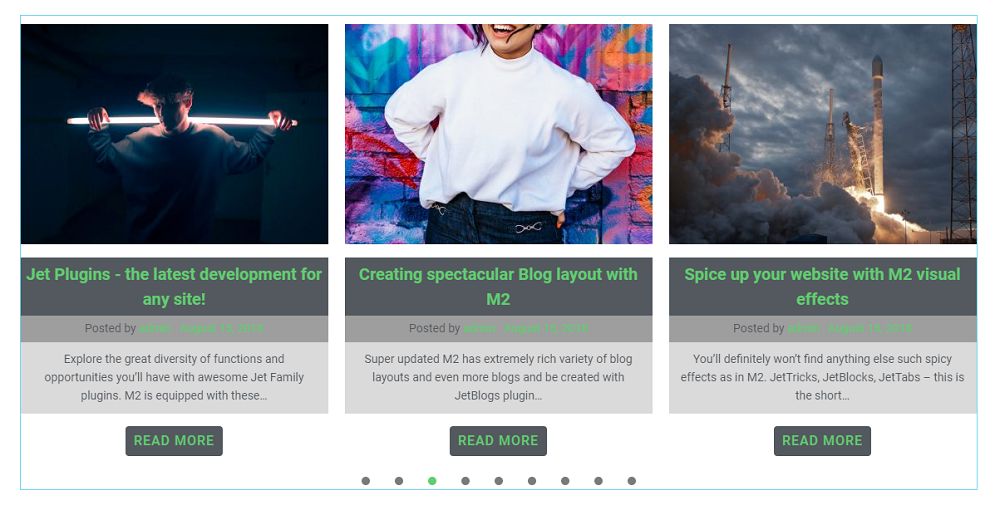
Now, when the technical part is set, it’s time to create an amazing appearance that will fit perfectly into the general style of your website. The customization panel is very flexible and allows you to change literally anything within the borders of the post carousel element. After about 20 minutes I managed to achieve this look, but I’m sure you will be able to create a much more interesting and fancy appearance.
For some people, it is better to see than to read, so here you are. This is a video tutorial about adding a post carousel to your website page. You will find there not only some detailed instructions but also an example of design with the details of “Style” tab customization.
I hope this little tutorial was useful and helped you to make your website page more interesting and attractive. If you have any questions or comments – please, feel free to leave them in the comment section below.

Read Also
Best Practices for Displaying Posts on WordPress Using Elementor
Elementor From A to Z: Sheer Selection Of “How To” Tutorials
JET Plugins for WordPress Elementor Builder [Review]
JetElements: Build a Better Website With Our New Elementor Add-on
Don’t miss out these all-time favourites
- The best hosting for a WordPress website. Tap our link to get the best price on the market with 82% off. If HostPapa didn’t impress you check out other alternatives.
- Monthly SEO service and On-Page SEO - to increase your website organic traffic.
- Website Installation service - to get your template up and running within just 6 hours without hassle. No minute is wasted and the work is going.
- ONE Membership - to download unlimited number of WordPress themes, plugins, ppt and other products within one license. Since bigger is always better.

A passionate WordPress monster since 2018. Loves professionally built website templates, is Elementor Page Builder fan and becomes extremely curious when it comes to trying some new site creation tools. Quora account
Get more to your email
Subscribe to our newsletter and access exclusive content and offers available only to MonsterPost subscribers.

Leave a Reply
You must be logged in to post a comment.