


Do you use push notifications on your site? Not yet? It's high time to use this effective tool for the better interaction with your audience and better content promotion.
WordPress themes push notifications are extremely popular among the modern-day business owners. Using these on blogs and websites has proven to be more effective than the tried-and-true newsletter subscription form. The best thing about web pushes is that a user doesn't need to browse your site in order to see your notifications. He may not even have the browser window opened.
All that he needs to do is to click the "allow" button and your push notifications will be delivered straight to his/her device.

WordPress Push Notifications
WordPress push notifications will help you notify the audience about the new pieces of content that appear on your site. You can also send custom messages to your clients at any time. Push notifications can be displayed on all gadgets and in all web environments imaginable. While choosing the optimal push notification plugin for your site, keep in mind the audience that you target. Are those smartphone or desktop users mainly? What browsers do people use to access your site? Keep this in mind during the decision-making. Double check if the chosen extension supports the right web platforms or not.
Originally, push notifications were introduced for Android and iOS devices in 2009, and started to spread across the rest of the web platforms afterward.
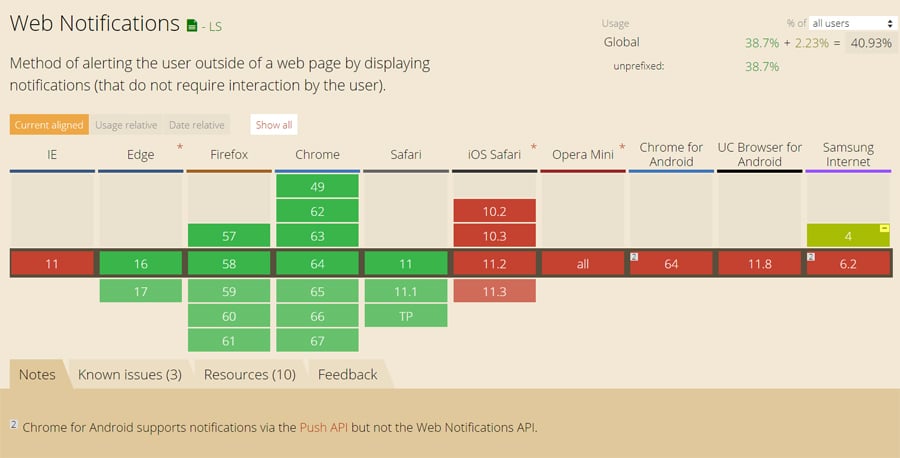
All modern-day web browsers support push notification. According to caniuse.com, the global support for push notifications makes up more than 40%. Safari was the first web browser that started to provide support for push. Next came Chrome and Firefox. Google Chrome is currently the most popular web browser worldwide. So, turning on push notifications for Chrome users will boost your business reach manifolds automatically.

Top Reasons to Use Push Notifications
Gone are the days opened every newsletter that was delivered to our email inboxes. As a rule, people skim over emails. In the rare occasions of the seasonal discounts or anniversaries of their favorite brands, customers can open the newsletter to see what's inside. There are too many online companies rushing the email inboxes of the web users. More often than not such letters are marked as trash to never bother the recipient in the future.
Push notifications can bring customers back to your site. On seeing a message right in front of them, people can make the immediate decision of whether or not your content appeals to them. In the perfect scenario, a user will click on the push notification to read through the details on your site.
Thus, using push notifications on your site, you can:
- increase user engagement;
- boost eCommerce sales;
- improve retention;
- grow click-through rates.
3 Case Studies from Companies that Benefit from Push Notifications
In fact, there are plenty of companies sharing their success stories about boosting user engagement with the help of push notifications. Web pushes are not for everyone, there is no doubt in the fact. What works for one business can have an opposite effect for another. The thing to remember is that your push notifications shouldn't annoy the public with their high frequency. Focus on quality rather than quantity of your web pushes, and the desired results won't be long in coming.
- Netflix has an enormously large customer base. Each subscriber has his own preferences, habits, and demands. What the company did was sending out the personalized push notifications based on the users' viewing history. Simple reminders about the new episodes of their favorite movies was an excellent way of growing user engagement and loyalty.
- Push notifications are especially useful for eCommerce businesses. Everyone who sells products and services faced the problem of abandoned shopping carts. La Redoute, a company selling French-style outfit, used push notifications to remind their mobile app users about the items that are left in the shopping carts. Each notification is highly personalized and takes a customer to the shopping cart where he can finalize the order. In doing so, the company increased the retargeting click-through rates by 2-3 times, compared to the regular mobile ads.
- JetBlue airlines used push notifications to remind travelers about the upcoming check-ins. Although this didn't bring the immediate conversion rates boost, JetBlue created an impression of the reliable company to which the customer will refer to book the next flight.
How to Add Push Notifications to Your WordPress Site
There are plenty of push notifications WordPress plugins available. Based on your budget and the functionality that you want it to include, you can opt for free or paid WordPress extensions. Different plugins are compatible with different browsers and devices. So, it's advised to check out your Google Analytics stats in order to make the right choice.
One of the most popular WordPress push notifications plugins is OneSignal. Trusted by 2,3% of all websites available on the web, this is one of the easiest to handle yet functional extensions letting content creators focus on the quality user engagement rather than the complex integration of the respective functionality into their websites.
The major features of OneSignal WordPress plugin include:
- 15-minute setup;
- real-time tracking;
- all major SDKs and devices support;
- A/B test messages;
- segmentation targeting;
- automatic delivery of the relevant notifications to the web users.
Step 1
In order to add the push notifications plugin to your site, you will need to install it on your site. You can search for OneSignal within your WordPress dashboard or get it through the direct download from WordPress repository. Once done, activate it.
Step 2
Create a free account at OneSignal.
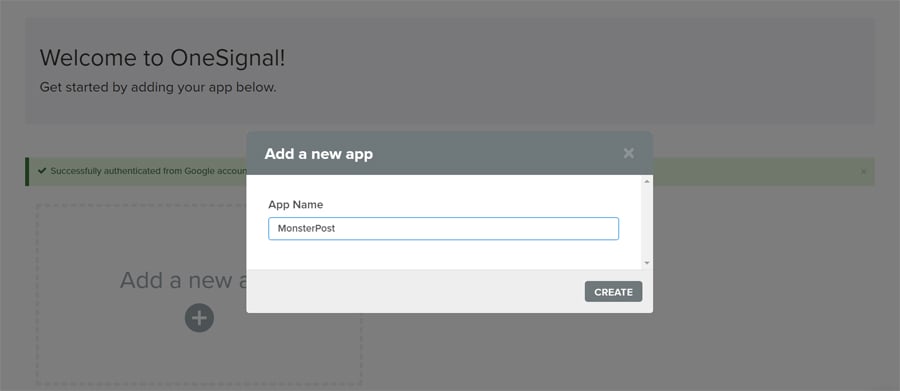
Step 3
I order to get started, you will need to add a new app. Give is a name. Once done, click "create".

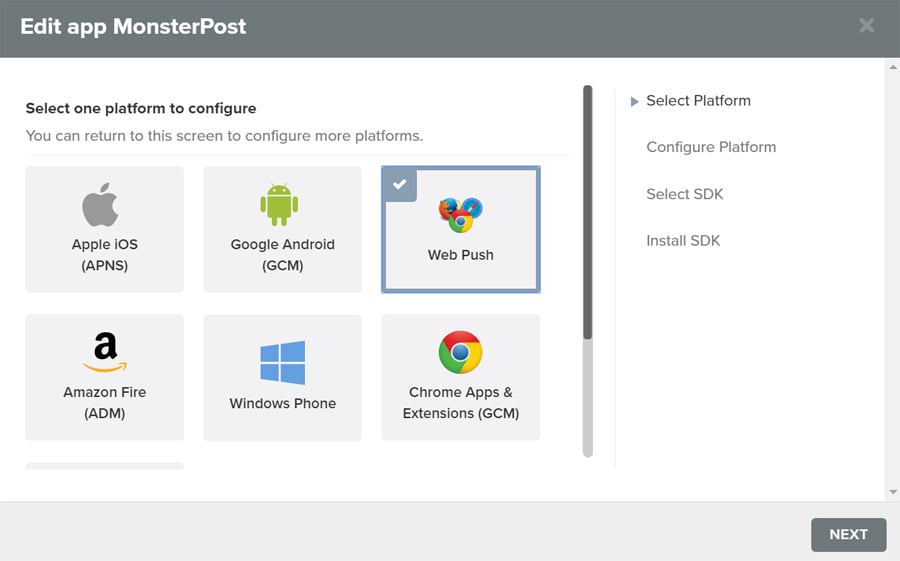
Step 4
Choose the platform. In this guide, we create push notifications for web browsers. So, select "Website Push" and keep moving further.

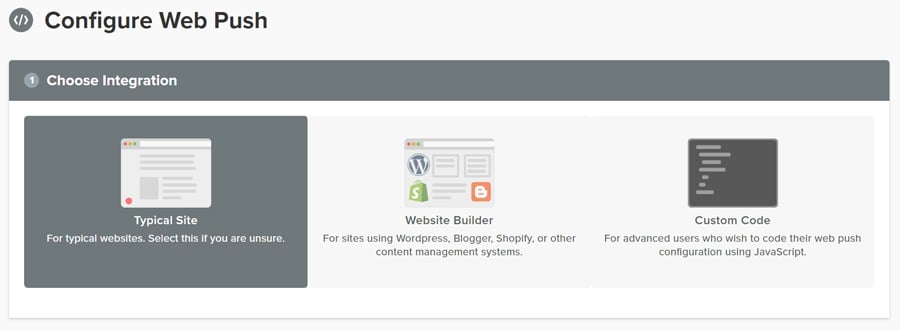
Step 5
Next, you will be taken to the configuration page. Select "typical website" and move further.

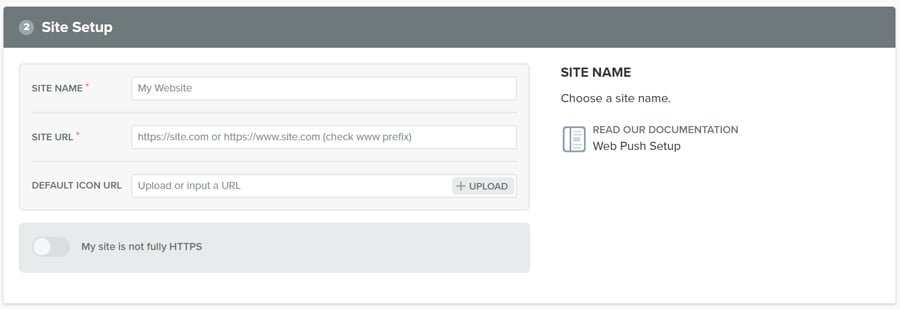
Step 6
Enter the name of your site, URL address, and default icon URL.

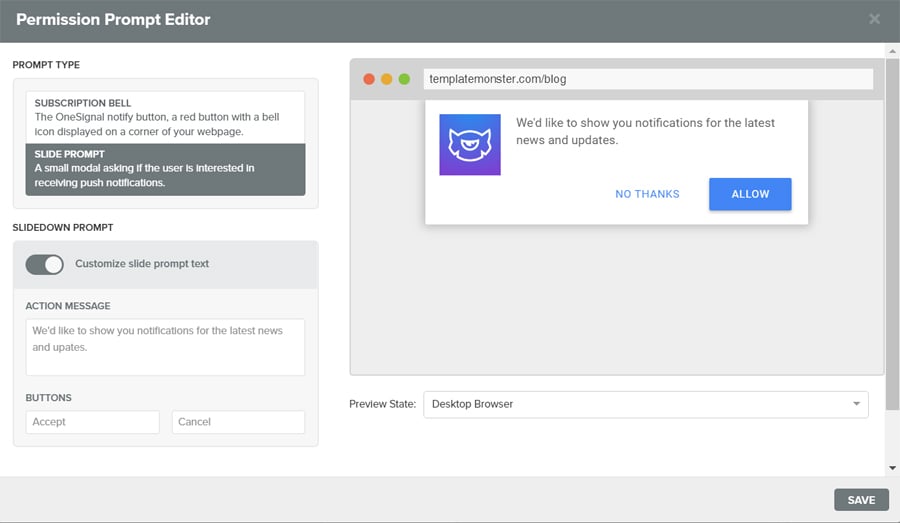
Step 7
Next comes the permission prompt setup. In this interface, you will need to set up in what ways you will ask the web users for a permission to send them push notifications.
First, choose the prompt type - a subscription bell (on the left) or a slide prompt (on the right). Next, customize the text the that prompt will feature and the buttons that it will contain. You can preview the results of the prompt configuration straight away.

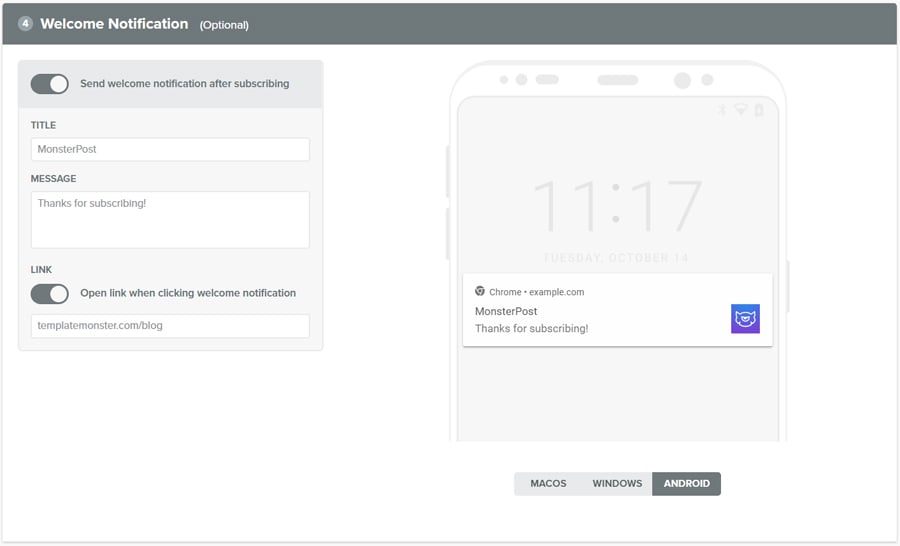
Step 8
OneSignal also lets you send a customizable welcome notification to your subscribers (though it's optional).

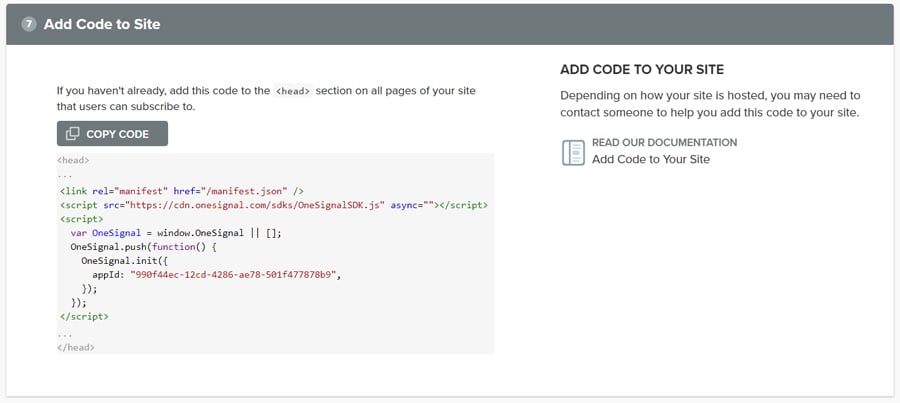
Step 9
Download the OneSignal SDK files and upload them to the top-level root of your site directory.
Add code to your site.

That's it. Now you can start collecting new subscribers and growing the public engagement on your site.
How to Unsubscribe from Push Notifications
Each browser provides its own unique way of unsubscribing from push notifications. Since we have already started to talk about Chrome, let's take a look at how to unsubscribe from receiving push notifications in Chrome (PC).
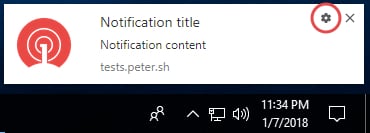
Click the gear icon int he push notification.

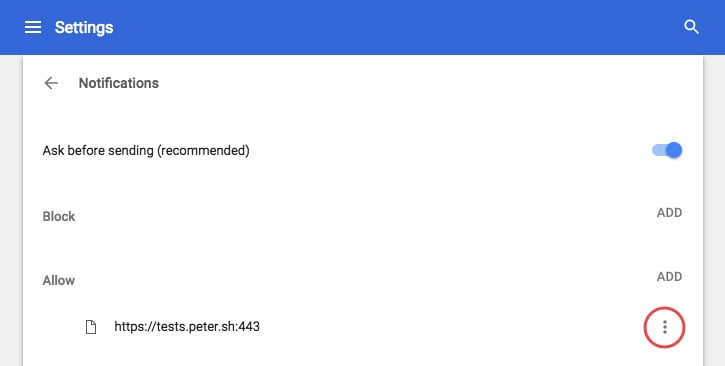
Find the site that sent you the notification, click the 3 dots icon, and select "remove".

In order to unsubscribe from a site you are on in Chrome (PC), complete the following steps:
Click the info button to the left of the site's URL.
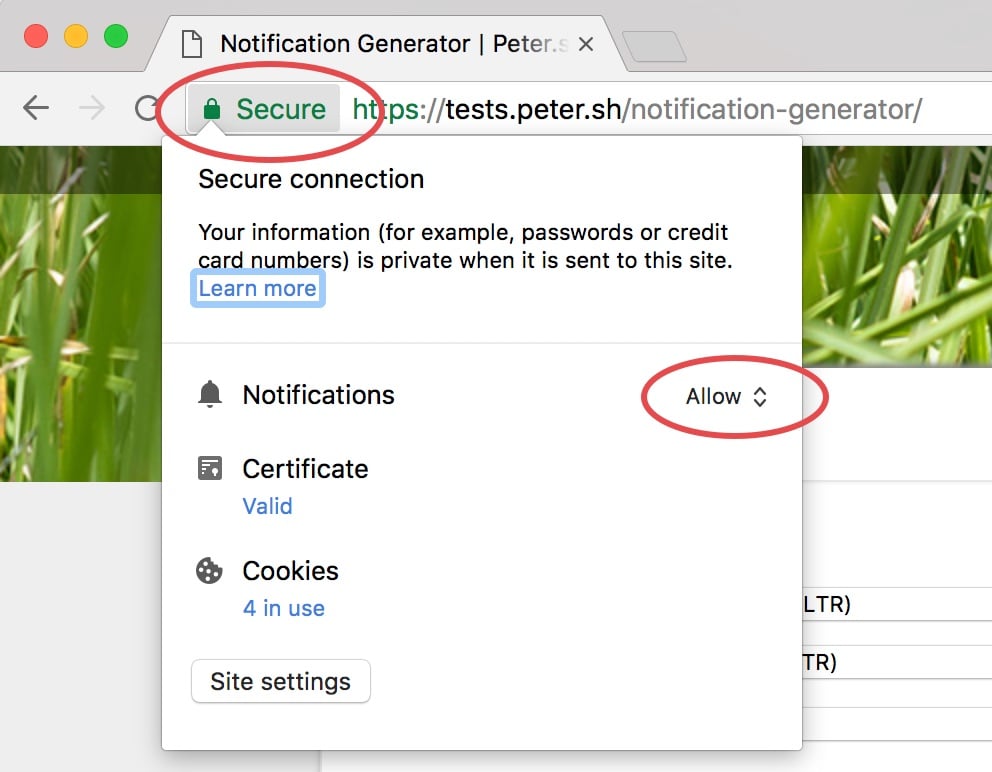

Click 'Allow' next to notifications.
Choose 'Always block on the site'.
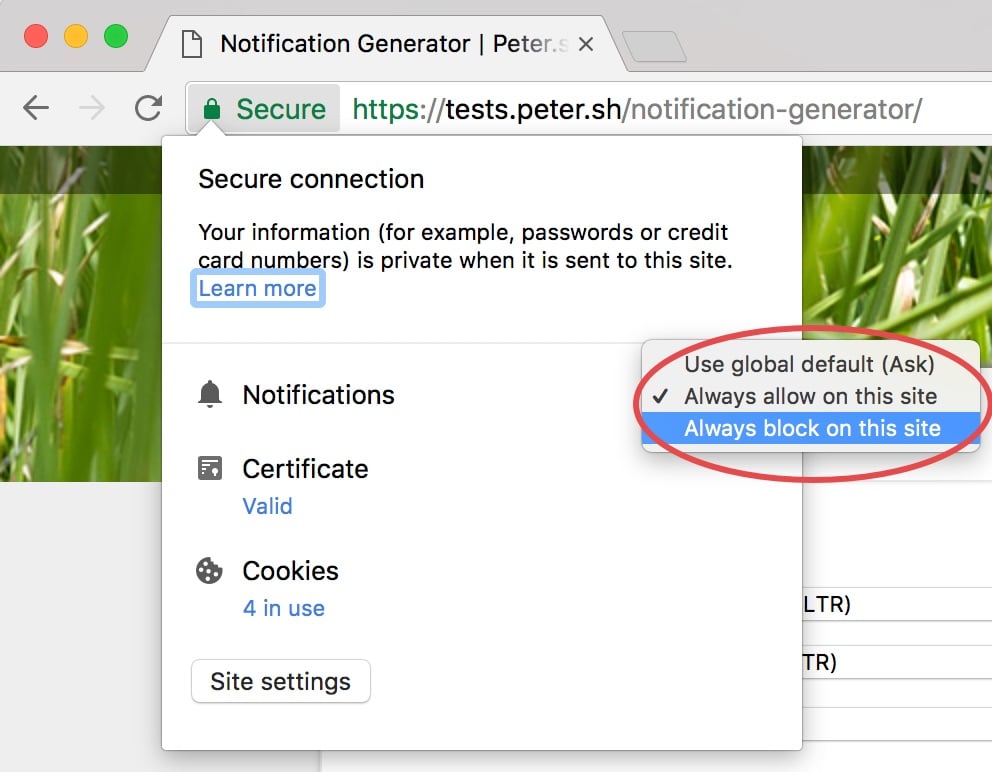
That's it! You've unsubscribed from the push notifications.
Setting up WordPress push notifications is easier than it seems. The described steps can be completed within a few minutes. Once installed and adjusted, you can start experimenting with different types and forms of content delivered to your subscribers at different frequencies.
Just give it a try. The benefits of using push notifications on WordPress sites are unparalleled. Enhance your own site or blog with the respective functionality and see the user engagement boost.
P.S. We will appreciate you sharing your own reflections on the use of WordPress push notifications plugins via a comment below this post 😉
Read Also
How to Send Push Notifications?
5 Ways to Unlock Your Sales Potential On Instagram in 2018
For TemplateMonster Vendors Exclusively: Start a Remarketing
How To Fix A 500 Internal Server Error In WordPress
10 WordPress Job Board Plugins That Push the Social Energy Transfer