


If you are an author or graphics designer then InDesign is a tool with which you really need to become familiar. Authors can save hundreds of dollars by learning how to layout books for publication. In addition, graphics designers can make hundreds of dollars laying out books for authors. Due to the fact that many graphics designers learn how to use InDesign in school, this article will be geared towards authors who choose the self-publishing option. You are going to learn the basics of setting up your book in InDesign and how to get started with the layout and formatting. Everything in this article will be done on Adobe InDesign CS6 so if you have older, or newer, version things may appear differently.
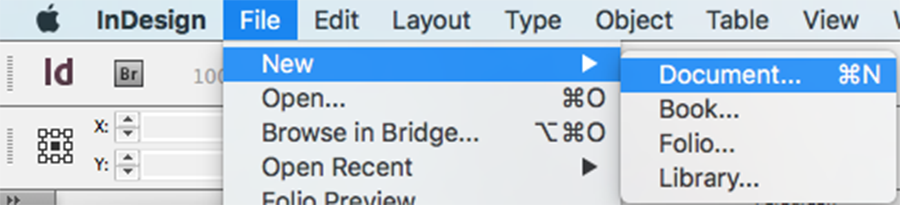
Once you open InDesign you will see a popup window. Go ahead and close it. If you don’t see the popup then you must have disabled it in the past. Now what you will need to do is go up to the “File” menu and hover over “New”. Then, believe it or not, you are going to choose the “Document” option. Yes, I know you want to create a book, but the “Book” option is not for you. You want to choose the “Document” option. This is very important because if you select the “Book” option then you will have a lot of trouble later on. Therefore, select “Document”.

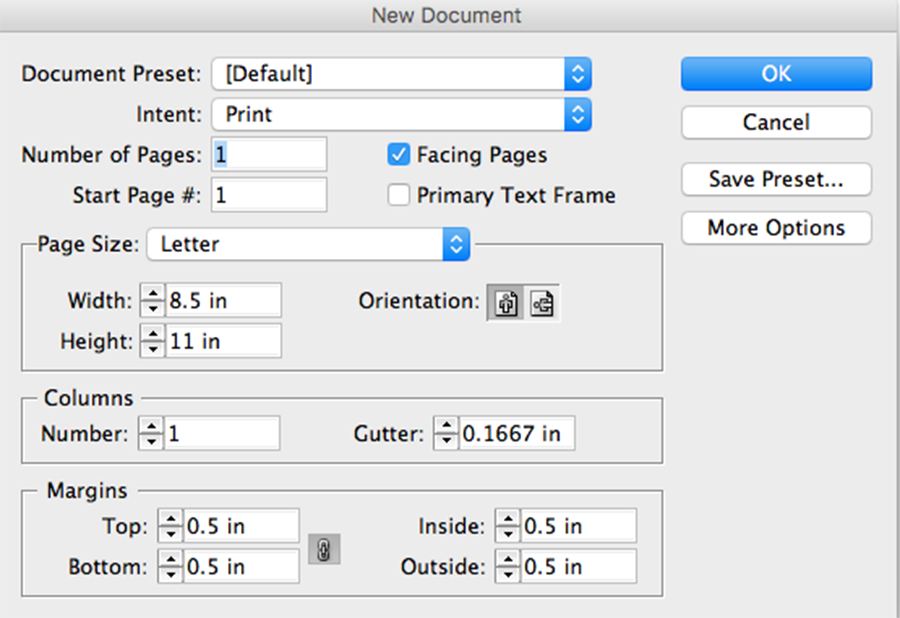
After making this selection, a popup window is going to appear. This window contains everything you need to set up the layout options for your book. The “Document Preset” should remain on “Default” unless you have a specific preset that you created and would like to use. The intent of this book will be for print because if you want to have the web or digital distribution then you can simply use a PDF or Word document and you wouldn’t need to use InDesign. Therefore, leave the “Intent” setting on “Print”. Now you can choose the number of pages with which you would like to start. Since you can always add pages later, go ahead and place a manageable number like “30” in the box. Leave the other options as is. The first page is set to be page number one and your pages are set to face each other so that it looks like a book rather than all in a row like a Word document.

Choosing The Page Size

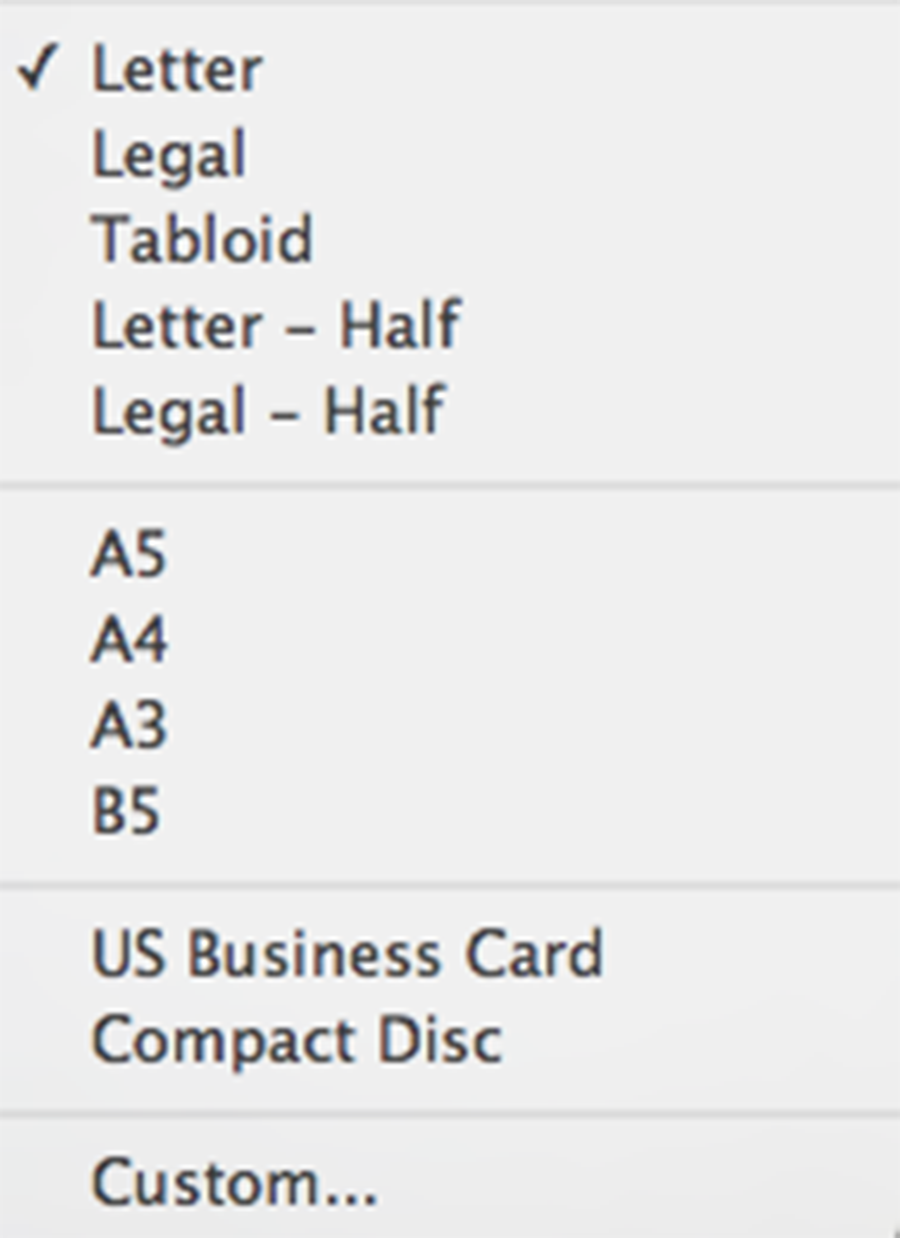
Now you may choose the page size of your book. You want to make sure to get this right because if you need to change it after you place your content on the pages you will have to do so manually one page at a time. This is a major pain and should be avoided at all costs. Believe me, if you make this mistake you will only do it once. Therefore, make sure you have your page size chosen BEFORE you place any content in your book. You may choose from several different options, many of which are useless for authors. However, if one of the sizes works for you then that is wonderful and you may skip the next section.
Creating A Custom Page Size
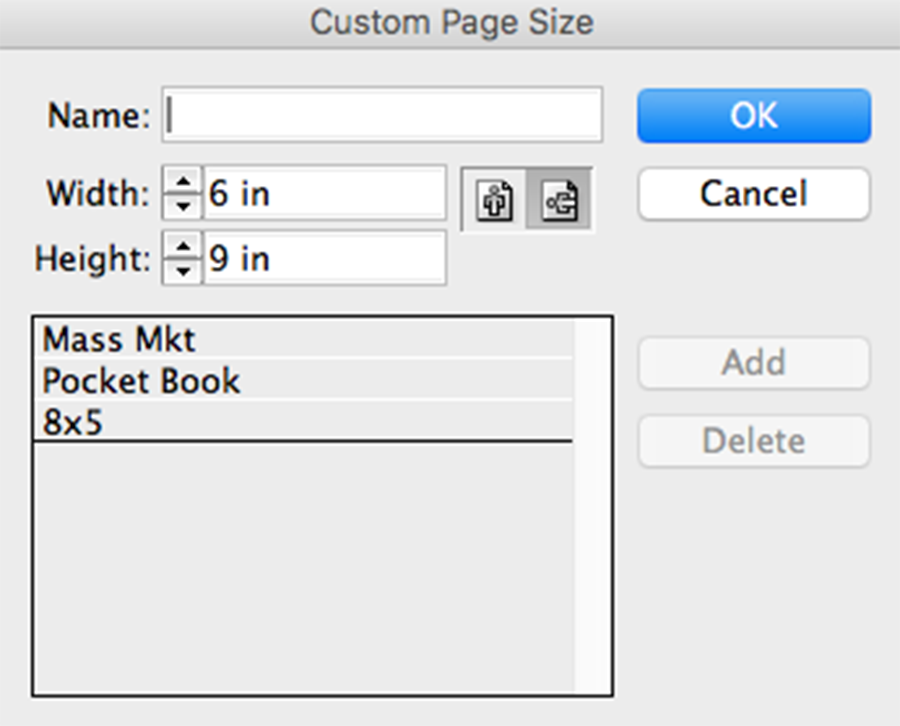
If you can’t find a size that works for you then your best option is going to be to create your own “Custom” page size. The reason for this is that many authors choose to publish their books at either 9x6 or 8x5. Don’t worry; creating a custom size is easy. Simply choose the “Custom” option from the “Page Size” drop-down menu. A little popup will appear. Give your custom option a name and then set the size you would like to use. Now, anytime you need that size again in the future, you will see it in the “Page Size” drop-down menu.
Columns, Gutter, And Margins
Leave the “Columns” and “Gutter” alone unless you have specific instructions to change them based on the requirements for your book. Your margins can be changed to be whatever you like. Generally, it is best to leave them at the default state of 0.5 on all sides. However, depending on the size of your book you may wish to increase the inside margin to 0.75 so that people don’t have to overly open your book to read the text close to the spine.
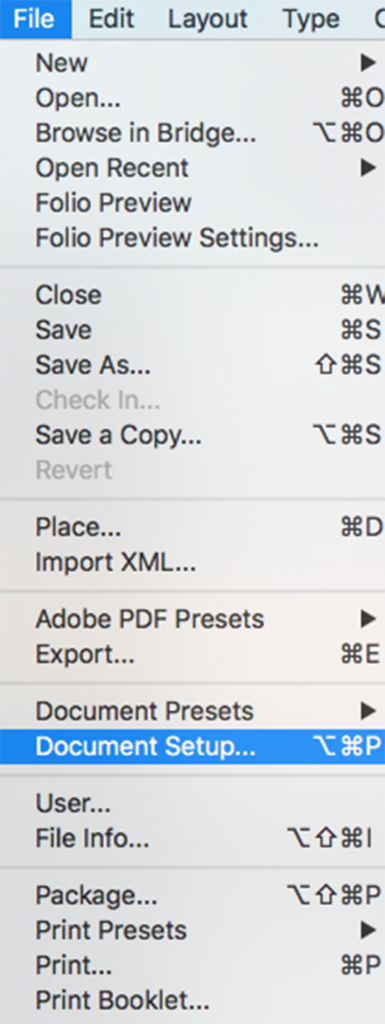
Once you are finished with your settings go ahead and click “OK”. You will see your pages populate and everything should look exactly like you want it. If not, then you will have to make some changes to the layout BEFORE adding any content to your book. Luckily, making changes is easy so if you want to change the size, edit the margins, or anything else then you can do so. Simply go to the “File” menu and go all the way down to “Document Setup”. Click on it and a popup will appear.


Here you can make any of the changes that you need to make to your book. An additional option that is in this window is the ability to change your “Bleed” and “Slug”. The slug is something that you don’t really need to worry about. The bleed is something that you need to know about but you may not need to use. The bleed is simply a set of lines that will go around the exterior of your book. The purpose behind bleed lines is to prevent your photos from being cut off and to keep them at the edge of your pages. Therefore, if you have any pictures you can line them up with the bleed lines so that when the publishers trim your book your photos will go all the way to the edge of your page and not be cut off. However, you must be careful not to place any important photographic data out there because there is a good chance it will be trimmed out of your book.


Conclusion
That is it! Now you know how to start the layout of your book in Adobe InDesign. Of course, this article barely touched the surface of everything that needs to be done in order for you to complete your book. However, it is a good start. There will soon be many more articles that you can read for continuing steps on how to get your book laid out in InDesign so be sure to check back for more information. In addition, feel free to check out all of the other articles on my personal website.
P.S. Don't forget to check out our design studio templates.