Shipping is one of the most vital aspects of running an online store, something that is absent in brick and mortar shops. A well-organized shipping process, and most notably shipping prices, heavily influence buyer decisions. Shipping prices should depend on what your customer purchases. However, you often sell at your store completely diverse products which require various shipping options. For example, bulky items or ones that need extra packaging material due to their fragility.
In this article, I will show you how to deal with the shipping challenges using shipping classes.
What are shipping classes?
A shipping class in WooCommerce themes is like a category to which you assign a product. This connection is in no way visible to your customers, which is completely different from actual product categories. Product categories are usually used by customers to filter out products at a store. This way, a customer can easily find a specific product. Shipping classes, on the other hand, help the store administrator define specific shipping costs for a given product category.
The reason why we need shipping classes is the fact that products in a specific product category do not always belong to the same shipping cost category. Thanks to this solution, we can, for example, put together fragile products regardless of the fact that not all products in a specific product category can be classified as fragile.
You can assign a specific product to only one shipping class at a time. Such advanced solutions as the Flexible Shipping plugin let you define the shipping costs based on the shipping classes to which the products in your customer's cart belong.
Example scenario
Sheer theory is not good enough for me. It always leaves you with many doubts while a lot of questions remain unanswered. That is why I've got a real-life example in store for you. It will show you how shipping classes work. I will use a store based on the #65908 template from TemplateMonster. I've come up with the following assumptions:
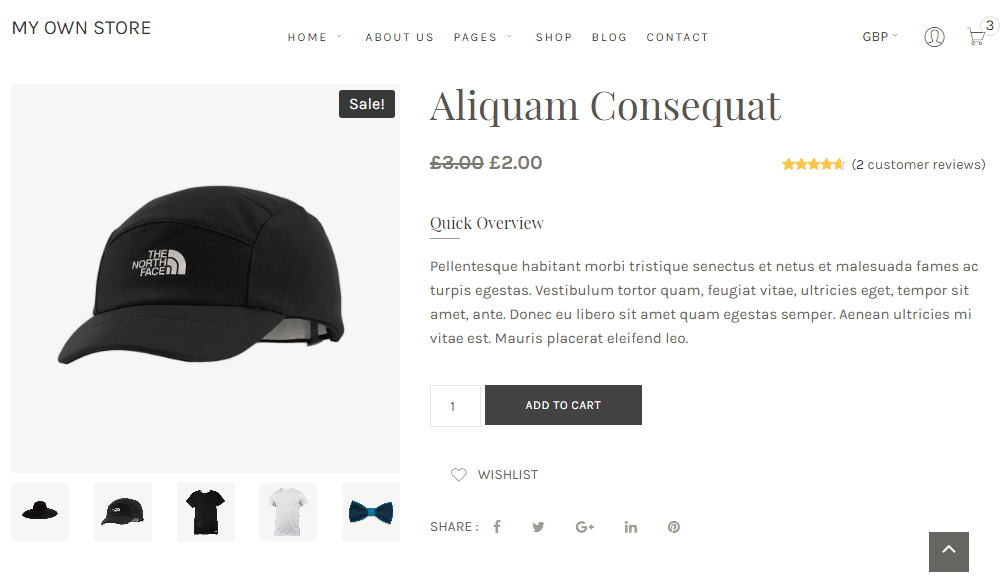
1. There are discounted products at the store. I want the discounted products to be shipped for free. If there are discounted and regularly priced products in the cart, the shipping price will be calculated only for the latter. In other words, I pay for the shipment only if a customer orders products that I want to get rid of. I've created this special offer to sell off my unwanted inventory.
2. At my store, I sell glasses and watches. Due to fragility, they need extra packaging material. I need to include in the shipping price the cost of the "Handle with care" option. I want the customer to pay all of these additional costs.
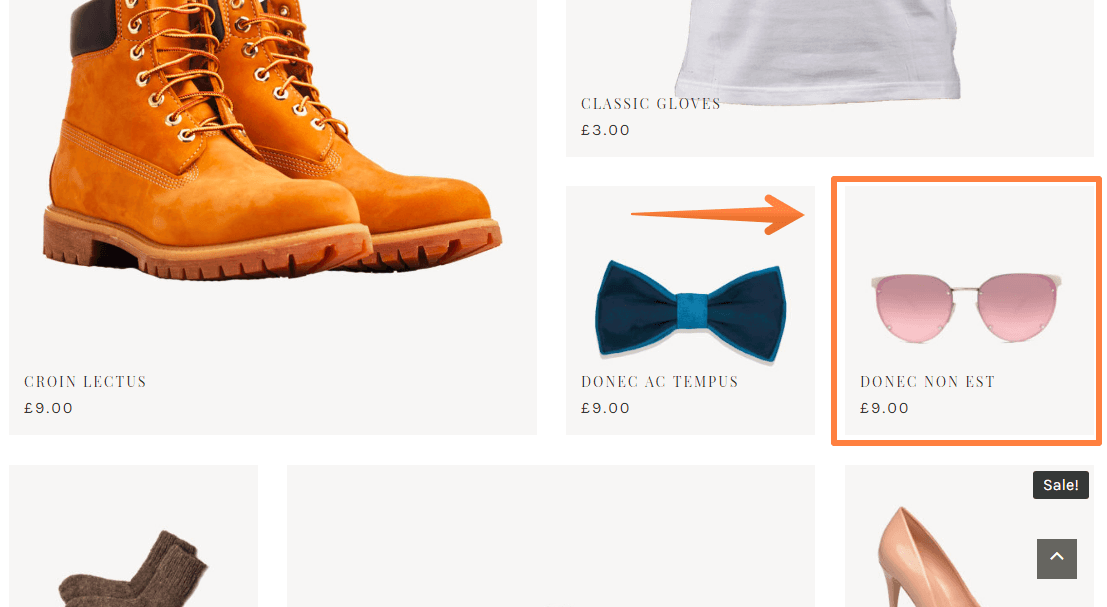
An example product with additional costs
The entry-level price of the shipping is $10. I add $3 for each 5 kgs. In the case of the products mentioned in the 1st point, shipping is free. For fragile products, I have to add $1 for extra packaging material for ich item and 1% of the product worth for the sake of insurance.
I can actually make these assumptions work thanks to shipping classes and the Flexible Shipping plugin. Below, you can see the configuration of shipping classes and shipping rules in the plugin.
How to configure shipping classes?
Setting up classes at your store
There are not many options when it comes to configuring classes. Let's go to this tab: WooCommerce <U+2192> Settings <U+2192> Shipping <U+2192> Shipping classes. Here, we can define the name of the shipping class. Moreover, we can add a description as to remember why we created the class in the first place, and also because other store administrators will find it easier to understand what a specific class is for. Also, this is the place where we can check how many products are grouped in a given class.
Selecting classes in products
The next step is assigning products to a specific shipping class. After creating a shipping class according to the steps above, go to the product settings: Shipping <U+2192> Shipping class:

How to make use of shipping classes in your store?
I use Flexible Shipping for configuring the rules related to shipping costs. It is available for free here. However, only the paid version supports shipping classes. I won't be discussing the installation of the said plugin as appropriate instruction is available here. Instead, I will go right to the specifics.
After installing the plugin, I add the Flexible Shipping method in the shipping settings:
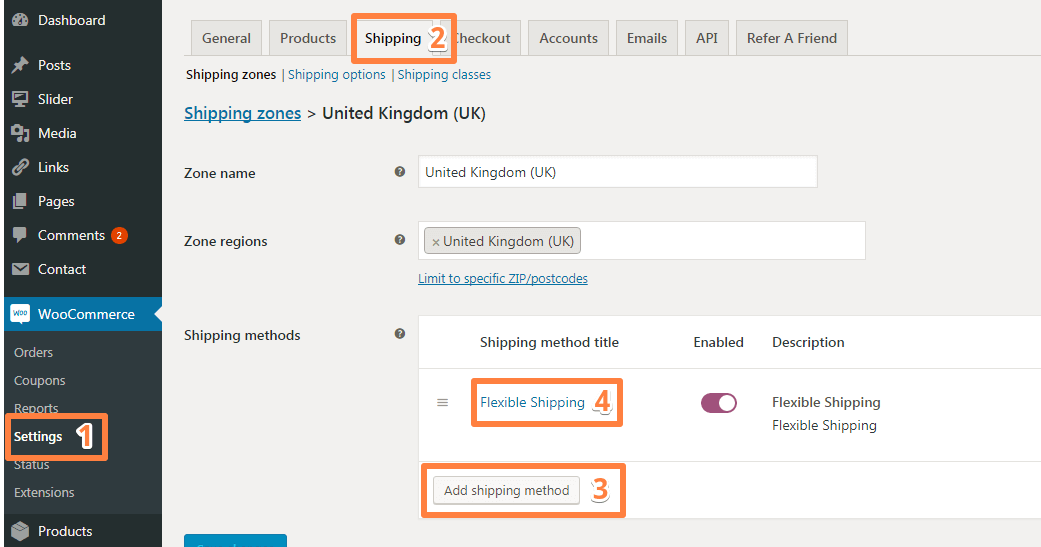
It's not an output method. The interface of Flexible Shipping allows creating multiple methods at once. I added a method called "DPD" in Flexible Shipping. This name will be visible to the customers in their carts.
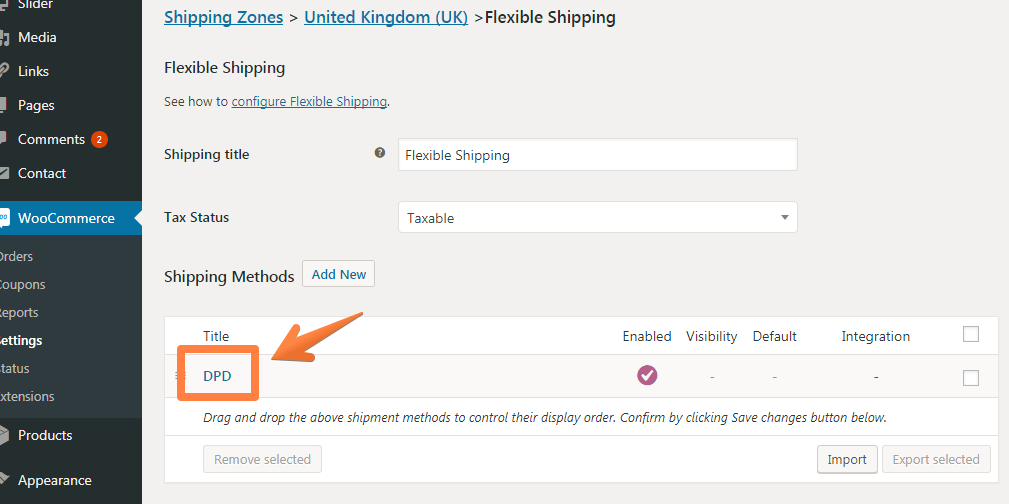
After accessing the "DPD" method in Flexible Shipping, I can configure the following rules:
How rules in store work in practice
For starters, I add a cap to my cart. It's discounted as you can see in the screenshot below. I set the "Free shipping" class for this item in the admin panel. It's a product that I no longer want in my inventory. The cost calculation is correct and equals $0.
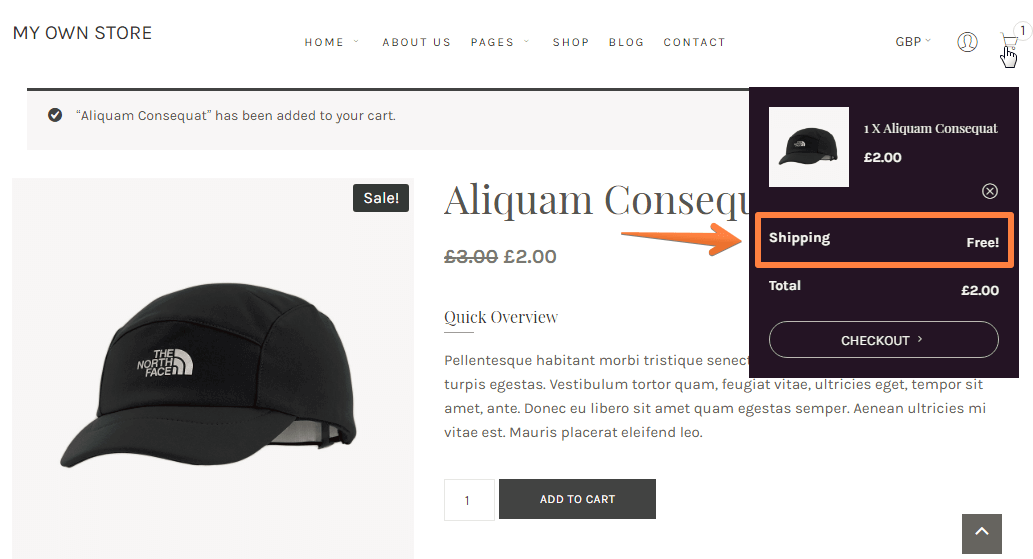
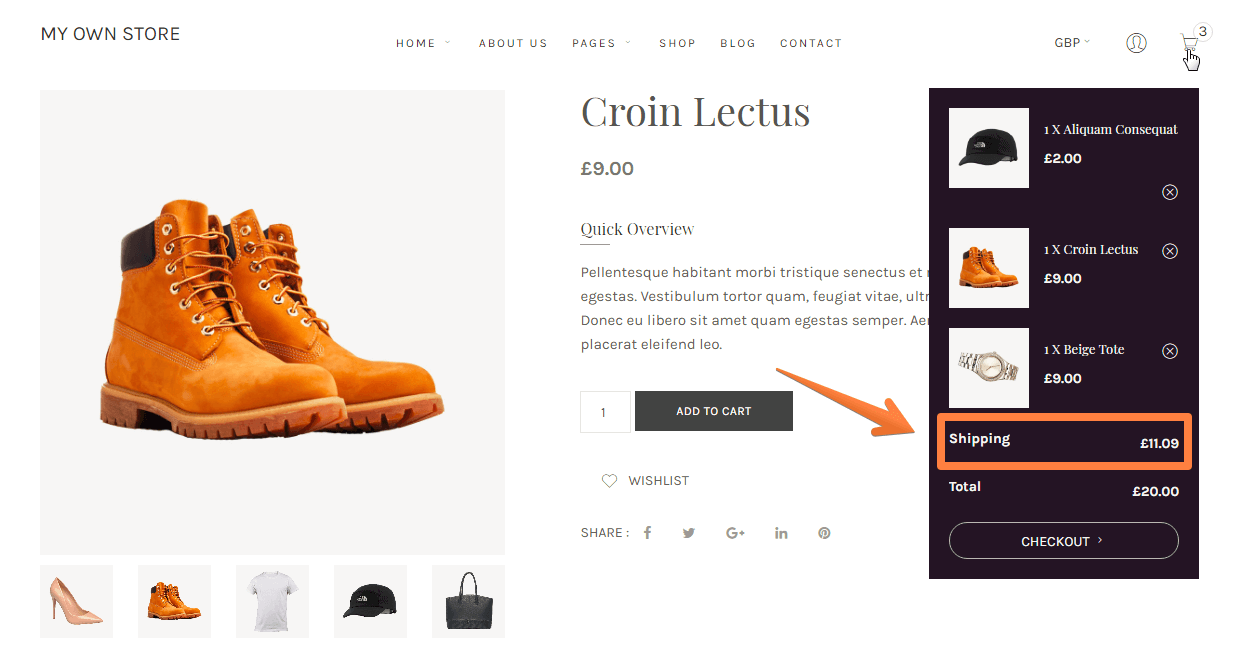
Next, I add two more items to the cart. One of them is a watch. It's a product that requires additional shipping costs. I'm going to remind you: it's $1 for each item and 1% of the product's worth. In this case, it will add up to $1 + 0.09¢ = $1.19 since the watch costs $9.
Then I add shoes. Neither the watch nor the shoes are included in the special offer. Therefore, we've got a regular shipping price, which is $10. The total shipping cost will therefore be: $0 + $1.19 + $10 = $11.19. You can see the amount on the screenshot below.

Summary
You can freely extend the functionality of WooCommerce thanks to plugins. This is what makes it so powerful and provides a store administrator with an extensive array of possibilities. Today, you've learned how to configure advanced shipping cost calculation. With the help of the Flexible Shipping plugin, shipping classes can change how shipping costs are calculated.
Also, do you need some help with setting up WooCommerce shipping options from scratch? Check out our Ultimate Guide to WooCommerce Shipping <U+2192>
Related Posts
Best CDN Providers To Speed Up Your WordPress Website
Make Your Website AMP Ready to be Appreciated by Google
How to Find, Attract, and Market to Your Ideal Customer on Instagram
4 Psychological Web Design Principles to Boost Conversions
Get more to your email
Subscribe to our newsletter and access exclusive content and offers available only to MonsterPost subscribers.

Leave a Reply
You must be logged in to post a comment.