


Intro
By buying the premium, universal Monstroid2 WordPress theme, everyone gets absolute freedom: the ability to edit the source code, one-click installation with TM Wizard, Elementor page builder, Jet modules - and that's not all! However, I believe that the coolest thing in Monstroid2 is that it gives you the ability to use additional skins for different types of projects. And in this article, we’ll find out how to change the Monstroid2 skin that you have installed, to another one.
Monstroid2 WordPress theme and the other 8,500 digital assets can now be accessed at a single bundle. We are talking about a brand new subscription service called ONE. Developed by TemplateMonster development team it can boast with over 1K WordPress themes, more than 2K eCommerce templates, 40+ plugins, graphics, and other templates.
The service aims to save your time, money, and energy by providing everything needed for website building in one place. Paying $19 subscription fee every month you also get 24/7 professional support and powerful extra services among other things. If subscribing today, you have a chance to save 5% with promo code BecomeThe1.
How to Change Skins in Monstroid2
Changing skins can be done easily and quickly from the WordPress dashboard where you have your Monstroid2 WordPress theme.
Go to your left side navigation menu and choose the Monstroid2 option. It will take you to the menu where you can manage everything you have inside your Monstroid2 WordPress theme.
To change the skin, you need to go to the Skins option on the menu. Here you will see your skins library with all the skins available for you in the Monstroid2. However, their number is constantly growing. To see whether there are any new skins available, click the green Synchronize Skins Library button and your library of skins will be updated.
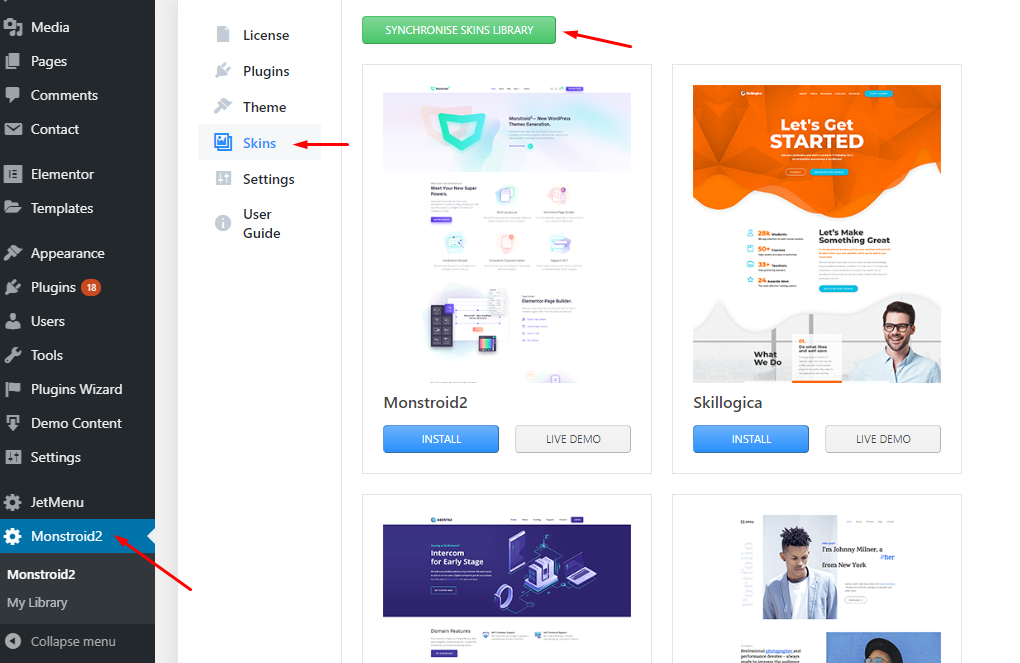

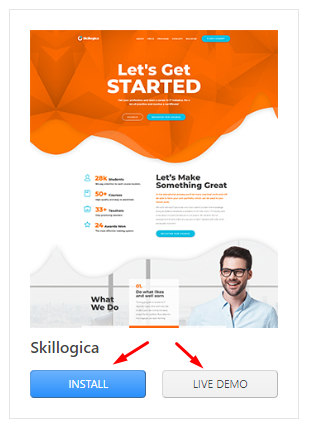
If you want to see a live demo before installing the skin, click on the Live Demo button. Otherwise, to proceed with installing the skin right away, simply click “Install”.

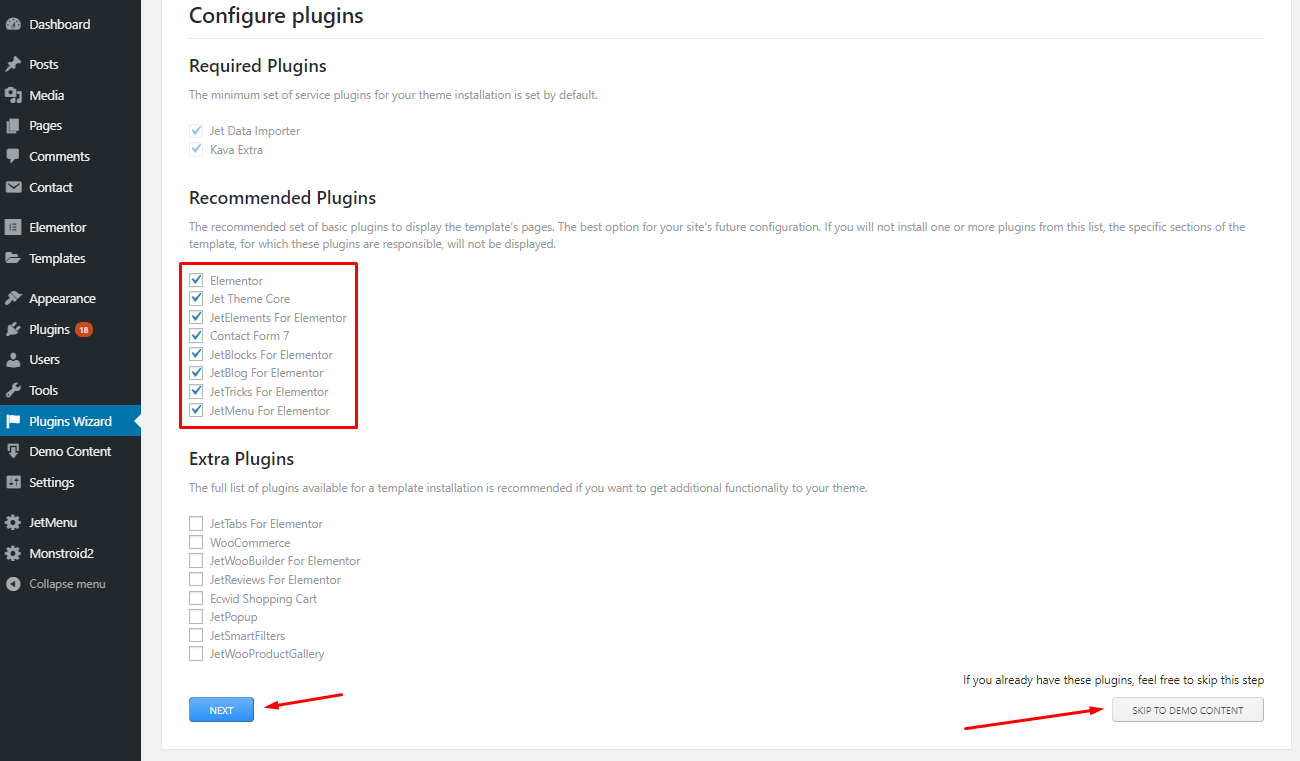
The next step is choosing the plugins that you want to install alongside the skin. If these are all the same plugins that you have in your current skin, you don’t have to install them all over again. Just skip to the demo content.

An installer will set up the demo content, which includes the design, post pages, and media library elements.
Then you will get three options:
- Append demo content to your existing content. If you choose this option, the new demo data will be added to the data you have on your website. This option is recommended if you already have some pages posts or media on your website and you don’t want to lose them.
- Replace your existing content with demo content. This means that your current data will be replaced with the new demo content.
- Skip demo content installation.
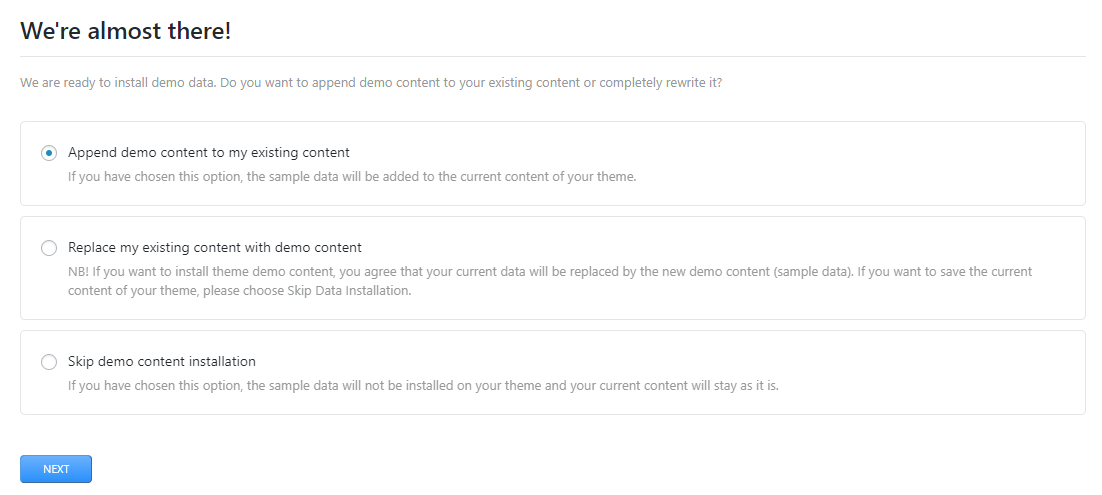

If you choose one of the first two options above and click “Next”, you will see the Importing sample data window that visualizes the process of adding sample content to your website. Then wait for the regenerating thumbnails to be done, and you will have installed another skin on your WordPress website.

Final Say
Now you know how to change the Monstroid2 skin and installed another one. I hope the article was helpful and you will not have any problems. Do you have any questions or requests? Leave them in the comment section down below, and I will be glad to answer them.


Starting A Website: What Options Do You Have? [Free Ebook]
By clicking the button you agree to the Privacy Policy and Terms and Conditions.
Read Also
Monstroid vs. Monstroid2: Clash of Titans
Monstroid2 WordPress Theme Gets a Complete Makeover
Avada 5.6 vs Monstroid 2: Fair Fight
Monstroid 2 Magic Button: Tinker Toys Box for Adult