How to Create an Animated Scroll Down Button/Arrow with Elementor Free and Pro
- Animated scroll down arrow with free Elementor
- Animated scroll down arrow with Elementor Pro
- Wrapping Up
How to create elementor animated scroll button? When you create a website, you certainly want the visitors to go through it steadily, from the top to the footer. However, not all visitors have time and willing to scroll the homepage down, seeking some information that is important for them. If such a user sees that there’s much to scroll – he will more likely leave the website that continues.

That’s where a “Scroll Down” button on the top of the website could help you. That button automatically scrolls the page to the place you consider to be the most important for the visitor to see. On the other hand, chances are that the user will stay on the page and just auto-scroll it, when he sees the button, then just leave.
So, this button will be really useful both for you and your visitors. In this tutorial, I will show you how to add a scroll down button to your website with the help of Elementor Page Builder and a little CSS coding (don’t worry, there won’t be really much to do).
Animated scroll down arrow with free Elementor
Let’s start with the free version. Further, I will also show how to create an animated arrow with the help of Elementor Pro and it will be a little easier. If you prefer watching the process “as it is” – here a video tutorial we shot:
Go to your website’s dashboard and open the homepage in Elementor editor. In the left-side menu search for the HTML widget. You will need the one that doesn’t have a WordPress logo on it.
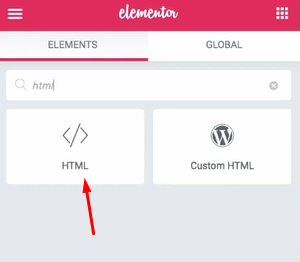
Insert an empty section right under the first block of the page and drag the widget there. As you can see, the field for the code opens in the menu. Copy the code I placed further and paste it to that field.
<i class="scroll fas fa-arrow-down">
<style>
.scroll-wrapper {text-align:center;}
.scroll {

    font-size: 50px;
    color: #000;

    -webkit-animation: scrolling 3s ease infinite;
    -moz-animation: scrolling 3s ease infinite;
    -o-animation: scrolling 3s ease infinite;
    animation: scrolling 3s ease infinite;
}

@keyframes scrolling {
  0% {
    transform: translate(0);
  }
  50% {
    transform: translate(0,40px);
}
  100% {
    transform: translate(0);
  }
}
</style></div>
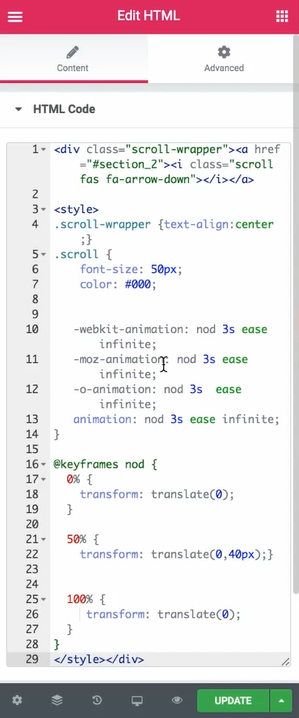
This code places a bouncing arrow into the center of the chosen section. Let me now describe you every row of that code, so that you will be able to change it whenever you would like to and create different types of scroll down arrows (there are lots of different variants of them, you know).
<i class="scroll fas fa-arrow-down">
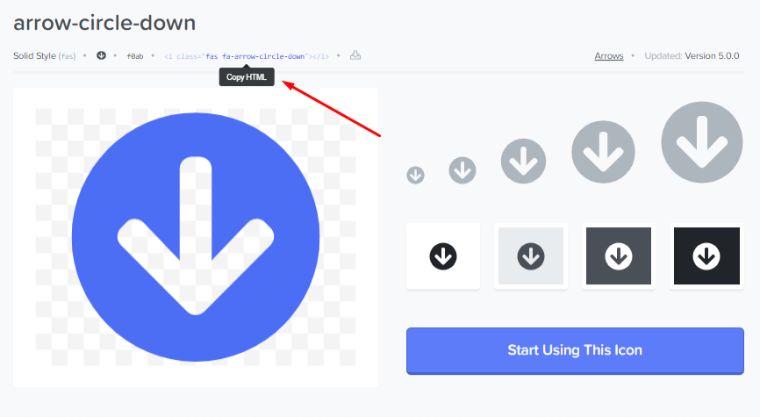
Here you change the shape of the arrow. First, you have to get a code for the icon. Go to the Font Awesome website, choose the type of the arrow you like the most, open it and copy the code placed right over the image. Then, replace the old coding with the new one, for example - <i class="fas fa-arrow-circle-down">
font-size: 50px;
When you will change the numbers in this line – the size of the arrow will change. You can play a little with it to understand which one will be best for you. If the arrow will be too big – it will annoy the visitor but if it will be too small – the chances are that the user won’t notice it.
color: #000;
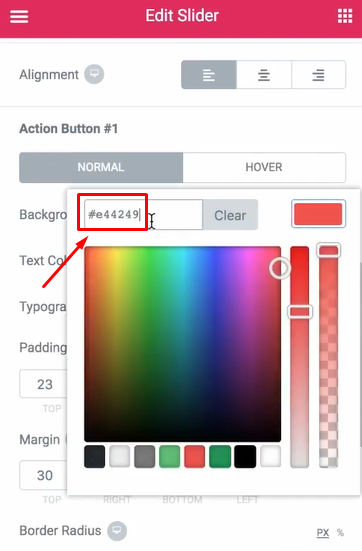
It is quite obvious – here you can change the color of the arrow. Just copy the hex code of the color you need and paste it instead of #000 (it means black). You can get the hex code in the “Style” tab of the Elementor menu for different parts of your page or choose the color (and copy the hex) on a website like htmlcolorcodes.
animation
All the “animation” lines define the way the movement of an icon will be shown in different browsers. Those features have similar values and if you change the value in one line – you should also change it for all the other lines.
scrolling
This value defines the way the arrow will move. Besides, actually, scrolling, there are other options too. For example, the arrow could “bounce”, “nod” or jus “move”. In fact, there is not really huge variety of movements for scroll down arrow, so I would recommend you leave the “scrolling” effect.
3s
That is the time the arrow will need to go from the starting position to the bottom and back up. The bigger the value is – the slower that scroll down arrow will move. Change it to define the perfect variant for your website.
infinite
In this position, you place the number of times you want the animation to repeat. “Infinite” here means that the arrow will move continuously and won’t stop. However, if you want it to freeze after some time, just replace the “infinite” value with a number.
@keyframes scrolling {
  0% {
    transform: translate(0); }
  50% {
    transform: translate(0,40px) }
  100% {
    transform: translate(0);  } }
These lines define the location of the arrow in the different parts of it way. By now, on the 50% (half of the 3s period you choose higher) the arrow is 40px lower from its original position. And at the end of its movement, it turns back to the top. If you want the arrow to dive deeper – just change the number of pixels.
<a href="#scroll-here">
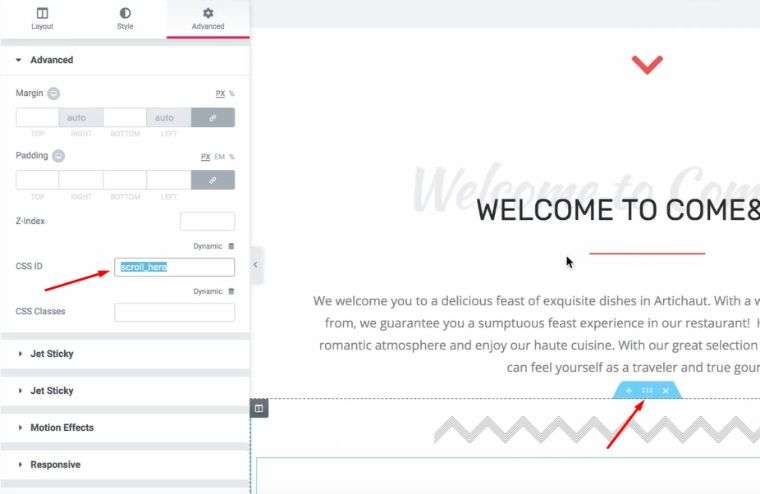
The scroll down arrow could just be an animation element without any other purposes. However, if you place a link there – the arrow will be clickable and lead the user to the part of the website you want him to see. Choose the section and click the “Edit Section” button at the top. Open the “Advanced” tab and in the “Advanced” section find the “CSS ID” option. Type the ID (a have chosen “scroll_here”) and copy it. After that paste it as a link to the CSS code of the scroll down arrow.
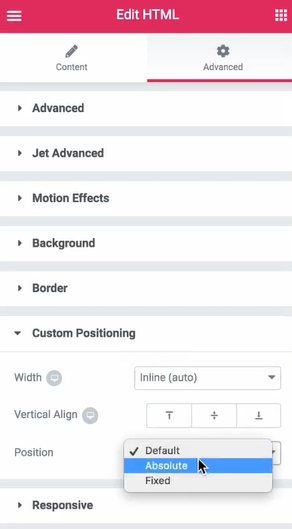
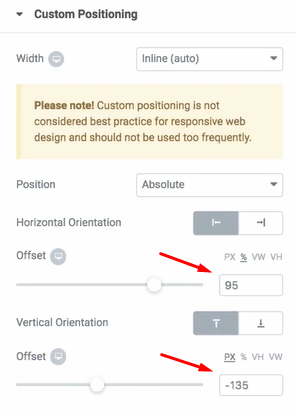
The arrow you added doesn’t have to stay in the central position under the first section. You can move it to any location on the page (but it will be definitely the most efficient to put it on the first screen somewhere). Go to the “Advanced” tab of scroll down arrow section and open the “Custom Positioning”. In the “Position” option drop-down menu choose “Absolute” value. It will open the horizontal and vertical positioning sliders. Move them and define the place for the scroll down arrow. You can also type in the values if you know the exact position you need that arrow on. Take into consideration, that for the tablet and mobile layout the positioning of that arrow will be different, so you have to change it manually by opening the website in other layouts and moving the icon.
Animated scroll down arrow with Elementor Pro
In fact, all the actions you have to perform are almost the same for Pro Elementor as they are for a free one. You need to take an icon, animate it, add a link and place it to various positions on the page. I’m going to define only what are the differences for the Pro version. If you want the whole step by step instruction – check out this video:
So, the differences:
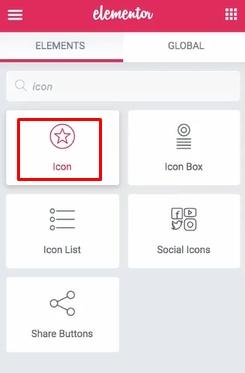
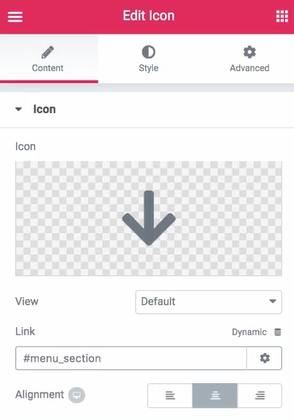
Icons. You don’t have to seek for the coding of some icon you liked – the Pro Elementor has a specialized widget, name “Icon”. A huge icon library is connected to it and you will be able to get a fitting icon without seeking its code. Besides that, you can download any SVG file there.
Size and color. You don’t need coding for it – those features are easily changed in the “Style” tab of the customization menu.
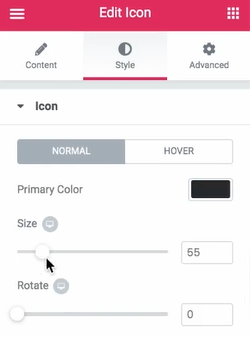
Animation. That is the thing you still have to do with the help of coding. Go to the “Advanced” tab of the icon element and open the “Custom CSS” section. There will be a field for the code and it is, actually, a part of the code I showed you previously.
selector {
  -webkit-animation: scrolling 3s ease infinite;
  -moz-animation: scrolling 3s ease infinite;
  -o-animation: scrolling 3s ease infinite;
  animation: scrolling 3s ease infinite;
}

@keyframes scrolling {
  0% { transform: translate(0);
  }
  50% {
  transform: translate(0,40px);
  }
  100% { transform: translate(0);
  }
}
The meaning of all the parts is similar to the one I used in the free Elementor page builder.
Link. You have to set a CSS ID for a section you want the scroll down arrow to lead the user to, the same way I showed it for a free Elementor. However, after that, you insert it to a special bar of the “Content” tab of the icon.
Wrapping Up
As you can see, the process is quite simple despite the need for coding. The snippet is completely ready for you to copy and paste it to the section. A scroll down arrow will make your website a bit more dynamic and help you to make the users stay on the homepage longer. It demands little efforts on adding it to the website but it definitely is worth it!
Read Also
How To Create 3D Parallax Holographic Effect With Elementor Pro Motion Effects
Elementor Motion Effects: Best Practice to Liven Up Your Website
How to Create a Gradient Button with Elementor
Elementor Image Slider: How to Add it to Your Website with Page Builder
Don’t miss out these all-time favourites
- The best hosting for a WordPress website. Tap our link to get the best price on the market with 82% off. If HostPapa didn’t impress you check out other alternatives.
- Monthly SEO service and On-Page SEO - to increase your website organic traffic.
- Website Installation service - to get your template up and running within just 6 hours without hassle. No minute is wasted and the work is going.
- ONE Membership - to download unlimited number of WordPress themes, plugins, ppt and other products within one license. Since bigger is always better.

A passionate WordPress monster since 2018. Loves professionally built website templates, is Elementor Page Builder fan and becomes extremely curious when it comes to trying some new site creation tools. Quora account
Get more to your email
Subscribe to our newsletter and access exclusive content and offers available only to MonsterPost subscribers.

Leave a Reply
You must be logged in to post a comment.