3 Easy Ways to Create Elementor Parallax Effect [Free Elementor Webinar]
- 3 Easy Ways to Create Parallax Effect [Free Elementor Webinar TRANSCRIPT]
- How to Create 3D Parallax Phone Effect with Elementor Pro Motion Effects
- How To Create 3D Parallax Holographic Effect With Elementor Pro Motion Effects
3 Easy Ways to Create Parallax Effect [Free Elementor Webinar TRANSCRIPT]
How to create elementor parallax? Previously we had the end-of-the-week-tradition to stream talks by Alexandra Payne across our social media platforms.
We decided to make this even more interesting and productive. This Thursday, July 25, Alexandra will host a webinar where she will tell you how to create parallax effect with Elementor builder.
Here is also the video of our Free Elementor Webinar
Here's a brief outline of the webinar:
-
- How to create simple parallax scrolling effect with no plugins?
- How to create complex parallax effects with JetElements add-on?
- How to create complex parallax effects with Elementor Pro?
Webinar Transcript - elementor parallax
Hi guys! Today we’re going to look definitely close at 3 ways to create Parallax effects. I’m sure that you’ll manage them very quickly, as these tutorials are based on free Elementor webinar by Alexandra Payne. So, don’t forget to watch/watch again her video to get a complete visual understanding!
Also, follow us on socials to stay informed about our new products, discounts, and free educational streams.
However, for a smooth start, we can’t neglect introductory parts. Hopefully, you think the same. Let’s go!
What’s Commonly Known about Parallax?
Parallax is the movement of objects relative to the distant background that changes from different positions of the observer.
First of all, this term finds its manifestation in astronomy and geodesy. The science of photography has transferred the rich capacity of parallax to modern web animation.
Parallax animation is widely used to cause catchy animation effects on websites backgrounds. It creates an engaging atmosphere while scrolling and gives more chances to a site. Such a one is more likely to get an interest of visitors from the search. Moreover, Parallax technologies can enrich pages with the illusion of 2D depth environment.
So, do you want to empower your WordPress website with the aforementioned benefits? Due to these tutorials, you’ll do it by yourself!
Parallax on Elementor WordPress
To begin, get assured that your site is based on WordPress. Or, seriously said, it’s necessary to install the Elementor Plugin to gain the maximum from our tutorials. This plugin suits numbers of purposes. It eases the process of building and customizing new pages and widgets. Plus, Elementor is fully user-oriented. Without knowledge in coding or web design, it makes accessible tons of stunning effects. Probably the most important is all possible Elementor extensions don’t slow website performance.
We’ll show you 3 different Parallax effects for backgrounds transitions. The first one is really free. The second requires JetElemets Addon. To make Parallax effects from the third lesson, you’ll need to buy Elementor Pro. As the most recent, Elementor team has launched Motion Effects in 2.6 Pro version. This feature allows making pages with moving elements and Parallax backgrounds without third-party plugins.
Tutorial #1 - Backgrounds with Parallax Scroll Effect
The first Parallax effect allows changing the type of background scroll. Discover how to make it on the free Elementor version without additional add-ons. It’s also very lightweight and won’t slow the performance of your website.
-
- Having opened the Elementor, create a new section.
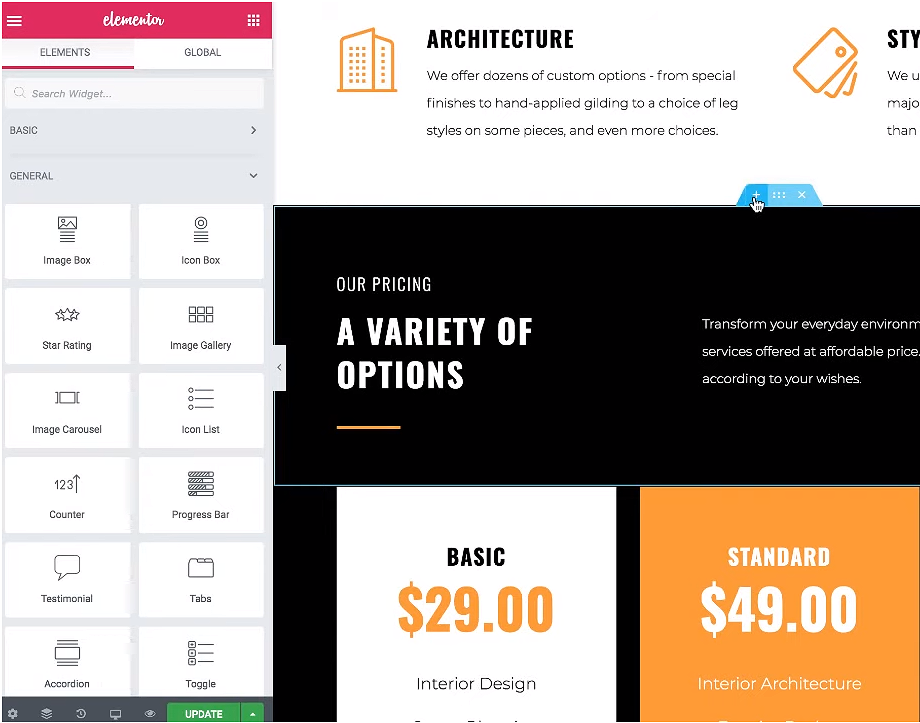
-
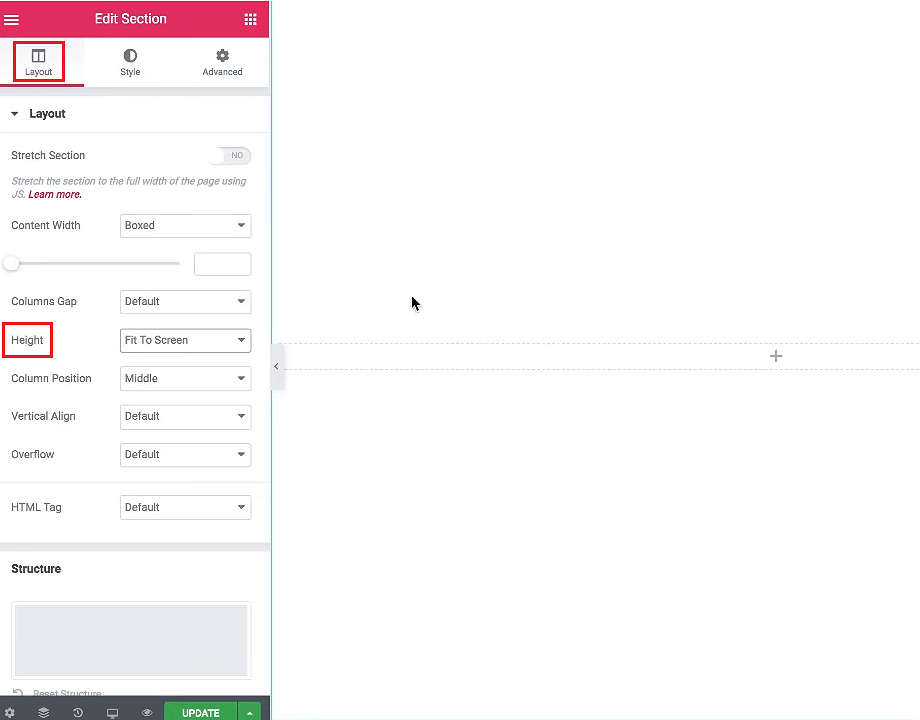
- In the panel tab “Layout”, just pick any height you need. Nothing more is required to be done in this tab.
-
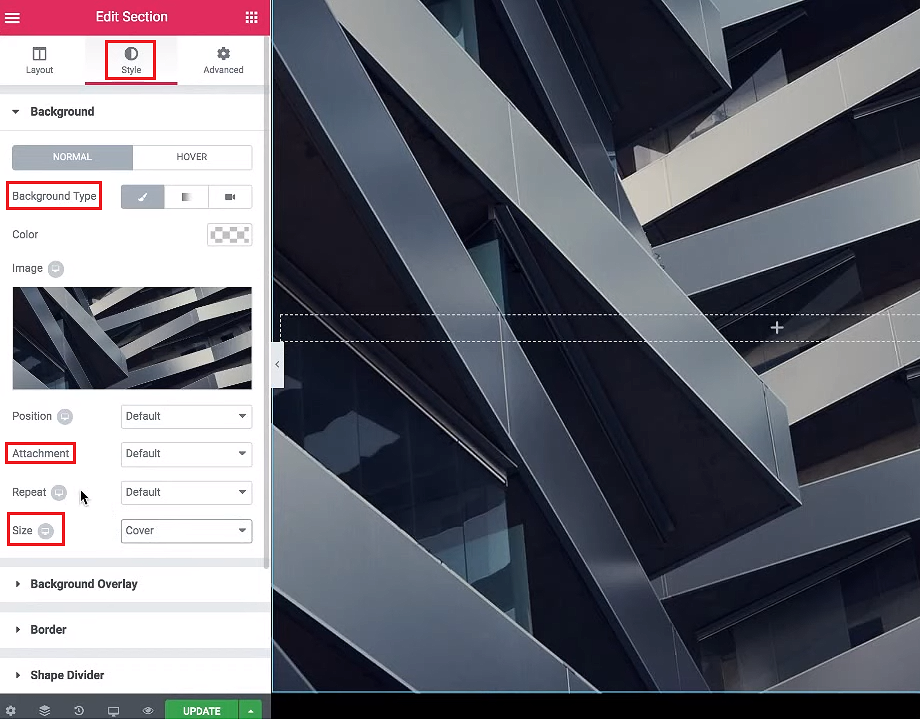
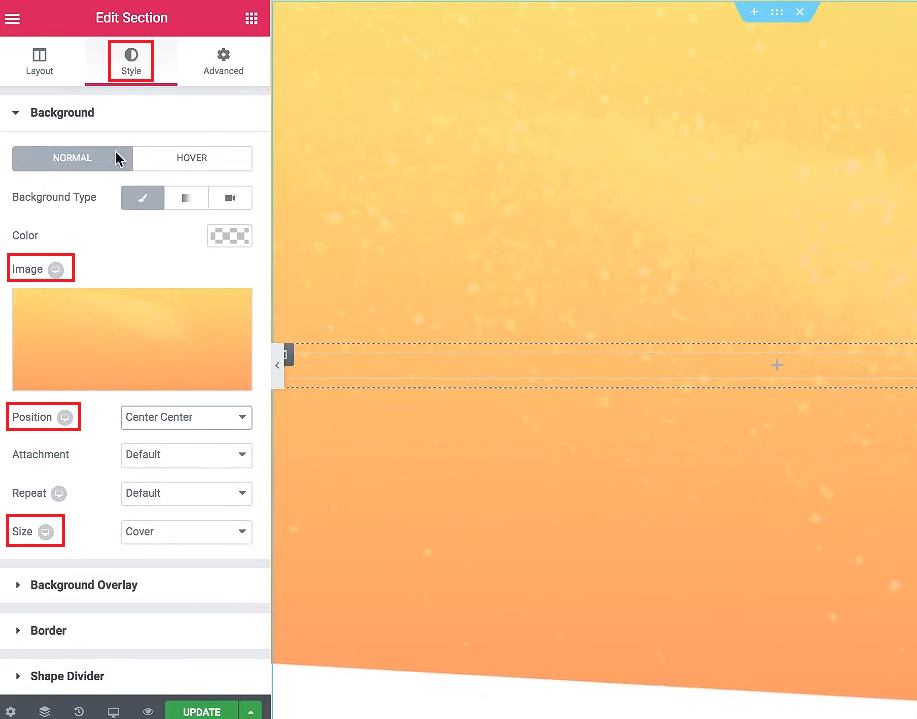
- Then move to the “Style” tab and opt “Image” as a background type.
-
- Continuing to work in the “Style” also mention “Fixed” for attachment and “Cover” as size kind.
- Now, you can see a nice Parallax animation effect on your page. It can meet varied designs and won’t distract your visitors from the main info. You can save these results or try something interesting on the text.
- We also want to show you one trick with text to boost the already created background animation.
So, decide what a text you don’t want to scroll with the rest of the page. As soon as you’ve done it, hover over your text to start editing heading. Click on “Duplicate” just like Alexandra shows.
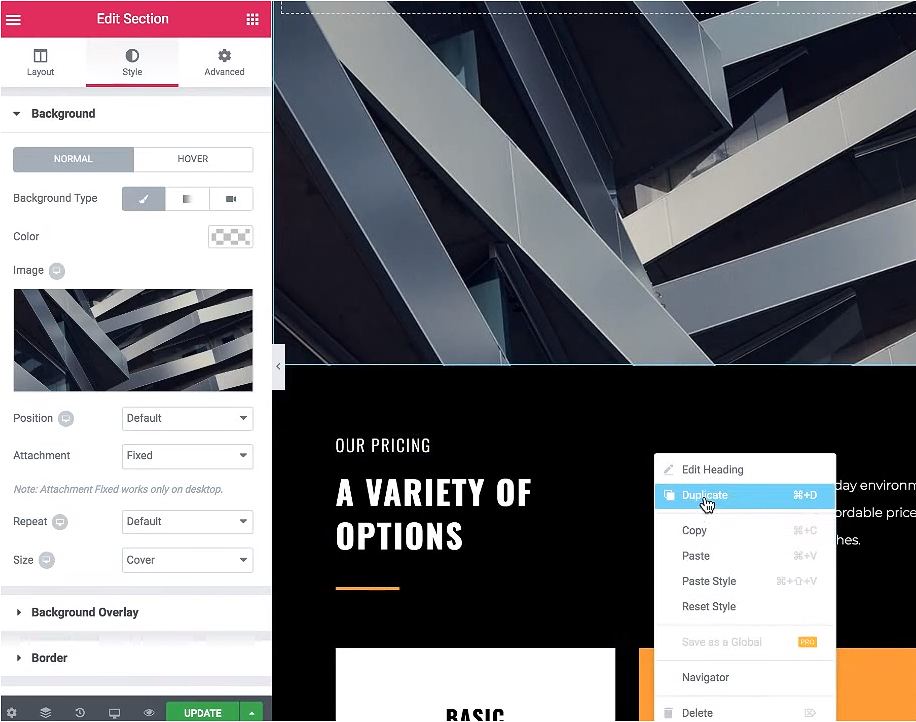
-
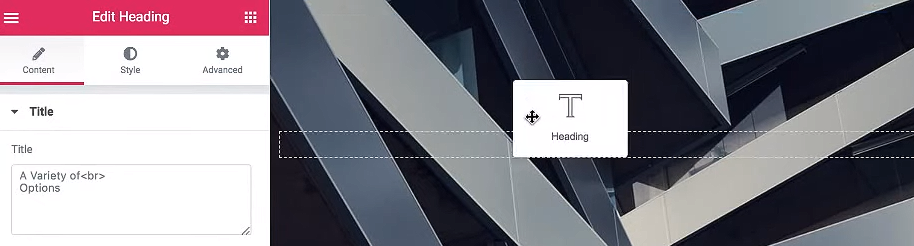
- After, drag this duplicated text element and drop it in the section you’ve created and edited in the previous steps.
-
- Go on working with it in the panel tab “Style” to change its size that is up to you.
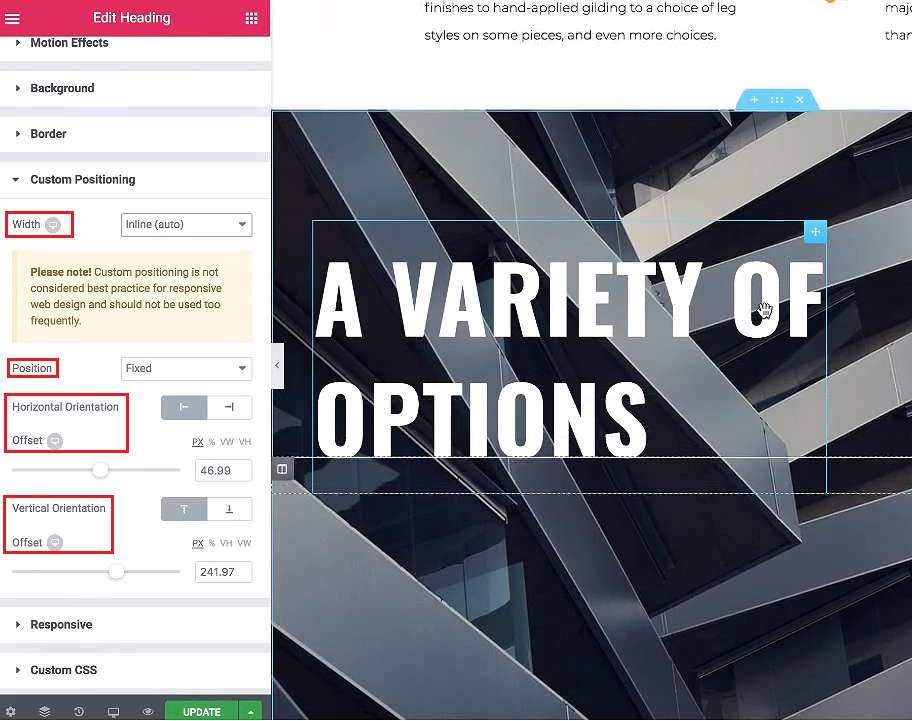
- In the “Advanced” tab, chose a new feature of Elementor “Custom Positioning”. There, click on “Inline (auto)” for width, “Fixed” for the position. Also, adjust offsets for horizontal and vertical perspectives.
That’s all!
Tutorial #2 - Complex Parallax Backgrounds with JetElements Plugins
The effect mentioned in this tutorial we’re going to create with the help of JetElements. It’s the best-selling addon for Elementor that provides around fifty widgets for different types of content. Although, for today, we focus only on Parallax functionality specifically to make complex animation backgrounds.
-
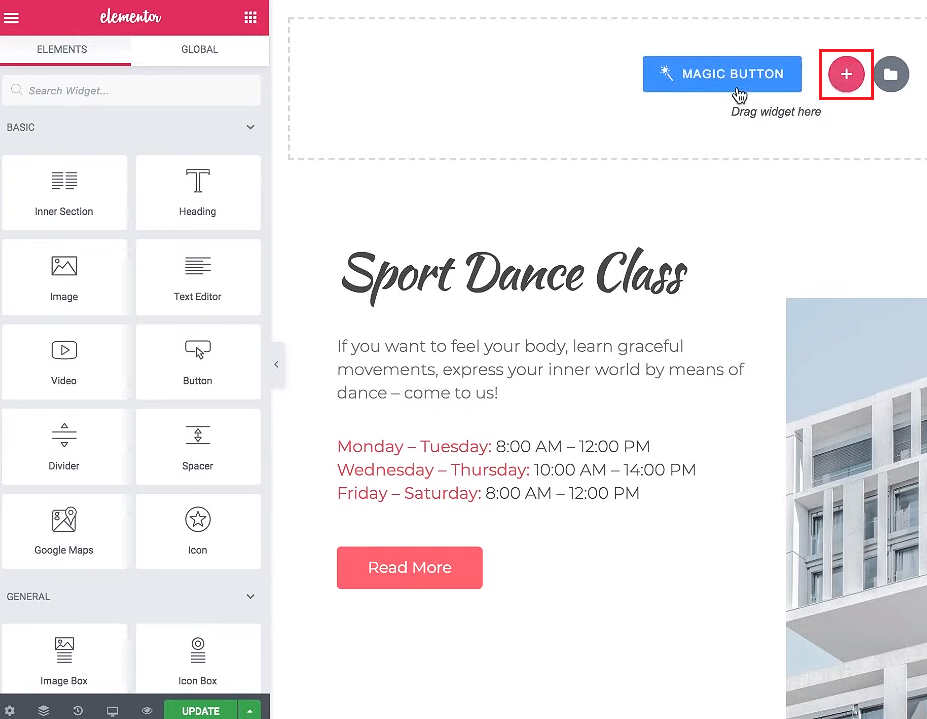
- Start clicking on “+” to open the library of pre-made pages and sections. You can opt the one like the most.
-
- In the panel tab “Layout”, adjust the height clicking on “Fit To Screen”. In this tab also find “Jet Parallax”, as it will be really needful in a few steps.
- Load the first image. To manage this action, move to the “Style” tab. As soon as you’ve done it, choose “Center Center” as the position, “Cover” as size. Other settings you can leave by default.
-
- Come back to “Jet Parallax” to edit layers for the animated backgrounds. Add your first element. In the webinar, it’s a picture of a dancer (to give you a better understanding).
- Make important edits to your image. Feel free to play with varied Parallax types and other options. To get the same results as in our tutorial, choose “Mouse Move” Parallax type, 50/50 background positions to get your visual element directly at the center, and “Transform 3D” animation property.
As well, pay attention to the speed. Usually, animation that performs on very high speed is distracting. So, take care.
-
- Add other items and edit them mostly the same way you’ve managed the customization of the first image. To achieve the effect that Alexandra has done, watch this part more attentively. Or, let creativity move you.
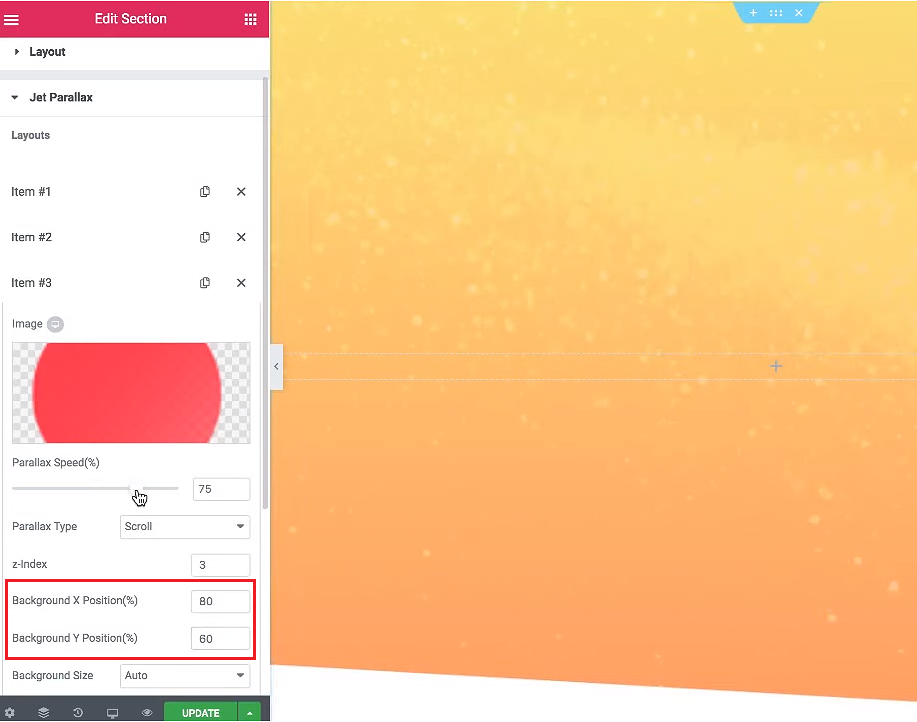
It’s recommended to make sure that z-Index is adjusted to the position of your layers. Edit size of each element considering that some have to be smaller and so on.
-
- Set the Parallax speed for your effect. And opt a Parallax type. We’ve chosen “Mouse Move”.
- For the background position, choose 80/60.
Enjoy results and don’t hesitate to check JetParallax to achieve this and lots of other animation effects even quicker!
Tutorial #3 - Parallax Backgrounds and Moving Elements with Elementor Pro
As it was already mentioned, this tutorial is based on the spectacular usage of Elementor Pro and its new Motion Effects Option. Here, you’ll learn how to make super cool Parallax moving elements, like these spinning plates from the video. Moreover, they are supplied with a background animation that reacts to the movements of the cursor. Even though it seems not effortless to manage it from the first sight, you’ll create it on your own very fast!
-
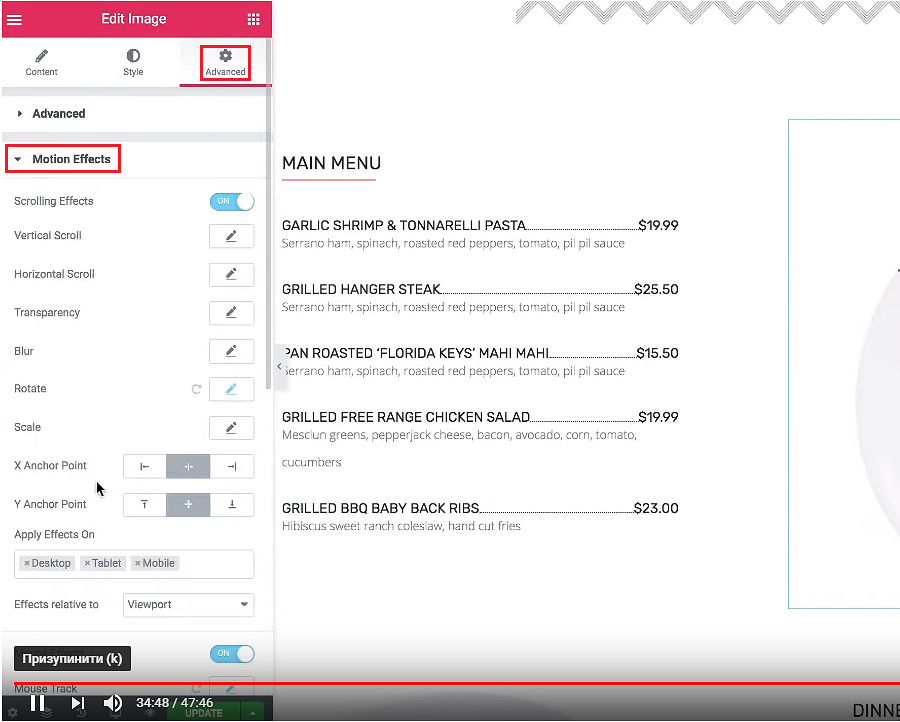
- Begin with a text element (the one that’s the closest to ours from the example). Opt a vertical type of scroll in the panel tab “Advanced”. This ensures this text to move at different speed comparing to other elements on the page. As for the blur, decide what degree is the most suitable for you.
- Now, move to your second visual element - a picture of a dish in our example. Edit it in the “Advanced” tab, “Motion Effects”. Turn on “Scrolling” and “Mouse Effects”, and “Rotate”.
As for the “Rotate”, there two additional tabs, “Speed” and “Viewport”. The last one indicates in which point the animation will stop while scrolling.
Also, setting “Mouse Scrolling” pay a bit more attention to the “3D Tilt” option to add the illusion of 3D movement.
-
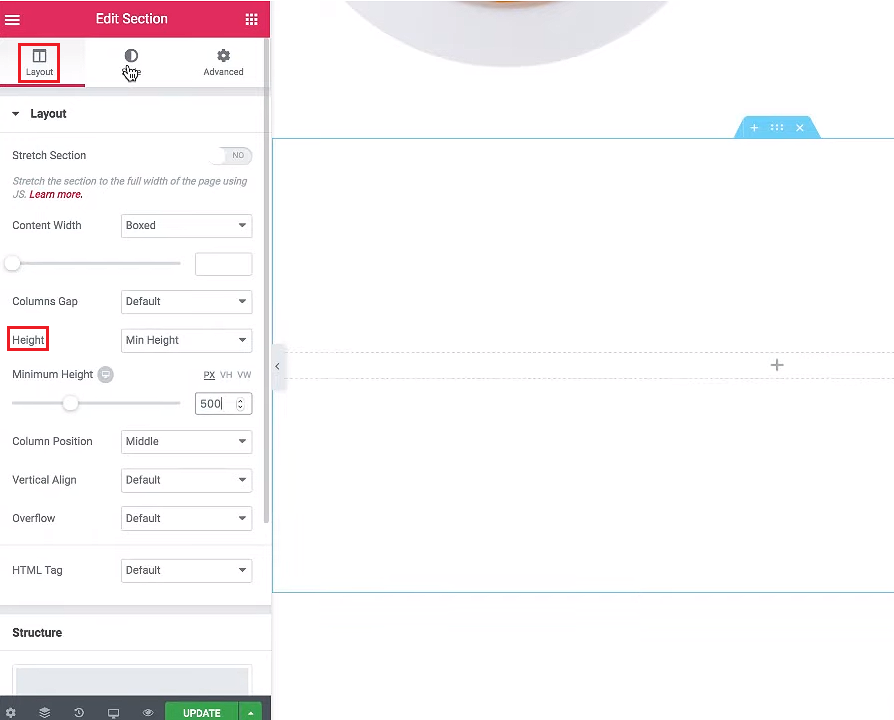
- And, the last element of our animation. It’s the background. So, click on “+” to create a new section. In the “Layout” tab, choose 500 for “Min Height”.
-
- After, work in the “Style”. There, opt “Classic” as a background type and load your image. Go to the “Seize” and click on “Cover”. Choose “Center Center” for the position.
- Find “Scrolling Effects” and “Mouse Effects” - two new options in the Elementor panel. They are available only for Pro version users.
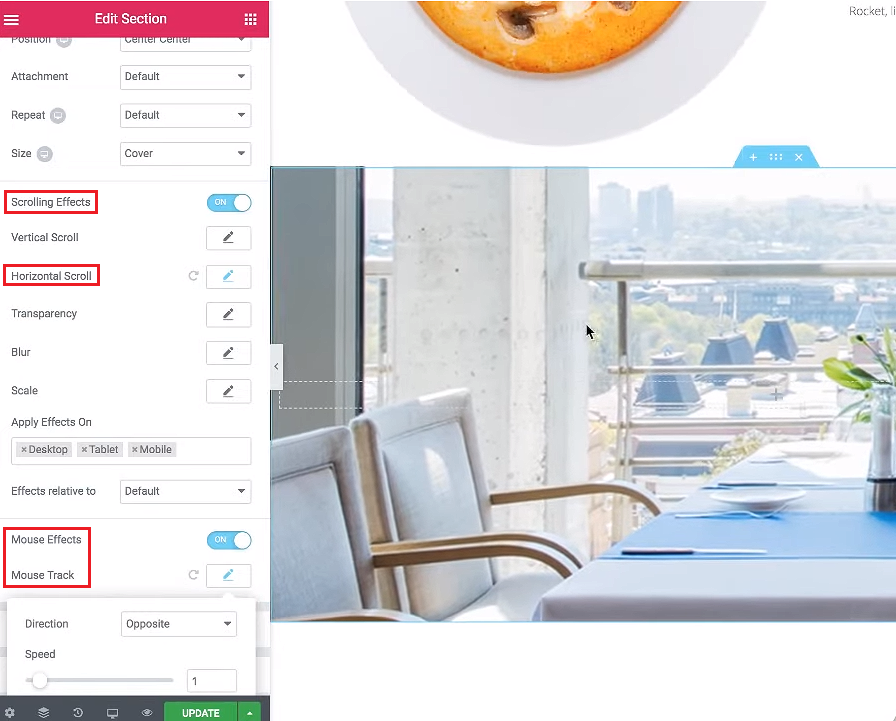
Turning on the “Scrolling Effects” you can adjust any you like for your page. However, for this tutorial, we need a horizontal type of scrolling. Also, activate “Mouse Effects” and “Mouse Track” to make the background image react to your cursor. As you may have also noticed, you can add a text.
It’s time to save your work and check how it performs. Hopefully, you like it!
In these tutorials, we have focused mostly on Parallax backgrounds. Feel free to let us know if you want to find out more on how to make Parallax or other effects on Elementor. You can do it in the comments. Stay tuned and wait for new tutorials!
How to Create 3D Parallax Phone Effect with Elementor Pro Motion Effects
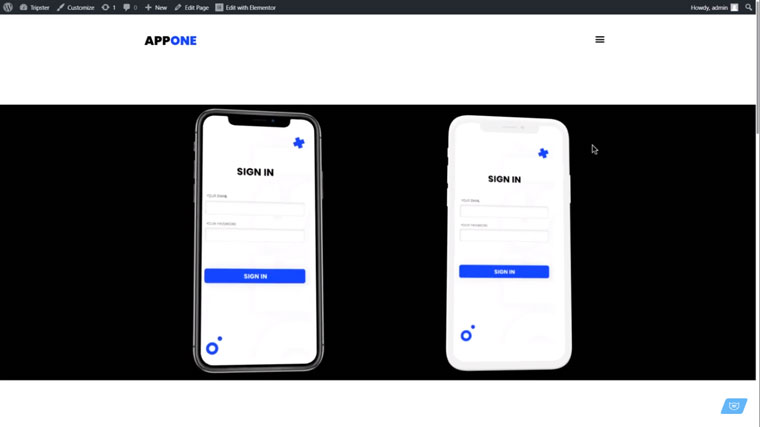
What a cool 3D parallax effect can do is increase the engagement of the users with your webpage. It brings in an interactive experience during the observance of your phone mockup, making the viewer achieve the first virtual contact with the product. This is rather intriguing, isn’t it? Here, we’ll give a detailed step-by-step tutorial of how to create this 3D parallax phone effect using Elementor Pro Motion Effects.
Notably, the effect can be made with any phone, background, colors, or sizes. So, you can integrate your own product and make it interactive on your site. So, here is the video tutorial, in which you can see all the moves needed to achieve the effect. And the following written guide is for your enhanced. convenience.
Overall, you will necessitate only three items:
-
- Elementor Pro editor
- Phone mockup
- Screenshot or image that you will use as the screen on the phone.
You can find some suitable phone mockups on the TemplateMonster site.
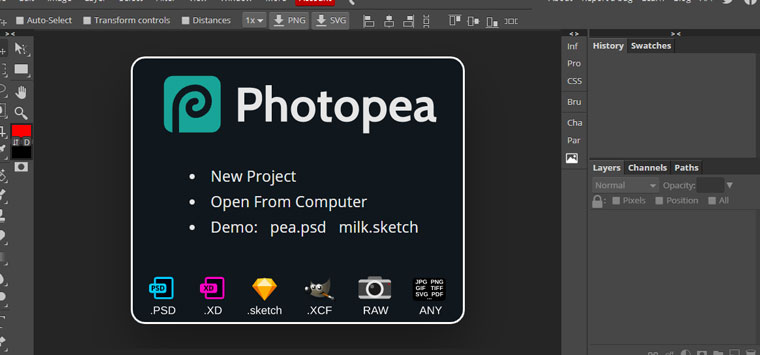
Step 1. Prepare the Phone Mockup.
To prepare the mockup and screenshot, we will use a free online tool, Photopea, which is like Photoshop and is very easy to use. Of course, if you want, it’s possible to use any other tool of your choice.
Open the mockup in Photopea and delete all the unnecessary effects like shadows, reflections, and the screen container.
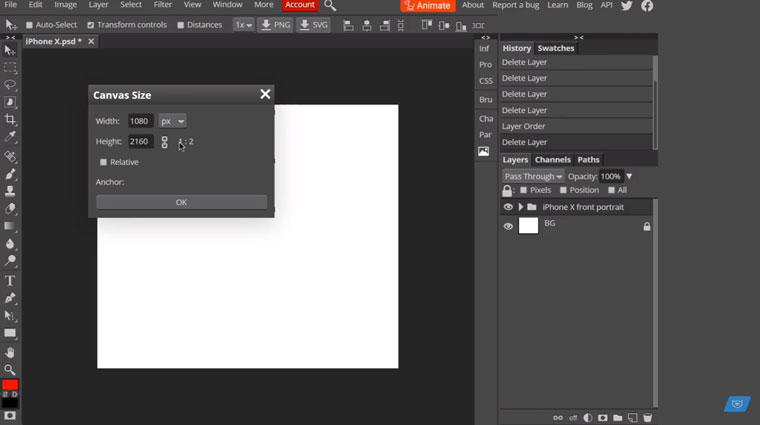
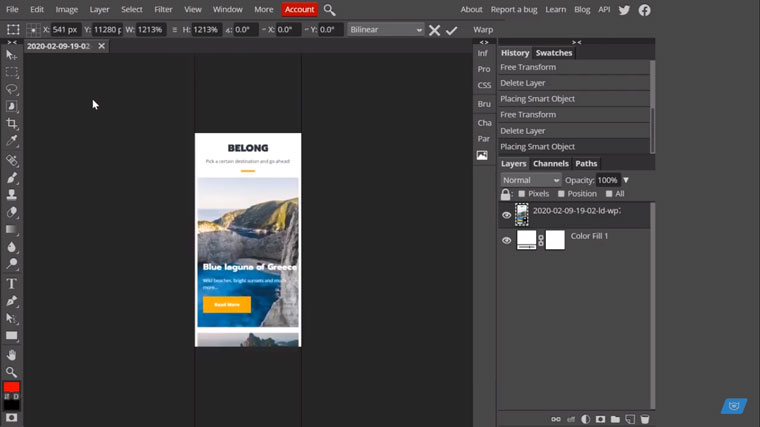
The next thing you need to change is the dimension and size of the mockup. It means that you need to alter the canvas size as shown in the following screenshot. We will set the Width to 1080 px and Height to 2160 px with the correlation 1:2. However, you can pick whatever sizes you want.
Furthermore, you should change the color of the background to white. Even if the color of your mockup is grey or close to white, also change the placeholder to white color.
Now, you are ready to save it as a PNG file. The size of the image can be even made smaller as it doesn’t have to be extra sharp.
Step 2. Prepare the Screenshot.
Now, we need to open our screenshot that we have prepared beforehand and adjust it to fit the size of our mockup. The ratio should be the same as in the mockup. Save it as PNG as well. Now the elements are ready and we can move to the next step.
Step 3. Create a Section in Elementor
Here, you should open up the Elementor editor and create a new section. We’ll put some content there just for the context. Further, set the vertical align inside the column.
Before integrating a mockup, we should go to the Inner section and delete the second column. In this way, we can create multiple layers of motion effects, which makes the page structure more complex and allows making layers.
Step 4. Bring in the Mockup
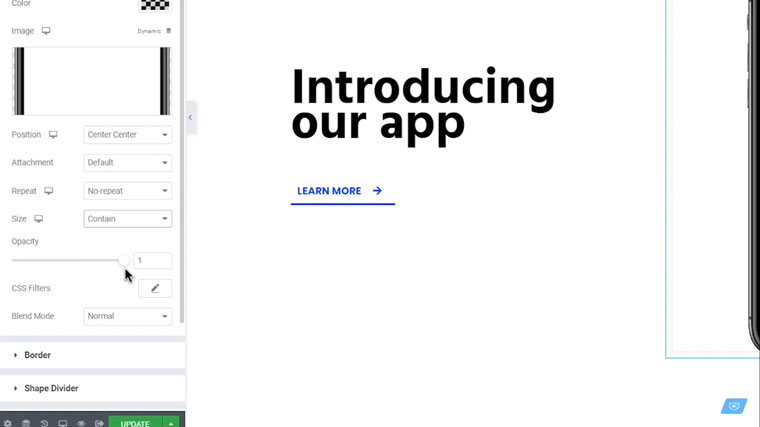
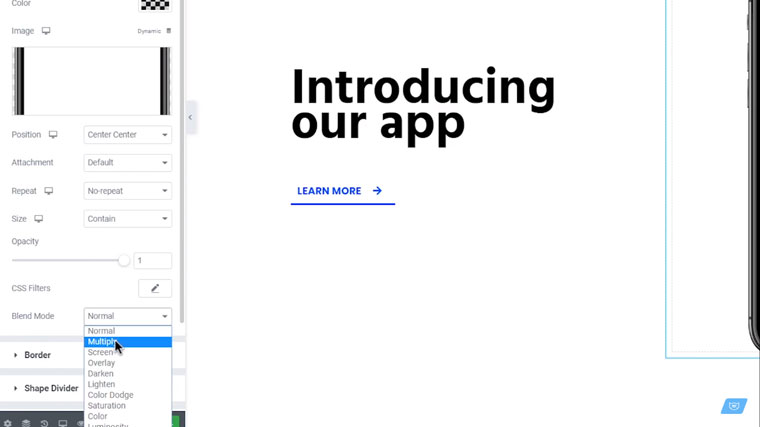
Next what we have to do is to bring in the phone mockup. Go the Inner section settings - Background Overlay. There you pick the image of the phone you have prepared. After you have it on the page, adjust the settings as shown below. Namely, Opacity - 1, Position - Center Center, Attachment - Default, Repeat - No-repeat, Size - Contain.
Step 5. Upload the Screenshot.
Now, upload the screenshot and set it as the section background. However, for now, it will be covered by the mockup. To fix it, go to the Background Overlay and set the Blend Mode to Multiply. Now, all the areas of the mockup that are white become transparent.
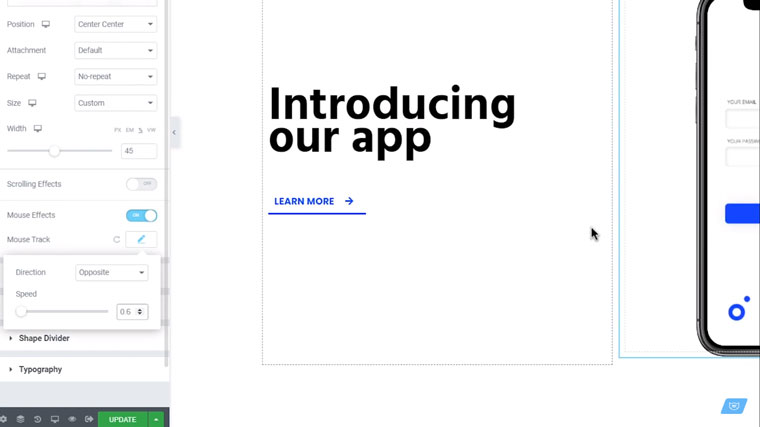
Now we need to adjust the background image properties. We should adjust them in the same way we did for the mockup. Opacity - 1, Position - Center, Attachment - Default, Repeat - No-repeat, but in the Size section - it should be Custom. In this way, it is possible to adjust the size of the image to fit in the mockup.
Step 6. Add Motion Effects.
Now we need to add the Motion Effects to the background image. We are still in the settings of the Inner Section background image. We need to enable Mouse Effects and change the Speed to 0.6.
To make the entire phone move, Further, we need to go to the Setting of the Parent Column - Advanced Settings - Motion Effects.

In the Motion Effects, enable Mouse Effects, turn the direction of Mouse Track to Direct and increase the Speed to 0.5. Next, adjust 3D Tilt - place it to Direct and set the Speed to 2
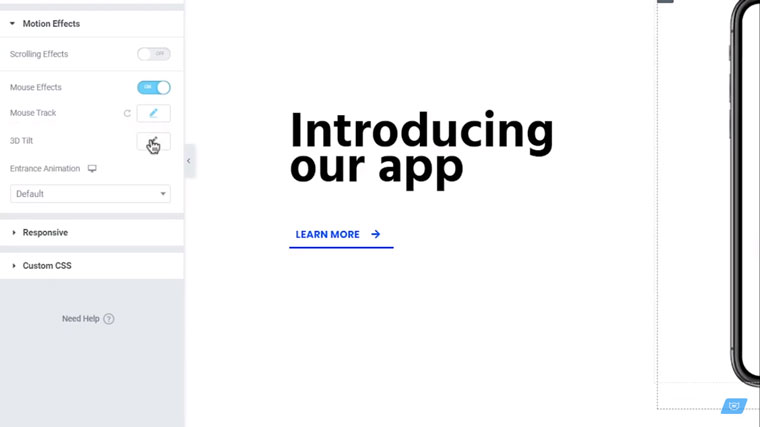
Here you go. Enjoy the effect!
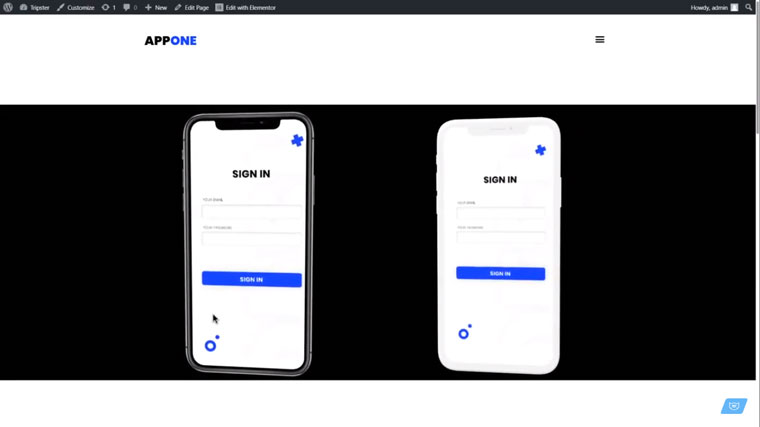
This way, the engaging 3D Parallax phone effect is easily accessible with Elementor Pro Motion Effects. Notably, the process will be the same for any background and various mockups. This is it, we made it, and now you can try yourself to create the interactive experience on your webpage.
How To Create 3D Parallax Holographic Effect With Elementor Pro Motion Effects
The design of a site if devised wisely can work as an attention grabber for the audience, can enhance the user experience, and thus boost the productivity of your project. One of the tools to make a visually appealing web page is to implement a 3D parallax effect, which takes place with the help of layers that move with a different speed that ensures the illusion of depth of the visual.
It creates a vision of a multidimensional space and can add certain interactivity. Thus, using a mouse cursor, the user is able to change the view of the objects as they move in the dimensions following the cursor.
In fact, they don’t move in 3D space, but there is an illusion that the objects turn as they are located in several dimensions. As it was mentioned earlier, it occurs due to the differing speed of the object movement. Thus, a layer that will have a slower speed will create the illusion of being closer to the observer.
In this article, we'll review in detail how to create a 3D parallax effect for a hero section or any other section of your site where you want to use the effect. For this goal, we’ll need Elementor Pro Motion Effects.
You can view a detailed video tutorial on the subject matter:
or read the following guide with a thorough description of each move.
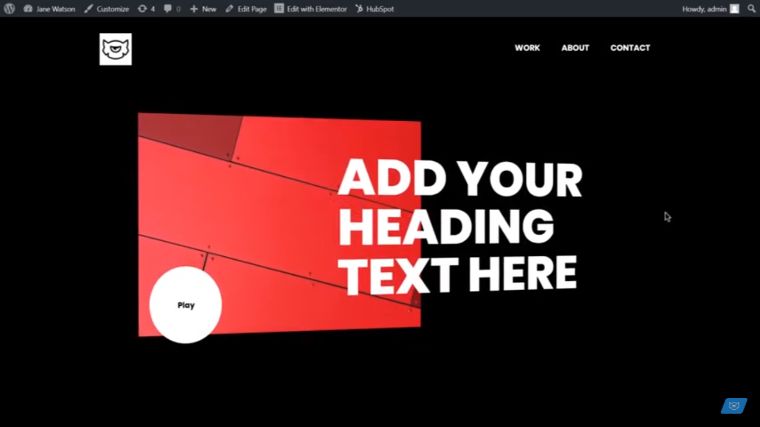
The elements that will be achieved are flat, but they’ll look like multidimensional due to the mouse track effect. Here, we'll create a similar 3D effect as the following one.
Step 1
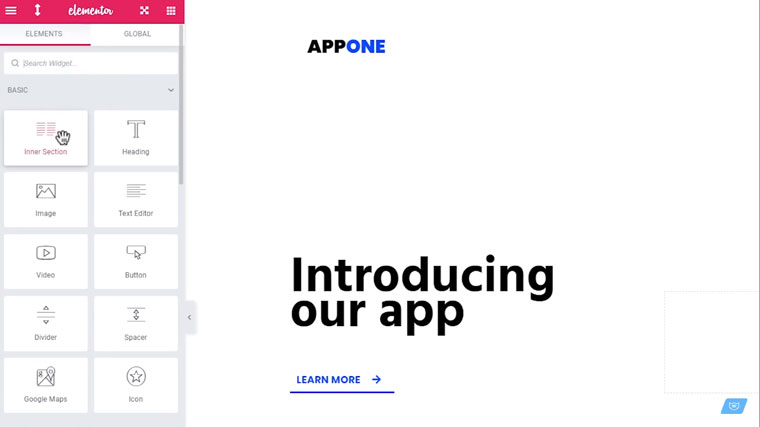
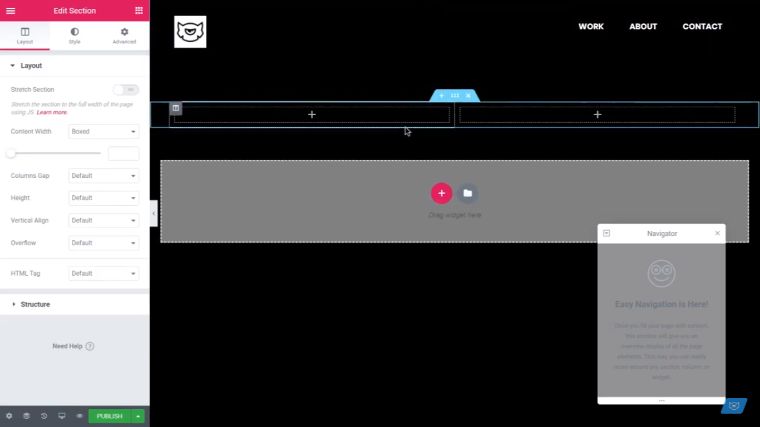
At first, We must open the Elementor editor, and begin the process with the columns. The interface is rather intuitive and simple for exploitation. Push the plus button to see the selection of columns.
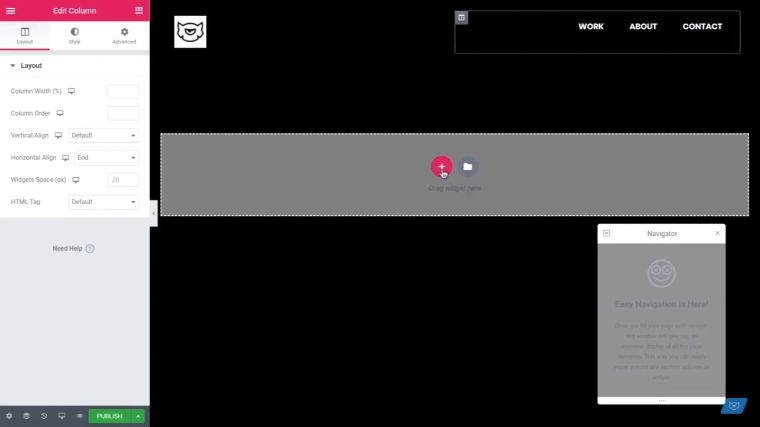
Choose the desired column style. Here, we’ll create the section of two columns. The first is determined for the image and the other one for the heading.
Step 2
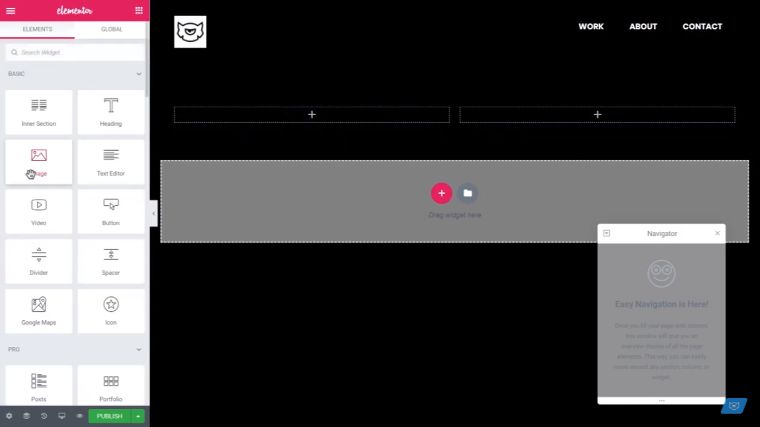
The column on the left will be an image, so you should pick the image from the Elements - Image section and drop it to the first column.
You can pick custom image sizes and dimensions; this is not critical for devising the parallax effect, but it is only important for your project design.
Step 3
Now we need to go to the settings of the column and move the column to the right. The Edit Column button is on the top left corner of the image in the column.

Further, go to Advanced settings there, move to Margins and switch to percents.
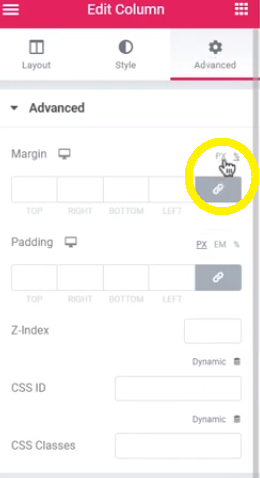
Avoid using pixels as they are an absolute value, while percents are a relative value. After that, unlink the values and set the following ones.
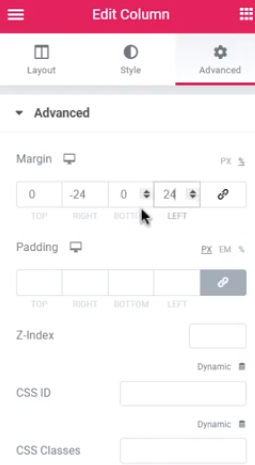
In this way, you'll move the image slightly to the right.
Step 4
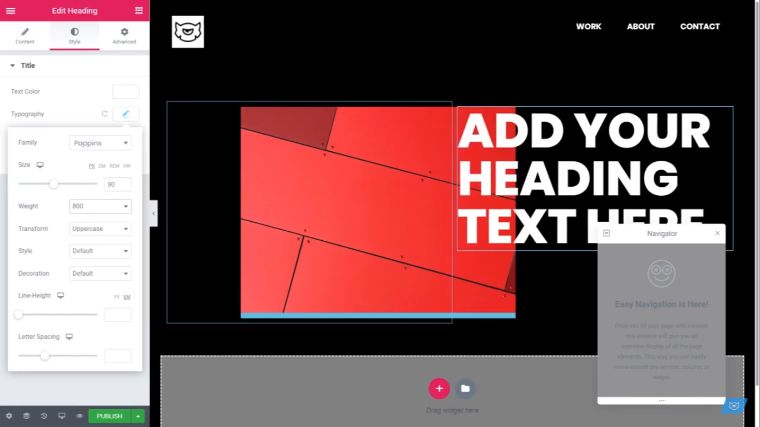
Now you'll need to add the heading into the other column. Go to Edit Heading and customize the heading in the style section. The particular style of your heading depends on your preferences, thus here you can enter any values.
Step 5
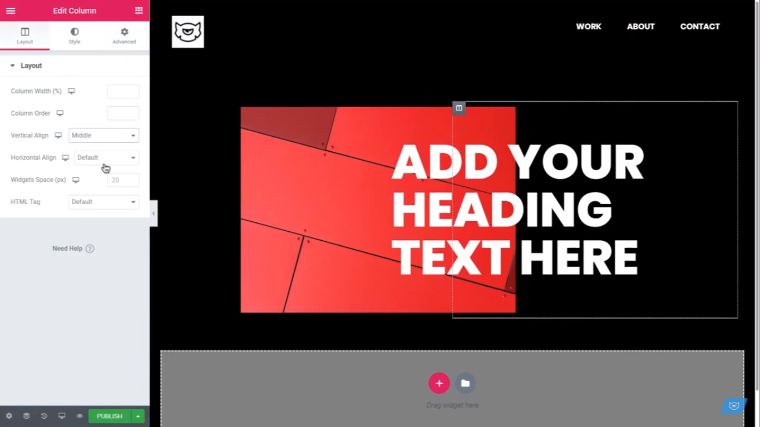
After that, we also need to move the heading to the left as we should create the effect that the heading overlaps the image. For this goal, go to Edit Column – Advanced (the same as when editing the image).
Here, you should also set the Margin value, setting the negative margin value.

Step 6
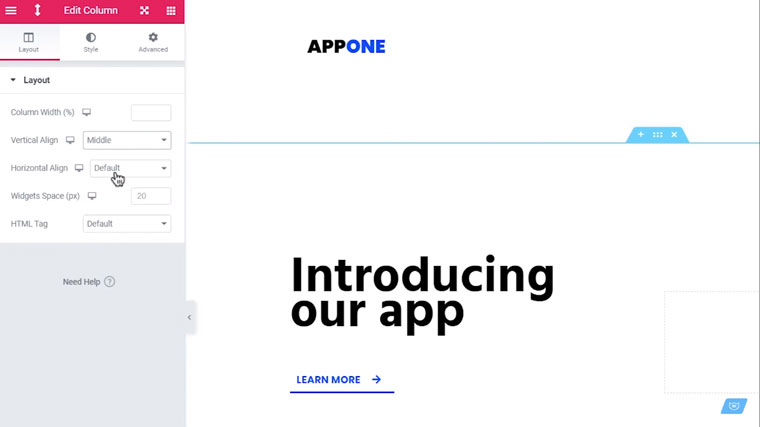
Then go to the Column Settings again – Layout. Find Vertical Align and change the value to Middle.
Step 7
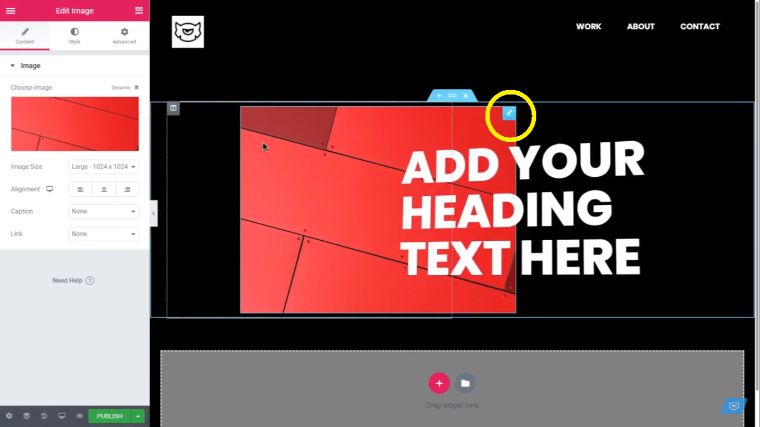
The next thing you should do is go to the settings of the widget (not the column but the widget). The button is located on the top right corner as shown in the image.
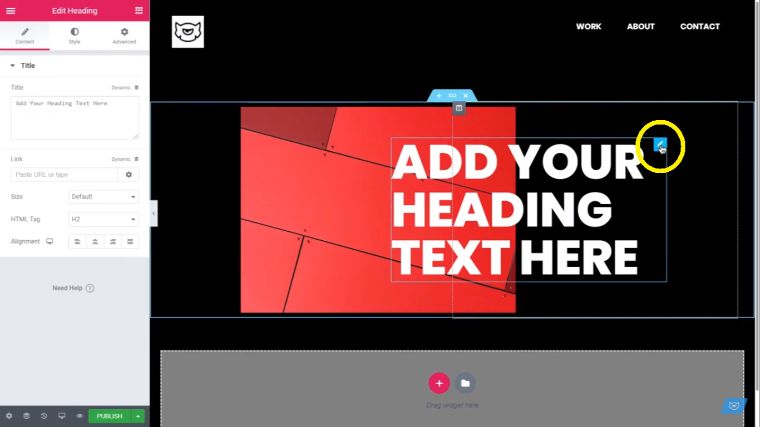
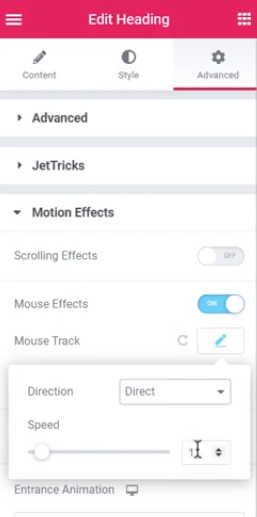
Go to Motion Effects section, enable Mouse Effects and 3D Tilt. Now the element will react to the movement of the cursor.
Step 8
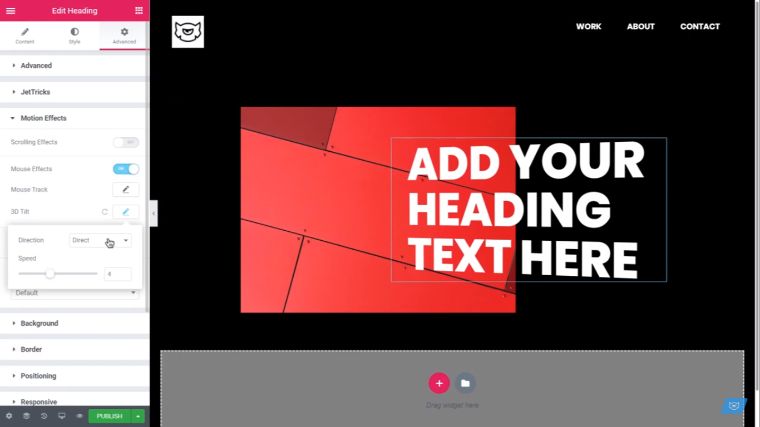
We need to enable the same effect for the image. Go to the widget settings of the image, the button to which is located on the top right corner as shown in the image.
Then pick Advanced settings, go to Motion Effects, enable Mouse Effects and 3D Tilt. Go to the settings of 3D Tilt and change the speed for creating the illusion of the space between the elements. Consider decreasing the Speed to 3.
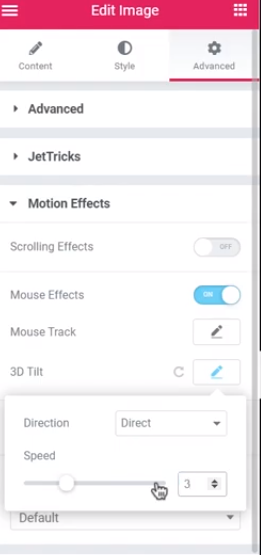
However, for the present moment, it doesn't look like there is a lot of space between the two elements. To make the effect more apparent, go to Mouse Track under the same Motion Effects section. There you'll see Direction and Speed values. The default values are the Opposite and One. Change the direction to Direct and play with the speed value to view which suits best for you.
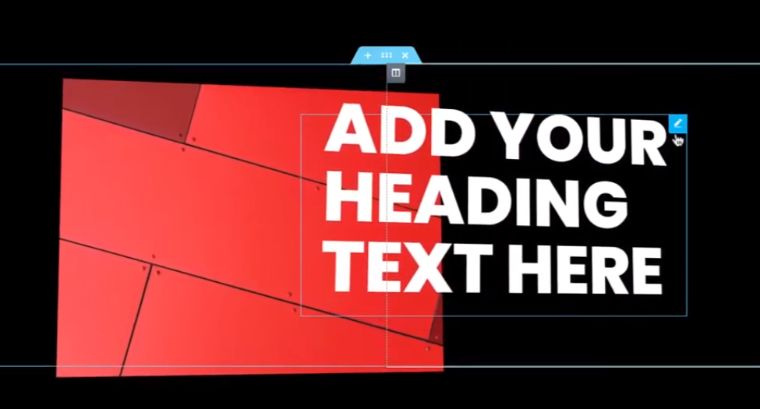
This will create a dimensional effect like it is shown in the following image.
Step 9
Now we need to create the button. Create a new section and look for the new button widget. Drag and drop it to the new section. Adjust the settings to fit the style of the rest of the elements.
Step 10
Before going to Motion Effects, we'll need to move the button upward. Go to the Positioning section and adjust Width to Inline, Position to Absolute, which will enable moving the button to the desired place.
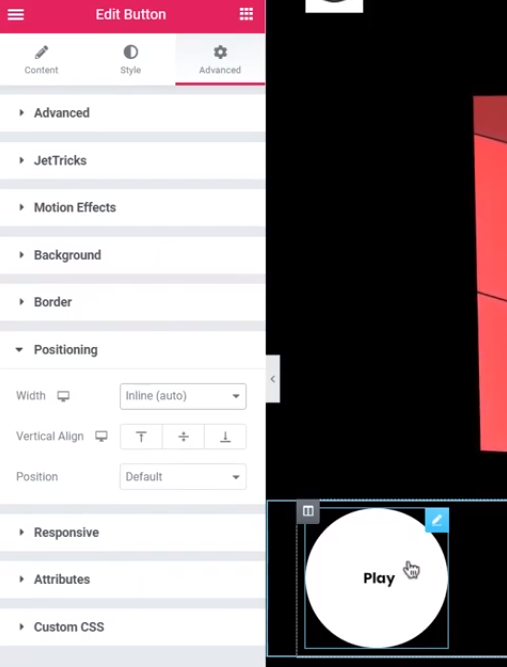
Notably, you should take time to check how it will look on mobile devices as this may cause certain visual issues on various devices.
Also, here you should play with the values to pick the right positioning of the button for your design project. We’ll pick the following ones:

Step 11
Now we'll proceed with adding motion effects. Go to Motion Effects. To make the button motion effects look the same as the other elements, pick the Direction – Direct, enable 3D Tilt, and consider increasing the speed. Here, we pick increasing it to 5.
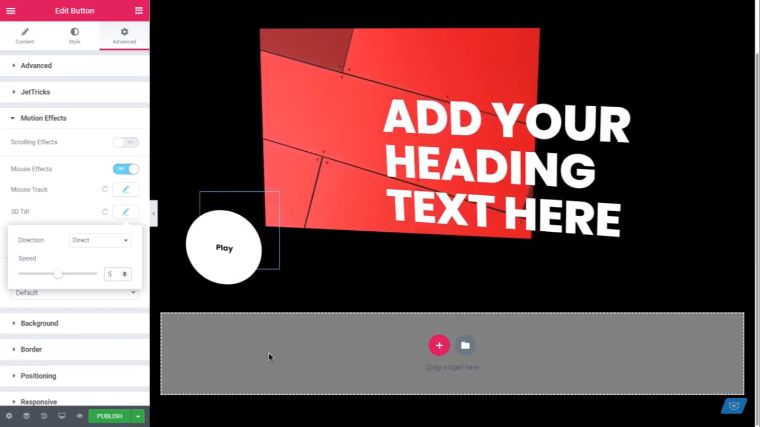
That’s it. You’ll get the following result, the elements will react to the mouse cursor and move creating the multidimensional effect.
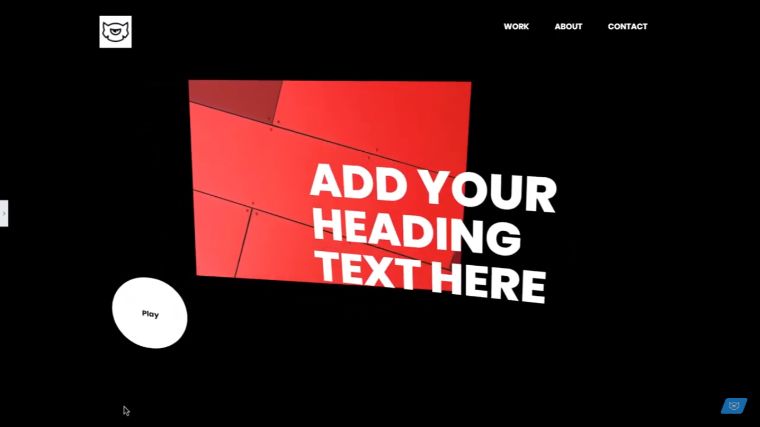
At the end of this procedure, you’ll get a cool 3D appearance of your site. This holographic effect is engaging and provides a certain virtual interaction of the user and the web page. As you may have noticed, it took us several minutes to reach the desired effect as it is indeed easy to gain with Elementor.
How do you think will this stunning effect suits the design of your website?
Read Also
How to Set Up Blog Post Lists with Elementor Page Builder
Elementor Image Slider: How to Add it to Your Website with Page Builder
How To Design Buttons In Elementor | 17 EASY Elementor Button Styles You Can Create in Under 5 Min
How to Create a Gradient Button with Elementor
Elementor Motion Effects: Best Practice to Liven Up Your Website
How to Create a Responsive Parallax Scrolling Effect with Elementor
Don’t miss out these all-time favourites
- The best hosting for a WordPress website. Tap our link to get the best price on the market with 82% off. If HostPapa didn’t impress you check out other alternatives.
- Monthly SEO service and On-Page SEO - to increase your website organic traffic.
- Website Installation service - to get your template up and running within just 6 hours without hassle. No minute is wasted and the work is going.
- ONE Membership - to download unlimited number of WordPress themes, plugins, ppt and other products within one license. Since bigger is always better.

Get more to your email
Subscribe to our newsletter and access exclusive content and offers available only to MonsterPost subscribers.
