How To Design Buttons In Elementor | 17 EASY Elementor Button Styles You Can Create in Under 5 Min
Although buttons may come in different styles, sizes, and colors, they all have one common function — make the website visitors perform some action. This can be registration on the site, login, request of the information, joining the mailing list, checkout, and more. Nonetheless, the elementor button is not just the element to press.
When properly designed, it can contribute to great usability and, consequently, influence visitors’ behavior. Choosing the right style for buttons is crucial, especially if you want to improve the way users interact with your website.
Here’s where you may wonder what style of buttons to choose and how to design them so that they could convert the visitors into loyal customers. This article aims to guide you through each step of creating different types of buttons using the Elementor visual page builder. Read on to access 17 styles of Elementor buttons you have a chance to design in less than 5 minutes. You can create them separately and add to a custom-made website developed from scratch or choose from Elementor WordPress themes that come already equipped with default UI elements including buttons.Without any further delay, let’s get to the actual guide and learn the ways to design buttons in Elementor.
Elementor Buttons as Essential UI Elements
Buttons are designed to encourage visitors to perform actions you want them to take. And if users don’t press the button, something goes wrong and may indicate design reasons, such as:
- The button doesn’t look like a standard button.
- The color makes users set any action aside.
- The button is placed in an unexpected area.
- Users have no idea about what the button is for.
- The button doesn’t convince users to click on, etc.

On the contrary, there are a few quick tips aimed to help you create the buttons that will reduce users’ confusion and significantly improve click rate on the website.
- The button should look like a standard button. Make sure the visitors clearly understand that they should click on it.
- Don’t go too big. The button should draw attention, yet it doesn’t have to annoy. Keep the balance.
- Leverage contrasting colors to make your button stand out on the website. Bear in mind that the color has to be balanced with dimension — the smaller the button, the more contrasting the color. It should also suit the overall website color scheme and be the same for all buttons on the site.
- The text should be readable, yet not too big and fancy.
- Decorative elements are necessary only if they truly emphasize the purpose of the button, etc.
How to Design Buttons in Elementor?
Now that you have a clear idea about what website buttons should look like, it’s high time to cover other topics, like:
- What button styles Elementor supports?
- How to create button in Elementor?
But before that, let’s find out what Elementor is and what you should expect starting to use it.
Elementor is a visual drag-n-drop page builder specifically developed for WordPress. What it means for you is that you get access to a unique and separate interface for building pages, custom post types, and other UI elements. Working in Elementor doesn’t require any coding skills since everything can be done within the interface. On top of that, drag-n-drop functionality lets you play around with the elements moving them within the layout until the final result satisfies you. Because Elementor works on the front-end, the outcome is visible in real-time, right after every applied change.
And, of course, the page builder is compatible with any WordPress themes which makes it a tidbit for all WordPress users.

Picking up the pieces, the major benefit of leveraging Elementor is that you can build outstanding page layouts or UI elements at the push of a button even if you are not a professional developer and have no experience building websites. This gives you a number of possibilities, especially if you are on a low budget but still want to create engaging content. Another good thing about Elementor is that you don’t have to design layouts from scratch — the content editor provides a library with a wide range of templates that need only minor tweaks.
Like many other digital products, Elementor has its own drawbacks as well. But fortunately, they don’t make it any less popular among web users who want to build content quickly and effortlessly. And ideal WYSIWYG interface, the ability to modify content in detail, as well as an extensive library of ready-made templates make novice site creators, beginner bloggers, and WordPress developers mad about Elementor.
The last for this copy, but not even the least distinctive feature of the page builder is that it supports about 17 button designs, and further we’ll see how to change button styles in Elementor.
Simple Material Design
- Open Elementor content editor and find Button widget through a search bar. Once done, drag it to the layout.
- Go to the Content tab to choose the type and text of the button, as well as inserting a link into the appropriate field. To make the link properly work, press the button next to the link. Here, you can also play around with the alignment and the button size.
- Move to the Style tab where you can change the text and background colors, choose typography and its size, weight, and style, as well as playing around with the padding.
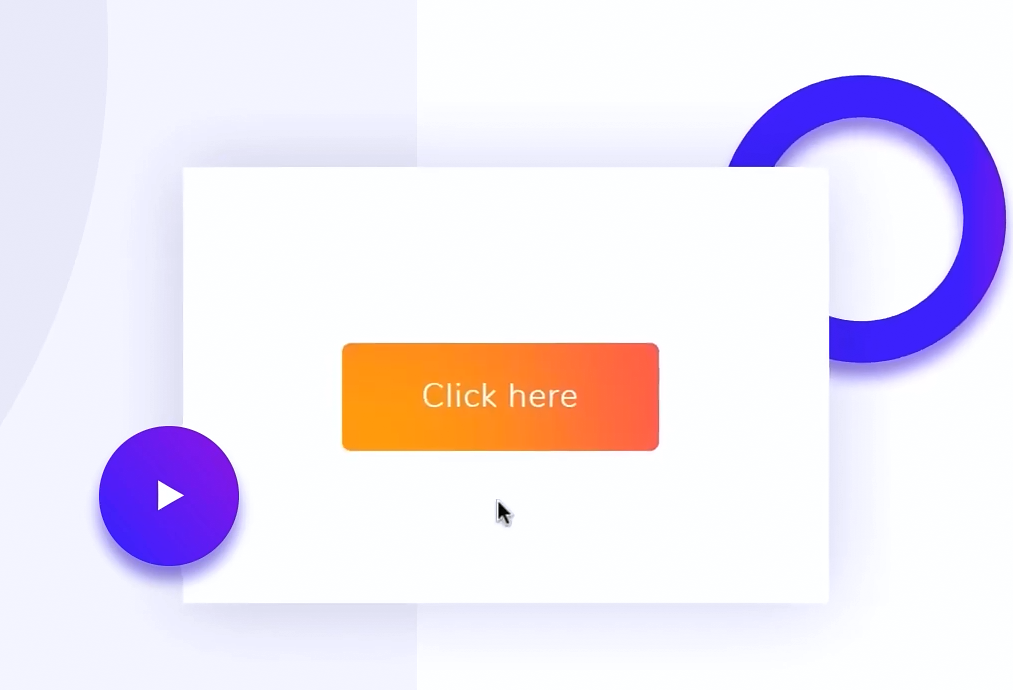
Gradient Elementor Button
If you want to add a gradient to the button, leaving the settings used for the Simple Material Design button. The only thing you may want to change is the Background Color.
Then, navigate to the Style tab > Box Shadow.
Change Position to Insert and apply changes to Spread, Horizontal and Vertical options.
Choose the color upon the Box Shadow section and configure the Blur to apply gradient effect.
Upon Text Shadow section, select Hover and pick the contrast Background Color so that the button changes its color under hovering.
Button with Rounded Corners
To change the shape of the button, go to the Style tab, and set the Border Radius to 50 for left, right, top, and bottom.
With the Hover option selected, you can now change Hover Animation to Shrink so that the button becomes smaller under hovering. Here, you can also experiment with the button background color, typography, and other settings depending on your needs.
Button with Sharp Corners
For those of you who want to proceed with a sharp-corner button, steps will be the following.
Navigate to the Style tab, change the Color Background, and edit Padding.
Set Border Type to Solid and put Width to 3 for the bottom.
Change to Hover option, pick the same color for Text and Border leaving Background white.
Sharp Corners + Icon
Start with the Content tab. Upon the Icon option, pick the icon you want to apply next to the button text.
Put the Icon Position and change the Icon Spacing. Navigate to the Style tab. Here you can change the typography, background color, padding, and letter spacing.
Upon the Hover option, change Border Type to Solid, set Width to 2 for top, bottom, left and right, as well as picking the same color for Text and Border leaving the Background white.
White Elementor Button with Shadow
Upon the Style tab, play around with the typography, its size, weight, and transform settings.
Pick the contrasting Text Color leaving the Background white.
Go to Box Shadow and change the color to grey. Leave Position as is (Outline) and apply changes to Vertical and Blur settings.
With the Hover option selected, change the Text Color and set Hover Animation to Bob.
Bold and Modern Button
Navigate to the Style tab again, play around with the typography and change the letter spacing.
Apply changes to Padding settings and then pick the contrasting color for Text.
Set the Border Type to Solid and tweak the width.
Go to Box Shadow and pick the same color as for the Text. Leave the Position as it is while applying changes to Vertical and Horizontal settings.
Bold and Minimal Elementor Button
Upon the Style tab, change Border Type to Solid straightway and change the width. Set border and text color to black while background to white. You may also want to set another font and configure Padding.
3D Elementor Button Illusion
To gain a 3D effect, you first need to create a regular button and apply minor changes upon the Style tab.
Here’s what you have to do: pick the Background Color, set the Border Type to Solid, and change bottom width to 4. After that, go to the Border Color and pick a darker shade of the color chosen for a background. This will give the button a 3D effect.
With quite standard techniques bared in mind, you are already supposed to get an idea of how to make button in Elementor. Now, you can simply play around with the settings, such as color, shape, and hover animation, and also create more Elementor buttons:
- Tiny and Fresh;
- Black and Blue;
- Green and Purple;
- Tender Purple;
- Blue and Buzzing;
- Green Tea;
- Orange and Rounded;
- Round and Simple.
Closing Thoughts: elementor button tutorial
The button is not just another UI element. This is an effective instrument aimed to improve users’ interaction with your website. Properly designed, it contributes to a flawless site usability, determines users’ behavior, as well as significantly increasing the conversion rate.
While looking like a button, using contrasting colors and incorporating the legible text, the button has to make the visitors perform the action you want them to take without hesitation. Additionally, when properly sized, the button easily encourages users to click through. And on the contrary, when it is too big and visitors have no idea what it is for, they are more likely to leave the website or not to take any action. These are just a few, yet substantial reasons why you shouldn’t ignore the design of your website buttons.
If you want to create eye-catching and converting buttons on your website built using WordPress, consider leveraging Elementor Page Builder with an extensive library of ready-made templates. Another option that should catch your attention is the JetElements plugin that also comes already equipped with a variety of default buttons. All you have to do is just apply minor changes according to your purposes and needs.
No matter what option you decide to come with, building website buttons with any of them is now a piece of cake.
Read Also
20 Best Environmental WordPress Themes For 2020
Top-30 Elementor WordPress Templates In 2020
Bitcoin Cryptocurrency Responsive Website Template
How to Build & Maintain Elementor WordPress Website? [Free Course]
Don’t miss out these all-time favourites
- The best hosting for a WordPress website. Tap our link to get the best price on the market with 82% off. If HostPapa didn’t impress you check out other alternatives.
- Monthly SEO service and On-Page SEO - to increase your website organic traffic.
- Website Installation service - to get your template up and running within just 6 hours without hassle. No minute is wasted and the work is going.
- ONE Membership - to download unlimited number of WordPress themes, plugins, ppt and other products within one license. Since bigger is always better.

Posting contributed articles about the major web design highlights and novelties. Come across a handful of useful tutorials and guides shared by experts in the web design and online marketing fields.
Get more to your email
Subscribe to our newsletter and access exclusive content and offers available only to MonsterPost subscribers.

Leave a Reply
You must be logged in to post a comment.