3 Easy Ways To Create Blob Shapes In Elementor
- How to Create Animated Blob Shape with HTML & CSS
- How to Put Image in a Blob Shape with Figma
- How to Export Blob Shapes from Figma
- How to Create Blob Shapes Using Lottie Animations
Blob shapes are a hot trend. In our new Elementor video tutorial, we’re exploring three absolutely effortless ways to create blob shapes and embed them in your Elementor website. No coding skills, third-party plugins, or extra software are required!
1. Animated blob shape with HTML & CSS
In the first part of this tutorial, you’ll learn how to make a slightly animated blob shape with the help of HTML and CSS. You can adjust the speed of the animation, adjust the number of copies, and you can move it around and you can place it anywhere you want as a really cool element to decorate your page.
2. How to put an image in a blob shape with Figma
In the second part of this tutorial, you’ll learn how to put an image in a blob shape. We're going to draw or generate blob shapes in Figma, then we'll put our image in there.
3. How to create blob shapes using Lottie animations
In the third part of this tutorial, we’ll be using Lottie animations. We believe there’s going to be a lot of Lottie animations on the web in the nearest future. They look great and can be scaled to any size. They load super fast because these are basically a piece of code that you can put on any web page including Elementor and make your assets look just great.
Watch the video below to see the step-by-step instructions on how to create blobs in Elementor:
How to Create Animated Blob Shape with HTML & CSS
- Go to the Elementor editor and grab the HTML element and place it over here. We’re going to put an updated version of code over here and this is what we have.
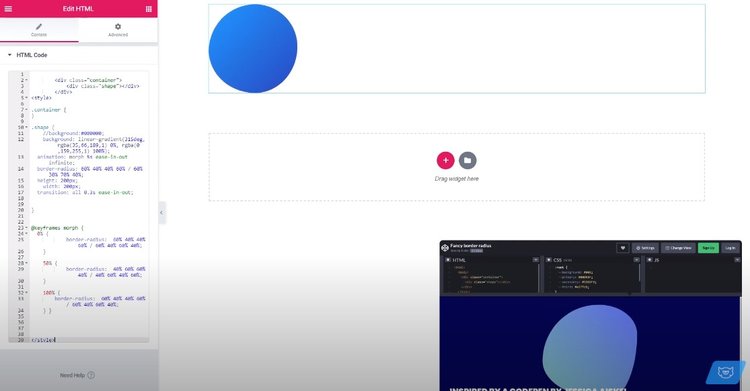
You can either apply solid color to your blob or you can add a gradient.
And the super handy tool that is gonna help you pick gradients a lot faster is called CSS gradient.
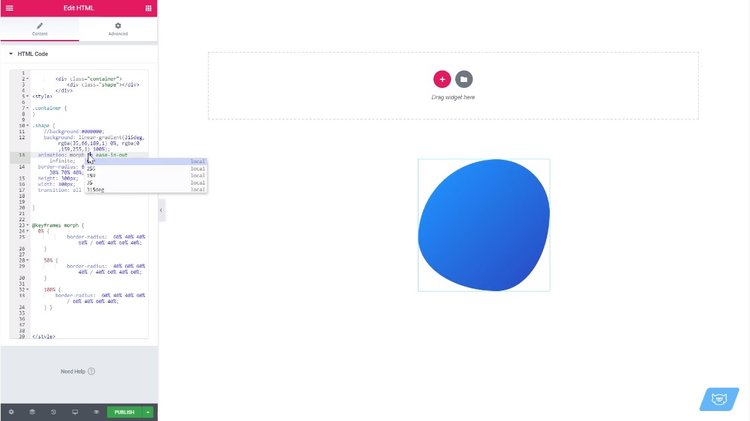
2. Go to 'Advanced' -> 'Positioning' and to change the width to 'Inline', so it crops all the extra space here and we change the position to 'Absolute'.
3. We can now move this blob around, and we can place it anywhere we want it to be. In the height and width parameters, we can easily change the size of the blob and make it bigger or smaller, change the speed of animation to make it slower or make it a lot faster, and we can also create copies of it - to add a bit more depth to the element itself.
4. Copy the pieces of code to create three copies in a row. For the copies two and three, we’ll change the position and opacity. And also the speed, of course, to see the variation in the movement.
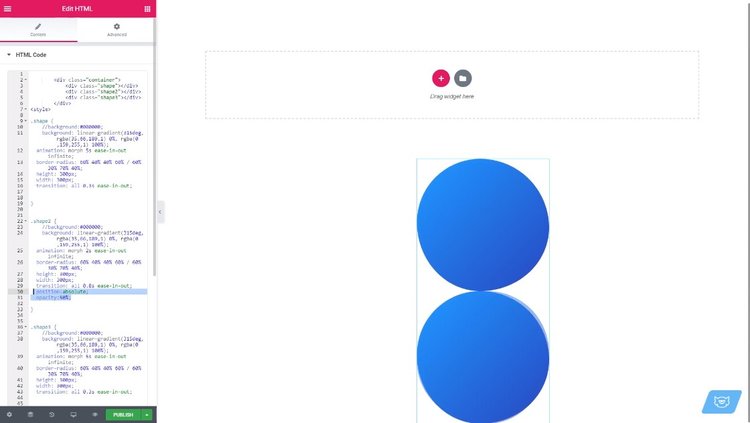
5. Copy the position:absolute and opacity:50% properties, lower the opacity to '30', and change the speed to '3'. Now we need to move the shapes up, so their position matches the position of the very first blob.
6. Use negative values to move the shape up and do the same to the second one.
How to Put Image in a Blob Shape with Figma
- In Figma, we're going to use two plugins that help you create organic blobs - Blobs and Make blob. Another plugin - Unsplash - will make the process of inserting images in Figma layout faster. To get these plugins, click "Install" and let's jump straight to our work area.
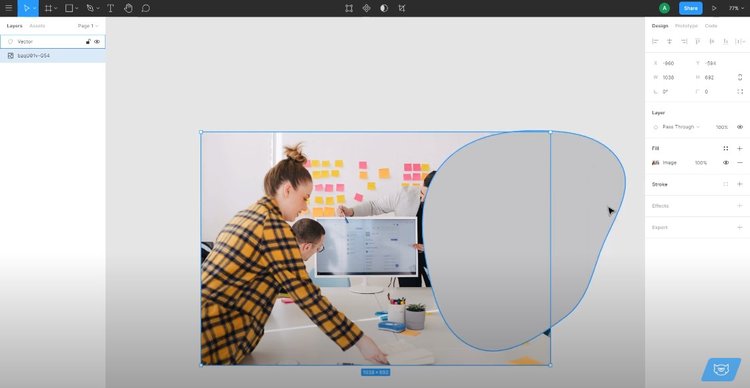
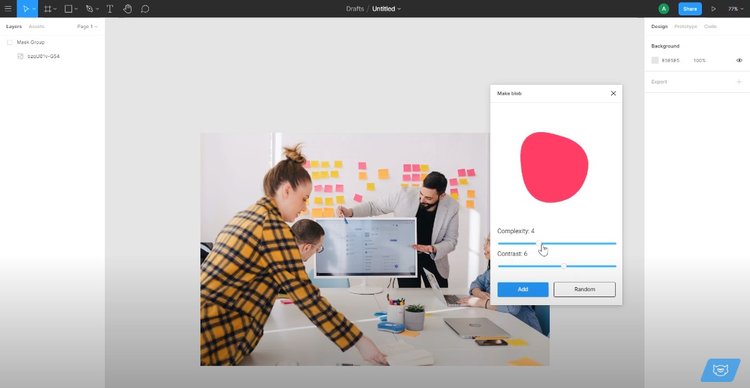
2. To access the plugins that we have installed, go to the plugins section drop down and open the "Unsplash" tab. Let’s search for an image. Once you have the image, open the Blobs plugin. Now, tweak the settings: complexity - let's turn it down to "3" and contrast - move it to 5.
3. In case the image is bigger than the blob, you’ll need to scale up your blob shape and rotate it so that it fits your purpose. Afterward, drag it underneath the image, select them both, and click "Use as mask".
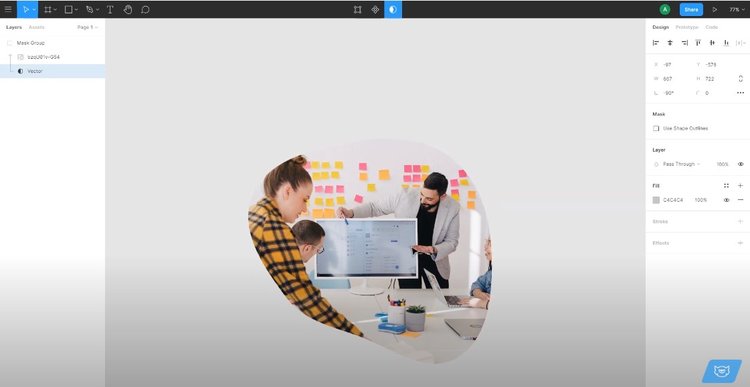
4. In this particular case, we’re going to move the mask around and see if we can find a better place for it. Now, let's try another plugin. Go to plugins -> Make blob.
How to Export Blob Shapes from Figma
What’s cool about creating blobs in Figma is that you can easily export your assets. Just go to the letters panel and select our mask group. You can rename it to something else and make sure it's selected.
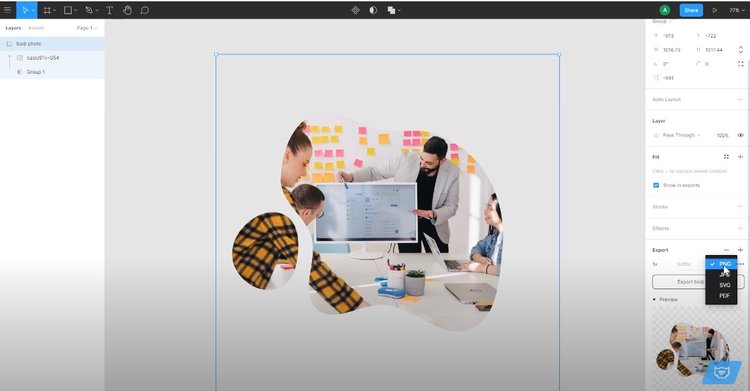
Go to "Export" and in the preview, you can choose the size and the format for the export. If you want to preserve the transparency of the backgrounds of the image, choose PNG and you'll be able to insert it anywhere on your Elementor page - just like a regular image.
How to Create Blob Shapes Using Lottie Animations
- Go to the Lottie files and use the search to look for the blob elements. You can filter these animations by color, style, and type. In this tutorial, we’re using the free ones. This animation is available to download and use for free under Creative Commons license.
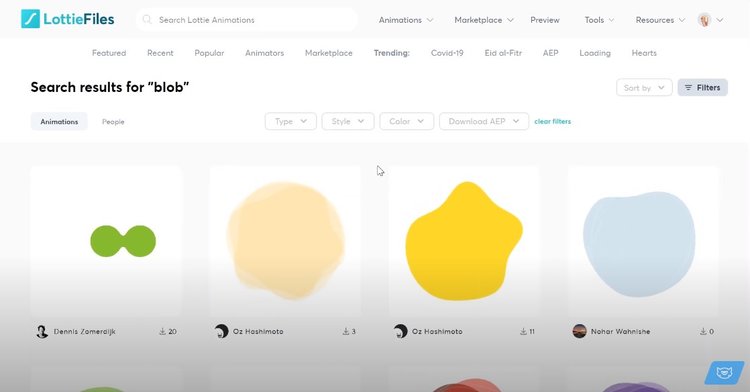
Before using any sort of images, videos, music, animations that were created by someone else make sure that you check the license and if you actually are allowed to use these elements in your commercial projects.
2. Before using this animation in our project, let’s see how you can change its color using "Edit layer colors". You need to create an account on the Lottie website to be able to edit the elements that you choose over there - it is free.
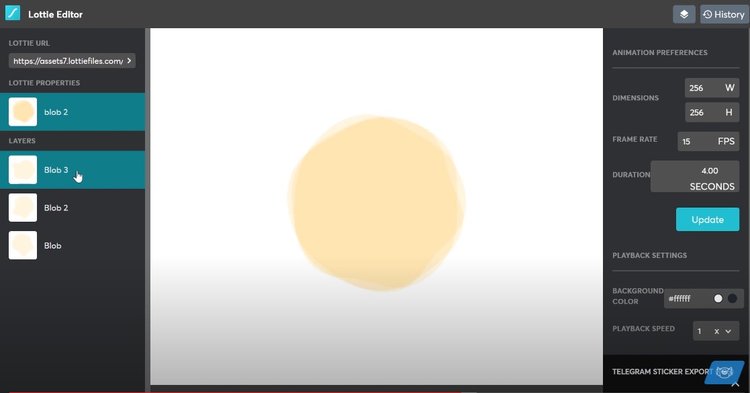
3. In your Lottie account, click on the "Edit colors" option to access the so-called Lottie Editor. There are multiple layers in the animation, you can change the color of each of the layers separately. In total, we have three layers over here and you can go in and change the color of each layer separately. This is just for demonstration purposes.
4. If you have a ready animation without any modifications, saving, and embedding it will be fast and easy - within the Lottie Editor you will be redirected to a code generator to get a code snippet that you can paste on your website.
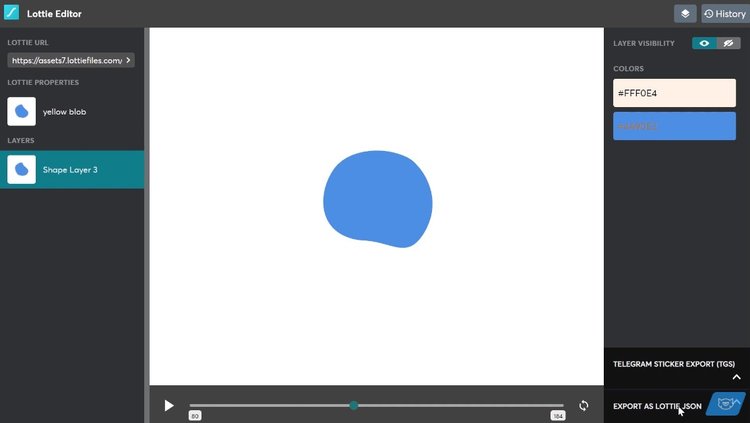
5. If you’ve just modified your animation, the process is going to look a little bit different. What you need to do is export the initial file as a Lottie JSON using the “Export as Lottie JSON” button.
6. Get back to the Lottie Files homepage (lottiefiles.com) into the “Preview, test, and share Lottie animations” area. Now, you simply drag and drop your Lottie JSON over there and you just uploaded your modified blob.
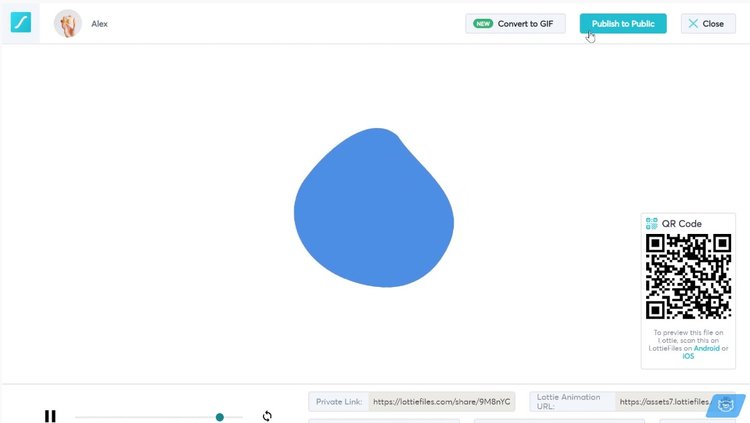
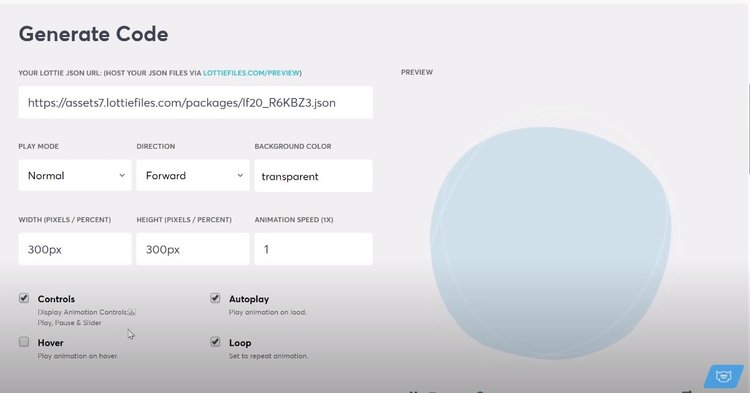
7. You do not need to click "Publish to Public”, you need a Lottie animation URL. This is a completely new URL, and we need to go back to the code generator and replace the code with the newly generated code for our item that we have saved on our account. You can tweak the settings within the code generator, and then copy the new piece of code to use it in Elementor.
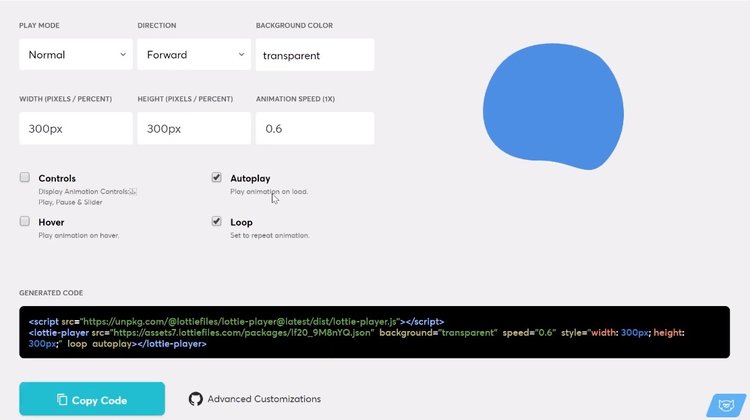
8. In your Elementor panel, grab the HTML element again and place your code in there. You can always adjust the width and height of the element and this will change the size of the blob itself.
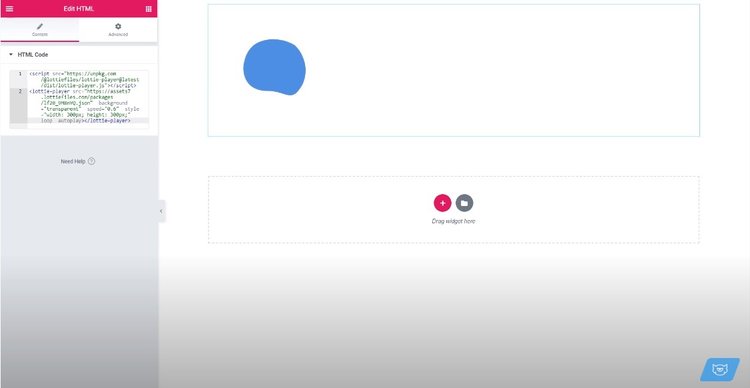
9. Now, doing the same thing again as we did in the very first part of the video. Go to "Width" -> "Full width" -> "Inline" and set the position:absolute and what you can do is you can drag it around and put it anywhere you like.
This is it for this tutorial! Let us know in the comment section down below - how often you use blobs on your websites? And if you're going to use any of the methods presented in this video to try it out on your website?
For more Elementor tutorials, subscribe to TemplateMonster’s YouTube channel!
Read Also
Neomorphism Elementor Pro Tutorial
Elementor Tutorial: How to Create Video Masks in Elementor Free?
3 Easy Ways To Create Blob Shapes In Elementor
Create Elementor Slider with Custom CSS
Don’t miss out these all-time favourites
- The best hosting for a WordPress website. Tap our link to get the best price on the market with 82% off. If HostPapa didn’t impress you check out other alternatives.
- Monthly SEO service and On-Page SEO - to increase your website organic traffic.
- Website Installation service - to get your template up and running within just 6 hours without hassle. No minute is wasted and the work is going.
- ONE Membership - to download unlimited number of WordPress themes, plugins, ppt and other products within one license. Since bigger is always better.

Irene is a content writer who loves reporting on the latest web design and online marketing trends, WordPress and eCommerce solutions. Apart from writing tech articles, she’s keen on photography and has a couple of cool Photoshop image retouching tricks up her sleeve. You can connect with Irene on Twitter.
Get more to your email
Subscribe to our newsletter and access exclusive content and offers available only to MonsterPost subscribers.

Leave a Reply
You must be logged in to post a comment.