How To Create Paragraph Styles In Adobe InDesign
This article is going to show you how you can create paragraph styles in Adobe InDesign so that you can easily and efficiently start placing content within your book. In case you don’t have your book laid out yet go ahead and check out this great video tutorial I made in conjunction with How To Video Channel.
Paragraph styles are one of the most valuable tools to help you make your book. They can make editing and layout go much faster and are very easy to set up. With paragraph styles, you can set a style for your chapter title, your subtitle, any headings you may want, and your regular paragraph text. Then, anytime you need to type something in a certain style, you can simply select the style, and the text will automatically change.
Finding The Paragraph Style Window
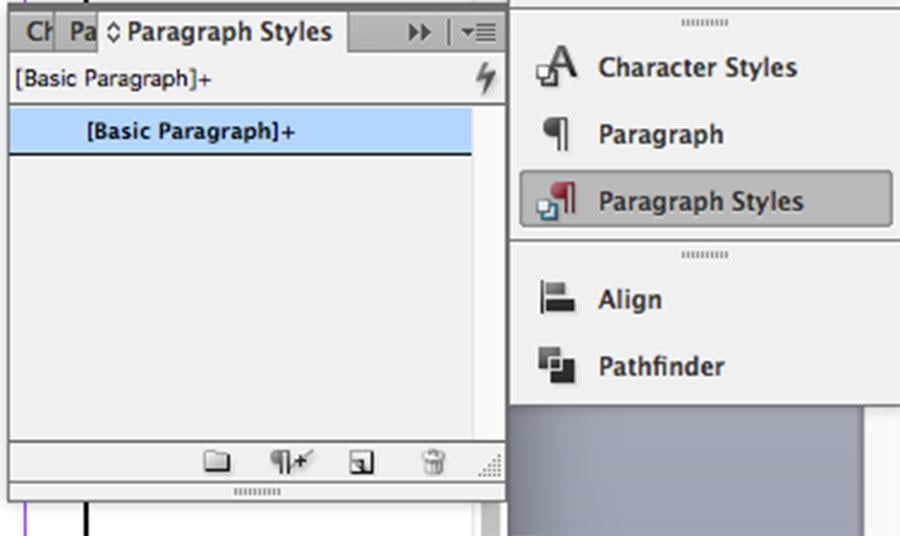
The first thing you need to do is navigate to your InDesign document. Hopefully, you will find the paragraph styles tile on the lower right-hand side of your screen. If you click on it, you will see it open up, and there is already a style in there called “Basic Paragraph”.
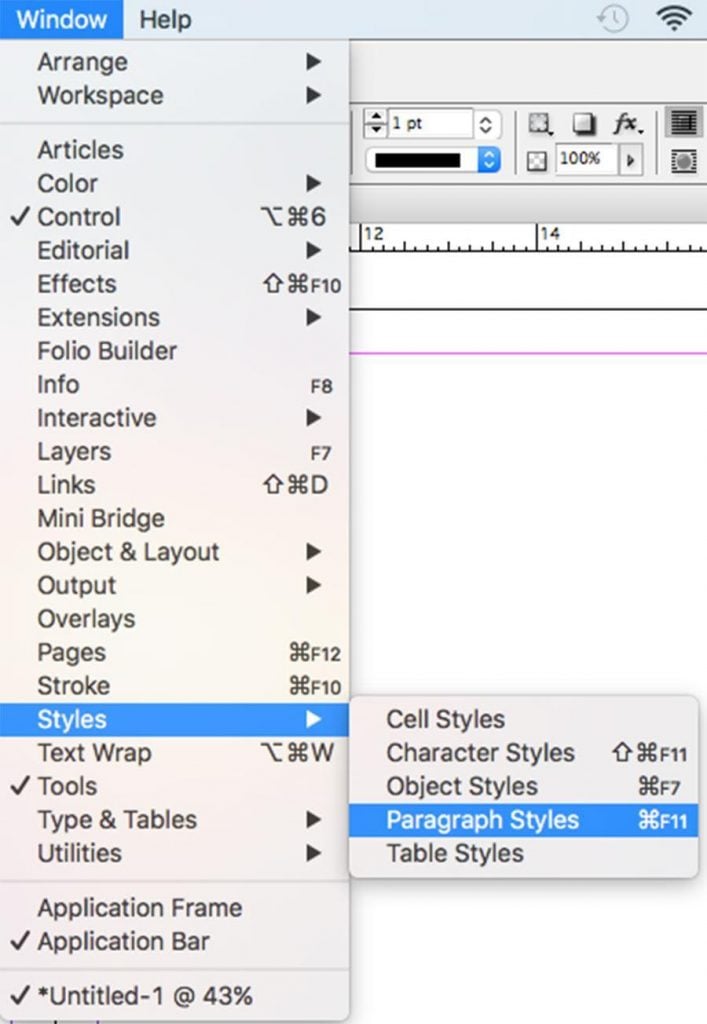
If you don’t see the paragraph styles tile on the right side of your screen then you can go to the “window” menu on the top of the page and hover down to “styles”, then go over to “paragraph styles”, click on it and it will show up on the right side of your screen. Alternatively, you can also use the keyboard shortcut command or control F11 to view the paragraph styles window.
Once you have the paragraph styles window available, you may proceed with creating a paragraph style. There are two ways to do this, and one of them is a little more detailed and extensive than the other. One allows you to easily select from several different options so that you can have your paragraph style set up exactly the way you like and the other is a little more basic. Of course, you can always edit a paragraph style later to make any changes that you may need.

Creating A Paragraph Style Method 1
With the paragraph styles window open, simply navigate to the bottom where you see a row of four small icons. There will be a folder, paragraph symbol, a piece of paper, and a trash can. You need to select the one that looks like a piece of paper. If you hover over each of them, you will notice that a little word box pops up telling you what each of the buttons will do.
When you click on “new paragraph style” a style automatically appears in the window and is titles Paragraph Style 1. Go ahead and double-click on it to open up the paragraph style options.
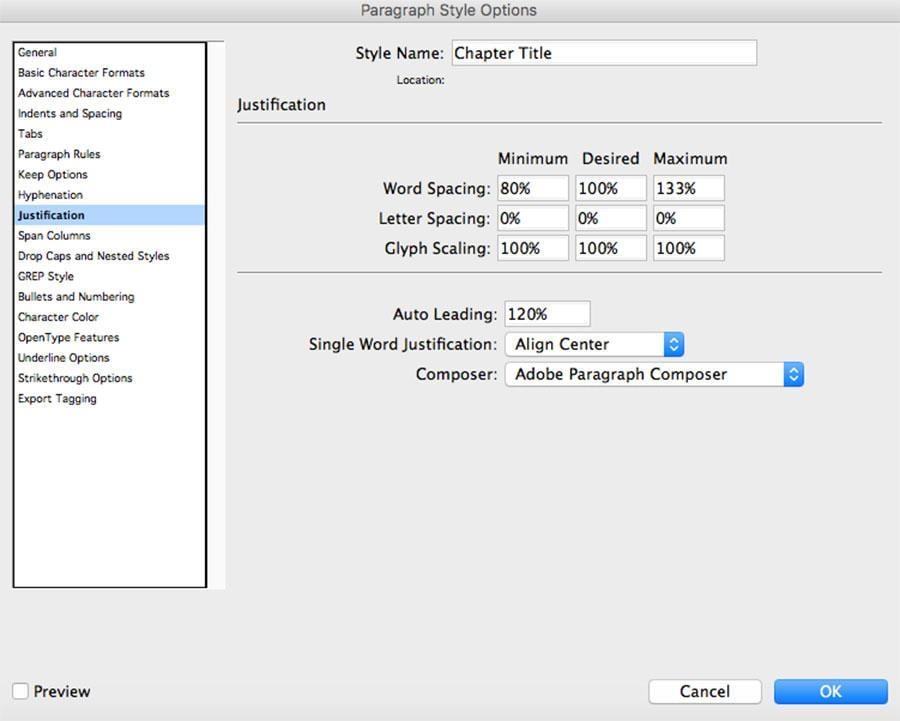
This is a long and complicated list of options that you can use to do anything you want with your paragraph style. The first thing to do is to give your style a name. Make it something that is as close to what it represents as possible. For example chapter title or section heading. You want it to be very easy to distinguish between your paragraph styles.
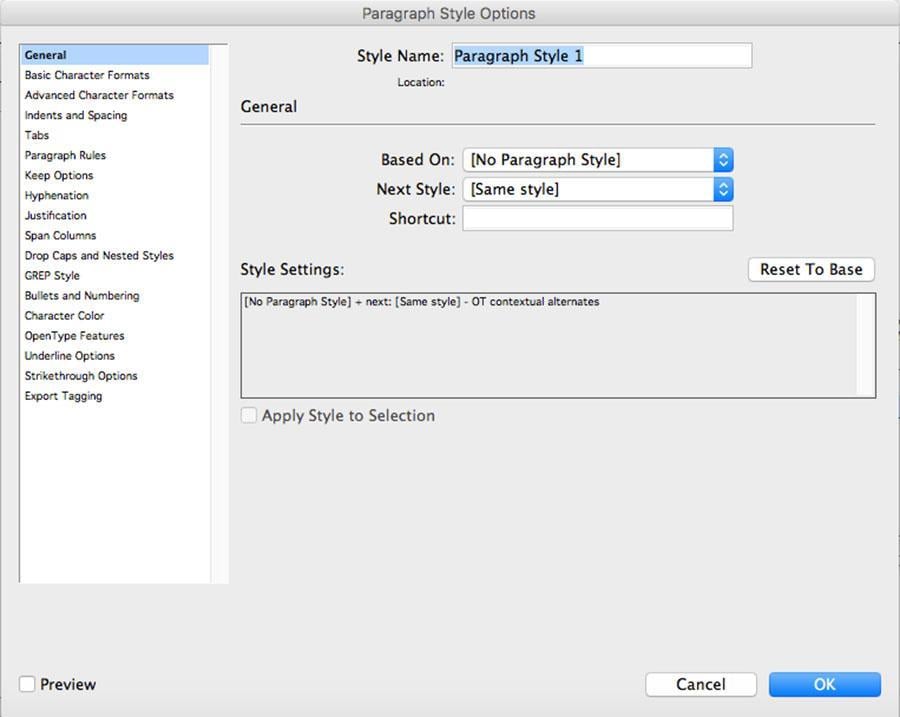
Once you change the name, leave everything else in the general settings as is. Go to the Basic Character Formats tab. This is really the most important section in all of the paragraph style options. This is where you can change the font, size, bolding, et cetera. Go ahead and create your style so that it appears exactly the way you want it to be.

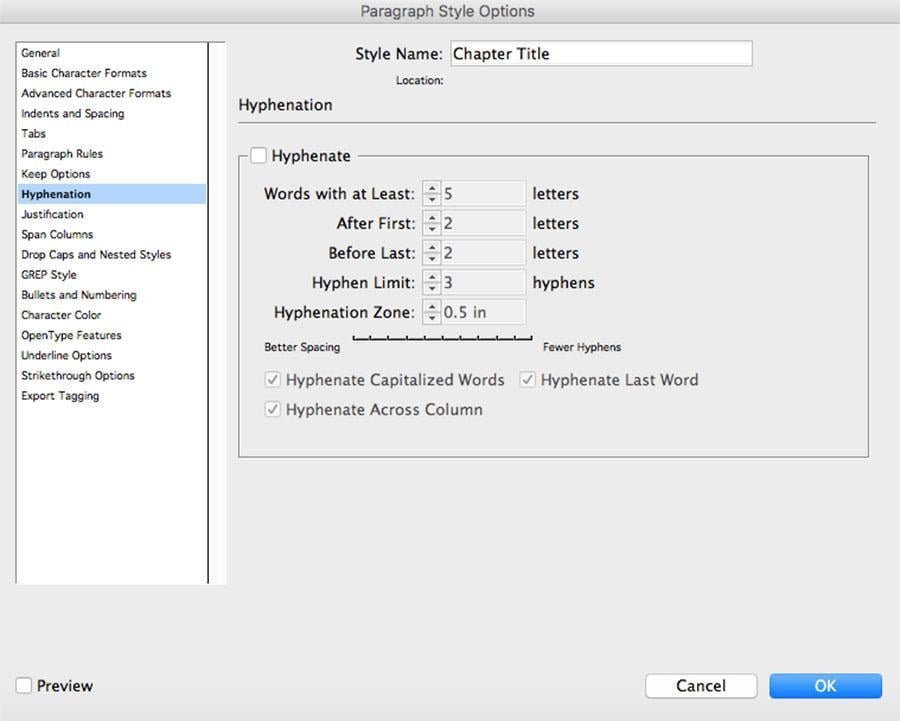
When the text is set up, you can go through each of the options one by one to continue creating your ideal paragraph style. However, the only important ones that you really need to concern yourself with are the hyphenation and justification.
Hyphenation
The hyphenation option is whether or not you want the style to be hyphenated from one line of text to the next line. This means that if a word is too long to fill up the end of the page that instead of the rest of the words expanding to fill the line the last word on the line will be broken in two so that half is on the upper line and half is on the lower line. I personally hate hyphenation because it is more difficult to read. Therefore, I always uncheck that box.
Justification
I usually don’t change the justification because I like my books to be justified. That means that they look evenly spaced on both sides of the page. All of the words at the beginning and end of the lines will line up vertically so that everything appears straight exactly like a newspaper column. However, if you prefer to have some things aligned to the left, right, or center, then this is where you will set that up. For instance: you may wish to have your chapter titles appear in the center of the page and would, therefore, choose the “align center” option for your chapter title paragraph style.
Once you have everything set exactly the way you want it, go ahead and click the blue ok button at the bottom of the options window. Now your paragraph style is created, and you will be able to select any text and then click on the paragraph style to automatically convert that text to the settings you set up in the paragraph style.
Creating A Paragraph Style Method 2
This method is much faster and can happen much more quickly. However, the options are not as in-depth. Therefore, it may be a good idea for you to create your paragraph style this way and then go ahead and double-click on the style within the window to further edit any options you may wish to change.
The first thing you need to do is type out some text on your document page. Go ahead and set the font, size, bolding, and anything else you may like. Make the text look exactly how you want it to look. Then, simply highlight the text and go over to the paragraph styles window. With the text highlighted, click on the new paragraph style button. A new paragraph style will be created with all of the options specified for your selected text. Simply double-click on it to rename it to whatever you like.
Conclusion
Of course, there are so many more changes you can make with paragraph styles. However, this should get you pointed in the right direction so that you can start getting your book laid out. Like anything, you simply need to start practicing and as time goes on you will learn how to do more and more with InDesign. Stay tuned because we have lots more articles coming out in the future to help you with laying out your book in Adobe InDesign. You may also wish to take a look at my books or these resources for more great information.
In addition, another thing that will help you are the videos that I made in cooperation with How To Video Channel. We are making a series of videos on how to work with InDesign. Each of these articles has a video that goes with it so be sure to check it out. If you have any questions, be sure to post them in the video comments. We will be sure to help you out as best we can.
Related Posts
How To Set Up A Book Master Page In Adobe InDesign
Enhance Your Adobe InDesign Skills With The Simple Tutorials
How To Layout A Book In Adobe InDesign

P.S. Just to make sure you get web design templates in the right place.

"How to" tutorials are the most effective guides when you need to quickly understand something and apply it to your website immediately. That's why I like to write them. Hope they will be useful! LinkedIn
Get more to your email
Subscribe to our newsletter and access exclusive content and offers available only to MonsterPost subscribers.

Leave a Reply
You must be logged in to post a comment.