
This is the fifth lesson of our Shopify Online Store Creation from the Ground Up course. If you want to get the full educational plan – follow the link and subscribe to the course.


- Formats and currency
- Managing sales channels
- Adding payment providers
- Defining the checkout process
- Charging taxes
- What to do with abandoned checkouts?
- Conclusion
So, you’ve created your Shopify online store to sell some stuff and gain profit. The layout and design of the website attract customers and convenient navigation along with well-thought-out product pages encourages them to make purchases. Now, when you have taken care of convincing the visitor to buy from you – it is time to make the payment process easy and fast. Once the customer has already gone through all the other steps it would really be a pity to lose them because of an inconvenient and troublesome check out process.


Here in this tutorial, I’m going to show you how to manage the orders that your clients make, how to add the sales channels and payment providers, and how to set the automatic tax count. Money loves precision, so it is very important for you to learn how to deal with the payment mechanics of Shopify. The system of making orders and paying for the product has to be understandable and convenient for the client but besides that, it also has to be comfortable for you. This part of the Shopify online store creation process is, probably, the most essential in terms of achieving the goal of every shop – gaining profit for the owner. So, let’s start with the basics – formats, and currency.
Formats and currency
It is highly likely that the default settings of your Shopify online store will be just fine for you but it is still useful to know how to change the basics – the currency you accept and the formats of the product (like what unit system to use).
Shopify functionality allows you to set a different currency for your product page and for the checkout. It is useful when you sell your products abroad. Then you can choose the currency which is the most convenient for your clients. On the checkout set the currency of your bank account. We will talk about checkout a little later. For now, let’s set the store currency.
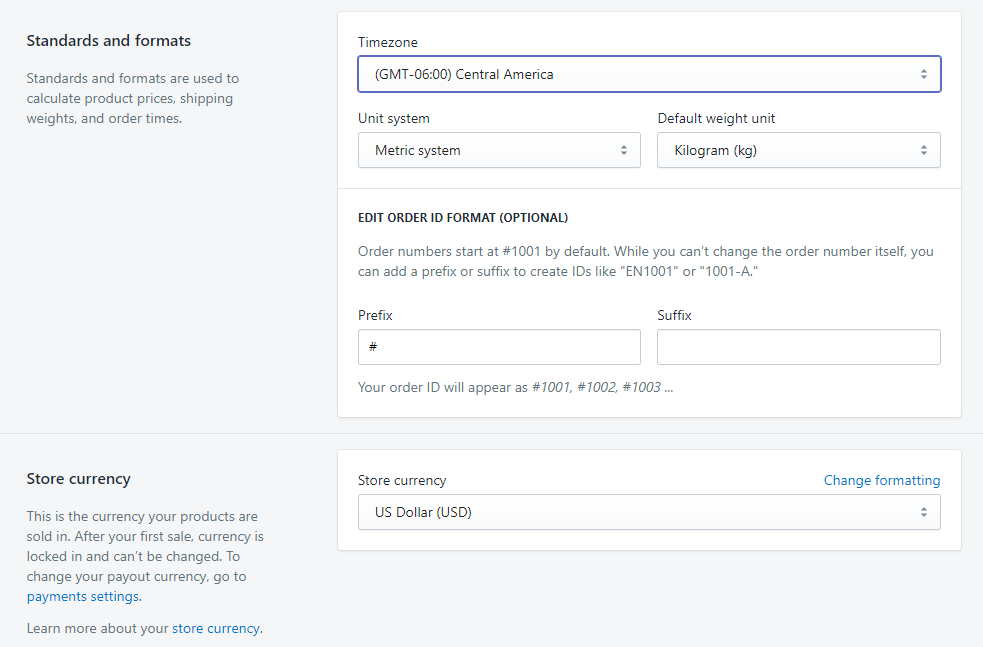
Open the Shopify dashboard and go to Settings > General. In this tab you can add the basic information about your shop–its physical location, define the standards, formats, and currency. Scroll the page down and here they are. In the “Standards and formats” section you can change the time zone, unit system, and default weight unit. I would recommend choosing the “Imperial system” only if most of your clients live in Great Britain. The weight unit should be set according to the average weight of your products (if they have weight). For example, if you sell jewelry – set this option to “Gram (g)”.

Managing sales channels
It is obvious from the title, that sales channel is the way you sell your products. The online store you created recently is the first and main of the sales channels but you can add a few more places, such as Amazon, eBay, Facebook, and others.
Why do you need some extra ways of offering your products to clients? Well, the answer is very simple – the audience. There are thousands of people who prefer buying from Facebook to any other platform. Selling through the multiple channels allows you to expand the number of customers that will be able to see your product and take some interest in it.
There are eight sales channels that are available for you by default. However, each of them has some requirements and if your store is not eligible for them – the channel will be marked as “Unavailable”. For example, Amazon sales channels will be available for you only if the currency of your store is set to USD or CAD.
To take a look at the list of available sales channels and add some of them – open your Shopify dashboard, go to Settings and open the “Sales channels” section. By now you will find only the “Online Store” option there. Click the “Add sales channel button” and you will see the list of available variants.
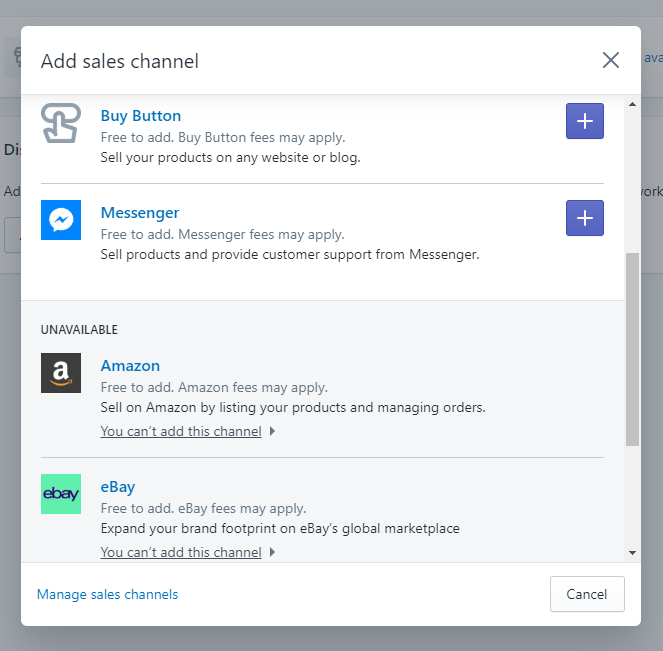

As you can see, the channels that your store is not eligible to have will show the “You can’t add this channel” drop-down. When you open it – you will see which requirement the store doesn’t match. If you are interested in adding that specific channel – you won’t have to wonder what part of the shop needs customization.
To connect two shopping platforms, you will need to have an account on the “other side”. If you have a Facebook page for your brand and added shop functionality to it – you will be able to connect that shop to your Shopify store. If you would like to take a look at the detailed guide about how to add a Facebook shop to the Shopify store – follow the link and read our Shopify Facebook Store tutorial.
Adding payment providers
If you have tried to buy something on the internet at least once – you probably noticed that there are usually several ways of making the payment. For example, you can pay via credit card (VISA and MasterCard) or a payment system like PayPal. I guess there’s no need to explain why you have to add several payment methods to your own Shopify online store. That’s quite simple – to make the purchasing process as comfortable for the user as possible.
You may think that the more payment options you offer – the better but the truth is that you have to achieve some kind of balance. To add a payment provider, you will have to create an account at that provider’s platform. Do a little investigation to understand whether the people who use that payment system will be interested in your product or not. What is the point of adding a payment system that will never be used by your customers?
The list of available payment providers is also available in the Settings tab of your Shopify online store dashboard. Click the “payment providers” section and there they are–payment providers you can add to your shop.
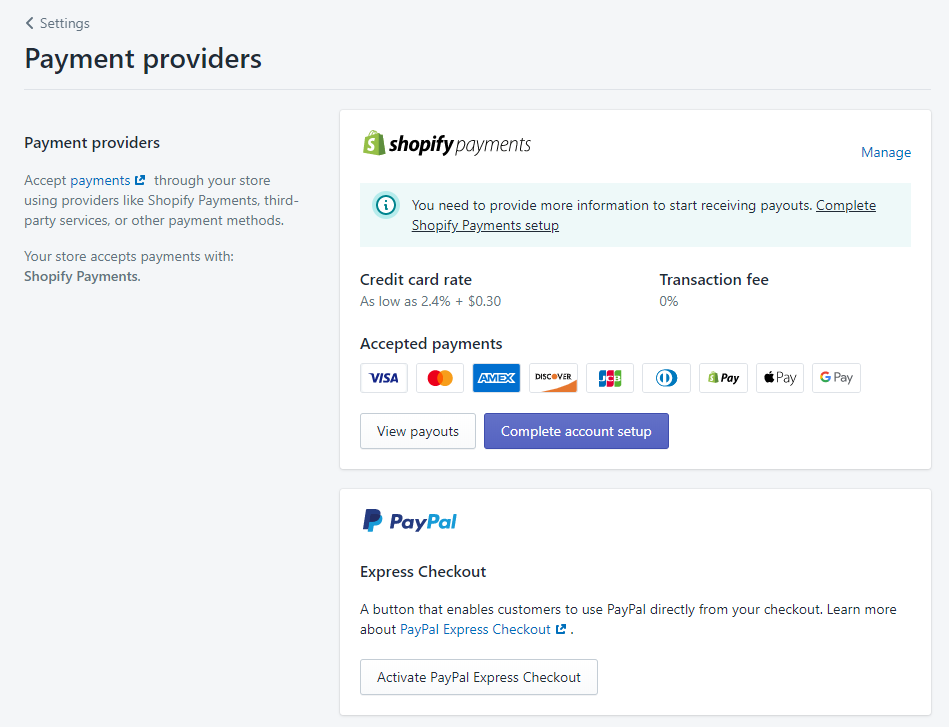

The default method is Shopify Payments. Actually, you don’t need to use this if you prefer other payment systems but I would strongly recommend that you activate it. Shopify Payments is a convenient system that will allow your shop to accept credit cards. There are other payment systems that also allow that but Shopify works a little better with its “native” payment provider.
To activate Shopify Payments, you will have to type in some personal data. First of all – your business details, personal and product details, customer billing statement, and banking information. Partly the bars are filled automatically – the data you typed in when you created the store will be automatically transferred to appropriate fields. Just fill in the rest and finish the account setup. Just like for the selling channels, to add a payment provider you will need an account on that provider’s site.
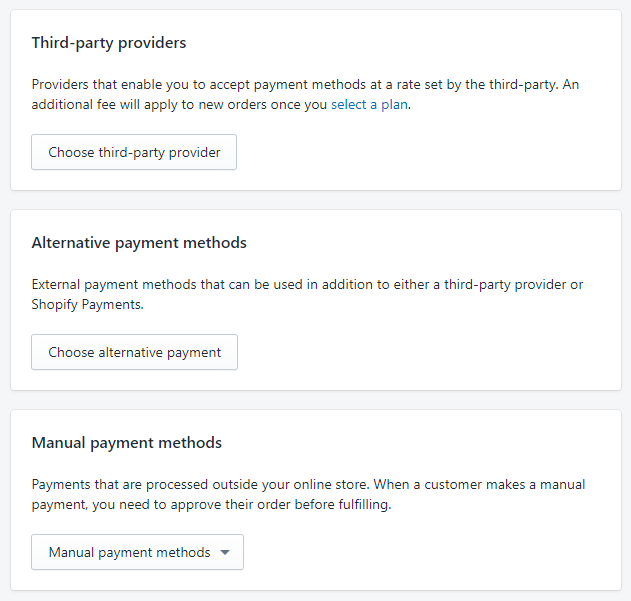
As you can see, by default there are three payment providers – Shopify Payments, PayPal, and Amazon Pay. If they don’t match some of your requirements – you can choose other third-party providers. The list of available options is really huge, so everyone can find a payment system that will fit his needs. Besides that, you can add some alternative payment methods that will support Shopify Payments or another provider. In the end, you can even create your own custom payment method that allows users, for example, to pay with cash.

The last available option here is defining whether you will capture the payments automatically or manually. Users choose the payment method, it is then authorized and captured, and on that final stage, it could be done by the script or yourself.
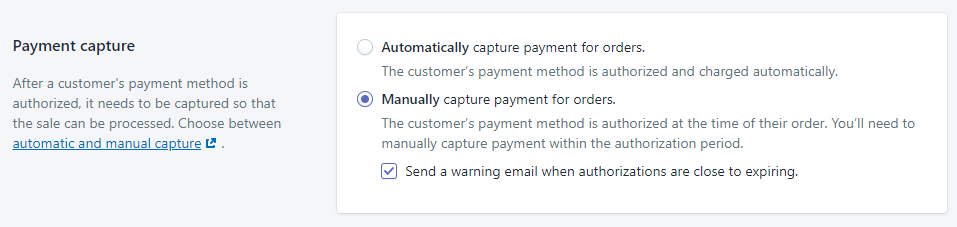

If the payments are captured automatically it saves your time. Shopify functionality sends the credit card payment data to the user’s bank for processing and you don’t have to think about it or spend time doing it manually. This choice is perfect if you sell products that can’t be divided into parts and set an automatic “out of stock” tag appearance.
You can also choose to capture every payment manually. In this case, all the processing is done in the “Orders” tab of the dashboard. You will be able to capture partial payments – for example, if the user changes his mind and want a lesser part of the product. Choose this variant if you need to have an opportunity to receive only part of the payment.
Defining the checkout process
When the user has chosen the item he wants to purchase, adds it to the cart and then hits the “Buy” button – he starts the checkout process. Every step he takes after that is defined by you. Depending on your needs and wishes you can make it as simple or complicated as you want.
To start setting up the checkout process go to Settings > Checkout. Shopify is a CMS made to simplify the online store creation process, so all the functions are intuitively understandable. You will just have to go through the whole list of options, choosing how you would like to use them. I would like to remind you about the balance here. Try to make the checkout process simpler for the customer (nobody likes it when you need to spend lots of time filling different forms) but at the same time make sure all the necessary data will be collected.
- Customer account. If you want the clients to create accounts in your online store you can choose the option that allows them to do the checkout only as registered users. It could be really convenient for you but I would recommend this option only if you have a big store with a sufficient number of products. If you are only starting – let the users make purchases without registering.
- Customer contact. Here you can allow users to checkout with their phone number or an email. If you want to have an email base – leave only an email option for them. However, I don’t recommend it. People like to have options to choose from and will be pleased if you leave them some choice.
- Form options. These are completely up to your taste because here you define what personal user’s data to collect. For example, if you offer shipping or delivery you will need the customer’s address.
- Order processing. The options of this section help you with some automation. When some part of the form is filled automatically it saves time and makes the checkout process much more convenient. You can even add some custom script but I would strongly recommend reading some tutorials first. When it comes to coding, an error could seriously damage your Shopify online store.
- Email marketing. If you are planning to send your clients some emails with offers and news – you will need this functionality. Of course, you can force the user to sign up for newsletters but this is not the best idea. It will be better to offer a choice to the customer and not force them into taking some action they might not want.
- Checkout language. It is obvious from the title – here you can choose the language of the checkout form. You can not only change the language for all the stores at once but also separately for a date, time, or other sections of the checkout form.
Charging taxes
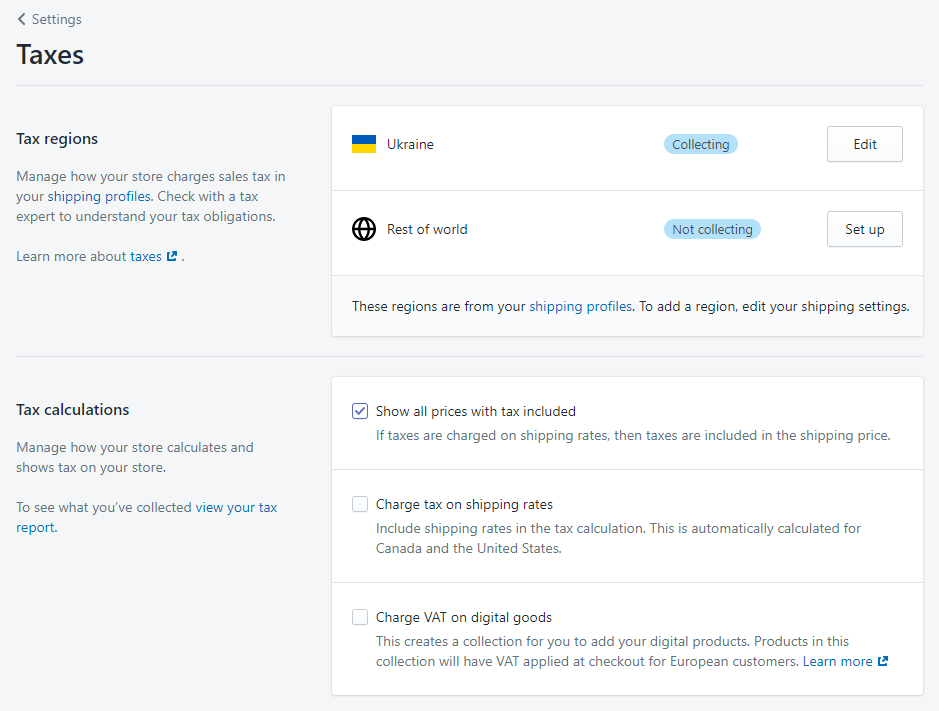
You are an official business person and of course, you have to pay taxes for the business you maintain. The tax rate could be different depending on the products you sell and the country you are working in. Although Shopify can’t do the tax filing for you – it can still help you to charge and calculate taxes. When you set the tax rate it will be added to the cost of an item or to the shipping rate.
Go to the Taxes section of the Settings tab. You can set a fixed tax rate for your country and the rest of the world. The percentage you choose there could be added to the cost of the products, to the shipping rate or as a VAT, if you sell digital items. If you are not sure about the taxes that are demanded in your country – I would strongly recommend consulting with a specialist. Tax laws can be complicated and it is better to clear everything up for yourself before setting the tax rate in Shopify. You will be able to change it any time you need to but it is always better to do everything right from the beginning, isn’t it?

What to do with abandoned checkouts
Sometimes customers go through the online store, add some items to the shopping cart and even start the checkout process – and then leave without completing it. Maybe, there was an error in internet connection or they suddenly realized that they don’t have enough money on their credit card. One way or another, such abandoned orders land into a special section of the dashboard. To see them, go to Orders > Abandoned checkouts.
Do you have to do something with them? Nope. However, it would be a really great idea to send messages to the users who leave their email before leaving. The chances are that your notification will remind the customer about the desire to buy from you and he would like to finish the checkout. Sending abandoned cart notifications could help you to make your Shopify online store more efficient and profitable.
There are two ways of sending abandoned cart messages – manually and automatically. If there are not many abandoned checkouts in your store – you can proceed with them manually. It is possible that you will easily understand which customers might finish the checkout and which ones won’t. However, if there is a huge number of abandoned carts (for example, if you have a huge store with thousands of items) – it is better to set the automatic response.
Manual mailing
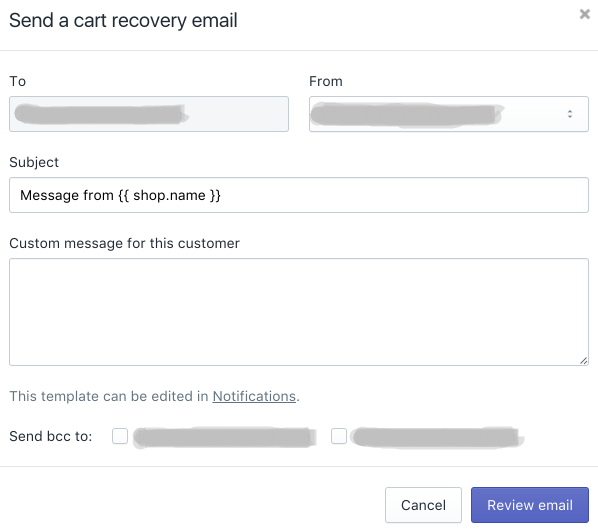

When you open the list of abandoned carts you will see the checkboxes of every line placed on the left side. Mark the carts you think will be finished and choose the “Send a recovery email” option. You can send just a link to the abandoned order but it would be much better if you write a short letter that explains where the link takes the customer and what you would like him to do. Click the “Review email” and then “Send notification” buttons. If the user will use that concrete link you send him – he will land right onto the cart he left. After he finishes the checkout process, the status of that abandoned cart in the list will be changed automatically.
Automatic mailing


This automation can be set not in the Abandoned Checkouts tab but in the “Checkout” section of the Settings tab. Scroll through and find “Abandoned Checkouts.” Click the checkbox and choose who you would like to send the email to and when. The smallest default time period is 1 hour – that is because you have to give the customer some time. Maybe he left the checkout page accidentally and in a few minutes will come back. Don’t be in a rush. To define the text and appearance of an email click the “Customize email” button.
Conclusion
I hope that your Shopify online store will gain lots of profit and quickly become really efficient. I’ve shown you how to deal with the Shopify functionalities that help you to gather and count the profit. Pay attention to the details, be patient, and don’t hesitate to ask for help from professionals.
Good luck!
This article is a part of Shopify Online Store Creation from the Ground Up course by TemplateMonster.
To read all the tutorials, follow the link and subscribe!
Subscribers will receive more tips, discounts, and hot offers via email!
Read Also
Mastering Shopify Online Store Functionality: Advanced Level
What You Need To Know About SEO for Your Shopify Store