The Utmost Elementor WooCommerce Guide
- How to Establish a WooCommerce Store Using Elementor
- How to Set Up WooCommerce Checkout and Cart Page with Elementor
- How to Edit Product Page in Elementor
- Which Elementor WooCommerce Theme to Use for Setting Up a WooCommerce Store
Searching for different Elementor WooCommerce tutorials all over the internet may be quite time-consuming. But what’s better is to have many of them gathered in one place so that you can create a full-fledged web store guided by one source. Being the same web users with similar interests and requirements, we clearly understand the need for such a source. Thus, we’ve decided to gather several frequently requested tutorials into one article and save you the time and effort of scouring the internet for the information.
This all-in-one tutorial will also be useful for those of you who have a website built on WordPress. Although it is known as a blogging platform, WordPress is also compatible with one of the most popular eCommerce plugins, hence it can be leveraged for building a web store. Also, WordPress comes with Elementor Page Builder which can also help to establish an eCommerce site quickly and easily.
So, in this copy, you will find:
How to Establish a WooCommerce Store Using Elementor
Have you decided to bring your brick and mortar business online? Congrats! This is a good chance to reach a wider audience with your goods and services, as well as increasing conversions and monthly revenue in the end. If you plan to craft an online store on your own, consider the things you need for it:
- A domain name
- A reliable hosting provider
- WordPress theme
- Free Elementor Page Builder
- WooCommerce plugin

#1. Buy a domain name and find a reliable hosting provider
In simple terms, a domain name is the name or address of the website while hosting is a place on the web where the site lives. The domain name should display your business idea, whereas hosting should be fast and supplied by a reliable provider. Many online businesses that establish their online stores using WordPress prefer SiteGround service because it caters to WP users. We are not going to reinvent the wheel here and will consider how to set up hosting service.
- Open SiteGround, select WordPress hosting type and click on the button to get started.

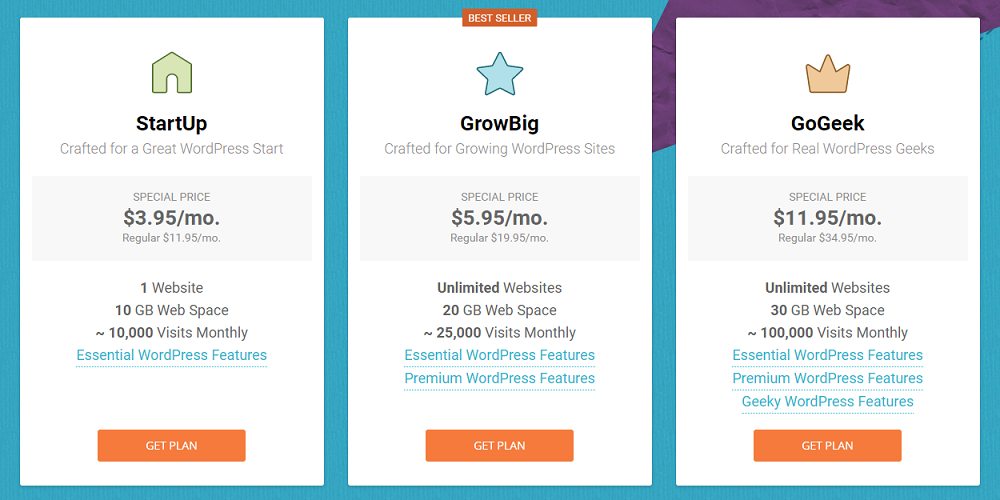
- You will be redirected to the page with pricing plans. Here, you can opt for the one that suits your needs and allocated budget and get the plan.

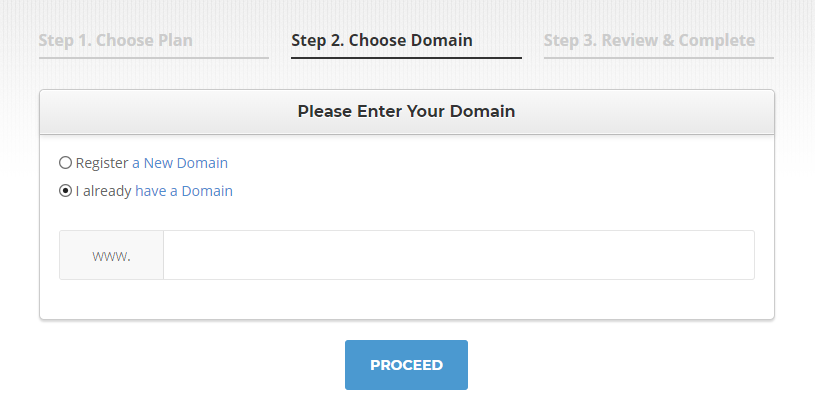
- On the next page, you’ll be asked to enter a domain name. If you’ve purchased it separately, just mark “I already have a Domain” and insert the URL in the space below. Click on the button to proceed further.

- The last step here is to provide your personal and billing details and then click on “Pay Now”.

#2. Install WordPress
Because SiteGround offers a one-click WordPress installation, we will come this way and find out how to set up WordPress through the hosting site.
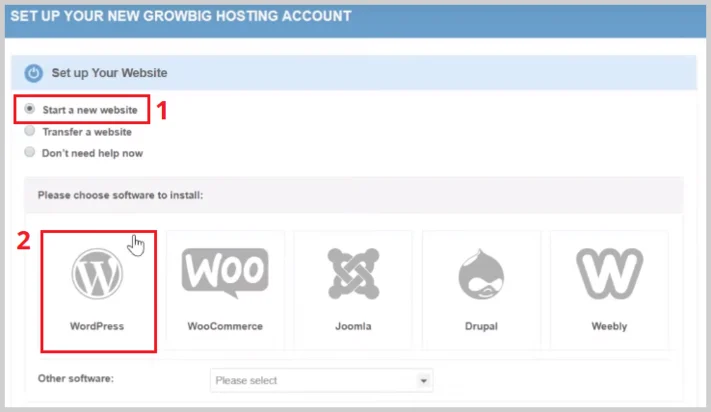
- Once done with the hosting purchase, you’ll be offered to proceed to the Customer Area. After choosing this option, you’ll be redirected to a page for setting up a new hosting account. Here, navigate to “Set Up Your Website” menu, mark “Start a new website”, and choose WordPress to install.

- Enter admin login details including email address, username, and password. Click to confirm and complete setup.
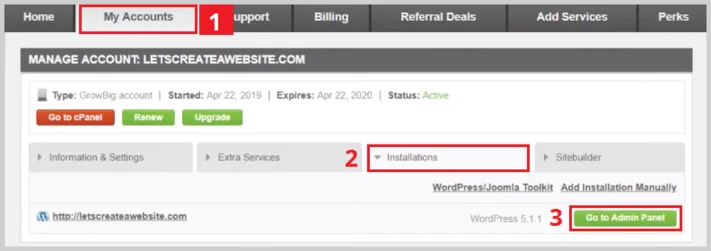
- Go back to SiteGround dash panel and choose “My Accounts”. Click on the installation tab to see the registered domain name. Push the “Go to Admin Panel” button to access the WordPress login page.

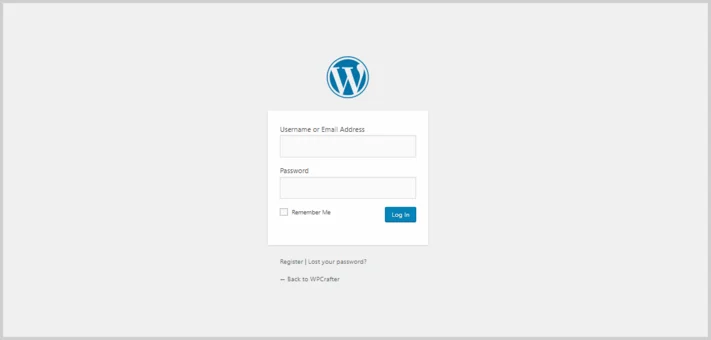
- Enter username and password to log in to WordPress website.

#3. Install WordPress Theme
WordPress repository includes the endless number of free themes you can choose from. If you decide to go with one of them, you’ll have to follow the next steps:
- Open WordPress dashboard panel.
- Navigate to Appearance > Themes > Add New.
- Search for a theme you’ve decided to use, choose install, and activate.
- After installation, you’ll see a “Thank you” message. Here, choose to get started with the theme.
#4. Install Page Builder and WooCommerce plugins
As for page builder, we recommend choosing the easy-to-use Elementor that allows building content at the push of a button. Additionally, it flawlessly works with WooCommerce plugin, hence is great for establishing an online store. Because these two add-ons are free, you don’t have to spend an eternity to install them. All you have to do is just go again to the WordPress dashboard, locate Plugins, and choose Add New. Enter the plugin name into the search bar, click to install, and activate. Repeat the same for the second add-on.
Once done with the installation, you can customize your eCommerce website.
How to Set Up WooCommerce Checkout and Cart Page with Elementor
Aside from WooCommerce custom shop page, an online store website should also include other important pages like checkout and cart page. Here’s where we are going to consider how to set them up.
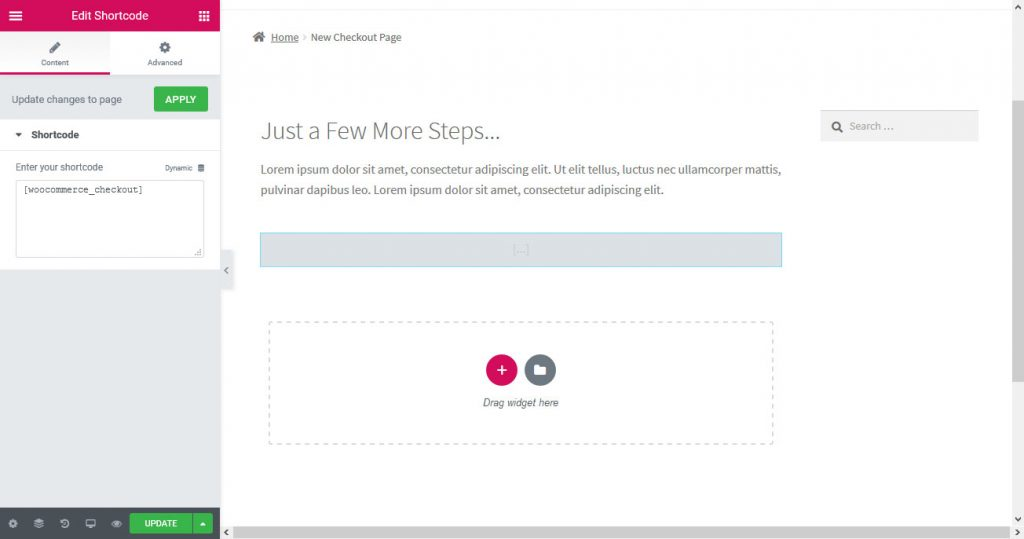
- Open Elementor editor and create a new page.
- Use the search bar to locate shortcode widget, place it where you want the form to appear on the page, and enter the shortcode {woocommerce_checkout} in the corresponding window.

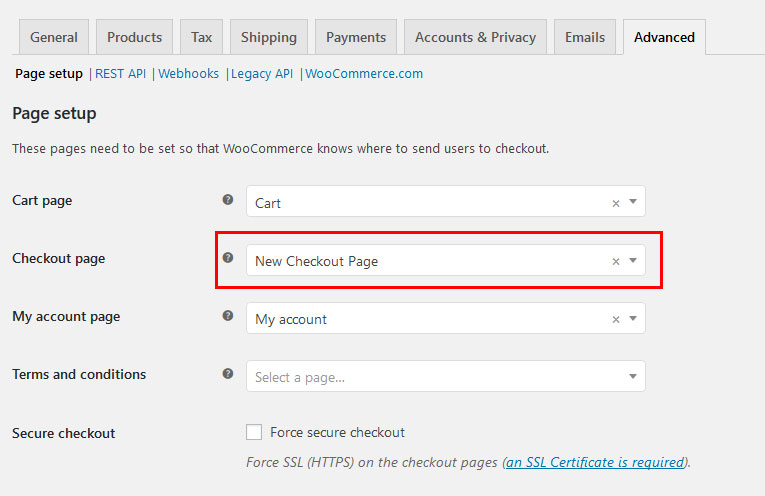
- Customize the page according to your preferences and make sure to determine it as a checkout page through Customizer > WooCommerce > Settings > Advanced.

Setting up the shopping cart page requires the same steps to be taken, the only difference is that you have to enter {woocommerce_cart} shortcode.
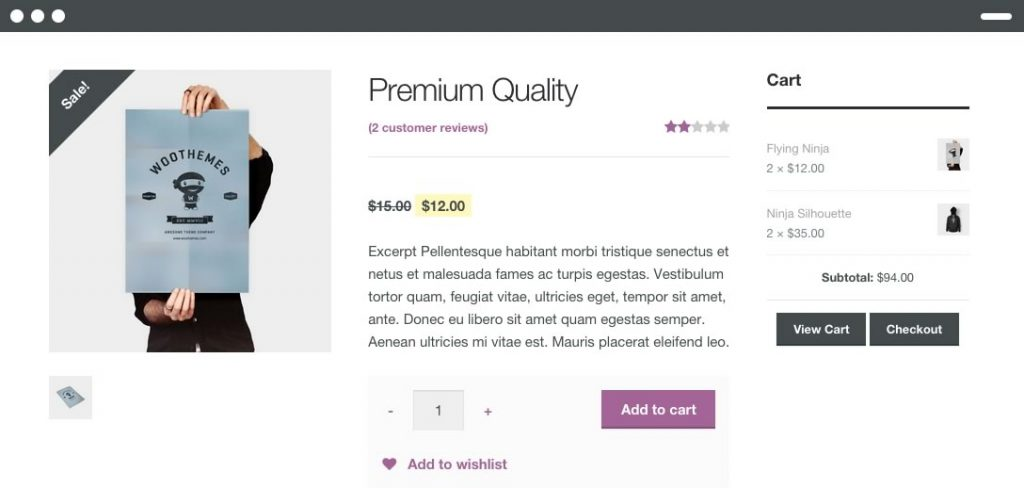
How to Edit Product Page in Elementor
Recently, Elementor presented WooCommerce Builder which is a great solution for creating WordPress shops with Elementor. In this specific guide, we are going to find out how to edit the product page using Elementor. But, before jumping into the actual tutorial, let’s see how the basic WooCommerce product page might look.
Not actually bad, but there’s always room for improvements and you can easily get to this kind of design:
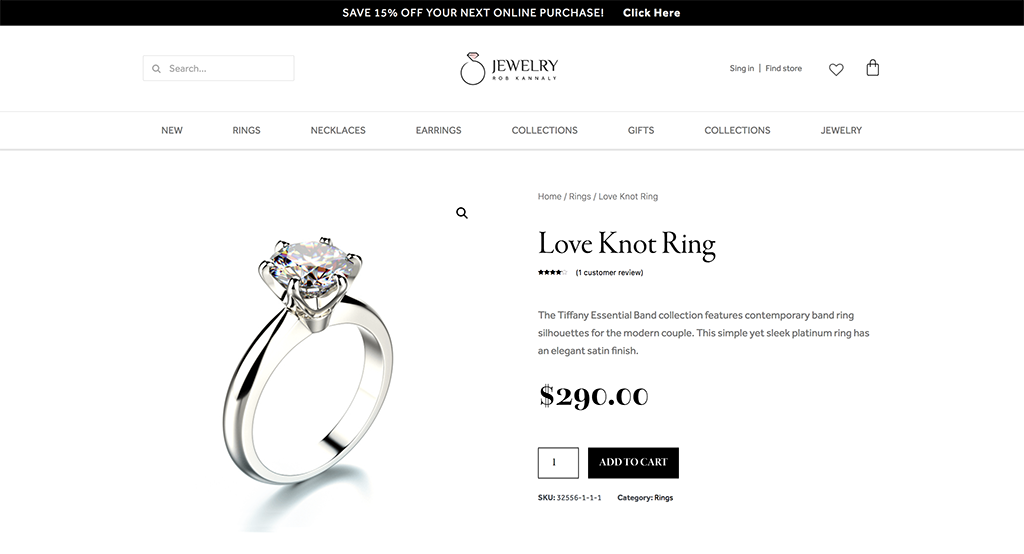
Now let’s see what steps you have to take to achieve the selling product page layout.
- Open your WooCommerce dashboard and find the Elementor section.
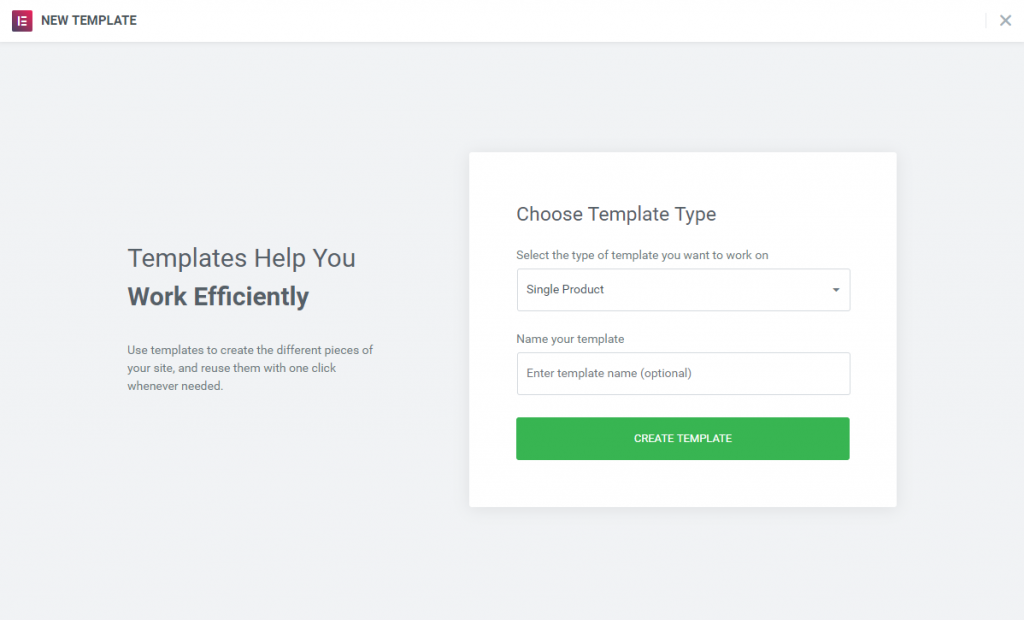
- Locate My Templates and click on the “Add New” button. In the popup box, choose Single Product and give a name to your template. Click the green button to create a template.

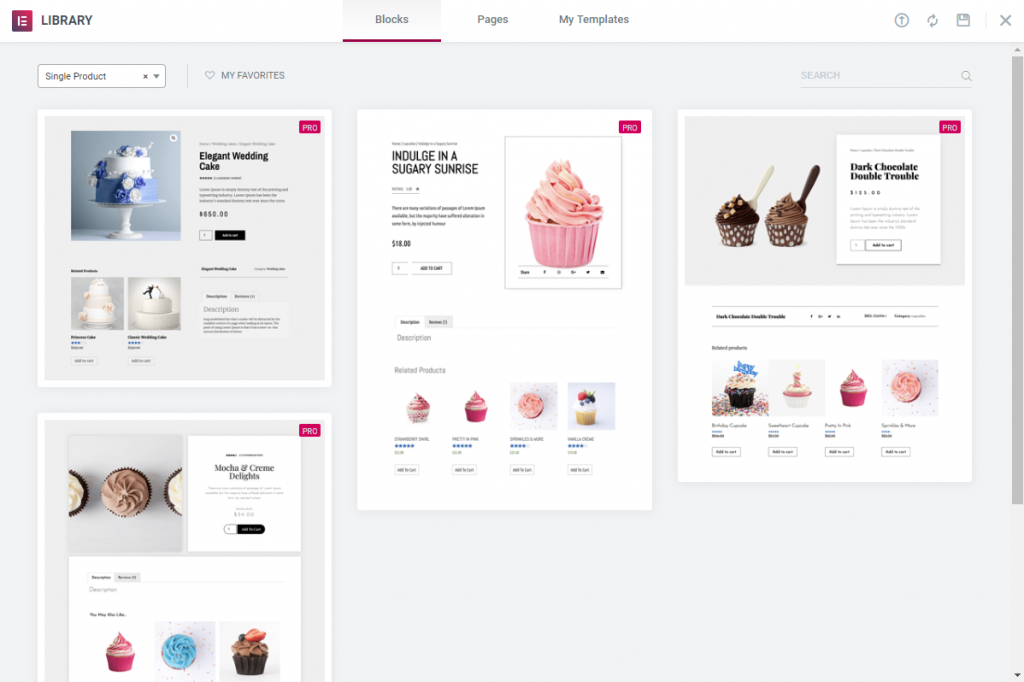
- You’ll be redirected to the template library where you can select from several different styles for a single product page. Here’s where you can customize the pre-designed template to fit the overall concept of your store. Or, you can go with creating a product page from scratch — move on to the next step.

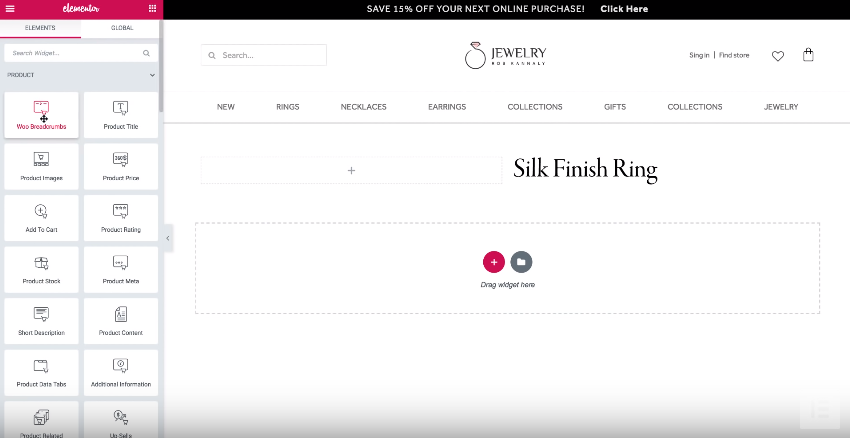
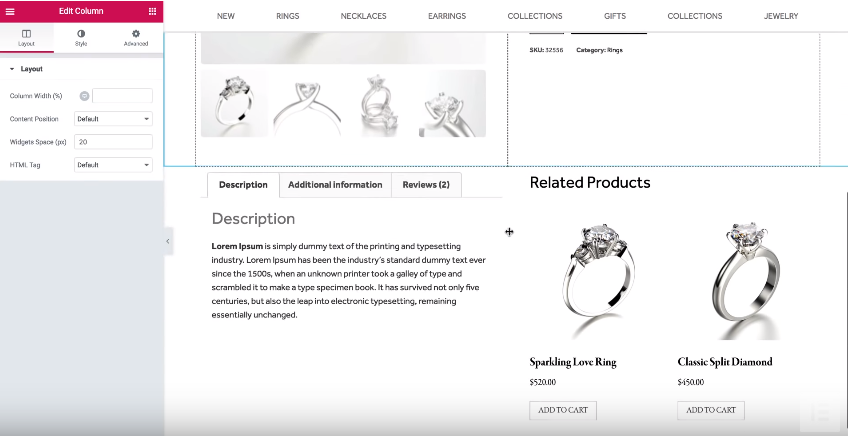
- Open Elementor editor and create a new section with two columns.
- Go to Elements menu, find Product Title widget, and drag it to the right column. After that, put the Woo Breadcrumbs widget above this specific product.

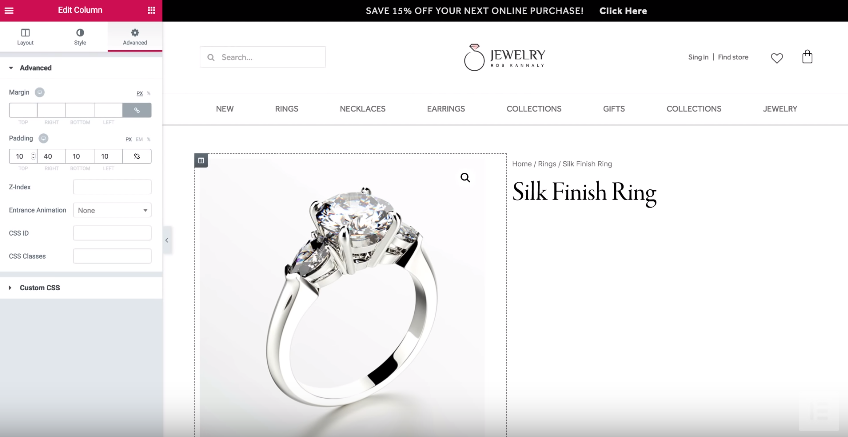
- Locate the Product Image widget and drag it to the left column. Play around with the padding to keep the image and product title slightly apart.

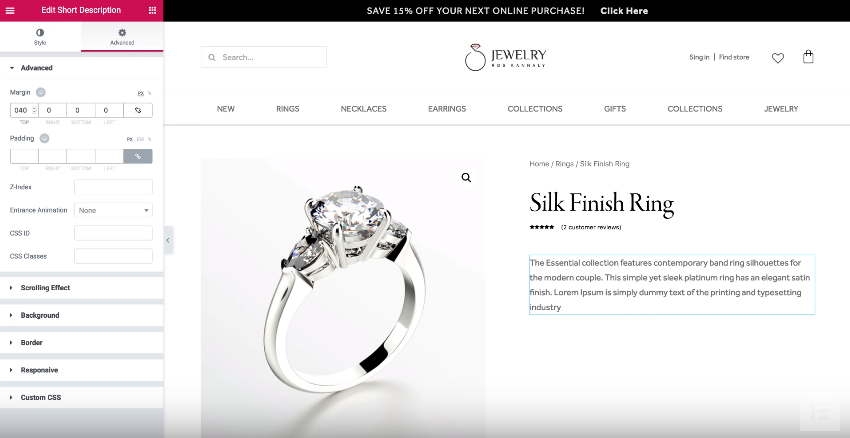
- Below the title, drag in the Product Rating widget, play around with the margin, add a Short Description widget, and give it some space on the top through margin settings.
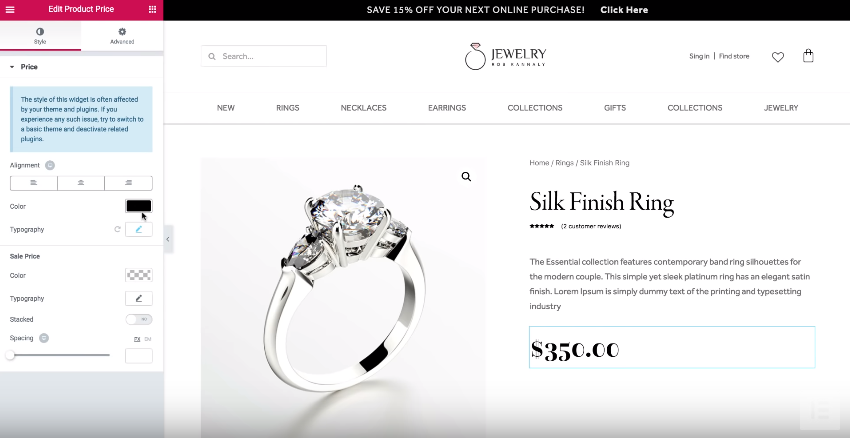
- Find the Product Price widget and drag it to the right section under the description. Go to Typography settings and replace the default font with a different one. Change size, weight, and color as desired.
- Next, try adding the Add to Cart widget. Play around with the typography including font, size, and color. Below the Add to Cart button, add the Product Meta widget.
- Get back to editing the image. Here’s where you can edit the border radius and distance between the main image and the products photo gallery.
- Add a new section with two columns again. Find the Product Data Tabs widget and drag it into the left column. Meanwhile, add the Product Related widget to the right column. To keep the columns evenly spaced, copy the format values from already adjusted columns and paste them into newly-created ones.

- Go further by adding a new section and apply the gradient color to it. Drag an Up-Sell widget in the section, and add padding inside it. Now, you are designing a single product page.


If you want to change the display of a single product, find the “eye” icon below, and go to Settings. On Preview Settings, select another page with this example, and click to apply and review. Click on Publish and set Display Conditions. Click on Publish and your single product is live.
Which Elementor WooCommerce Theme to Use for Setting Up a WooCommerce Store
Now that you already know how to create an eCommerce website, edit product pages, as well as create checkout and cart pages, you may wonder what WooCommerce theme to choose to build a store on its base. Here, we plan to consider the Top 5 templates that would bring many benefits to your online store.
Woostroid2 - Multipurpose WooCommerce Elementor Theme

WooStroid2 is a great ready-made solution for creating an eCommerce website with just a few clicks. It comes with WooCommerce package on board and multiple pre-designed skins for any kind of web stores. So, you can opt for one that perfectly suits your needs and establish a full-fledged, user-friendly online shop. All the skins, along with 1000+ unique sections, page templates, and web elements can be accessed at the Magic Button.
WooStroid2 contains a front-end Elementor Page Builder with a drag-and-drop interface which ensures handy customization of a website. In conjunction with a professional Jet plugin set specifically developed for Elementor, the latter allows for adding advanced functionality to the site. They let you create single and multiple products pages, archive page layouts, shopping cart pages, and more. Get WooStroid2 theme to advertise your online shop, reach a wider audience, and convert the leads to prospective consumers.
Attirezo - Clothes ECommerce Classic Elementor WooCommerce Theme

If you have a physical store and want to sell clothes online, take a closer look at this Elementor WooCommerce theme. It features a classic design with a user-friendly interface. Attirezo allows displaying products by categories, brands, prices, etc. It boasts advanced functionality which makes it a perfect option for building a fully-fledged online store. Aside from Elementor Page Builder disposable onboard, you will also locate Jet family plugins.
With the help of WooCommerce package and JetWooBuilder add-on, you can build and customize the online store at the push of a button. JetProductGallery plugin will let you vividly display the product images. The JetSmartFilters add-on will help to apply Ajax-powered filters to make products browsing hassle-free. These and other Jet plugins, like JetCompareWishlist, JetMenu, and JetElements, are here to let you create an engaging and popular shopping platform.
Willard - Tools & Hardware WooCommerce Theme
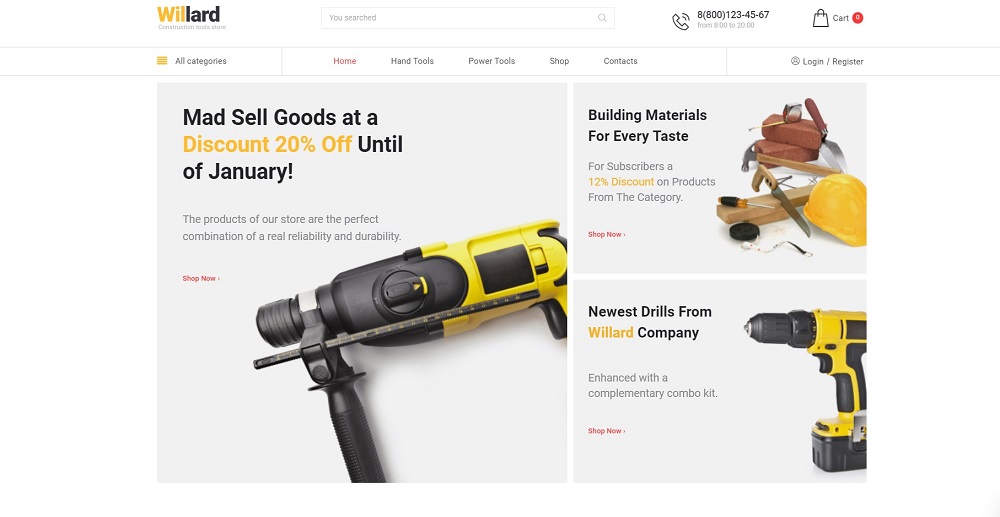
Willard is a WooCommerce theme specifically developed for construction tools store. Aside from a fully responsive and SEO-friendly design, this template also comes with an advanced set of features. A great variety of plugins, widgets, and other web elements are meant to help you craft a user-friendly web store with convenient navigation and simple interface. With Willard theme, you will be able to attract more sales to a store.
Pop-up Manager will let you create and manage notifications of different types to increase conversions. MotoPress Slider will help to present the hottest deals and promote the products the best way. While using Elementor Page Builder, you will have a chance to create any type of content and add advanced functionality when leveraging the editor together with Jet plugins. As you may see, Willard WooCommerce theme has been developed to make the website building process fast and easy while ensuring all the necessary functionality.
Naturio Food Store Template WooCommerce Theme

Organic goods are now in high demand which means that it’s high time to launch an online store for your organic shop and spread the word about it on the web. Naturio WooCommerce theme is a perfect solution. Inside the package, you will find the entire collection of pre-designed pages full of various details. While using them, you can complete a website with homepage, shop, and blog, as well as filling them with the needed information.
Like many other WooCommerce themes, Naturio comes with Elementor Page Builder on board. It is equipped with the latest drag-and-drop editor and well-designed modules which makes website building hassle-free. You don’t have to get “under the hood” and touch the code. All you have to do is just move the elements within the layout until you like the way it looks. This is the main reason why WooCommerce themes are so attractive even to non-techies.
Essorize - Electronics ECommerce Classic Elementor WooCommerce Theme
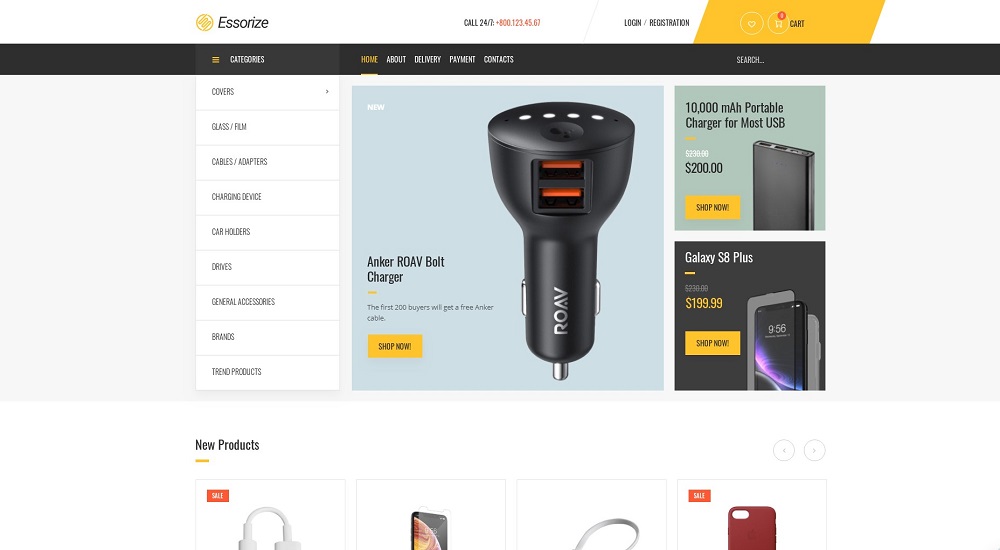
Essorize Elementor WooCommerce theme is a great option for those of you running an electronics store. Clear layout and minimalist design make it easy for everyone who wants to attract visitors to website content and encourage them to make a purchase. With classy pre-designed pages, you will be able to complete the products with all the necessary information. By using Elementor content editor, you can build any type of content as well as adding the advanced functionality to the site.
Apart from that, Essorize comprises high res images suitable for different business topics. So, you don’t have to spend extra time to find the gallery for a website. Additionally, the template offers multiple eCommerce plugins like JetProductGallery, JetCompareWishlist, JetMenu, and others ensuring a top-notch shopping experience.
Elementor WooCommerce FAQ
If your goal is to build and create an online store from scratch, then Elementor WooCommerce Builder is a real find and helper in this difficult task. Elementor WooCommerce Builder is a solution for building online stores in WordPress using Elementor. It includes all the tools you need to quickly visualize your plans and create a perfect online store.
Addons are important elements in building an online store. It is recommended to use them to improve and speed up your work. It is desirable to search and download addons from official websites. Use WordPress.org and you will definitely get rid of unnecessary problems and find the right Elementor WooCommerce addon.
The solution is up to you. TemplateMonster offers many options for Elementor WooCommerce themes. You can view a demo version of each and choose the one that suits you best. What about the selection criteria: the theme must be compatible with the latest versions of WordPress; have an attractive design; supported by WordPress plugins; allows you to customize almost all aspects of the design, including typography, colors; technical support; and of course the built-in support for WooCommerce.
It all depends on how exactly you want to create a shop page and present it to the audience, but the mandatory elements of the Elementor WooCommerce shop page should be: product name, its image, price, short description, details, related products, shopping cart, product rating.
Read Also: elementor woocommerce
How To Create a WooCommerce Store with Woostroid2 and Elementor Builder
How To Create And Shape Up Your Portfolio With Elementor Builder
How to Create Testimonials Using Elementor Page Builder
How to Set Up Blog Post Lists with Elementor Page Builder
Don’t miss out these all-time favourites
- The best hosting for a WordPress website. Tap our link to get the best price on the market with 82% off. If HostPapa didn’t impress you check out other alternatives.
- Monthly SEO service and On-Page SEO - to increase your website organic traffic.
- Website Installation service - to get your template up and running within just 6 hours without hassle. No minute is wasted and the work is going.
- ONE Membership - to download unlimited number of WordPress themes, plugins, ppt and other products within one license. Since bigger is always better.

Self-taught copywriter specialized in web design, marketing, and traveling. Graduated with a degree in German and English translation. Obsessed with guides, listings, and long-read blog posts. Open for new information and strives to explore more undisclosed subjects. Social Media Accounts: Fb, Twitter, LinkedIn.
Get more to your email
Subscribe to our newsletter and access exclusive content and offers available only to MonsterPost subscribers.

Leave a Reply
You must be logged in to post a comment.