

This is the third lesson of our Ultimate Gutenberg Editor Learning Course. If you want to get the full educational plan – follow the link and subscribe for the course.
Right after you finish installing a WordPress to your hosting and define the theme which fits your needs perfectly – it is time to start customizing it. I guess now you are sitting and glaring on the homepage demo content of the chosen template and have no idea what’s next. That’s OK, there’s no reason for panic. This is why I decided to give you some clear instructions about your further actions. WordPress was created to make your life easier, so the next steps are simpler than you think. I will now show you how to change your site’s name, add a logo, a favicon and set the menu. So, if you are ready – let’s start.
Website name
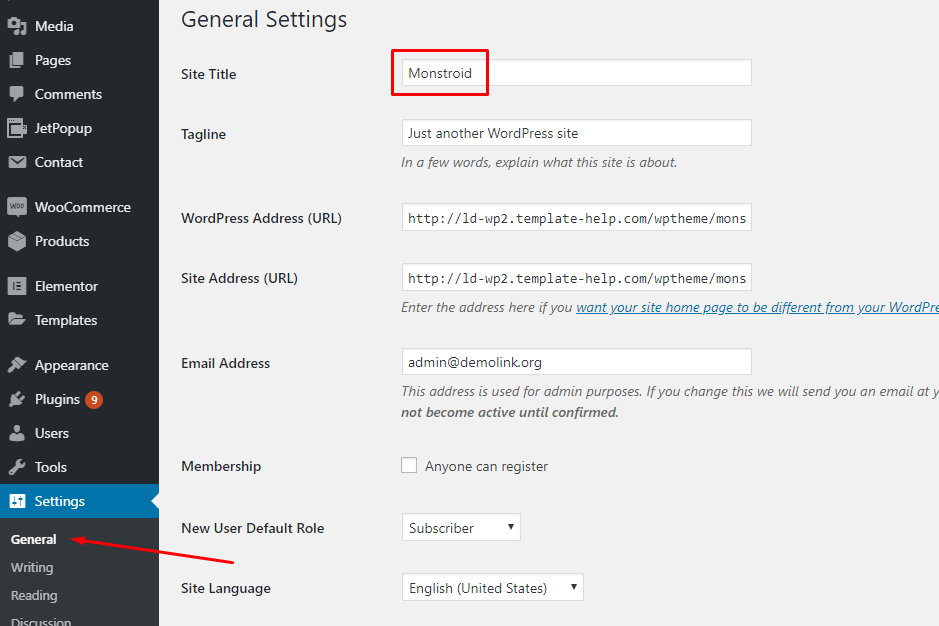
Usually, when you create a WordPress website it is given a default name like “My Website” or a “New Website”. When you install and activate a downloaded theme – it probably changes the WordPress default name to the theme’s name. The title of your website is shown in the upper left corner. And on the website, it will be placed according to the design settings. It’s obvious that the default name doesn’t fit your needs, so you have to change it.
Open the WordPress dashboard and go to Settings >> General. The first two rows on that page are “Site Title” and “Tagline”. In fact, the tagline is not really necessary. It is a place to put a slogan if you have one, if not – just leave it empty. By the way, you can also change the time settings in that window – just scroll it down a little and choose Timezone, Date Format, and Time Format.

Logo
The logo is a picture that marks your brand, like specifically shaped “M” of McDonald's or a little Polaroid shape icon of Instagram. It helps clients to identify your brand among the others and that is much faster than reading the title. So, when creating your blog, it would be a nice idea to create a logo and put it to the header. Logo creation is simple even if you don’t have a friendly designer who will do it for you. There's a lot of free online logo creation apps that will help you. For example, Hatchful of FreeLogoDesign. You just choose the category, style, and type in the name of your blog – and the app automatically generates a few variants for you.
When you have a logo that fits you, it's time to add it to your website. Open the dashboard and go to Appearance > Customize.
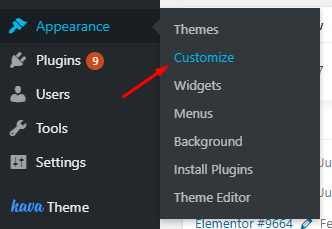

WordPress will open a big customization menu. On the left-side menu choose the “Site Identity”. The first row in that tab will be “Logo” and you just have to click “Select logo” button, choose the downloaded picture and it will be set as your website logo. Simple, huh?
![]()

Favicon
When you open a site in browser its tab usually has a website’s title on it and a tiny picture on the left side. That picture is favicon (aka “favorite icon”) and often it is similar to the logo. Favicon works just like a logo – it helps the user to define a concrete website tab. That’s very useful when a user has dozens of tabs opened.
It is very easy to create a favicon even with your own hands. You can take your logo and convert it to .ico file that is suitable for a favicon. Or take any other picture for it. There’s no problem in finding favicon generator on the web and mostly all of them are free. For example, favicon.io can help you create a favicon out of the text, emoji or a PNG picture. And in Faviconer you can also draw it in a simple painting app.
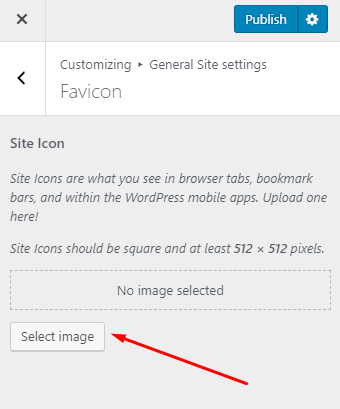
When the .ico file is already on your computer – go to the website’s dashboard. In WordPress 5.0 favicon settings were placed to the “General Site settings” of the customization window. From the dashboard you have to move to Appearance > Customize > General Site settings > Favicon. Click the “Choose picture” button, find the .ico file and voila – you have a favicon. If your theme sets a default favicon – you can change it by hitting the “Change picture” button.

Menus
The chances are, that your WordPress blog template already has a default menu. It is the row of pages’ titles you see on the header of your website’s homepage. However, despite that menu could be quite enough for your blog, there probably will be some pages you would like to add there. WordPress 5.0 allows you not only to create any number of different menus you would like to but also use different menus on different parts of the website.
All menus are managed and customized in the special tab. Go to Appearance > Menus and you will see the default menu of your current theme. Here you can create, edit and delete menus, as well as placing them on the different parts of the website in the “Manage Locations” tab. Let’s go ahead and create a new menu.

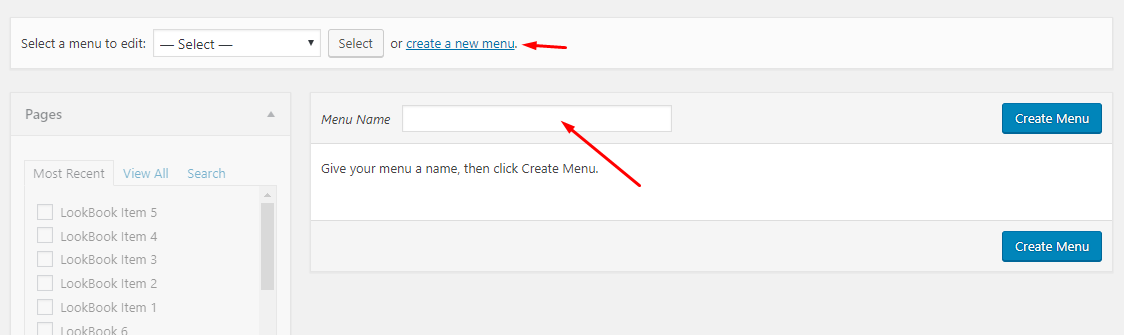
Click the “create a new menu” link in the upper part of the tab. You will see an empty form and the first thing you will have to do will be typing the name of a new menu. Do it click “Create Menu” button.

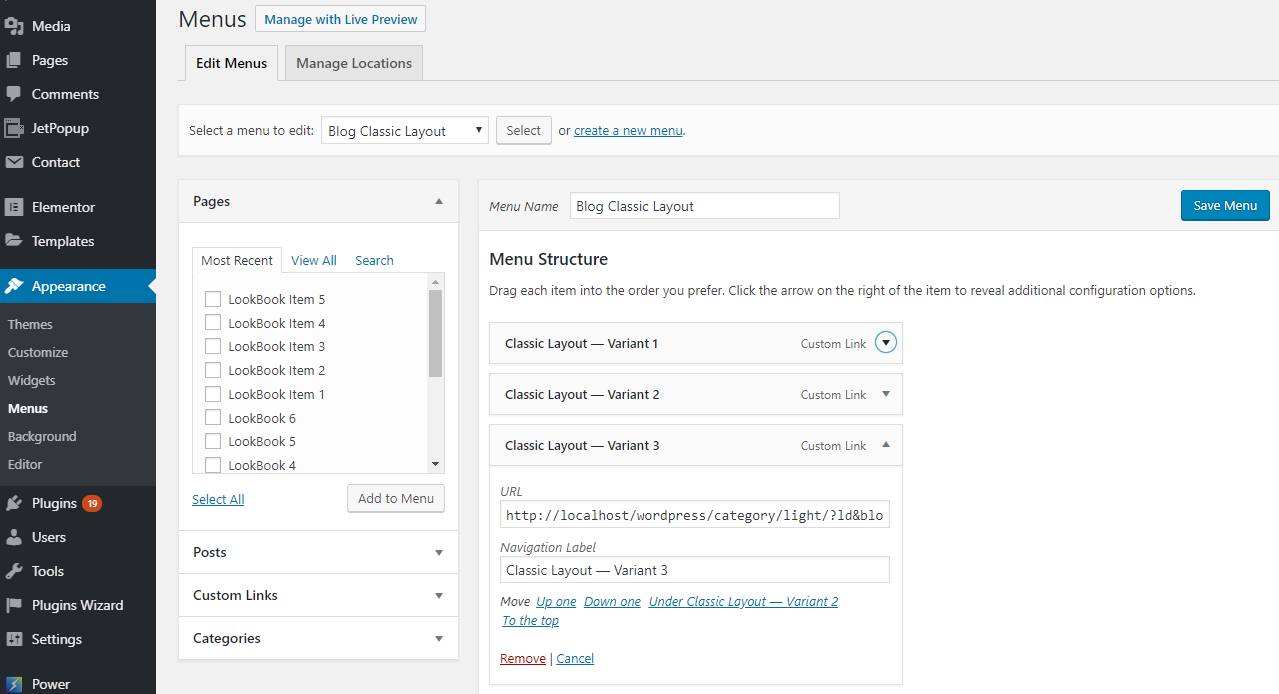
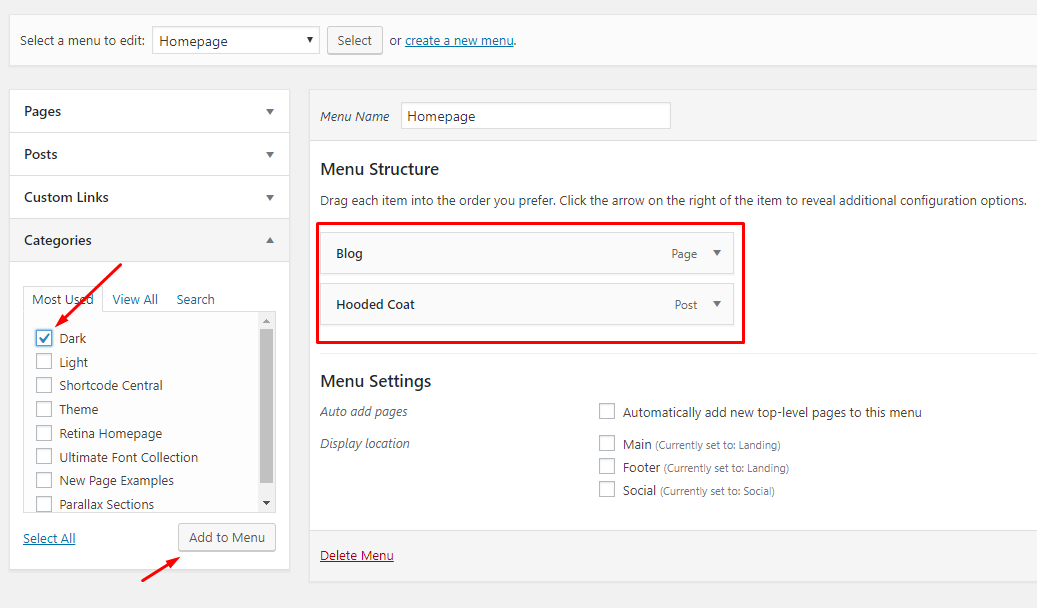
In the left part of the page, there is a list of items you can add to the newly created menu. It could consist of pages, posts, custom links and categories. To add the item select it in the list and press the “Add to menu” button.

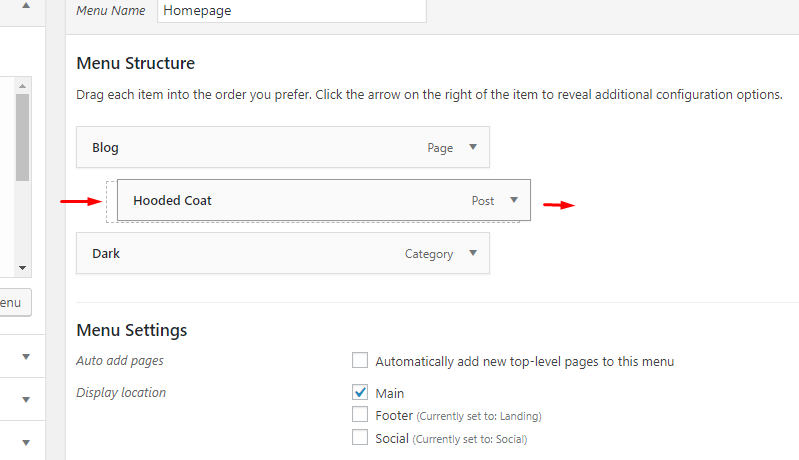
You can change every item’s label by clicking on it. The editing drop-down window opens and you will be able to type the title you would like to see. You can move every item by just dragging it with a pointer or by the movement buttons (“Up One”, “Down One”, etc.).


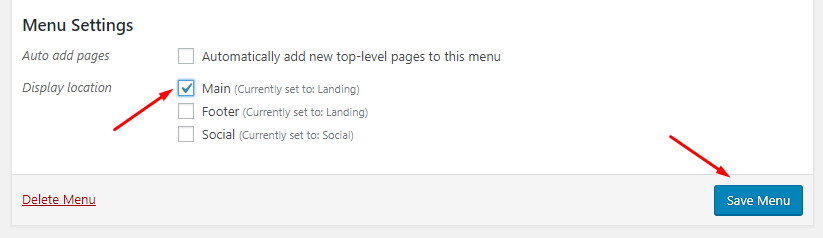
When the menu is finished you have to choose the location of that menu and press “Save menu” button. It is done – you created a simple linear menu. It will be displayed on the website part you have chosen for it.

Here you can also create some submenus – a drop-down menu item that opens after clicking one of the menu buttons. You just have to move the item to the right. Then it will become a sub-item for the one that is above it.

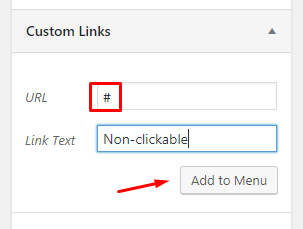
If you need a non-clickable menu item that will only open the submenu – you have to use a custom link. Type the hash mark instead of the link and type the title. When you will add it to the menu it will be non-clickable (it won’t lead the user to another page). When you add some sub-items – it will show only them.

Wrapping up
I guess the experienced WordPress users consider the answers to questions I gave you in this article obvious. However, not everyone could deal with blog maintenance without help. I hope this text will guide you through the theme customization and will be useful. I hope that if it really helps you – you will write a few words about it in the comment section below. Besides that, I would be happy to hear some reviews or thoughts about themes customization from you. Good luck!


Read Also
Divi vs Elementor: Natural Selection of Page Builders
A Step-by-step Guide to Converting Muse to WordPress
Ways to Create a WordPress eCommerce Site | Knowledge Base Guide
GoDaddy vs WordPress: Hosting and Builder Review
90+ Coolest WordPress & Gutenberg Shortcuts to Accelerate Blogging