Your Next Steps after Launching a WordPress Blog
Finally, weeks or months of the thorough work on the website are behind. “What now?” – you may ask. In fact, it’s only the beginning of work for the non-developers. Now, the website is a raw version of the booming and successful blog you can have.
More steps should be made to secure a website, make it appear in the top search results, and stuff it with useful plugins.

Here is a checklist of the must-do things that are crucial to the thriving blog.
- choose and install a theme + adjust it to the conception of your blog
- install Google Tag Manager
- create Google Analytics account
- add Google Analytics to a website with GTM
- activate clicks analysis in GTM
- add a website to Search Console
- change website’s users – delete a default admin, add a new one
- install Yoast SEO plugin
- install a plugin for comments
- add a subscription form
- add a page for a mailing list subscription + unsubscription
- change the format of the links
Further, you can check out a detailed guide covering all the check-list steps.
So, too much work is waiting for you – let’s not waste time!
1. Choose a Theme and Adjust it to Your Blog
Here you have a lot of space for creativity and a wide choice indeed. First, you can check out themes in a WordPress directory. There are 2,000+ variants for a blog. You can find both free and paid themes.
If you don’t find a favorite, there are dozens of third-party theme providers. They also offer free and paid solutions. An advantage of the third-party themes is that there are bigger chances of being unique.
For instance, there are 1,700 blog themes on TemplateMonster. Every theme often goes with powerful toolkits, plugins, skins, animations. There are other options for web design.
The prices vary. You can find themes both for $40 and $150.
If there is your first blog and you are a non-techie, I’d recommend you to choose a free theme and see how it goes. Making a wrong but free choice is not that painful, is it? 🙂
2. Install Google Tag Manager
For non-techies: Google Tag Manager is a thing.
Before using analytical tools, ad services, and other third-party elements, you should add their code to your website. It’s easy unless you deal with a couple of services, have basic coding knowledge or can hire a developer.
The problems can appear when you are a non-techie. Making changes to existing code or adding new integrations might be also challenging. First, it takes a lot of time. Second, an error in a tiny code fragment can lead to a website’s breakdown.
Still, you might have heard about a pretty good solution from Google – Tag Manager or GTM.
GTM is a super convenient system for JS and HTML tags management. You might need a developer’s help to add the GTM code itself to the website. Afterward, you will be able to connect any services and add new snippets in the GTM admin panel.
The first thing to do is to create an account. The process will take a couple of minutes and requires basic information.
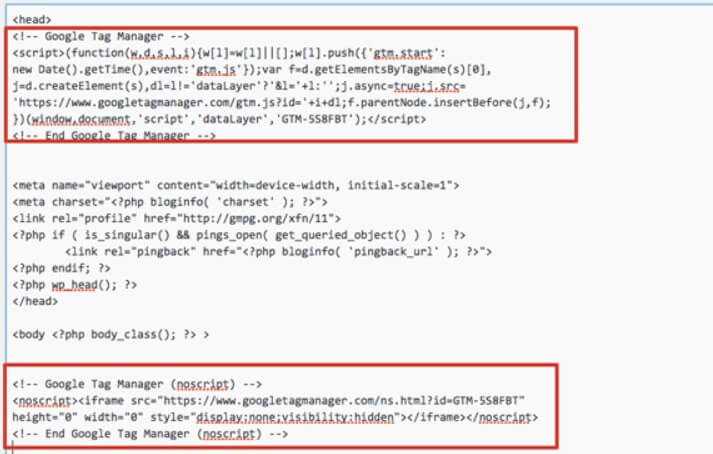
Afterward, you get a code in two parts. Go to WordPress admin panel > Appearance > Edit. In a catalog, you will find a header.php file. Open it to insert a code. Put the first part of the code right after a start tag <head>. The second part put after a start tag <body>.
Use a Chrome extension Google Tag Assistant to ensure that the setup is successful. To get the correct data, it’s necessary to make some changes in the container – to add Google Analytics tag, for instance.
3. Add Google Analytics
There is nothing complicated in creating a Google Analytics Account. Go to Google Analytics > sign in to your Google account > click Access Google Analytics > sign up. Put all the necessary data and get a tracking ID.
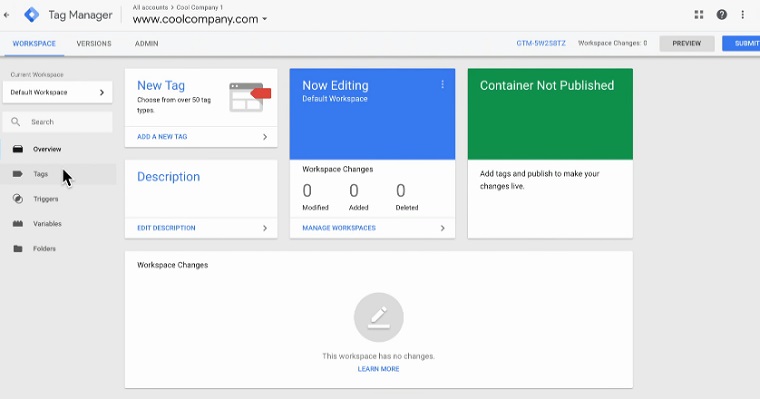
To deploy Google Analytics, click anywhere in your container Tags > New.
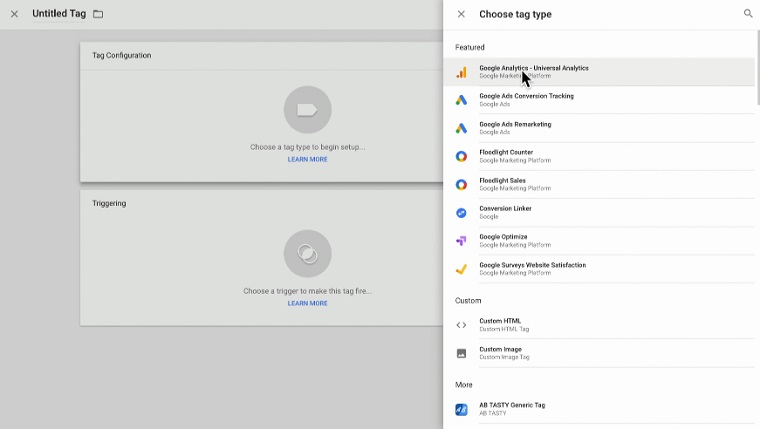
A new tag definition screen will appear. Choose Tag Configuration > Universal Analytics.
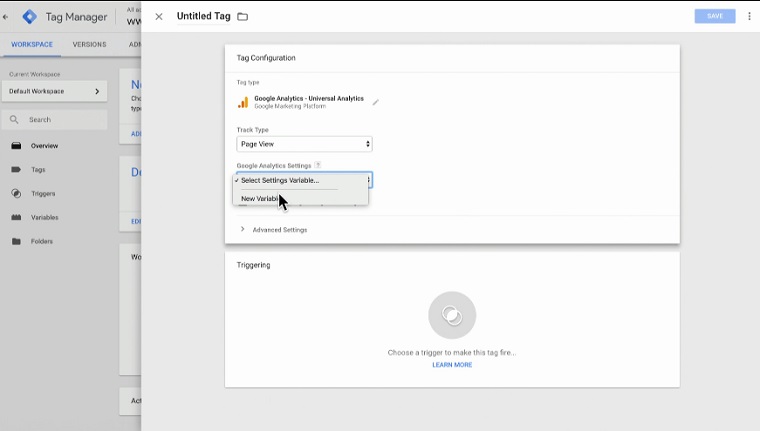
Then, you are to use the Track Type. For instance, Page View shows the pages the users mostly visit. Event type helps to measure specific interaction (e.g. number of clicks on the button).
Then, you will choose Google Analytics Settings Variable. If you have ever done this, you will reuse it. You will see an option from the drop-down menu. Otherwise, create a new variable.
For that, you will put your Tracking ID. You can also take control of more settings. After you save it, you can later choose the template of the settings. No need to repeat everything from scratch.
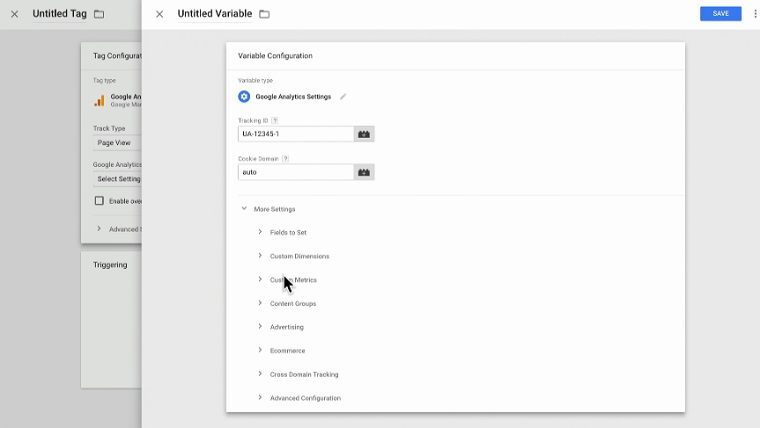
The last touch in this step – triggering. Here you define a trigger that makes a tag fire. You can choose an existing trigger or create a new one.
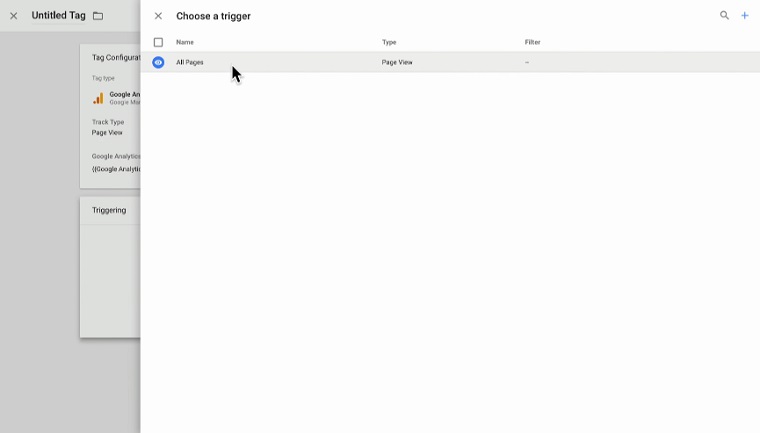
Save the changes.
4. Activate Clicks Analysis
I already mentioned that you can analyze the interaction on your website. It’s useful indeed when you make a promotion, for instance. To understand how many people clicked on the button/banner/link, you can analyze the clicks.
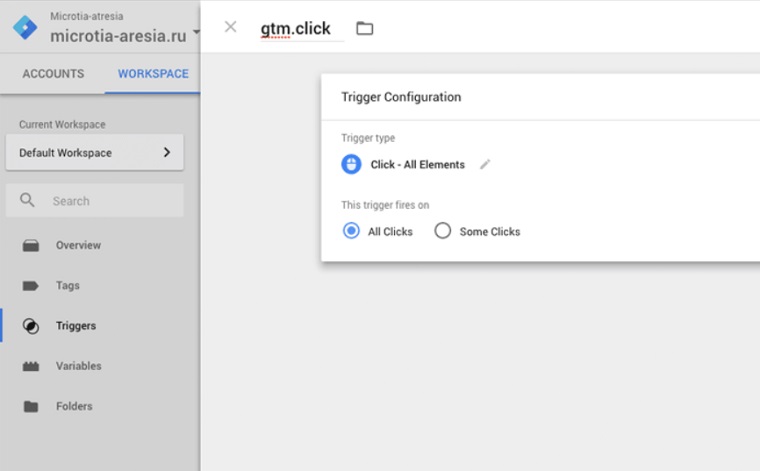
You need to set a trigger on the specific event – in our case on the clicks. Triggers tell the tag to fire when the specific event on the website is detected.
For that, go to Triggers > Trigger Configuration and choose a trigger type, namely make a tag fire on all clicks.
5. Add a Website to Search Console
Search Console is a free service from Google. It gathers and shows data about the website’s presence in Google search results. You can check out how often your website appears in search results and what inquires it meets. It’s possible to check out how often people click on specific inquires and which of them are more popular.
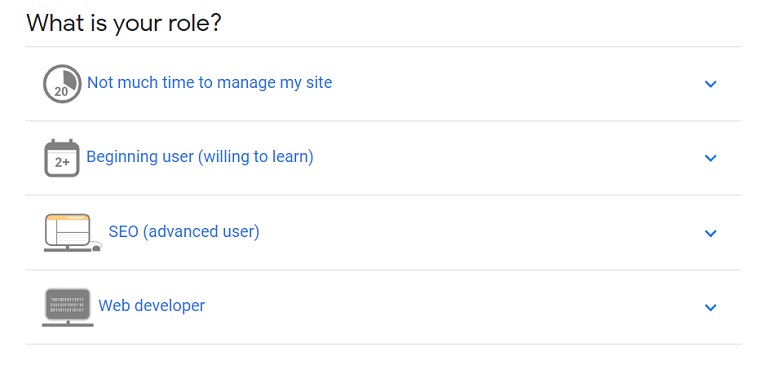
The thing that I particularly like about the service is differentiation. You can pick up your role according to your goals, needs, and time.
The process of adding a website to a Search Console is super simple. Make sure you have a Google account and downloaded a JetPack XML Sitemap. Install it and connect to your WordPress account.
To activate XML Sitemap feature, go to WordPress Dashboard > JetPack > Settings. Click the Engagement link on the top of the page. Activate the Sitemap feature with a slider.
Make sure that “Discourage search engines from indexing this site” option is not active. Go to Settings > Reading. Otherwise, Google won’t be able to detect your website and a Sitemap.
The next step lies in adding a website in a Search Console itself. Here is a detailed guide that covers every tiny step. I used it also when I added my first blog to a Console.
6. Change Website’s Users
Here is a super quick but crucial step. Go to Console > Users and change the default admin to the real admin/s, who will manage a website.
7. Install Yoast SEO plugin
The next step lies in installing an SEO plugin. SEO plugins optimize your website toward search engines. It helps to increase the rankings in the search results. What SEO plugins particularly do?
- optimize metadata (title tag, meta description, meta keywords, and content headings (H1s, H2s) – for search engines
- optimize the website’s content toward social sharing using Open Graph – for real people scrolling their feeds
- optimize XML Sitemap, robots.txt and .htaccess
Do they really work? Yes, unless you left your website’s SEO optimization solely to the “plugin’s custody”.
For instance, a plugin won’t write a meta description for your website. It’s you, who should come up with a unique and relevant meta description for each page.
Your contribution + the plugin’s algorithms = the perfect combination for successful optimization.
Speaking of the choice of the plugin, it’s more about the matter of tastes. Still, I would recommend the Yoast SEO plugin indeed. The fact that it’s free makes the choice more obvious. It stands out with the technical features as well.
It shows good results in page analysis and metadata optimization. You can detect the pages that appear/not appear in search results and find out the problems in the metadata. Plus, it has a powerful social integration with Facebook OpenGraph. The most important: it creates XML sitemaps automatically and sends information to Google and Bing.
Of course, there are other alternatives such as SEMrush or Ahrefs tool. They are cool but paid.
8. Install a Plugin for Comments
Before searching for a plugin, make sure that a theme doesn’t contain one. For instance, this theme for a blog already contains a commenting system. If the built-in system doesn’t please you, I’d recommend considering the Disqus service.
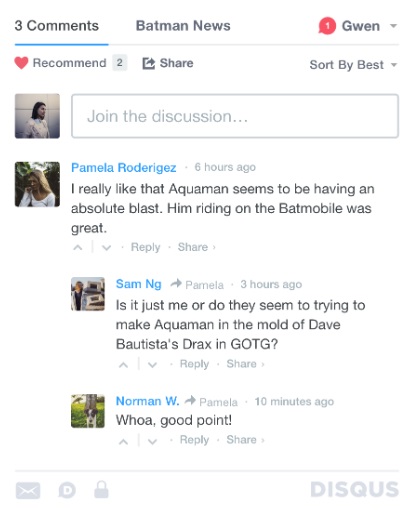
A good thing is that you can create one account and manage comments on all your websites. Plus, it’s easy for visitors to leave comments because they can log in with their social media accounts.
To add a plugin to a website, you should make a Disqus account and install a plugin in WordPress.
So, download the plugin and go to Console > Plugins > Add New > Install. Also, you can go directly to Console > Plugins > Add New and find Disqus Commenting System in the Search. Regardless of the way you choose, don’t forget to activate the plugin.

9. Add a Subscription Form
First, check out if the theme doesn’t contain a subscription form. For instance, this theme has a Newsletter Subscription form and is MailChimp ready.
Otherwise, follow this guide.
I chose MailChimp because it’s easy to use and covers basic needs.
So, create a MailChimp account and a mailing list. Click on the list which will contain subscribers’ emails and go to Signup forms.
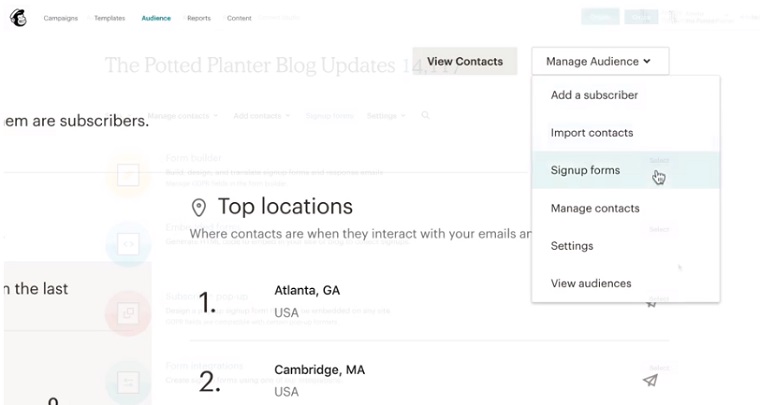
Then choose Embedded forms.
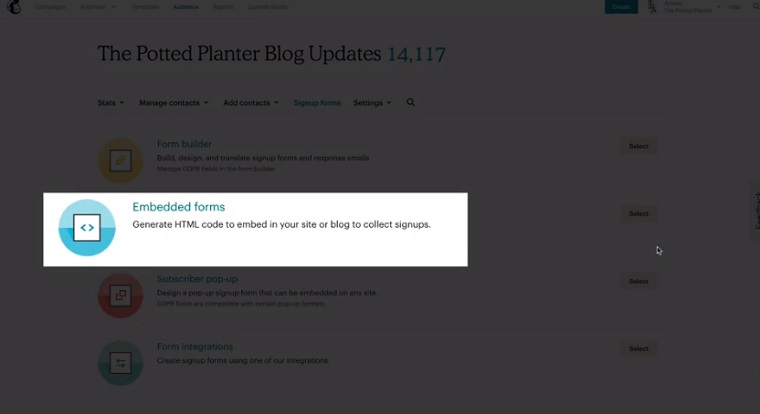
The folder with settings will open. There, you can change the title and description of the form and its other features.
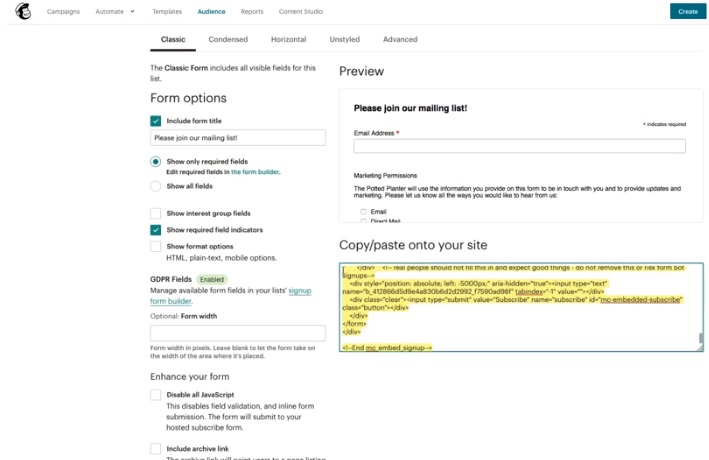
You can change the title and description later in code. I’d recommend copying the code (highlighted in the picture). You will need it later. Then, paste a code into your website’s HTML.
You can edit the fields by going to the Form Builder:
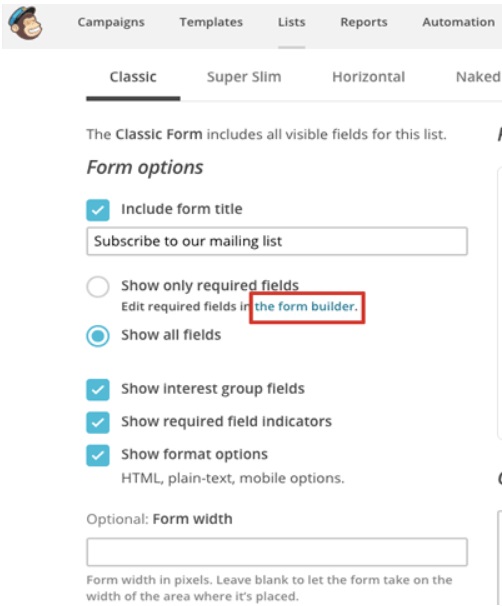
There, you can edit the look and content of the welcome and farewell letter, subscription confirmation letter, etc.. You can also add, edit, and remove the fields in the form.
10. Insert MailChimp Form in the Website
Have you copied this form’s code?
If not, go back to the first step of creating a form and copy it.
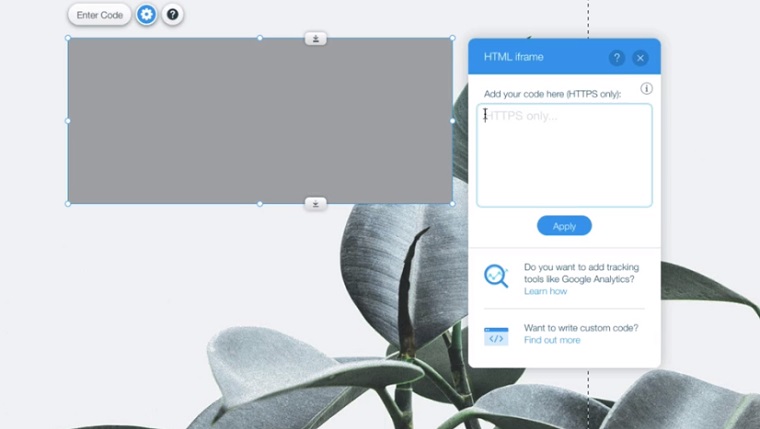
Then, go to Console > Appearance > Widgets. There, find a Text Widget. Then, move it wherever you want it to be: at the top or bottom of the page, left or right. It depends on the location of the widgets zone.
Click on the widget and paste the code of the form. That’s it!
If you have a desire and basic CSS knowledge, you can work on the stylistics of the form. Go to Console > Appearance > Edit > Styles and write the styles for the form.
11. Add a Page for a Mailing List Subscription and Unsubscription
It’s not necessary but I usually create pages for subscription and unsubscription. It’s also easier to set a trigger on subscription in Google Analytics. The aim would be then to lead the visitor to the subscription page.
So, go to Console > Pages > Add New. After you create and edit the page, go to the same MailChimp settings > Create Forms. In the drop-down menu, choose Confirmation thank you page > paste the URL of the new page.
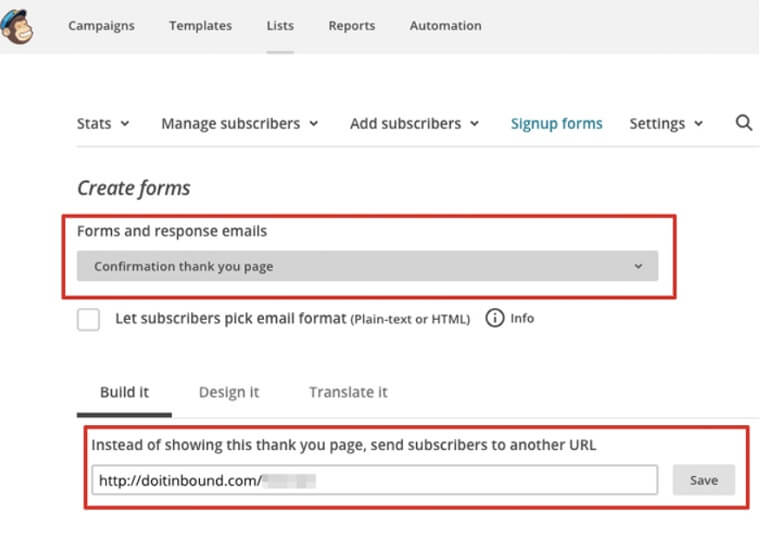
In the same way, you can create an unsubscription page. With a sad face.
12. Change the Format of the Links
By default, the WordPress links don’t look attractive – the URL of the page has /?p=123. Human names are easier to memorize. Plus, if the person wants to find a post by hand, it will be easier if the link contains the name of the blog and category. It’s better for indexation also.
So, go to Console > Permalink Settings and choose a Custom Structure option.
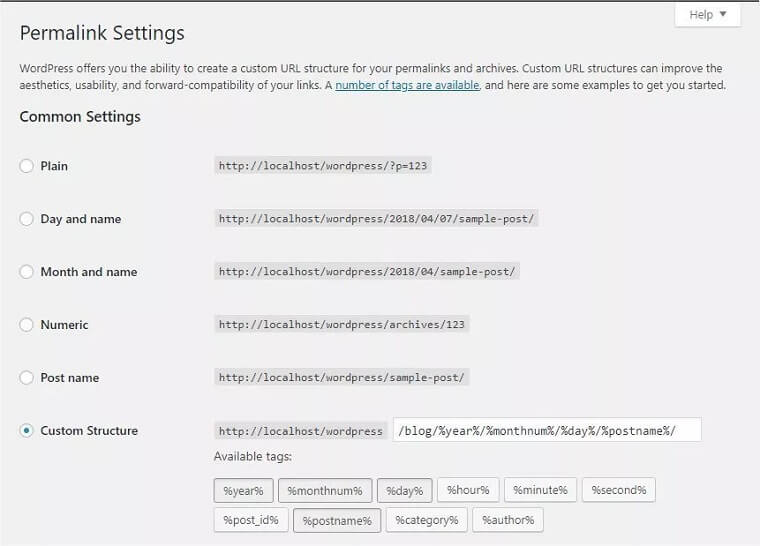
There are radio buttons that correspond to the correct Permalink Structure for a blog. Choose one of them.
That was the last check-list point, by the way. Now, the most exciting stage is looking forward to you. You can start filling a blog with content. Remember that your efforts can go in vain if the content will be poor.
I hope the article was useful.
Stay tuned for more guides!
Starting A Website: What Options Do You Have? [Free Ebook]
By clicking the button you agree to the Privacy Policy and Terms and Conditions.
Read Also
How to Launch WordPress Site | Easy WP Guide
11 Things to Do before Launching a WordPress Site
Step-by-Step Instructions on How to Create a Blog with Elementor and Monstroid2
How to Delete a WordPress Blog?
Don’t miss out these all-time favourites
- The best hosting for a WordPress website. Tap our link to get the best price on the market with 82% off. If HostPapa didn’t impress you check out other alternatives.
- Monthly SEO service and On-Page SEO - to increase your website organic traffic.
- Website Installation service - to get your template up and running within just 6 hours without hassle. No minute is wasted and the work is going.
- ONE Membership - to download unlimited number of WordPress themes, plugins, ppt and other products within one license. Since bigger is always better.

Get more to your email
Subscribe to our newsletter and access exclusive content and offers available only to MonsterPost subscribers.

Leave a Reply
You must be logged in to post a comment.