Elementor Sticky Header Guide: How To Create Overlapping Sections, Sticky Header And Footer With Elementor Pro
In this article, we’ll overview the creation of overlapping sections with the elementor sticky header and footer.
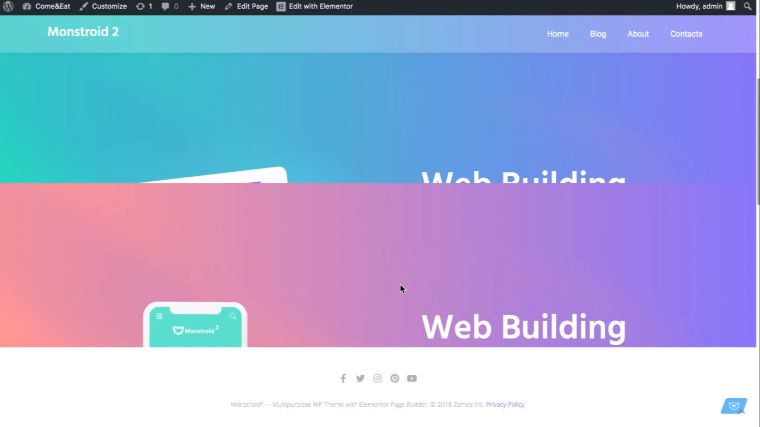
Namely, the aspired animated effect includes the next sections of the web page covering the previous ones when the user scrolls down the page, while the header remains on the top of the page, and the footer appears when the user gets the final section. It is shown in the following two images:
To achieve the desired outcome, we’ll necessitate the Pro version of the Elementor editor.
You can view the detailed instructions of how to gain the described output in our channel video:
And for those who feel more comfortable when reading the instructions with step-by-step illustrations, we have prepared the following written material.
Step-by-Step Guide
Step 1
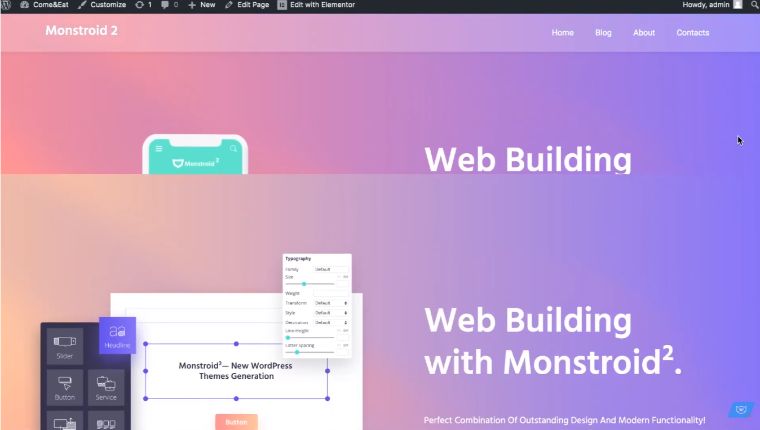
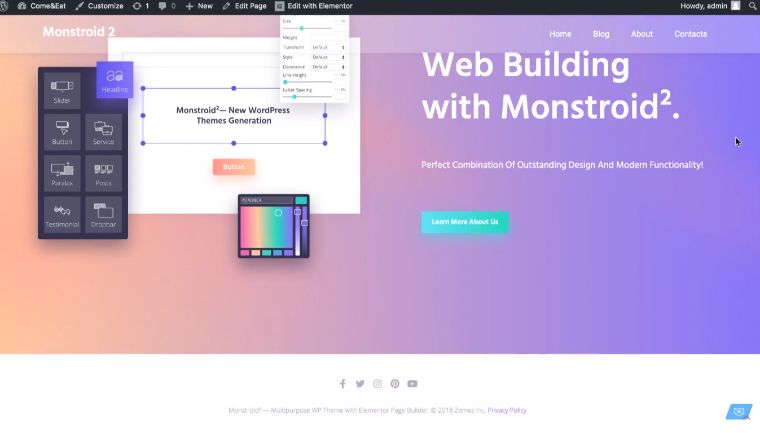
To demonstrate the moves you should undertake to achieve the desired output, we'll take the pre-made layout using our Monstroid 2 theme. We also have prepared the header and footer using the Elementor Pro editor. Thus, you’ll need to construct the number of sections which you want for your page and devise the required elements.
Organizing these things will be your first action.
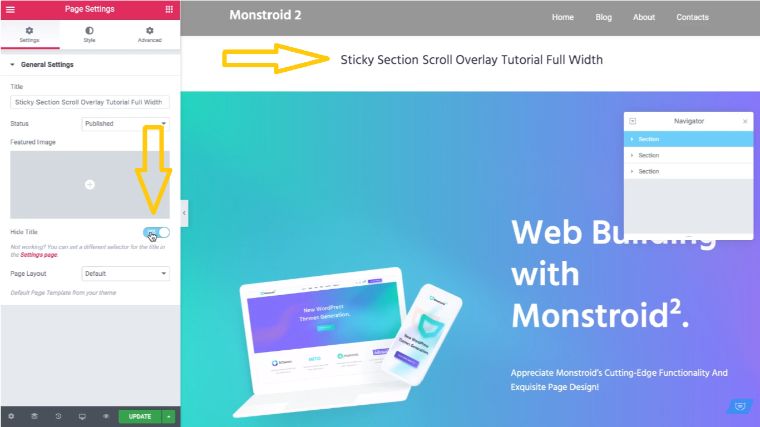
Step 2
Notably, when you start creating the design of your site in the Page Layout – Default mode, you'll see the title which will be visible under the header. Obviously, you don’t need this title. To hide it, you can enable the Hide Title option in the same Page Settings.
However, it may not work for your theme. In this case, go to the preview of your page and right-click and pick Inspect from the dropdown menu.
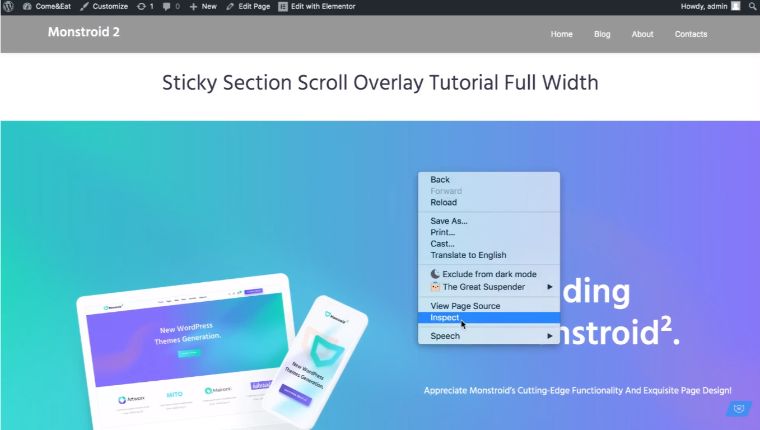
In the comment section opened, choose the top-left icon. What we need here is to copy the name of the class. To find it, we need to select our header, and we'll see the class and will copy what is written there.
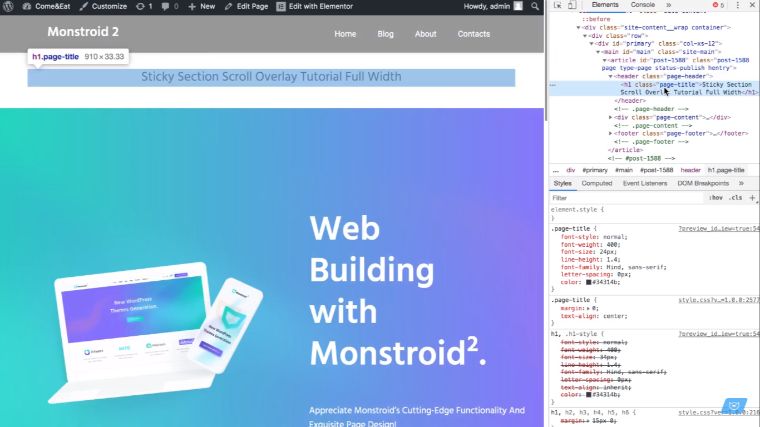
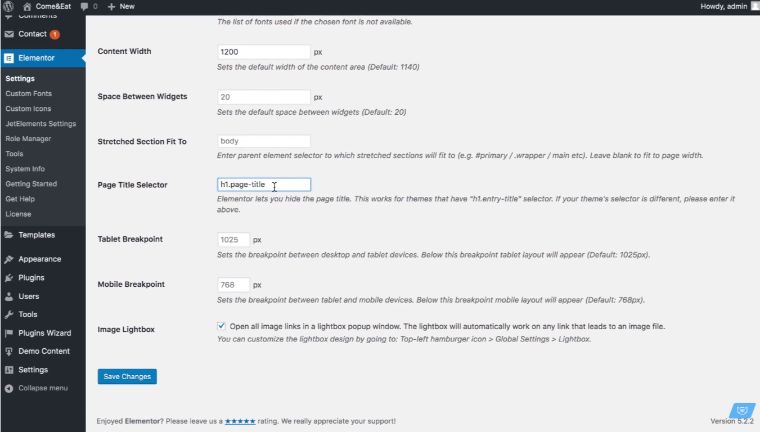
In our case, it is “page-title”. We copy it and go to the WP dashboard.

There, go to Elementor settings – Style tab and find Page Title Selector among the listed items. Paste after h1. what we have copied before.
If you’ll go back and examine how the layout looks like at the moment, you must notice that the title has disappeared.
Step 3
Now we’ll start creating the overlapping sections. We need to grab the first section.

And move it so it is underneath the header. For this goal, go to Advanced Settings and set the Margin Top value to -140.

Now the top of the section matches the bottom of the header.
Importantly, we recommend you using the navigator. You can access it clicking on the icon which is located at the bottom of your editor panel, the second from the left.
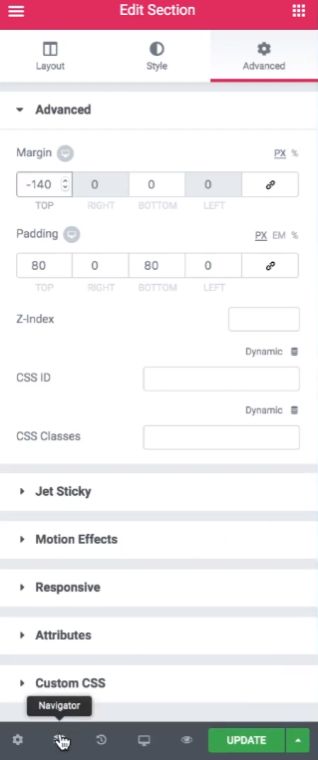
Otherwise, you can right-click and pick Navigator.
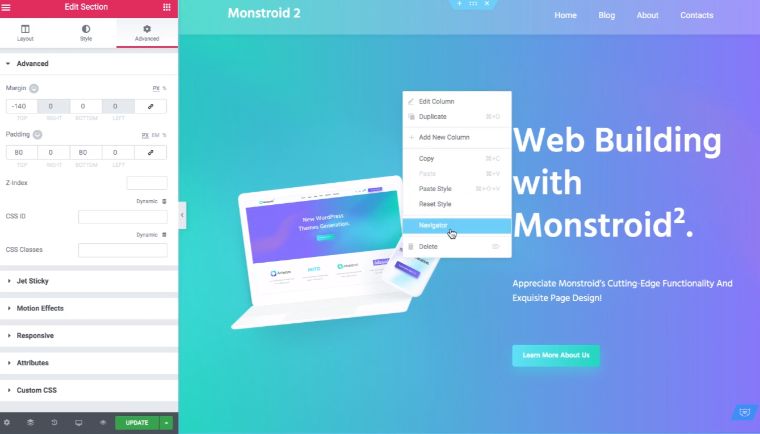
What are the benefits of using navigator?
First, if you want to change the order of your sections, you can drag and drop them in it. The functionalities can be compared to layers in Photoshop. Also, you’ll have a clear picture of what and where the sections, inner sections, and other elements are.
Step 4
Now we need to make the sections sticky, and we'll start from the first one. If you are working on the default layout, you should enable the Stretch Section function in the Edit Section - Layout tab, which will make the section stretch to the entire width of the page. Also, at the same place, set Height – Fit to Screen.

Now we should go to the Advanced tab, get to the Motion Effects and find Sticky option, picking Top from the list.

After that, find the Z-index in the same Advanced tab. It allows ordering the sections from top to bottom. The items with the higher Z-index will be on top of the items with lower Z-index.

Thus, if we go to Section 2 and set the Z-index higher than in the first one, namely 6 in our case, it appears on top of the first section. Pay attention to the fact that you can set your own values depending on your page parameters.
After setting the Z-index, in the second section, go to Motion Effects and pick Top under the Sticky options.
Then go to the third section and set up the Z-index that will be higher than the one of the second card, namely 7 (in our case).
In this way, we have made everything to make our sections overlap the previous ones.
Step 5
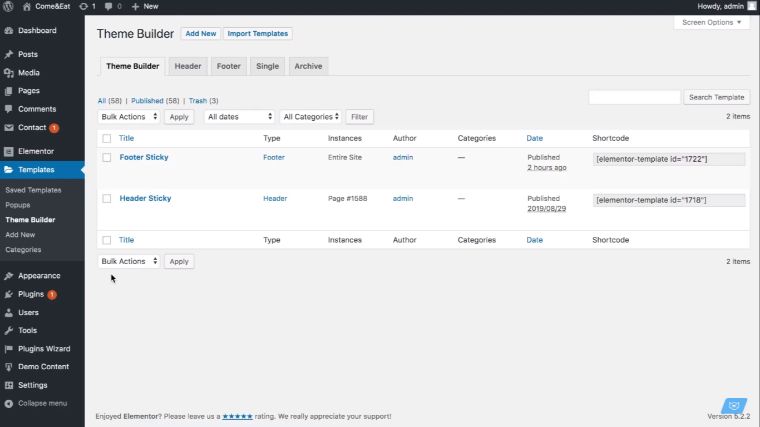
But for the moment we have no header. To correct that, we need to go to the WordPress Dashboard >> Templates >> Theme Builder. Here we can access all the parts of the theme that we have.
Pick Header Sticky and open with Elementor. When in the editor, go to the Advanced tab and set the Z-index higher than the other elements, for instance, 10.
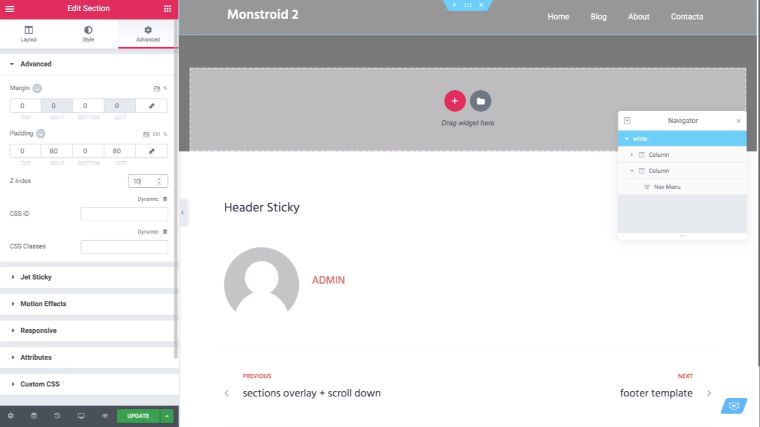
After that, go to the Motion Effects and pick Top under the Sticky options. Now when we scroll the page down, the header remains on the top of the page.
Step 6
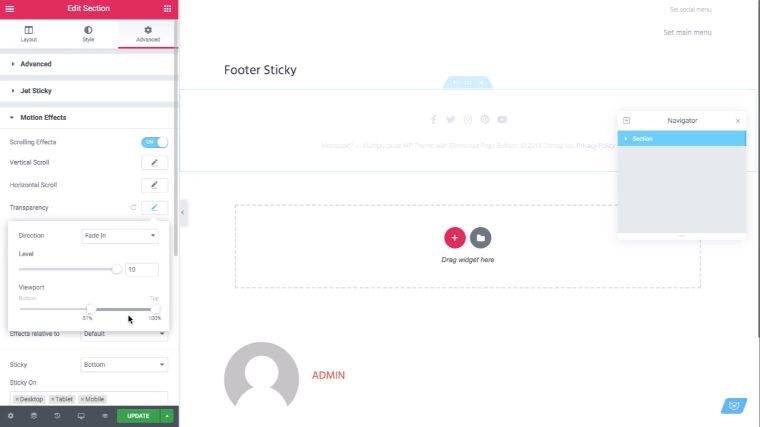
The last element that we miss for the moment is the hidden footer, which will show itself only when we scroll down to the third card.
We should go to Theme Builder (the same path as for the header) and pick Footer Sticky >> Edit with Elementor.
In the Advanced tab, find Z-index. It should be somewhere in between the second card and the third card, so it is on top of the second card and covers it, but the third card is on top of it. When we scroll to the end of the page, the third card reveals the footer. Thus, we’ll make the Z-index value equal to 7. Further, go to the Motion Effects and pick Bottom under the Sticky options.
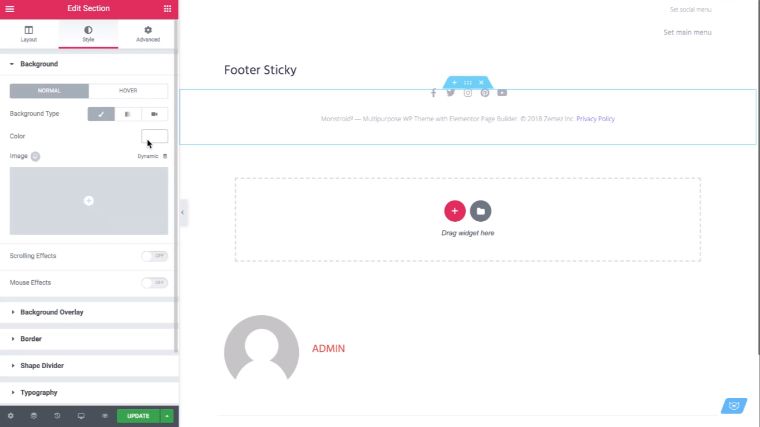
Also, we should set the background for the footer as it should not be transparent. Make it in the Style tab in the Edit Section mode.
Step 7
Now we should clean up some issues. Namely, what we don't want is to view the footer while scrolling the first sections as it is shown in the following example.
To fix this, in the Motion Effects, we should enable Scrolling Effects and enable Transparency option. In the latter one, pick Fade In for the Direction and 55-100 for the Viewport. However, the latter values may differ in your case. It means that the footer will not be visible until we reach 55% of the page. Also, don’t forget to make Effects relative to >> Entire Page.
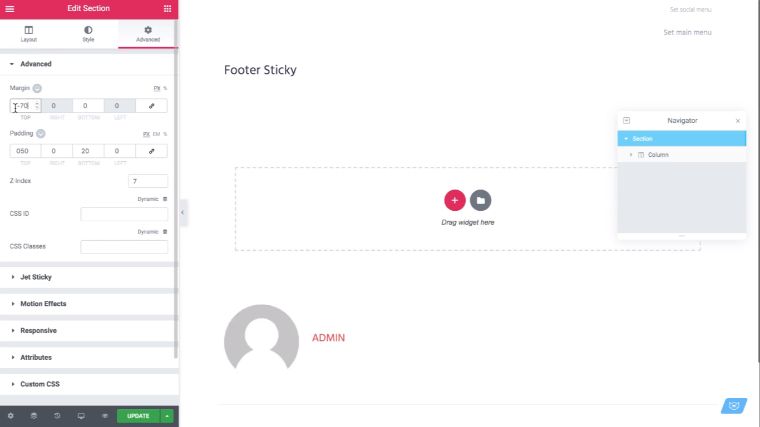
We have moved the top section underneath the header, so we have to add the negative margin. In our case, it will be -70.
That’s all. We have achieved the result – the header stays sticky, the sections overlap when we scroll down, and we can see the footer when reaching the third section.
Conclusion: elementor sticky header
As you see, it was not difficult to gain such a cool output. I hope that everything was clear in the instructions, and you’ll be satisfied with the effect that you may have achieved. This will help you to get the animated view of your webpage and improve the usability of your online project.
Assuredly, the visitors will admit the convenience and attractive appearance of your site.
Read Also
How to Create an Animated Scroll Down Arrow with Elementor Free and Pro
How To Create 3D Parallax Holographic Effect With Elementor Pro Motion Effects
Elementor Motion Effects: Best Practice to Liven Up Your Website
How to Create a Gradient Button with Elementor
Don’t miss out these all-time favourites
- The best hosting for a WordPress website. Tap our link to get the best price on the market with 82% off. If HostPapa didn’t impress you check out other alternatives.
- Monthly SEO service and On-Page SEO - to increase your website organic traffic.
- Website Installation service - to get your template up and running within just 6 hours without hassle. No minute is wasted and the work is going.
- ONE Membership - to download unlimited number of WordPress themes, plugins, ppt and other products within one license. Since bigger is always better.

Writer and editor with 4 years experience in research writing and 5 years in professional editing. The areas of interest include psychology, online marketing, web design, game design, art, innovation, and scriptwriting. Reach her on Facebook.
Get more to your email
Subscribe to our newsletter and access exclusive content and offers available only to MonsterPost subscribers.

Leave a Reply
You must be logged in to post a comment.