How to Create a Shopify Store?
This is the first lesson of our Shopify Online Store Creation from the Ground Up course. If you want to get the full educational plan – follow the link and subscribe to the course.
- Create an account
- Setting the theme
- Theme customization
- Recommended theme
- How to delete the Shopify online store?
- Conclusion
If you are looking for information on how to create a Shopify store, you have probably already considered other eCommerce platforms. Shopify is a reliable company that has been working for about fifteen years now and there are more than eight hundred thousand firms that have chosen it for their commercial websites.
If by any chance you are still not really sure about what platform to choose, check out detailed comparison articles we have on our blog: Shopify vs WooCommerce, Shopify vs BigCommerce, Shopify vs Etsy. Reading these articles will help you to choose the right CMS.
Attention Shopify Theme Makers!
Start selling your Shopify themes at the TemplateMonster marketplace. Enjoy author-driven pricing and high commissions. Get a share of up to 70% for exclusive items, and 40% for non-exclusive ones.
Create an account
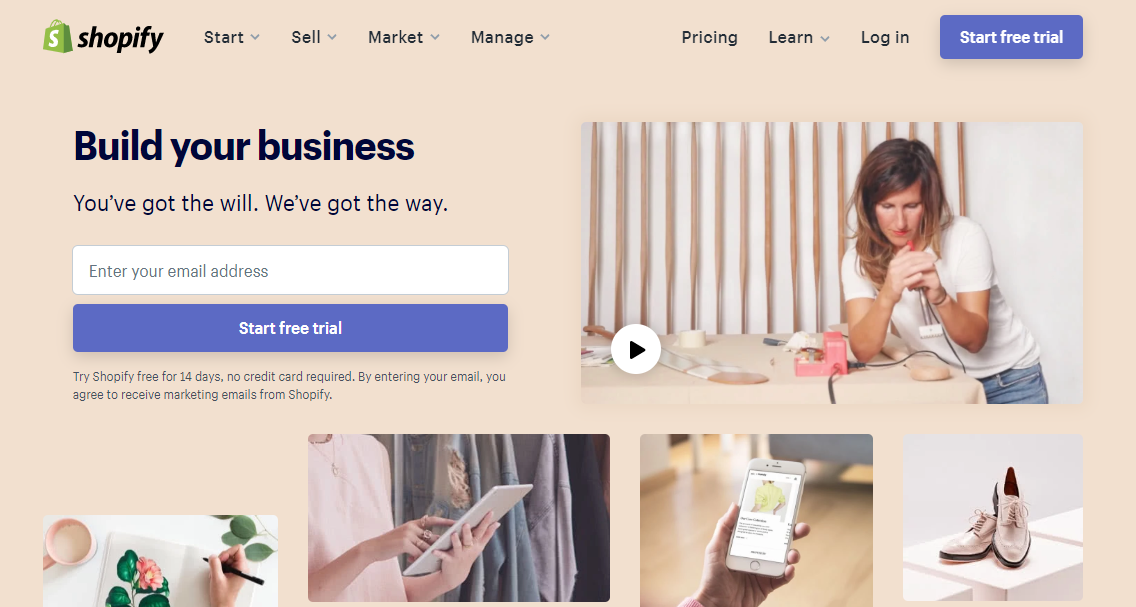
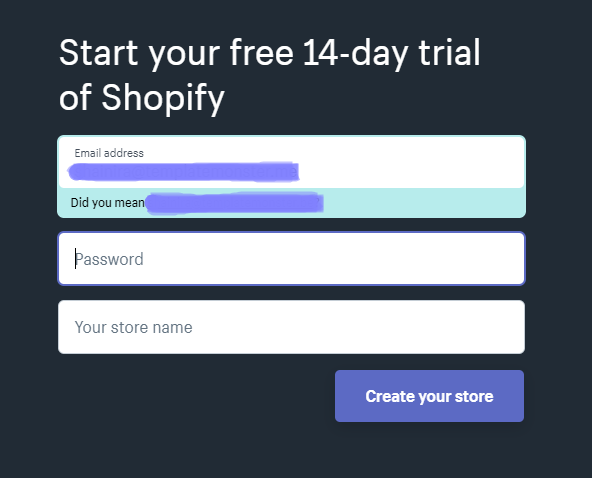
The registration process is very simple. You go to the Shopify website and see the free trial registration bar right on the homepage. Before buying one of the plans you can try using Shopify for free for fourteen days. Type your email into the bar and the account creation process will begin. The registration wizard will ask you for the name of your store right away, so be sure to think of it before starting.
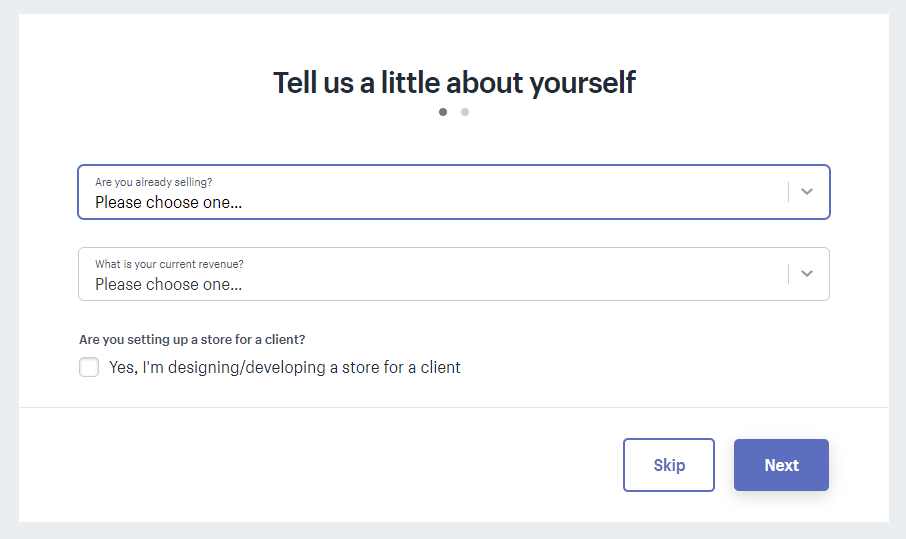
Just follow the steps of the registration. You will have to answer a few questions about your selling experience, revenue, and the purpose of creating the site. It will also gather some personal data about you, your business address and your phone.
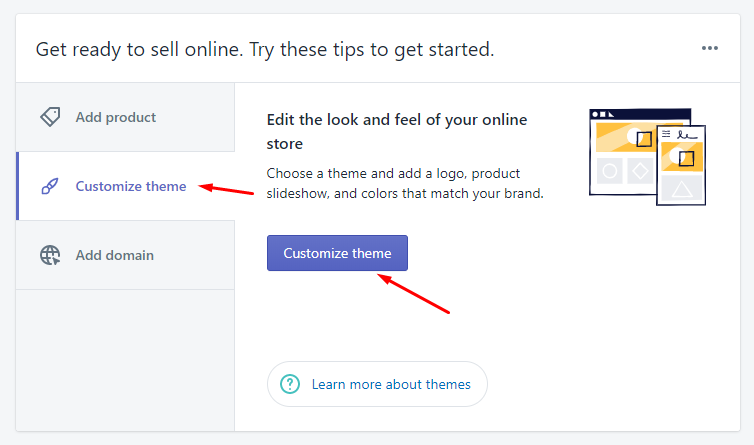
When the process is finished you land at your Shopify website’s dashboard. There you can see a window that offers you to start creating your website with adding a product, customizing a theme and choosing a domain. Let’s start with the theme.


Setting the theme
Appearance matters a lot. Users evaluate the design of your Shopify online store and their impression will be the main argument to stay a little longer or leave. Probably, you are not a skilled web developer and won’t be able to build a whole website from scratch. Shopify is the CMS for people who don’t know how to code, so it takes care of the look. The ready-made theme, created by professionals, already has all the elements you need and is breathtakingly beautiful.
So, in case of the Shopify, you can choose a free or paid theme from the original shop or get a nice theme elsewhere (for example, in the TemplateMonster marketplace) and download it to the website. If you just started the online store creation, you can open the themes menu right from the homepage. There is a set of tips for beginners, so just open the “Customize theme” tab and hit the “Customize theme” button.
Besides that, if you would like to change the theme further, you will easily reach it by going to Online Stores > Themes. Here is the part of your online store’s menu where you can manage your themes. The currently used theme is displayed at the top of the list. To fill the theme library, you can either take a look at free themes or go to the theme store and buy the one you liked the most.
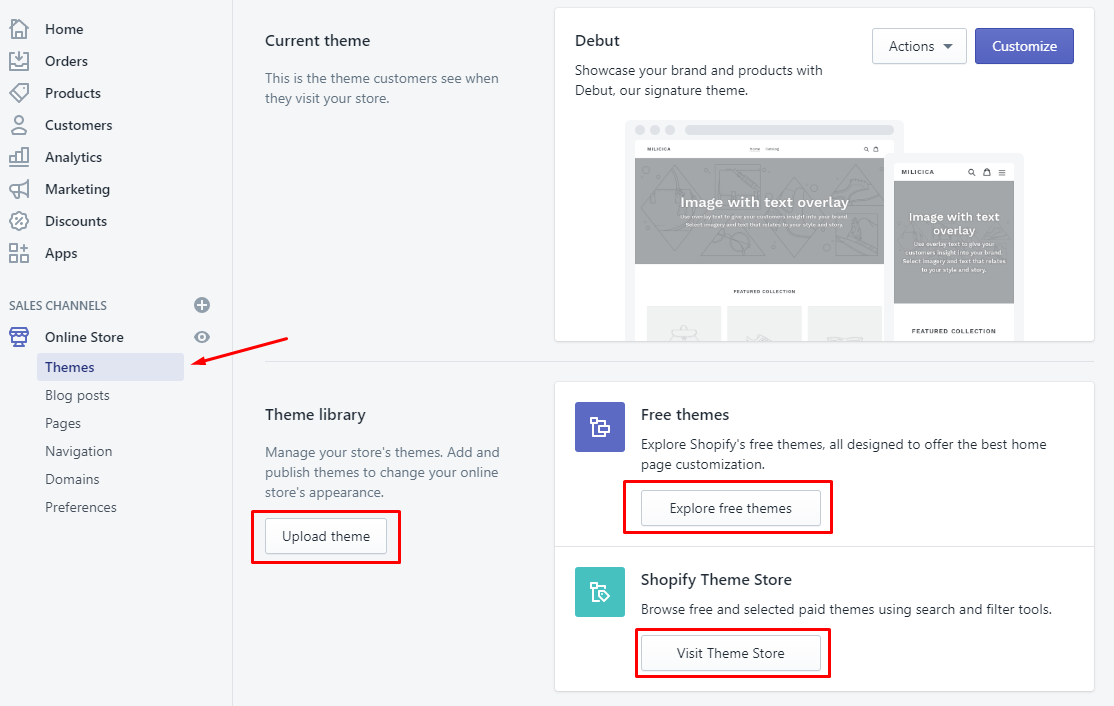
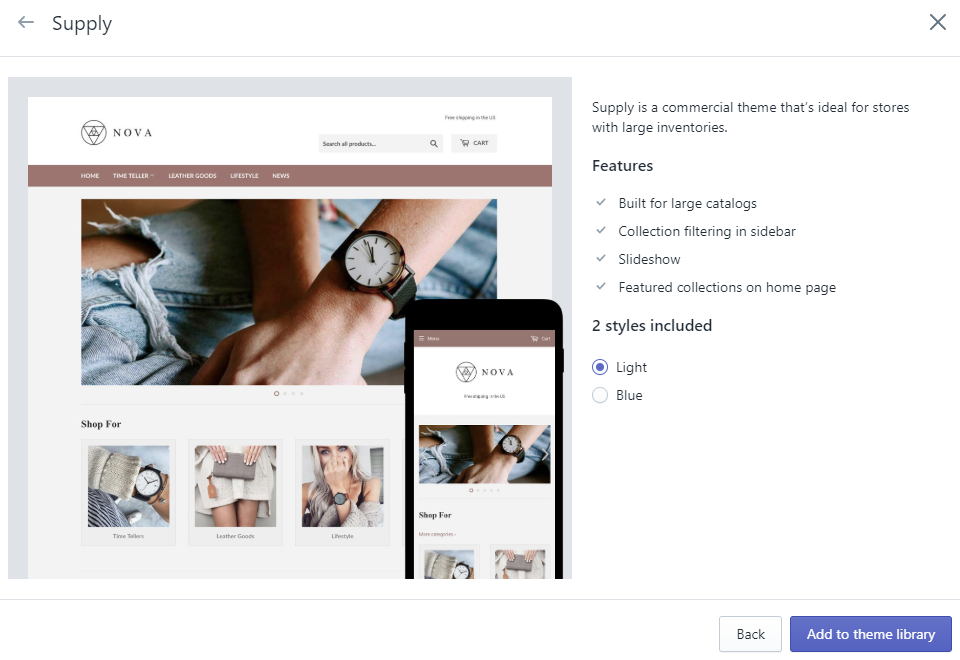
If you decide to take a look at free themes, there will be eight variants to choose from. That’s not much but could be quite enough to start with. I will experiment with Nova free Shopify theme. Installation is as easy as a piece of cake—you just click the theme you liked and then hit the “Add to theme library” button.
If you already found and downloaded the theme of your dream, you can freely use it. Click the “Upload theme” button, choose the file from your PC and upload it. Pay attention to the file format as you need it to be a .zip folder. When the theme is installed you will see a green notification at the top of the page.

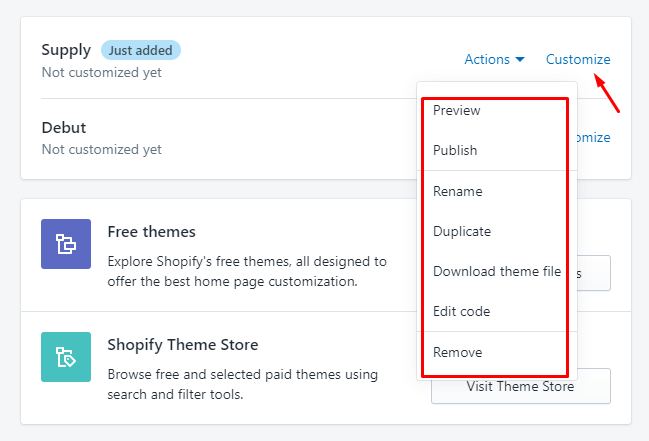
All added themes will be displayed in the list of theme library. Every line of the list has an “Actions” drop-down menu that allows you to preview, publish, rename, duplicate every theme, as well as download the theme file, edit the code of the theme and remove it from the list. There is also the “Customize” button, and it is obvious from the title that it will take you to the customization panel.
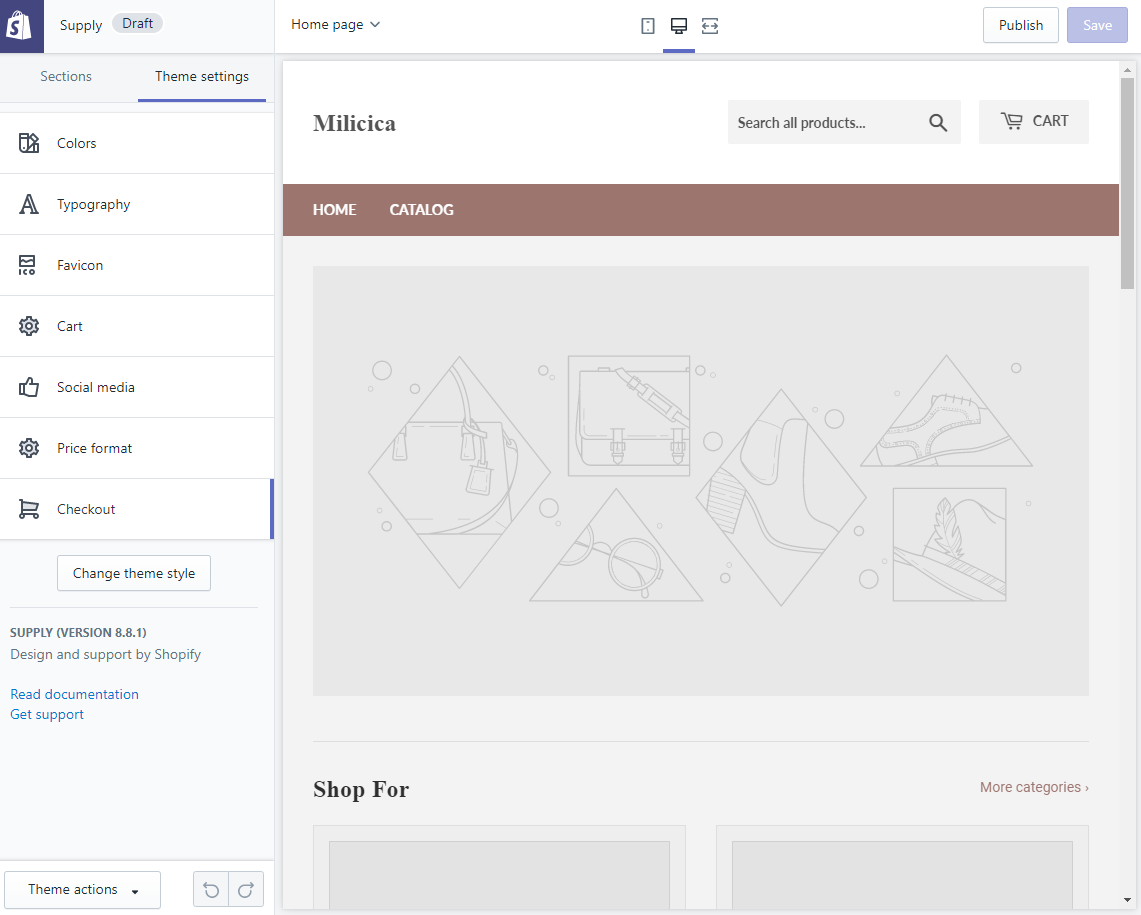
Theme customization
The person who created the theme made it look attractive. However, you still need to do some customization to make your Shopify online store unique. You can do it in the customization mode by changing the color scheme, inserting your original content and doing other design changes. Let’s take a brief look at what could you do in the “Theme setting” tab of the customization menu.
Colors
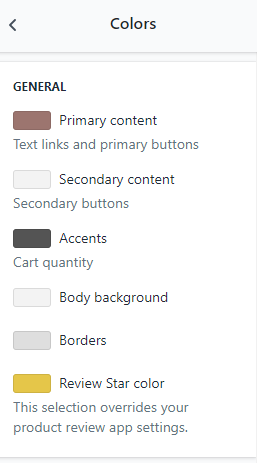
The color scheme of the theme you are currently using is set here. The sets of colors are conveniently separated according to the place you use them — general, header, text and footer. The colors must be specified in hexadecimal format (for example, #aabbcc), but it is also possible to select a color from a palette provided. The colors picked from the palette are easy to apply on other parts of the page; just copy the hex code.
Typography
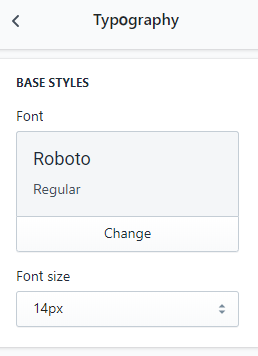
In this sub-menu, you can define the fonts that will be used on all the pages of your online store. You can choose the typography for headers, main menu items, buttons, and all the other texts. The number of available options is huge if you didn’t find the one you like; just click the “Load more” button. You can also change the size of the letters. To make reading the descriptions of the products easier for your audience, I would recommend you to choose sans-serif fonts for the “Base Styles” section.
Favicon
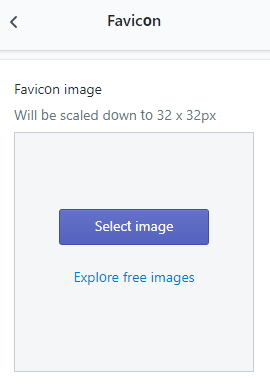
I’m sure you noticed a tiny image that appears on the left side of almost every website tab you open. That is a favicon and if you have a logo you should think of putting it to the tab too. Here in this sub-menu section, you can do it. You need a 32x32 px image. There are lots of online favicon generators on the internet that could transform your logo into a favicon. For example, Real Favicon Generator or favicon.io.
Cart

Shopify offers you three types of carts that you can set in this tab—page, drawer and modal. If you choose “Page”, the user’s shopping cart will open in a separate page. “Drawer” option will make the cart open on the top of the page after the main content slides down. “Modal” variant will cause the shopping cart to open in a pop-up window. The drawer variant is the most convenient one for my taste, but you should choose what will fit your needs.
Social media
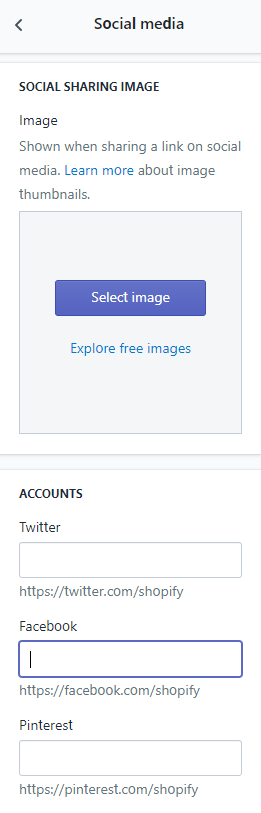
If you are only beginning to create your business, you won’t be able to fill this tab, which helps you to add social media sharing links to the website. They will lead the user to the appropriate social media and automatically help them to share your page with their timeline. Here you can also choose what picture will be shown in the post the users share. And at the bottom of the menu, there are a few settings of social media sharing buttons.
Price format
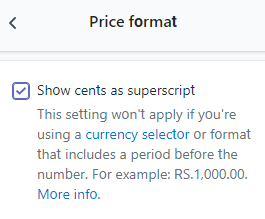
There’s only a single setting here; you can decide whether to show cents as a superscript or not. There’s also a notification that says you won’t be able to affect price with these settings if you are using a currency selector.
Checkout
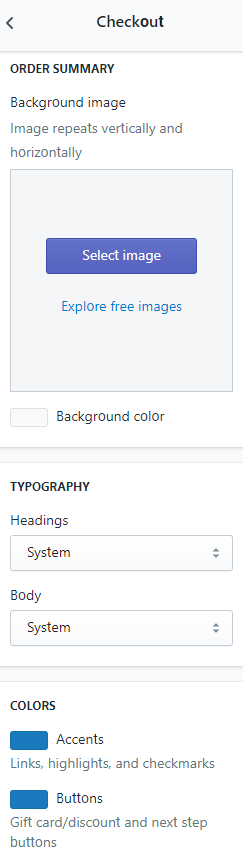
When the user decides what they want to buy from your store and chooses to pay for it, they will see a checkout window. In this tab, you define what exactly they will see. You can change the backgrounds of banners, logo images, backgrounds for order summary, colors and typography of the buttons.
Recommended theme

This tutorial will be incomplete if I don’t tell you about the Shopify theme that is, to my mind, the best for an efficient online store. Apparelix is a multipurpose but clear theme that was created to meet the most complicated requirements. Downloading this theme, you get not a single theme, but a huge set of ready-made sections, which could be combined any way you like. It is made by professional web designers and is both good-looking and lightweight. Apparelix won’t affect the downloading speed of your website in any way. It is constantly updating and you can be sure that you use an up-to-date theme with all modern features and advantages.
How to delete the Shopify online store
Oh, crap. You opened the store some time ago and now you don’t want it anymore. Such things happen sometimes and you need to know what to do to get rid of your shop. That’s not really a problem and won’t take much time. Shopify bills you every month, so you need to close the store to avoid additional payments.
Before closing the store make sure you have no debts. If you haven’t paid your monthly bill for Shopify usage or any of the paid plugins usage, you won’t be able to close the shop. By the way, if you have some paid add-ons and want to use them on another website, remove them from your Shopify store manually. If you leave them, you won’t be able to use them anywhere else.
So, if you do all the preparations go to the dashboard and click the “Settings” tab at the bottom of the left-side menu. You will see a list of settings, available for you as an administrator of the website. Find the “Plan and permissions” option and click it.
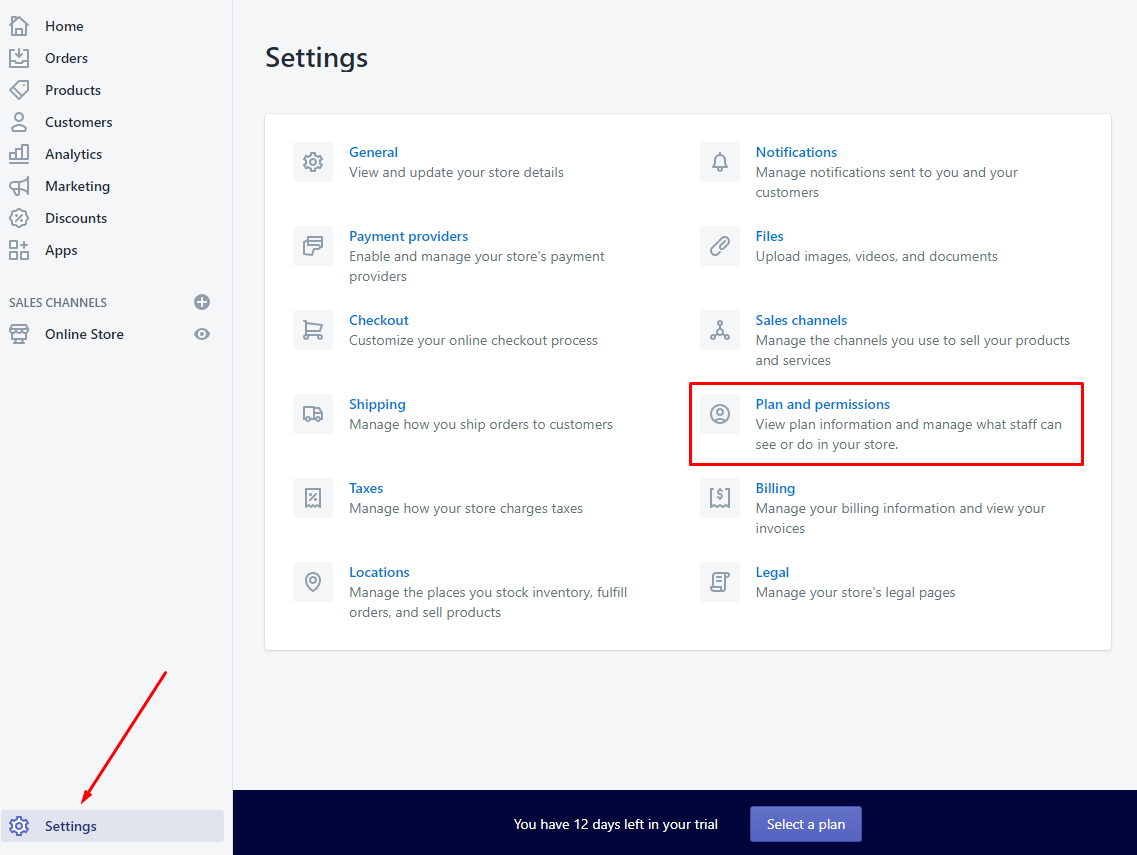
Scroll the page down and you will see the “Store status” table. Here you can hire a Shopify specialist who will help you to deal with any issues you have with your shop, pause the store or close it. When you pause the store you get the chance to get back to it anytime you feel ready. After closing the store, you will have only thirty days to change your mind and reactivate it. After that, all the settings and content will be gone.
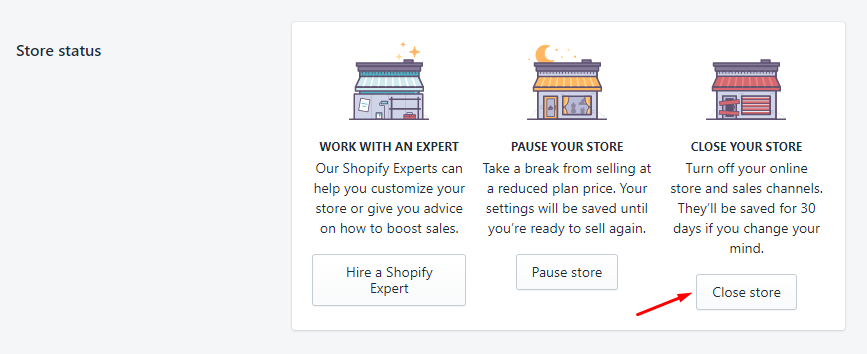
If you are really sure, click the “Close store” button, type in your password and confirm the wish to proceed. That’s all. Your Shopify online store is over and no one will be able to visit it anymore.
Start a Store with the Roxxe Responsive Multipurpose Shopify Theme
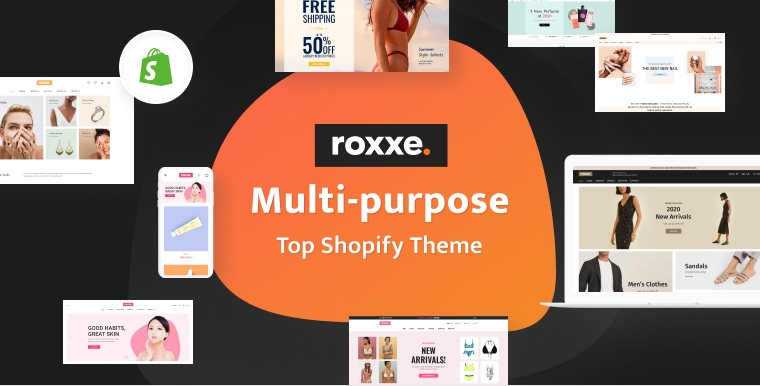
So, do you want to create an online store quickly and without coding? Then, you’ve made the right choice in favor of Shopify. This platform is really great for online commerce. And what even better can be is to pick out the right theme. Luckily, now you are welcome to seize the opportunities provided by our today’s guest. It’s a responsive multipurpose Shopify theme called Roxxe.
Roxxe is developed for an online store building without complications. Above all, it doesn’t matter if you’re tech-savvy or not. Therefore, everyone can start with Roxxe and launch a powerful online shop. Likewise, more than 60 skins totally prove this. Using them you can establish a store of any size, for any business niche.
With the Roxxe Responsive Multipurpose Shopify Theme, you can rest assured that it includes all the necessary pre-made sections, elements, and web forms for eCommerce sites. Plus, this flagship item is integrated with the best Shopify apps. For example, don’t hesitate to check a fresh Roxxe + Growave collaboration and get your 30-day free trial of marketing apps for business growth.
Sell Fashion Poducts with the Vendy - Multipurpose Shopify Theme for Fashion
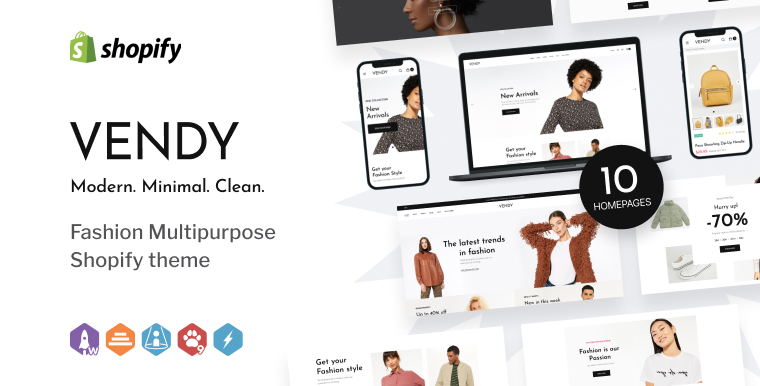
Wow! Have you ever seen a Shopify theme, with the best win-win options, that goes for a such price as Vendy?
Well, Vendy is an all-in-one solution for those who value ageless design, handiness, and powerful SEO. This minimalistic Shopify theme for fashion is also a perfect way to start a dropshipping business yourself. And, varied ready-made homepages will give your ideas a strong base and alternatives to realization.
Above all, Vendy comes with:
- customizable headers and footers;
- user-friendly menu options;
- web forms for contact, booking, subscription, and search;
- product page templates with pre-designed grids and listings;
- high-grade wishlists and shopping carts;
- responsiveness and retina-readiness.
As well, the Vendy Multipurpose Shopify Theme for Fashion provides layouts of lookbook and blog pages. There is a good possibility to show your products in the right light and engage more loyal customers. What do you think?
Conclusion
Those are the basics. Now you have learned how to create a Shopify online store, how to choose and apply a theme and what instruments there are to customize it. The store you created probably already looks good and is ready for adding the products and setting the prices. Carry on like that and soon you will have a great store that your customers will like to buy from.
This article is a part of Shopify Online Store Creation from Ground Up course by TemplateMonster.
To read all the tutorials, follow the link and subscribe!
Subscribers will receive more tips, discounts, and hot offers via email!
Damn... I wish I had such instructions 10 years ago... That would have changed my life!
Feel free to leave any questions in the comments, we will definitely help everyone!

A passionate WordPress monster since 2018. Loves professionally built website templates, is Elementor Page Builder fan and becomes extremely curious when it comes to trying some new site creation tools. Quora account
Get more to your email
Subscribe to our newsletter and access exclusive content and offers available only to MonsterPost subscribers.

Leave a Reply
You must be logged in to post a comment.