
This is the fourth lesson of our Shopify Online Store Creation from the Ground Up course. If you want to get the full educational plan – follow the link and subscribe to the course.

- How to add products in Shopify online store?
- How to create a collection in Shopify online store?
- How to set up a discount collection in Shopify online store?
- Conclusion
The creation of any object, virtual or real, has a few stages of complexity. First, you do the basics and only then move on to more difficult features. Building a Shopify store is not an exclusion. Firstly, you register an account and choose the fitting theme. Only after that you can move to the next stage, do some more detailed customization and add products.


This article is a kind of “stage two” for the business owner who has already registered an account and now wants to understand how to adapt the chosen template to their company’s needs. That’s why to use the tips I’m going to show you in this tutorial you have to have a registered Shopify website. If you don’t know how to create an account, check out our How to Create a Shopify Online Store article.
How to add products in Shopify online store?
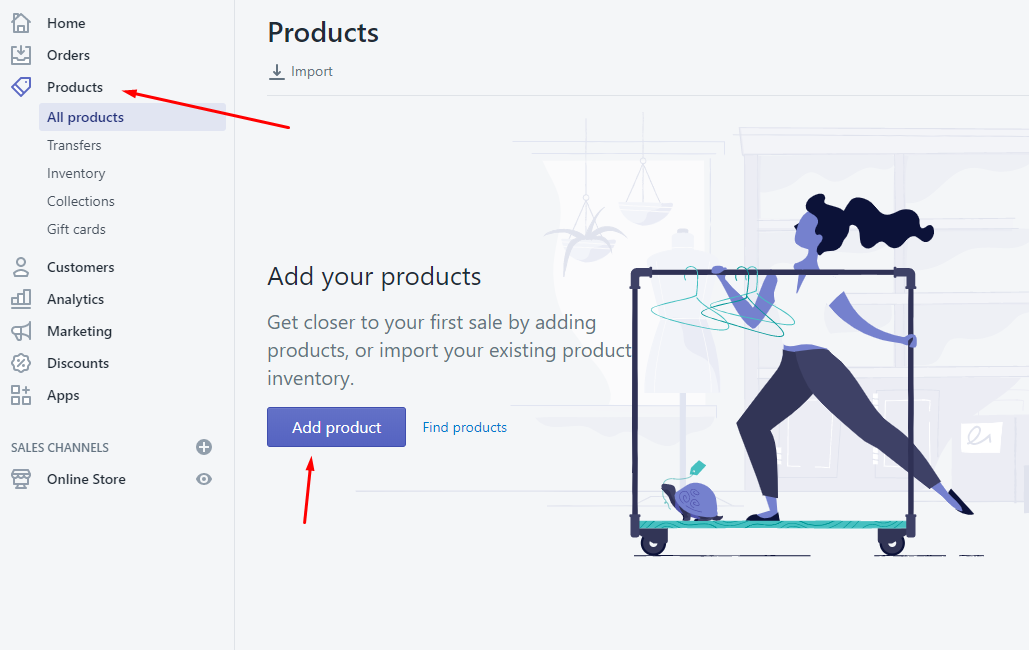
It is obvious that a store can’t exist without products. Real objects or virtual ones—you still have to create product cards for them. Since Shopify was created to match the needs of online shops, adding products is quite simple. Go to the Shopify website and log in to your account. In the left-side menu of the dashboard there is a “Products” tab; click on it. If you haven’t done that before there will be no added products there. Hit the “Add product” button to proceed.

The product adding form is quite big so that you can describe the item as widely as possible. The more details you give to the user the more likely they will buy the product. Customers like to know almost everything about the product without contacting the store manager. Let’s go through all the options.
Title and description
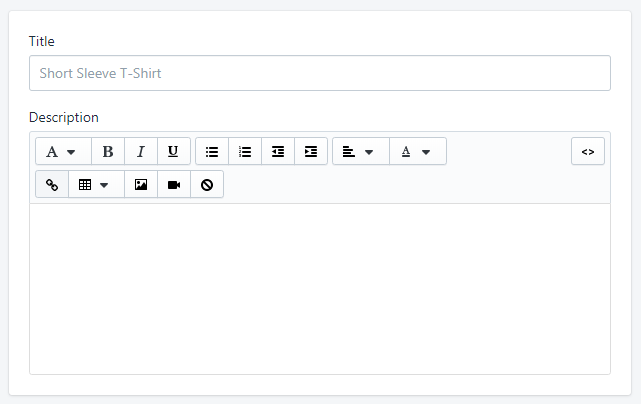

Those are the first things the user reads about the product. Make both the title and the description of the item as clearly as possible. Don’t name the products only by the brand and model title—always add definition words. For example, “Nike Air Max” is not enough for a title. Use “Nike Air Max shoes” or “Nike Air Max trainers” instead. The description should also be clear and detailed. The more you can tell your customers in the description, the better. However, make sure that it won’t be a plain text. Beg texts annoy customers because they are complicated to read. Add some lists, divide the text into paragraphs and give the most important information (about the size, price, colors, and materials) first.
Images
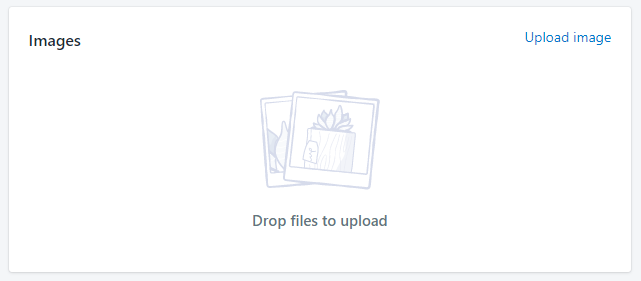

This part is even more important than the title and description. While shopping on the internet customers can see the item only in the photos. Make sure those photos will not only be sharp and attractive but also show all the details of the product. It would be a wise idea to hire a professional product photographer for this.
Product availability & Organization
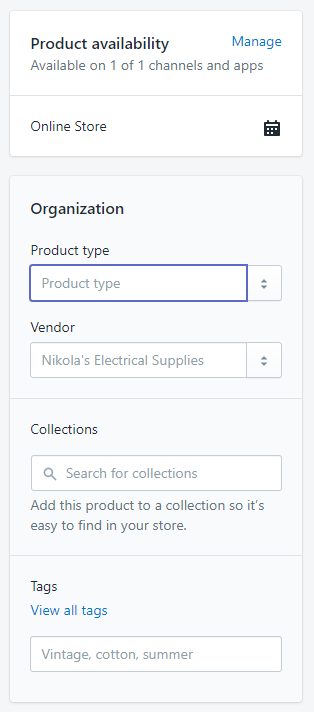

Those are two side menus located on the right side. If you have a few selling channels besides the Shopify online store, for example, a Facebook shop, you can choose to show where that product is still available. The “Organization” menu allows you some convenient tools for adding repeatable additional information: product type, vendor, collection affiliation and tags. When you type the information to the bar for the first time (like “shoes” in the Product Type bar), you can automatically add it to the list by clicking the “Add” drop-down option. The next time you would like to add it to other products, you can just choose it from the drop-down menu.
Pricing
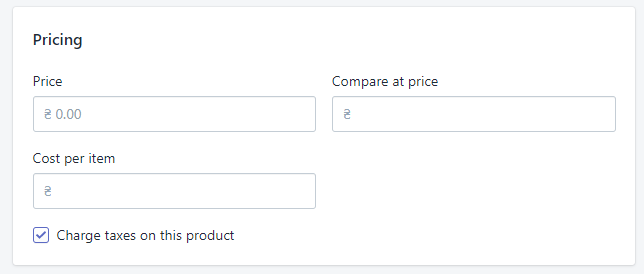

It is quite obvious from the title—in this part of the menu, you can set the price of the item. If the product had a higher price and now you reduce it—you can add the previous cost to the “Compare at price” bar. Besides that, you can add a price for a single item if you are doing the wholesales. The checkbox at the bottom of this menu allows you to match for the clients if the price includes taxes or not.
Inventory
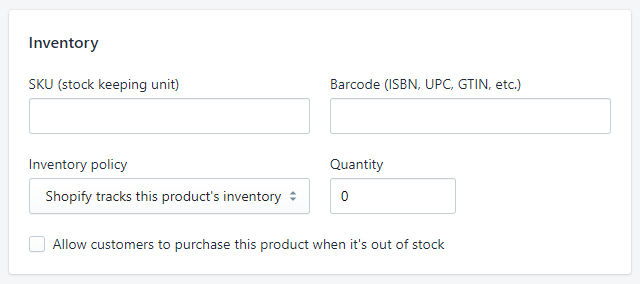

This menu item does a little automation for your store. The data you set here is automatically monitored by Shopify, and when the product is out of stock the special tag will appear on that product immediately. Here you can set the SKU (stock keeping unit), which is a special code, that helps you to track the items in the storehouse. You may not need that code if you sell virtual goods. Additionally, you can type in the barcode, the number of items, choose the inventory policy and allow customers to buy the products that are marked as “out of stock.”
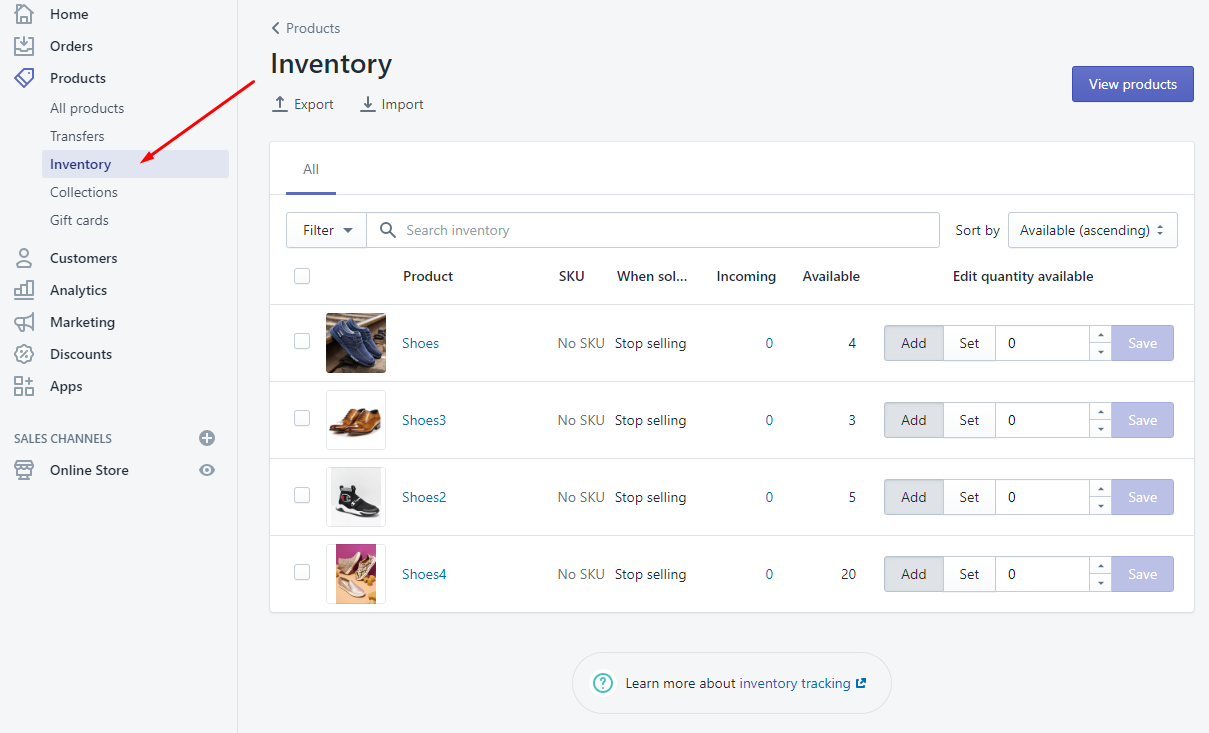
By the way, to quickly change the number of available items you can go to Products > Inventory. All the products are listed there with a convenient availability counter. You won’t need to open every item separately to change the number of products that are in the stock—you can do it here, quickly and easily.

Shipping
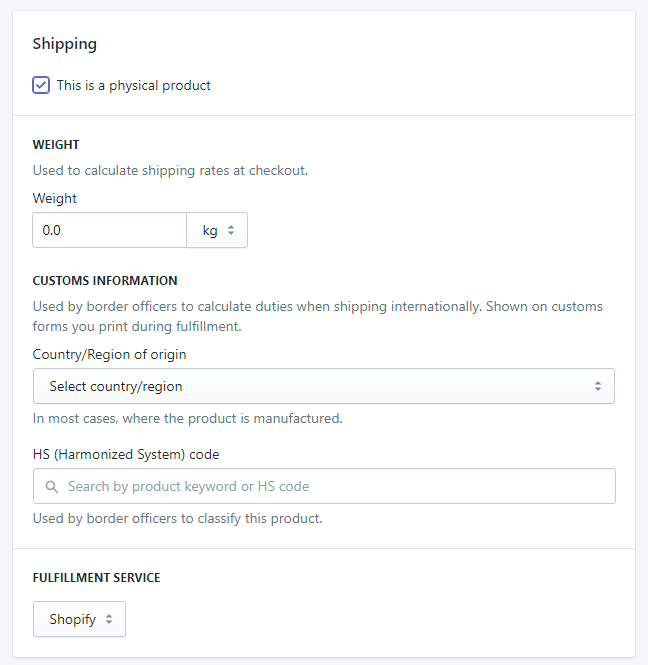

The first thing you have to set here is the “physical product” checkbox. It will determine whether there be any shipping. For the real products, you can mention the weight, country or region where it was manufactured and the Harmonized System code (this is a special definition of the product, which would help the border officers to understand what kind of product it is). Besides that, if you add some shipping service, here you can choose it.
Variants & SEO preview
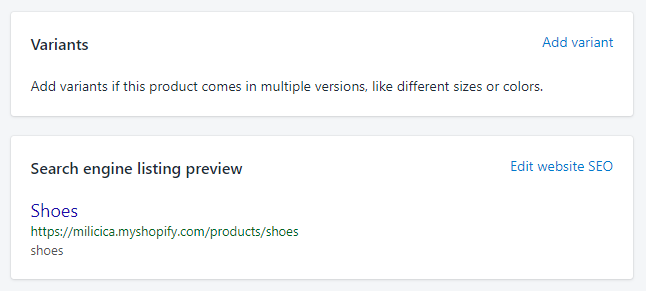

If your product can have some variations, like the same item but in different colors or sizes—in the “Variants” section you can add it. The “Search engine listing preview” shows you how the product will look like in the list of search engine results that will be given to the user. To improve the SEO rates you can add some meta description with symbols and keywords.
When you finish to fill in the product form, click the “Save product” button at the bottom of the “Save” button at the top of the page. Congratulations! You added your first product to the store!
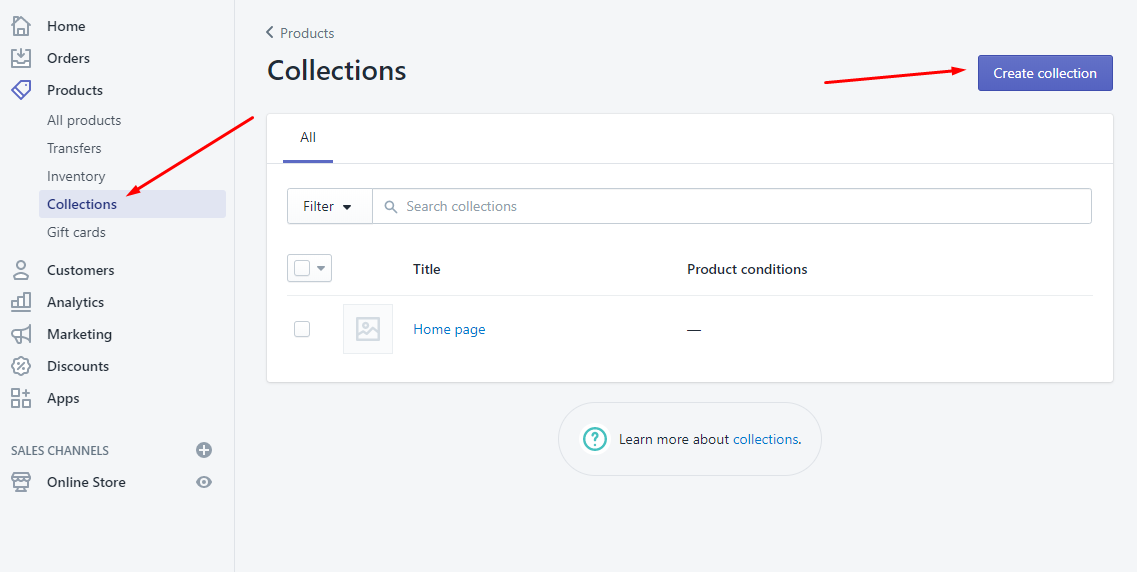
How to create a collection in Shopify online store?
Collections are groups of products that have something in common. A collection is a convenient tool that helps you to sort the items and the customer to find the products they will like. Its creation is even simpler than adding items to the inventory and could be easily done from the Shopify dashboard. Go to Products > Collections and you will see the list where only a default “Home page” collection is displayed. The products added there will be shown on the home page and you can choose which items to offer to customers first. Hit the “Create collection” button and let’s start.

First of all, you have to type in the title of the collection and its description. Avoid beautiful but not intuitively understandable titles. You need your customers to understand quickly and clearly what they will be able to see in the collection. The description also should be laconic and clear. The right-side menu allows you to add a cover photo for your collection and it will be really useful. People like when the objects could be identified visually without reading anything.
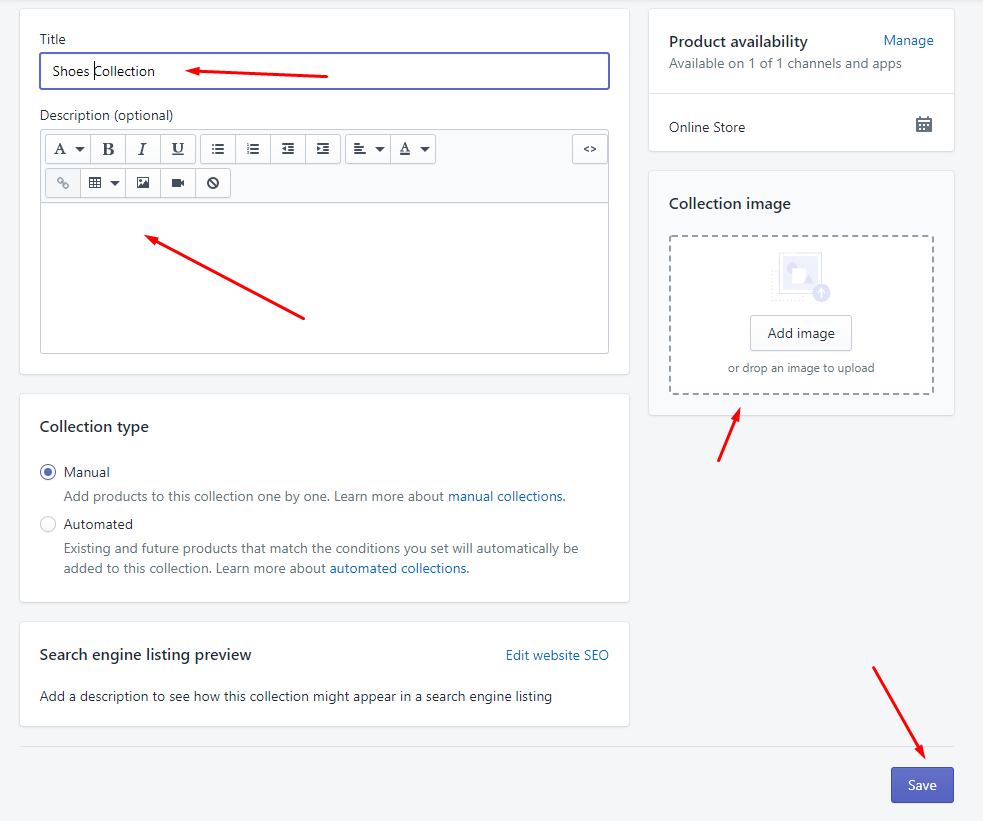

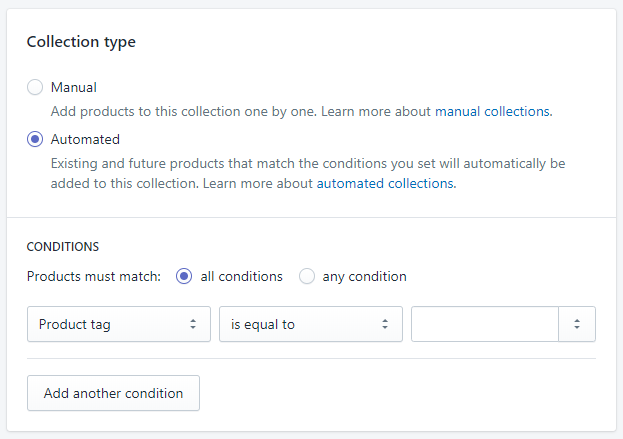
In the “Collection type” section you have two options—a manual collection and an automated collection. If you choose a manual it will be your job to choose what products will be included in the collection. You will have to hand-pick them. In the case of an automated collection, you choose the conditions. The products will be added to the collection automatically as you include them in inventory.
When you are done with typing, click the “Save” button and the collection will be ready for adding the products. An appropriate section will appear in the collection list right after saving. If you choose the “Manual” type of collection, you have to click the “Browse” button. In the emerged window click the checkboxes of the products you want to add to the collection. After that choose the way it will be sorted.
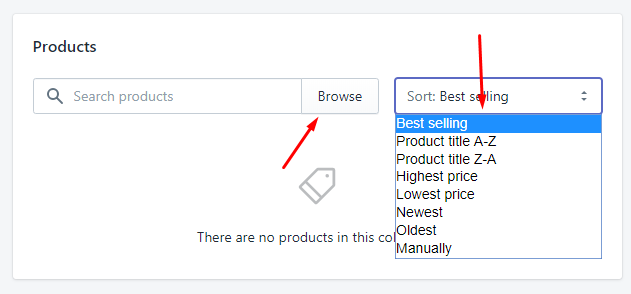

If you choose the “Automated” type of collection, there will be an additional section under the “Collection type”. Click the drop-down and choose the conditions. You can add as many of them as you would like to. All the products that will match the conditions will be automatically added to the collection.

After adding the products your collection is complete—congratulations! From the Collections tab, you will be able to edit any of the collection when you would like to. Now you can change the title and description, and add or delete products.
How to set up a discount collection in Shopify online store
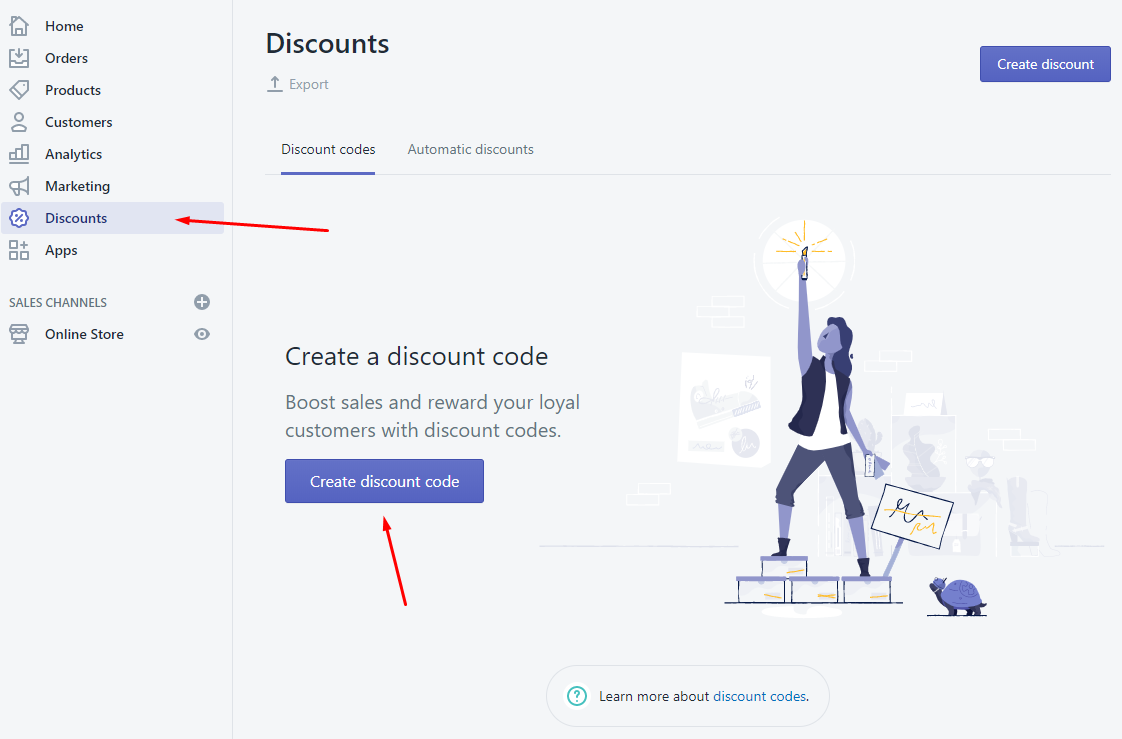
Setting a discount for some items or charging a sale could boost your sales and make your Shopify online store more popular. To start the discount creation, open the dashboard and go to the “Discounts” tab. Since you haven’t created any discounts, click the “Create discount code” button.

In fact, the interface is intuitively understandable and you won’t have any problems with it. However, let’s go through the available options:
- Discount code. This is a word that users will type in to get their discount. Use understandable words here; in this case, the code will be easier to understand (use something like “blackfridaysale” instead of “sdafgdfg44”).
- Types. Here you set what the user gets after entering the code.
- Percentage. The price of the item will be reduced for the percentage you’ll set.
- Fixed amount. The price of the item will be reduced for some sum of money
- Free shipping. The user won’t have to pay for the shipping.
- Buy X get Y. When the user will buy some amount of products they will get something else for it.
- Value. When you have chosen the type of discount, you have to set the value of it. For the “Percentage” and “Fixed amount”, you have to choose the value in percent or in currency and choose what products from the order it will be applied to. For the “Free shipping” you can choose the countries where the shipping fee will be excluded. Besides that, here you will be able to offer free shipping to customers who are going to purchase a certain amount of items. For the “Buy X get Y” you have set the conditions, according to which the customer gets their bonus.
- Minimum requirements. If you want to limit your customers in some way, you can do it right here. You can charge some minimal sum of money or number of items after purchasing which he could get the discount.
- Customer eligibility. This is another method of limiting. It allows you to choose specific customers or groups of customers who can use that discount.
- Usage limits. It is obvious from the title that these sections allow you to limit the number of usages of this discount code for a single customer.
- Active dates. When you create a discount for a specific event, you need it to be available for some specific period. In this section, you can define that time.
When you finish setting the discount, click the “Save” button. The discount will now appear in the list. Besides the common discount code, you can create an automated discount that will pop-up in the customer's shopping cart. This automated discount will have the same options as the common one.
Conclusion
Now you are a step closer to achieving complete mastery of Shopify. As you can see, it is not very complicated to manage the store in this CMS. Shopify was created for the online store's creation, so it is not strange that it has all the convenient tools to make the process simple and pleasant. Start filling your store with items and become a really successful merchant!
This article is a part of Shopify Online Store Creation from the Ground Up course by TemplateMonster.
To read all the tutorials, follow the link and subscribe!
Subscribers will receive more tips, discounts, and hot offers via email!
Read Also
How to Create a Shopify Store?
Shopify Online Store Theme Customization: Astonishing Layout