How Do You Create Double Exposure Effect On Your Website Background?
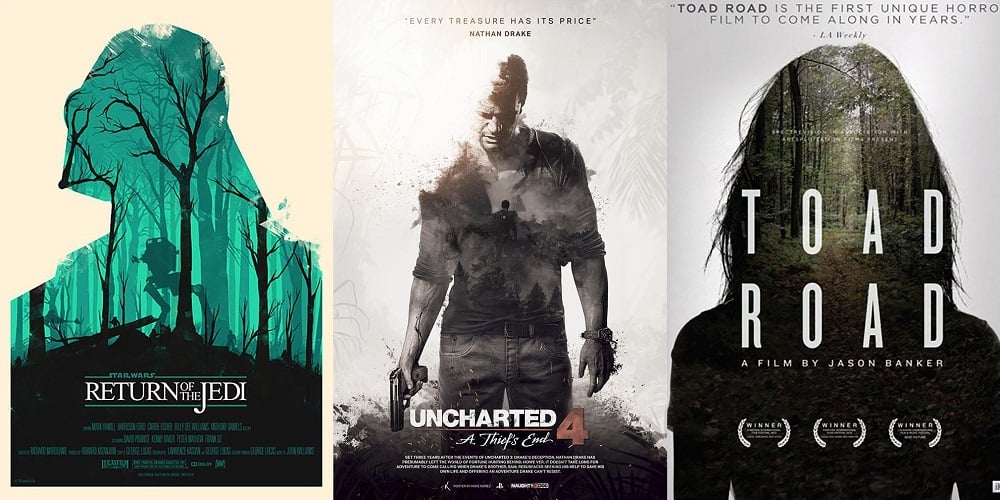
Fan-made film posters are often much better than the original ones. Maybe this is because fans make posters after viewing a film dozens of times and noticing all its details. Professional artists hired to draw posters, on the other hand, draw posters before movies are released. Of all film posters, my absolute favourites are those using double exposure effect. They show the essence of the movie in the most accurate way.
You can use this effect too. Inspired by photography and cinematography, lots of modern web designers start using double exposure as a background on their websites. Originally, the effect was made in Photoshop (or in other visual art software) and then transferred to a website, but that method is not necessary now. I use Elementor Page Builder to create websites, and recently they added functionality that creates different effects right on the page, and one of the functionalities is the double exposure effect. Photoshop is now unnecessary (at least for some effects), and you don’t need to shift back and forth between different programs. Let me show how you can create double exposure portraits via Elementor functionality.
Stunning double exposure portrait in a few simple steps
The first thing you should do is to open your website dashboard, choose Pages > Add New and hit the “Edit with Elementor” button. Make sure you updated your Elementor plugin, or the new design functions won’t be available to you.
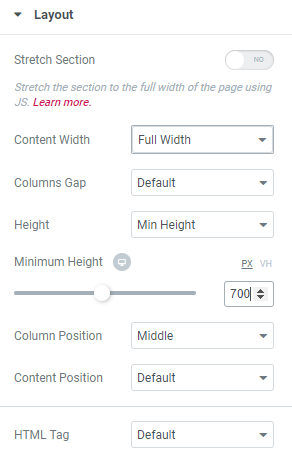
Click the dark-red “Add Section” button, and in “Layout” block set the Content Width to “Full Screen” and Height to “Min Height” (move the slider to get the best size for your screen).
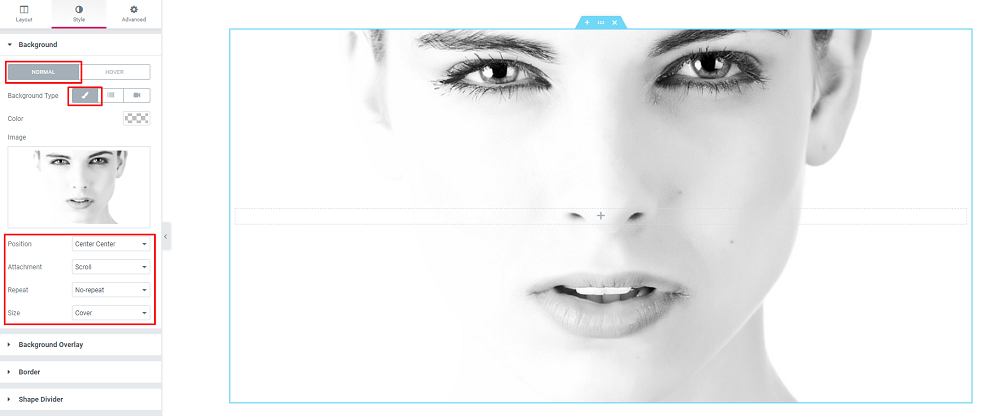
Now go to the “Style” tab and open the “Background” section. Choose “Classic” Background Type and choose the main image. The Position has to be set to “Center Center”, Attachment to “Scroll”, Repeat to “No-repeat” and Size to “Cover”. Of course, you will have another image, so you probably should play with the settings to fit the picture to your needs and taste.
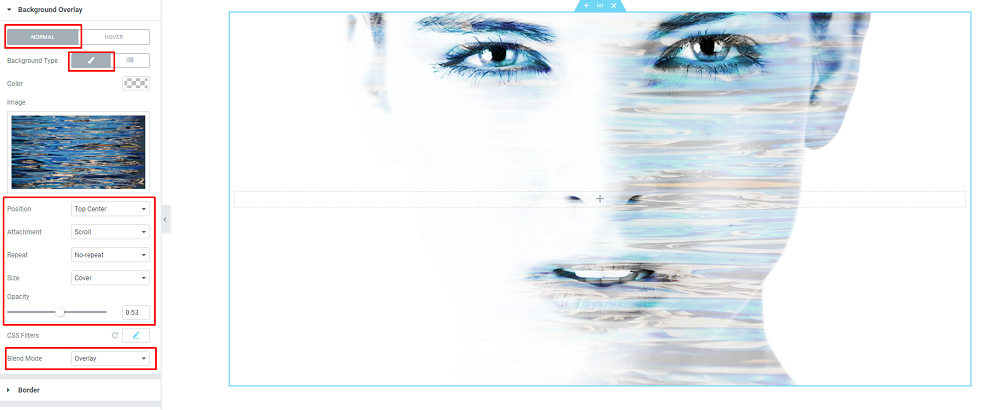
It is time to go to the “Background overlay” section. Here you will set the second image that will create the double exposure photos effect. So, the Background Type is still “Classic” and the position setting is just the same as you choose for the main background picture. Opacity slider, obviously, sets the measure of overlay picture transparency. Move it to choose the best look (the medium opacity is the best variant). “Blend mode” will show double exposure in the best way. I chose the “Overlay” variant, but you can try all of them to see which one looks best.
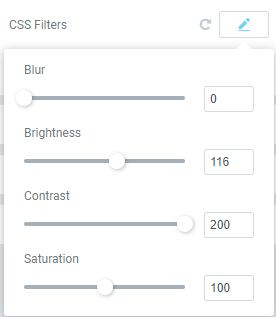
The CSS Filters settings will help you to make some finishing touches and polish your double exposure photos to perfection. Set the Blur, Brightness, Contrast, Saturation, and voila – your masterpiece is finished. It may still need some text or icons, but now a vivid double exposure background is complete.
If you want to see how all the customizations are made in motion, you might be interested in our double exposure tutorial video.

Read Also
100 Free Photoshop Video Tutorials
20 Best Photoshop Video Tutorials
23 Modern Photoshop Text Effects Tutorials
Free Mockup Generators: Create a Realistic Mockup in One Minute [No Photoshop Required]

A passionate WordPress monster since 2018. Loves professionally built website templates, is Elementor Page Builder fan and becomes extremely curious when it comes to trying some new site creation tools. Quora account
Get more to your email
Subscribe to our newsletter and access exclusive content and offers available only to MonsterPost subscribers.

Leave a Reply
You must be logged in to post a comment.