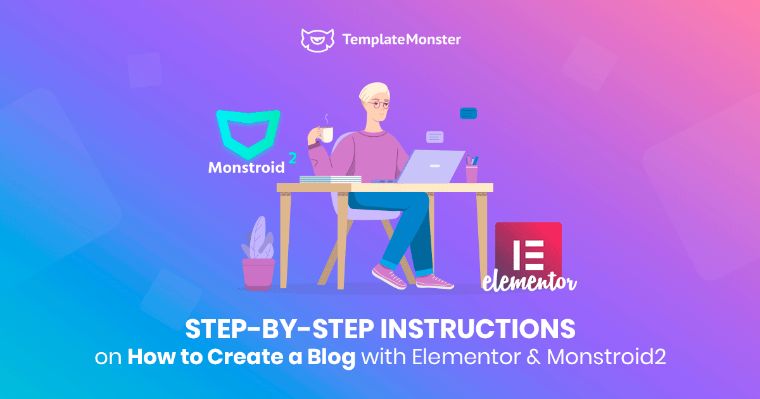
Step-by-Step Instructions on How to Create a Blog with Elementor and Monstroid2
- Review of Monstroid2 Theme
- Step-by-Step Instructions on How to Create a Blog with Elementor and Monstroid2
- Conclusion
Creating a blog is one of the best ideas to implement nowadays. Whether you own a small business, an online store, or just want to launch and develop something new, blogging will give you many benefits. Being the most popular CMS in the world, WordPress is a reliable platform for creating your blog. It is incredibly easy to install and use, and it does not require any knowledge of programming.
With such an Elementor WordPress theme as Monstroid2, you can create a blog yourself in less than an hour. The drag-and-drop page builder is so easy to use that even a beginner can cope with the task in no time. You will more than one thousand ready-made design elements, sections, and pages if you choose the Monstroid2 WordPress theme. These pre-made elements and pages will help you create a blog lightning-fast and with little to no effort.
Today, we will discuss the advantages of Monstroid2 theme and how you can create a blog from scratch so it is easy for beginners to follow.
Review of Monstroid2 Theme
Monstroid2 is a multipurpose modular Elementor WordPress theme powered by TemplateMonster. It is an all-in-one revolutionary solution for your dream website. Whether you have blogs, portfolios, business sites, and even e-commerce projects, you will be more than satisfied with this theme option.
First of all, you will be impressed with a super-light package weight (250 kb) and its smooth performance. To learn about the theme itself and how to install and customize it, you will get detailed documentation included in the package. You will have tons of absolutely stunning skins for any topic. Sure thing, they are updated on a regular basis, and you will continue to get weekly updates. To get the best customization results you will have access to more than 500 pre-designed sections and ready-made pages available in Magic Button. You will definitely enjoy the customization process with the world’s most popular Elementor page builder. It means real-time editing, ease of use, free and open-source, all with no coding skills required. This is an extremely convenient drag-and-drop page editor. Customizing a webpage has never been easier. There are no limits to creativity!
Among the top advantages of the theme are the following: a user-friendly installation wizard, flexible customization, new-age modular functionality, incredible Jet Elements plugin on board, JetMenu plugin to create spectacular Mega Menus, and much more. Interested in having an online store? The WooCommerce module is included. All JET plugins are sold separately but after you purchase the Monstroid2 theme, you will get all JET plugins for free. The developer cares about you and provides lifetime updates, 24/7 lifetime support, and clear documentation. Got a dream? Make it possible with Monstroid2!
Have you ever worked with Monstroid2 WordPress theme integrated with Elementor Page Builder? Do you want to get limitless access to more alike templates with the previously mentioned content editor? We recommend going ahead with ONE subscription service that has recently been launched by TemplateMonster.
To save your time, money, and energy, we’ve decided to create all-in-one service including everything you might ever need for website building. It comes with HTML & CMS templates, PPT templates, graphics, WordPress themes, plugins, and eCommerce templates. Pay $19 per month and get a distinctive service you’ve ever dreamt about. You can also receive a 5% discount with promo code BecomeThe1 in case you a constant reader of our blog.
Step-by-Step Instructions on How to Create a Blog with Elementor and Monstroid2
Ok, I will go through the entire process step by step explaining to you how to create a blog with Elementor and WordPress theme really fast.
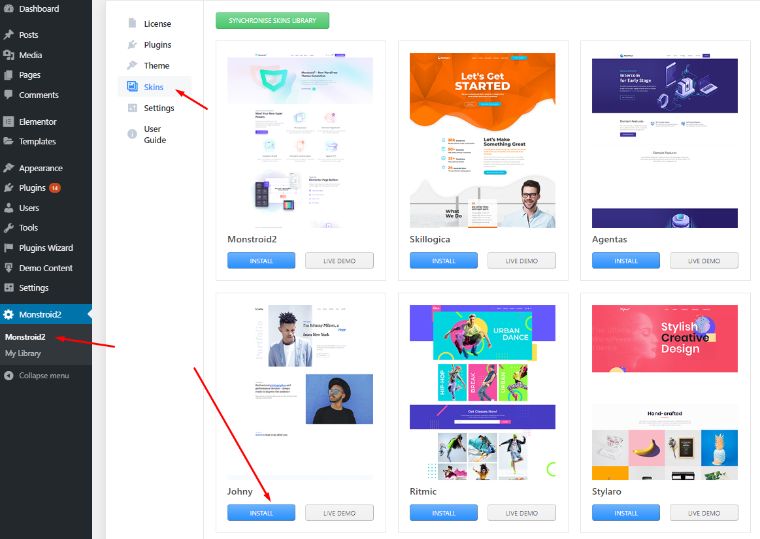
I assume that by this time you have already registered a hosting account and installed WordPress there (if not - go through this Easy As LEGO tutorial). After that, you found a Monstroid2 theme and understood it will be ideal for your blog. Following the Wizard you have already installed the Monstroid2 WordPress theme, chosen skin, and activated plugins. When the theme was released, it had about 20 skins.
The developers add one more skin every week and there are 48 of them by now. I am going to create a simple blog, so I have chosen the "Johny" blog skin. I will use it as an example but you can repeat all the actions with the skin you preferred the most. By the way, any time you would like to change the skin you can go to the dashboard and than Monstroid2 > Skins. All the available skins are listed there and by pressing the "Install" button you will replace the previous skin with the new one.
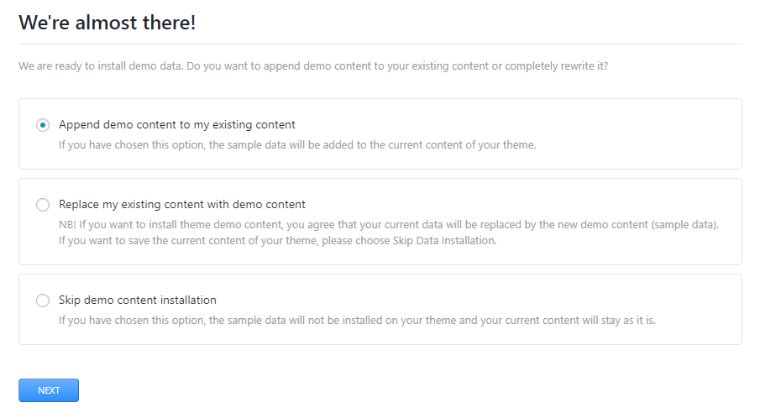
You can choose any plugins you like but I strongly recommend you to activate Elementor, JetThemeCore, JetElements, ContactForm7, JetBlocks, JetBlog, JetTricks, and JetMenu. As for the demo content - select ‘Append demo content to my existing content’ if you don't want some of your existing content to be harmed.
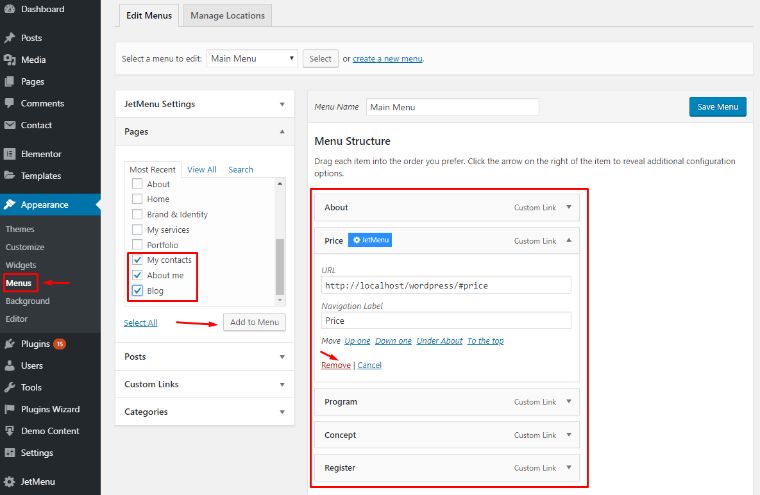
Now, when the design is generally set, the first thing to customize is the menu. Navigate to the Appearance section on the Dashboard > Menus. Select Main Menu to customize its structure. I am going to build a little blog, so I remove all the "custom link"-type menu options and replace them with pages "Blog", "About me", and "My contacts". Click ‘Save’ after. If you need more details about creating a nice menu - check out this WordPress Theme Customization tutorial.
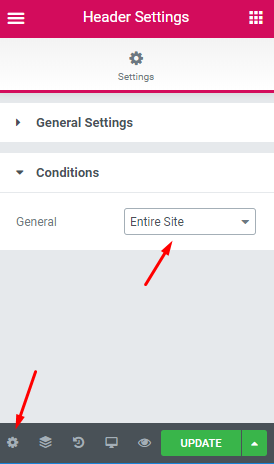
it is time to start the appearance customization and to be consistent - let's take a look at the header first. Go to the Monstroid2 > My library to see all the theme parts you can apply to your web page. I will start with a Header and click ‘Edit with Elementor’. Now you see the header which is ready for customization. I will grab a .PNG file from the Media Library and edit it with the help of the Content, Style, and Advanced tabs. Header Settings > Conditions menu allows you to choose where you want to apply the header. Click ‘Save changes’ after.
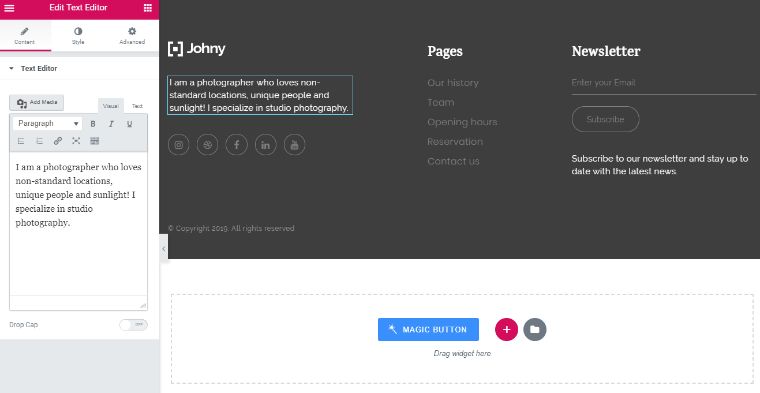
Now, go back to the WordPress dashboard, choose Footer and click ‘Edit with Elementor’ to customize it. Change the default logo with your own and edit the size, padding, and margin. Add your links to social media and change the description. The Content/Style/Advanced tabs allow you to customize it to your liking (background, description, typography, colors, etc.). Navigate to the Newsletter section to change the ‘Subscribe’ text. The copyright message can also be edited or removed completely. Once you are done with the footer, click ‘Update’. Byt the way, if you want to read more about header and footer customization - take a look at this Monstroid2 Guide.
When the header and footer are complete you can move to the body design and content. Go to the Pages menu in the dashboard and edit them one by one. Click ‘Edit with Elementor’ to start customization.
You can make your blog page or homepage a little more interesting by adding a blog post list. Our How to Set Up the Blog Post List With Elementor will tell you how to do it.
And now let's do some more appearance customization. Go to Appearance > Customize in your dashboard. In the "Blog Settings" tab you will find the options to change the Layout and Style preset. Then go to Colors while you are on a Live Customizer page. Here you can choose a color scheme to match your style. The Typography tab allows you to edit the look of all the text you display. Click ‘Publish’ afterward to apply all the changes. If you want to know all the options that Live Customizer offers - go through the How to Customize Your Blog Design? tutorial.

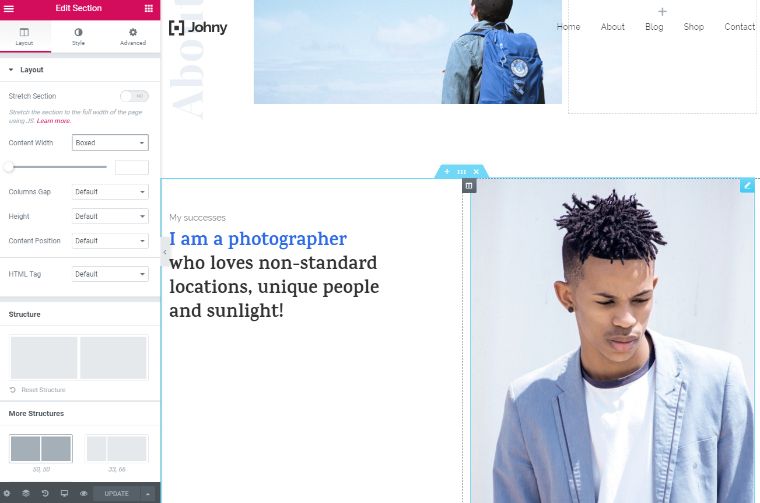
Do the same customization to all other pages. Get back to the dashboard and jump to the About Me page. Click ‘Edit with Elementor’ to start customization. Replace the image, add the text, etc. Also, you can get back to your homepage and grab some settings you have already used to create a template. Proceed with the About section, replace an image, and apply the template created before. Navigate to My Skills section. You can insert an image, edit a headline, and update the text. The default Contact section can be removed, and I am using the template of the contact form, which was previously styled and saved. Do not forget to update the page after your edits.
When everything is done - don't forget to check out all the pages created. You want your blog to look perfectly, don't you? The final check won't take too much time but could help you see some minor bugs you missed earlier.

Conclusion
The popularity of the internet is growing very fast, and every day a lot of new users are wondering how to create a blog and promote their project. Serious educational literature and specialized textbooks are not always helpful - everyone is looking for a simple, clear, and concise answer. Everything is easy - you just need to have a little patience and carefully follow the instructions of the detailed step-by-step guide I have just provided. It should not take more than an hour of your personal time to get knowledge on how to create a blog with Elementor and Monstroid2 WordPress theme. As a result, you will get a beautiful, full-featured, and multifunctional web resource. Good luck!
Read Also
Monstroid2 WordPress Theme Gets a Complete Makeover
How to Create a Countdown Timer with Elementor Page Builder
How to Set Up Blog Post Lists with Elementor Page Builder
Add Instagram Feed to WordPress Page with Elementor Page Builder
A Step-by-Step Guide For Creating Gradient Overlay Using Elementor Blending Modes
Don’t miss out these all-time favourites
- The best hosting for a WordPress website. Tap our link to get the best price on the market with 82% off. If HostPapa didn’t impress you check out other alternatives.
- Monthly SEO service and On-Page SEO - to increase your website organic traffic.
- Website Installation service - to get your template up and running within just 6 hours without hassle. No minute is wasted and the work is going.
- ONE Membership - to download unlimited number of WordPress themes, plugins, ppt and other products within one license. Since bigger is always better.

A passionate WordPress monster since 2018. Loves professionally built website templates, is Elementor Page Builder fan and becomes extremely curious when it comes to trying some new site creation tools. Quora account
Get more to your email
Subscribe to our newsletter and access exclusive content and offers available only to MonsterPost subscribers.

Leave a Reply
You must be logged in to post a comment.