All You Wanted to Know about PowerPoint Snap to Grid
- How Can Rulers, Gridlines, and Guidelines Help Me to Create a PPT?
- What’s a PPT grid?
- More Samples of Snap to Grid
- How to Enable the Grid in PowerPoint?
- How to Customize a Grid on PPT?
- How to Disable PPT Snap to Grid?
Could you imagine while being a green sophomore, that there are certain principles of creating great PowerPoint presentations and an option as PowerPoint snap to grid that can turn messy information flow into a well-organized slide?
Yes, creating presentations is way more than dragging and dropping text and pictures and the software provides plenty of tools to facilitate the process of content organization. In a matter of a few clicks, you can create a neat layout that will make the perception of information easy to the audience.
Are you excited? Keep on reading to find out what’s PPT snap to grid and how it can be helpful to you!
How Can Rulers, Gridlines, and Guidelines Help Me to Create a PPT?
Probably, you’ve heard about such options as rulers, gridlines, and guidelines but have you ever used them? These options come indeed in handy:
- to define a proper location of the elements and blocks of elements on the slide;
- to maintain a consistent style – the main elements will have the same style and location on all slides;
- to create a slide that is easy to perceive and navigate.
In other words, the PowerPoint grid helps to unite and organize information.
Cohesion is a crucial term in design. A visual connection between stand-alone elements makes them look unified, bonded, interrelated. We talk about perceptual unity but why is it so important?
Information design considers perception to be the first and the most important part of the chain during which information affects people:
Perception > Memorization > Involvement
Your goal, as a speaker, lies in providing the most efficient visual perception that delivers 90% of information to the human brain.
Speaking of PowerPoint presentations, a unified picture, where the style, color, font and size are interrelated, this creates logic and allows perceiving information consistently instead of pulling its pieces out of the context.
Compare these two slides:


On the surface, both slides have numbers, bullet points, a title with another font size, and subheadings with another font face. But which slide is easier to read? That’s definitely the second one because the content is organized in logical blocks that are consistently located on the slide, so the audience could easily follow the line of the speaker’s thought and not be confused.
So, perceptual unity is super important in terms of psychology and aesthetics. If you want the information to be delivered to the audience it’s crucial to locate all elements of the slide correctly.
Still, doing it manually takes a lot of time and the result doesn’t always look neat. Rulers, guides, and grid in PowerPoint come in handy and speed up the process.
These instruments help to define the location of the elements and blocks of elements on the slide. They help to create a unified style, so that all of the titles and subheadings, for instance, would look identical.
But let’s not go too deep and stick to the subject.

What’s a PPT grid?
The PowerPoint grid is a system of presenting visual information using stand-alone blocks or modules. In other words, it’s a system of horizontal and vertical dots that help to orient and coordinate stand-alone elements of the composition. The slide created with a gird is way easier to navigate and “read’.
The PPT grid helps to place graphic and text objects on a slide and create precise boundaries between them. By doing that, each of the objects stays noticeable but at the same time, you tie them all together creating a consistent style of the slide and the entire presentation.
The slide with the grid in PowerPoint looks like that:
By default, the dotted lines are invisible. They also won’t be printed or visible in the Slide Show view.
More Samples of Snap to Grid
PPT snap to grid is useful when you want to place the slide elements with particular precision. For this purpose, you need to change some grid settings. After playing with the settings, you will get a better idea of how useful this option can be in terms of accurate positioning of objects.
So, let’s see how it works.
On the first slide, we inserted a rectangular shape and filled it with a picture.

Also, we inserted another rectangular shape with other height and width and with a picture inside it.

Let’s see what happened. We managed to place the second shape right to the same spot as the previous one (bottom and top left part). It was possible because we were able to move the objects as close to the gridlines as we needed. This option gives control of their location on the slide. Without snap to grid, we couldn’t place the objects so identically.
So, this option will make the slides look neat and professional.
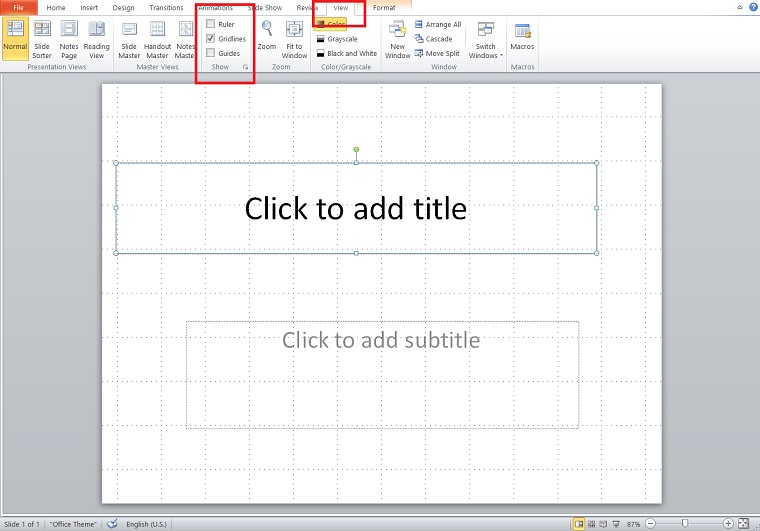
How to Enable the Grid in PowerPoint?
To turn the PPT grid on, use the Shift + F9 combination. The same shortcut turns the option off.
If it doesn’t work, go to the Ribbon > View > Show and tick the Gridlines box.
That’s it!
How to Customize a Grid on PPT?
Open a context menu > Grid and Guides or go to the Ribbon > View > Show.
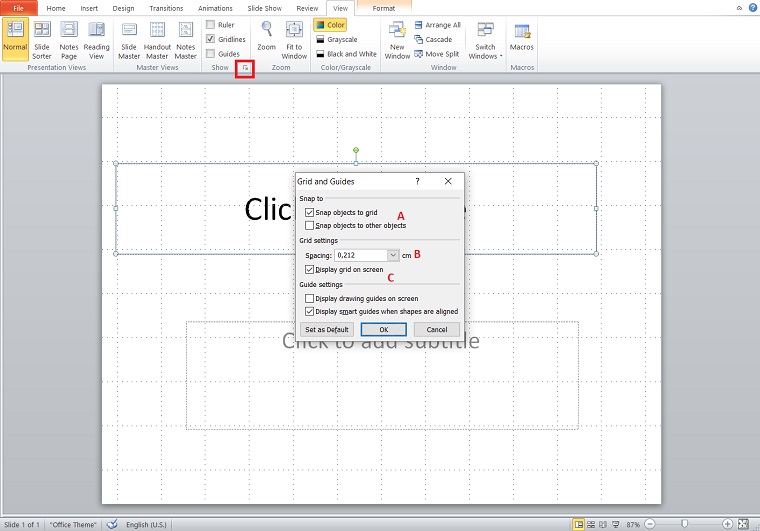
This box combines settings for Grids and Guides.
- A. Snap objects to grid
This option enables snapping the objects to the gridline as soon as you drag them closer to it. The Ctrl + Shift + F9 combination also enables this option.
- B. Spacing
This parameter changes the default grid spacing values and adds particular flexibility when it comes to placing the objects. Here, you can see the difference:


The smaller spacing allows replacing the objects precisely.
- C. Display grid on the screen
Here you can enable or disable the gridlines on the slide. Instead of ticking this box, you can use the aforementioned Shift + F9 shortcut.
With the Set as Default button, you can apply this option to all slides.
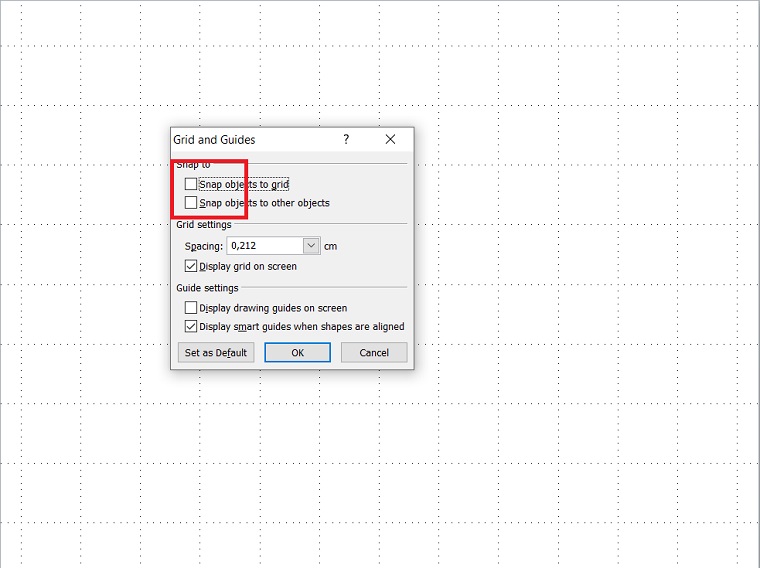
How to Disable PPT Snap to Grid?
To turn off snap to grid PowerPoint, use the aforementioned Shift + F9 shortcut.
You can also open a context menu > Grid and Guides or go the Ribbon > View > Show to open Grid and Guides settings and remove the checks:
You can dive into the process or use a ready-made PowerPoint template and save time. All the templates are thoroughly created according to the principles of the information design, so you can literally drag and drop pieces of content and don’t worry that it may look bad.
That’s all for now but stay tuned for more MS using tips and tricks! : )
Read Also
The Magnificent 50 Free PowerPoint Templates
How to Narrate a PowerPoint Presentation: PPT Tutorial
PowerPoint Borders: Why Do You Need Them and How to Add
How to Create Effective Business Presentations with Orange PowerPoint Templates

A freelancer, who is nuts about traveling, art, and learning foreign languages. Excited about exploring new cultures. Particularly jazzed about conveying ideas with words in an outstanding way. Instagram
Get more to your email
Subscribe to our newsletter and access exclusive content and offers available only to MonsterPost subscribers.

Leave a Reply
You must be logged in to post a comment.